Leaderboard


Popular Content
Showing content with the highest reputation on 08/01/20 in all areas
-
I find the skill in blackjacking should lie in maneuvering yourself into a position where you can knockout an AI and hide the body without getting detected by other AIs. Once you’re in that position, the blackjack should always function reliably as long as you aim at the head from behind - you shouldn’t have to worry about things like hitting the nape of the neck (without a crosshair) or standing at a certain distance, which I wouldn’t label elements of difficulty but rather potentially frustrating inconveniences. It’d certainly be a case where realism should give way to gameplay. The Thief games take this too far in that hitting any bodypart from any direction will knock them out, and they don’t get alerted by you running up to them, but that aside I think they’ve got it right with respect to my previous paragraph. I only rarely hear someone complain that Thief’s blackjacking is too easy, but it comes up again and again that TDM’s blackjack is too unreliable.4 points
-
Hey guys, I have this page on Facebook that I've been feeding with 360 screenshot from games I love, or games that look good. I really want to show off and promote as many awesome indie video games by shooting scenes in their 3D worlds Can anyone here recommend me some great maps that I can cover for my page? I usually shoot some 10-20 360s and then publish them sporadically mixed in with other games. Here's the page so you can see how it works out in practice thank you!2 points
-
Im going to do the same thing that was used in idtech 4 and use props to set the correct build steps, this should ease it for anyone who wants a go at the source code. Then im going to upload it to github for those who want to toy with it. Atm im traversing the code to get at some possible memory leaks pointed out by PVS studio, i will mark these in case fixing them causes other problems.2 points
-
100 percent2 points
-
And even more reduction statically linked in ogg vorbis and theora. Also updated GLee to latest and added the msvc 2017 runtimes to the archive. redist-static-dependencies-30-07-2020.7z can be found under the same url. Patched the source with a fix for a crash bug in one map where a node gets traversed badly. So now it only relies on the OpenAL32.dll and the various SDL dll's. SSE2 support is now mandatory but pretty much all cpu's today support that so it should be no biggie unless you intend to run it on a pentium 22 points
-
As my custom assets work has increasingly shifted from models towards scripting, I'll open a new thread here to contain any scripts that I write which can be reused in other missions, starting with the A ) Presence Lamp This is a Lost City-style lamp that brightens and dims depending on the presence of the player or an AI. It fades between 2 colours and can trigger its targets whenever it switches fully on or off, so it should also be viable in various other situations. The standard setup consists of the following: - a trigger_multiple brush. The spawnarg "anyTouch" controls whether AIs, too, are able to activate it - a presence lamp, highly recommended with a colorme skin - one presence light, or any other light with appropriate spawnargs The targeting chain is trigger brush -> lamp -> light When the player or an AI stands in the trigger_multiple brush, the lamp switches on and starts a short timer. Subsequent triggers reset the timer. If the timer runs out because no one's standing in the trigger brush anymore, the lamp switches itself off. Notes - Multiple trigger brushes can target the same lamp, and one trigger brush can target multiple lamps. However, each presence lamp can only target one light, so if you want i.e. a bouncelight you'll need to hide an additional silent presence lamp somewhere and target it from the same trigger brush. - The lamp and the light use their own colour spawnargs respectively, since setting 0 0 0 on a lamp would make it appear pitch black. - Technically the trigger brush can be exchanged for anything else that triggers the lamp every 0.5s (this number can be changed via "update_interval" on the lamp), i.e. a trigger_timer. - This was originally named the proximity lamp and was one of many scripting jobs for The Painter's Wife. I've renamed it to "presence lamp" because the mapper may place the trigger brush(es) wherever he wishes: proximity to the lamp is not a factor. Credits go to Bikerdude for putting together the crystal lamp models. Download Presence Lamps - Google Drive Place or extract the .pk4 into your FM archive, then look up the presence lamp prefabs. If you already are using other custom scripts, remember to add the presence lamp's .script to your tdm_custom_scripts file. B ) Teledoor This is a Skyrim-style door which opens just a bit into a black_matt "void" before teleporting the player to a different area of the map, which may represent the other side of the door. This is used for connecting physically separated map areas with each other, such as when there's an exterior/interior split of a building or ship to allow for more mapping freedom. [Full Thread] C ) Mass Teleport This is a teleportation setup designed to seamlessly teleport the player and any moveables between two identical-looking areas. This allows the mapper to link 2 physically distant areas with each other while maintaining the illusion that they're connected. The teleportation zones should be free of AIs as they can't be teleported like this. [Post] D ) Automaton Station A station for Sotha's automatons (includes the automatons) which can be switched on and off by patrolling automatons. (Part of core assets as of 2.10) [Post] E ) Camgoyle A sentient turret originally made for the FM Written in Stone. It's based on the new security camera entity and augmented with scripting to allow it to fire magical projectiles at the enemies it detects. People are more than welcome to use it and to convert it into something else, such as a mechanical turret. [Post] [Download] F ) Audiograph The audiograph is an Inventor's Guild device for playing back recordings stored on spindles, which are small metal cylinders the player can pick up and store in his inventory. [Post] G ) Turret A new companion to security cameras familiar to Thief players. It will become active as soon as an enemy is detected by a targeted security camera, firing projectiles to fend off the intruders. Similar to the security camera and the camgoyle sentry, turrets are highly customisable in their behaviour and appearance. [Thread] G ) Fog Fade Dynamically change fog density depending on what location the player is in. [Thread]1 point
-
Phew, it's almost exactly been 3 years since my first post about my VR modification for TDM. Three more versions of the game have been released in the meantime, and with them come performance improvements that I feel it's finally viable to continue my work on the VR adaptation So without further ado, head on over to https://github.com/fholger/thedarkmodvr and grab the latest release. It's based on the future 2.09 version, but is fully compatible with a 2.08 install. Although I've tried to make the VR version use its own set of resources (separate `darkmod_vr.cfg` and shader folders), I'd recommend you make a backup or copy of your TDM installation to be able to get back to the flat version cleanly without effort. Please heed the README in the repository, particularly about the choices of VR backends. Some noteworthy information for this new version: performance should be considerably improved from the old alphas. That doesn't mean it's perfect - although the CPU bottleneck is now completely gone, the game is now severely fill-rate limited. So if you have a current-gen headset with high resolution and/or a weaker video card, forget about any supersampling or AA. I also strongly recommend to stick to stencil shadows and disable soft shadows and ambient occlusion - the latter isn't that impressive in VR, anyway, and simply not worth the GPU cost. And even then, there will be some scenes in some missions where reprojection is just unavoidable, even with the beefiest GPU. That being said, I have tried a multitude of maps, and I think it's very playable. the UI is finally usable! Both the menu and ingame HUD elements are projected to a virtual screen in front of your sitting position. It's not the most elegant or immersive solution for the HUD, but it works vertical mouse movement is excluded from the VR view - this was suggested by some of you way back, and I think it makes the experience much more enjoyable. It can make it a little hard, though, to aim with the mouse for actions like frobbing items, because there's currently no visual indication to where the mouse is pointing. I'm planning to add one asap, but in the meantime, you can equip a weapon to get a vague sense of your mouse orientation. If you do want to re-enable vertical movement in the view, set 'vr_lockMousePitch' to 0 in the console. Other than that, I hope you enjoy this new version. Let me know which improvements you'd like me to work on first. Also, there are probably any number of render and other bugs still left in there somewhere. If you find one, please report them over at the Github tracker (https://github.com/fholger/thedarkmodvr/issues), so I can keep track of them. Latest Update:1 point
-
Obsttorte was interested in what I learned while making the LQD with the modular building technique, so I'll write some words about it here. What is modular building? It is about reusing every piece you build. In the old building technique you make things by hand. Then you move elsewhere and make things by hand. Every time you start from scratch and do a lot of work until you have a small area that looks good. In Modular Building Technique (MBT), you make parts you need by hand, make them into .ase models and then clone them. You spend a lot of effort to make a single pretty detail piece. Once it is done, you can easily clone it. Also you can easily make derivatives of the existing piece. Ie. first make a wall. Then use the wall and make it into a 90 degree corner. And a wall with a doorway. And a T-junction. And a Wall with niche etc etc. Every piece you make, you create with the intent of making it reuseable. It takes a bit longer to make a single piece, but once you have a library of pieces, you can create good-looking rooms in few moments, just by cloning and bashing the modules in place. Some history I first thought about large scale modules, whole rooms and corridor pieces. The module would contain everything: worldspawn walls (the sealing geometry) and the details. In LQD the first floor was built with this principle. The corridors were repeatably cloned: straight corridor module, straight corridor module, straight corridor module, 90 degree corridor module, straight corridor module, T-junction module and so forth. When I reached the 2nd floor in LQD I started build smaller modules. Straight wall model piece, 90 degree wall model piece... Like seen in the LQ's study and this tutorial, for example. I personally feel this small module approach was far better than the large module one. The reason is you get more from the pieces: build sealing geometry, then clone the models in. Or the other way around if you prefer. Cloning entire rooms (mixture of worldspawn and models) is a bit clunky and error-prone. It is easier to make the location from several small reusable model pieces and then draw the sealing geometry around it. How to build modular? 1) Decide a grid size. This is THE MOST important phase. Try out different scales and decide what size factor your map will be. In LDQ I decided that the grid will be 144x144. It felt right for a castle. 2) Design the pieces so that they fit together and in to the grid. Here is a single example, which shows how the module pieces fit with the grid. Remember to leave room for sealing world geometry! That is, the worldspawn walls and floors marked in the screenshots below: The above example is in 2d. I mean the module pieces touch in XY plane. If you design your pieces properly, you can also make them fit in the vertical dimension too. That means you can mix and match pieces you build to have more variety: wall type A, ceiling type B and so forth. See below how the ceiling module fits on top of the wall modules. Pay special attention to the texture alingment. Remember, that the textures cannot be shifted anymore in an ase-module piece. Thus the texture alignment must fit nicely when the module is designed. 3) Build! Once you have the pieces ready, all you need to do is clone them and create the room. You might want to make the pieces into ase-models for lower memory impact (a model is loaded only once, cloning func_statics will eat more memory) and to protect your func_statics from DR corruption bug. 4) Decal modules! You can also make decal modules. When I built the wall modules seen in the screenshots above, I also retextured them with dirt decals and saved them into ase models too. This means I can simply clone a decal module on top of the actual module, thus griming it up with a single cloning. See screenshot below, actual module and it's decal counterpart. This simplifies griming things up a lot! You can also make modules for various other things, like wall damage, windows, vaults and the like. When you need a piece, you build it, make it into a module and place it. Then when you need a similar piece later, you just clone and place. No point in doing wall damage by hand, as you can just quickly clone a piece you made earlier and paste it all around the place: 5) Skins! Note also that this is not the limit. By writing a skin file, you could have variation within the modules, like the wall paper in the screenshot below: Summary All in all, you spend a lot of time designing the pieces. I would recommend building the pieces in a separate modules.map. This way you have a factory: you build pieces there, it is quick to dmap and jump in-game to inspect you work. Once you are sure your piece is perfect, you make it into an .ase model. Then open your map and mash the pieces you have together quickly and minimal effort to create a good looking location. Keep on mapping with the pieces until you need a new one. Then go back to you module factory and build a new piece. Make sure it is perfect, make it into a model and continue. Look at the wall in the above screenshot. Building that by hand via the traditional way would take a while. In the modular way, once you have built a single unit of that 3 unit wall, you can built the whole wall in seconds. Or any wall of any lenght! That is the power of the modular approach. Good looking details with low amount of work. Downside is that you are locked to a grid and you need to spend a lot of time with the modules initially. Also you need to have the discipline to plan your map a bit so that you won't waste time building modules you don't want or need. Special considerations: Note the part where the different modules touch each other. Pay special attention to this spot. You have to be very careful how you align your textures. There should not be a seam there. You could avoid the seam making the texture 'mirror' between the touching module brushes. This is very critical part in your module design so pay attention to it. Larger modules can be good too. For example, the spiral staircase towers (there are two in LQD) were a single module containing all the worldspawn and func_static walls. I made one tower and then just cloned it and placed it into the other location. Two towers at the expense of one. If I'm gonna map in the future, I'll just grab the tower from LQD and retexture. Assuming the next map uses same grid, that is... And one more benefit. Sticking to the grid makes later adjustments really easy. In LQD, there is the bedroom that was converted to a storeroom next to LQ's study. Initially this room was just sitting in the end of the corridor and there was no access from the spiral staircase tower into it. When I was drawing the in-game maps I felt that there should be an third option for accessing the second floor. Then I just added a corridor module between the store room and the staircase. Changed the wall modules into doorway wall module and the connection was ready. Hopefully this helps other mappers to explore alternative mapping techniques.1 point
-
TDM has envshot already, which will create a 6 sided box images, front, back, left, right, top, bottom.1 point
-
Hi, I am currently working on my first mission. You can download the files from my google drive here.I would appreciate any feedback you could provide. I have provided the aas32, cm, map, and proc files. I don't think there is anything else I need to add. If I need to upload more just let me know. Thank You.1 point
-
@duzenko @stgatilov Is there a chance you could help him? As for the picture and the red headlight AIs:1 point
-
The game sums up loot that isnt goods or jewels "gold". This includes coins. So i assume "gold" to be the canonical name of the currency.1 point
-
I already wrote this here, but I will do it again. All these issues can simply be fixed by removing the knock-out immunity once a guard is alerted which I do in the Unofficial Patch. Thus if you fail to black jack the first time for whatever reason, you have multiple tries until the guard intervenes with their weapon! I usually get the right angle and distance before they can do that :).1 point
-
No problem man, but we've visited this topic before, and the number of complaints is actually really low. Of the number of people who use the mod, it's a handful of people who chime in, maybe 5-6 at the most. The success of the mod in general indicates that the VAST majority of people do NOT have an issue with the blacjacking, especially since BJing is such a prominent feature of the game.1 point
-
Niiiiiiiiiiice and secret-rich FM Desk lever bug here too.....1 point
-
Theres a new build here https://sourceforge.net/projects/cbadvanced/files/penumbra overture/ get redist-30-07-2020.7z i have severely reduced the number off dll's needed to run penumbra as well as updated SDL SDL_ttf and SDL_image libraries with the latest dependencies linked in statically. Cg has also been updated which reduced the number of headers Cg needs as well. fltk does not seem to be used in the windows build so the fltkdll.dll might actually be remove as well. All SDL libraries are now the latest versions from the old series. SDL2 might come in handy next Easiest way to update is simply to remove all dll's in penumbra and then copy over the contents of redist-30-07-2020.7z1 point
-
Build order is OALWrapper -> HPL1 -> Penumbra the HPL.sln does this in the right order after that you can go into the tools folder and build any solution under there to get the mapping tools. But it is imperative that you do it in this exact order as the tools rely on atleast the OALWrapper and HPL engine being built beforehand. Penumbra itself is not needed if you only need the tools, but it is built anyway. The HPL engine is built as a library which can be linked to by client applications (tools / game clients etc.) a bit like the irrlicht engine but as a static library with dynamic runtime bindings.1 point
-
Wait are you opening the HPL.sln in the root dir file or penumbras ?, you need to open the HPL.sln file as that includes all the other solutions and is setup to build in the correct order.1 point
-
? thats the HPL header thats odd that it cannot find this, try checking in the C/C++ tab in properties for penumbra under additional include directories. Should look like this -> ..\include;..\dependencies\include;..\OALWrapper\include;%(AdditionalIncludeDirectories)1 point
-
That's correct. The ai needs to "see" the missing entity marker, and that depends on the lighting. Punishing the player for carrying lots of loot is really a bad idea as stated by others. But the major reason given, that it punishes the player for doing what the game requires from him or her, is also applyable on things like ko limitations or no kill objectives. I mean you are giving the player broadheads, fire arrows, mines and what else and then tell him not to use it. That is pretty ridiculous. The main issue here is the mission design. Of course it sooner or later breaks immersion if the player collects 40 vases, 20 golden plates, 12 paintings etc... But there is no reason for mission authors to clutter the mission with loot. Simple place less. Of course taking out too much guards will leave an almost empty mission that provides no more challenge and stands in contrast to the actual idea of a stealth game. But mappers can place ai in a way that taking them out is a worse option then sneaking by them. I don't see Thief and TDM as ghosting games, were the player should not interact with the ai at all. You have your tools for a purpose, and killing is an option, of course. Leaving an ai alive and conscious should be the best option in most situation and not something the player does because it is trve (in terms of how real Thief pros play such games ).1 point
-
It is a niche product though it is used more than one might think since many companies use inhouse dos based tools that they simply cannot update. As for us mere mortals well have you ever had an older game that actually still works on modern windows just to be slighted by the crap 16 bit installer which refuses to run , with this you can still use the 16 bit installer even dos installers work. But this thread was about HPL1 not my little sideproject have you tried building it yourself yet ?.1 point
-
First Stalker 2 teaser. Lots of black screen and I'm seeing some refurbished locations, but still excited about this one. Just hoping it's not going to be so bug infested as the first Stalker. https://www.youtube.com/watch?v=_NuPJmiQh-A1 point
-
Please bear in mind, it was discussed in the past, and for archival purposes, I have mentioned it there. We never got too far with the Strigis concept, it was all fairly nebulous. We don't even have concept art for that particular monster.1 point
-
Ah, I was just going to write down a list of recommended music from Kevin for potential background music in FMs. I felt this would be ideal tavern or household minstrel BGM. Nice to see some have used it already.1 point
-
The new rain in 2.08 is so fucking awesome!1 point
-
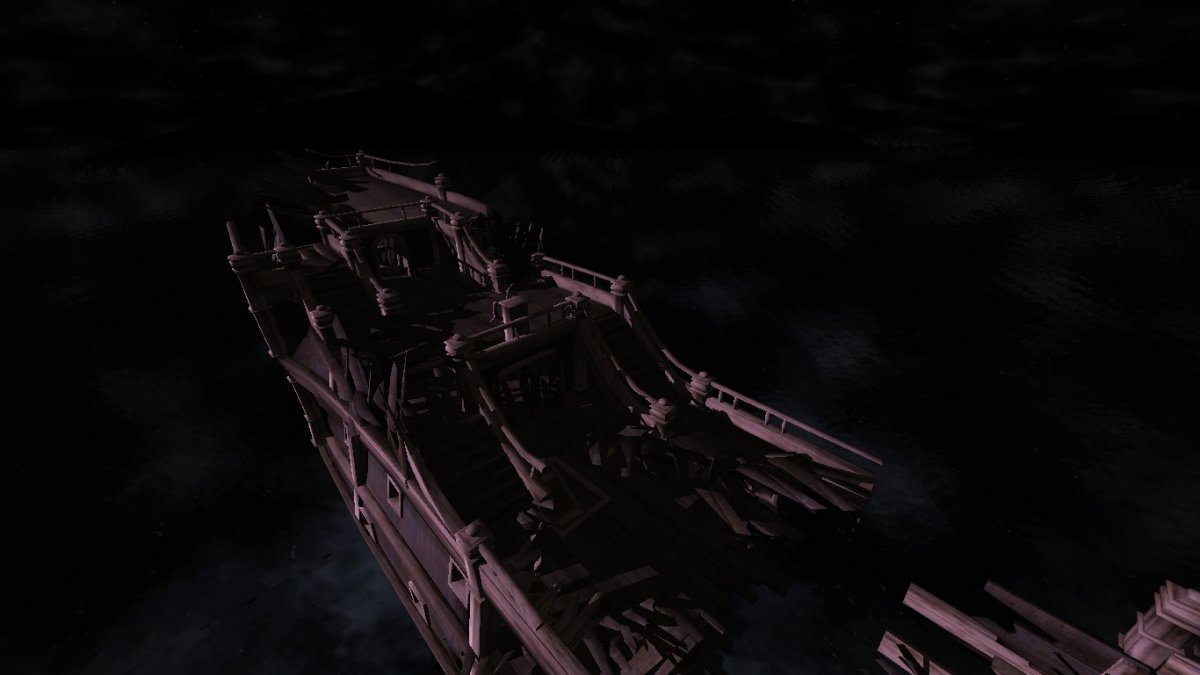
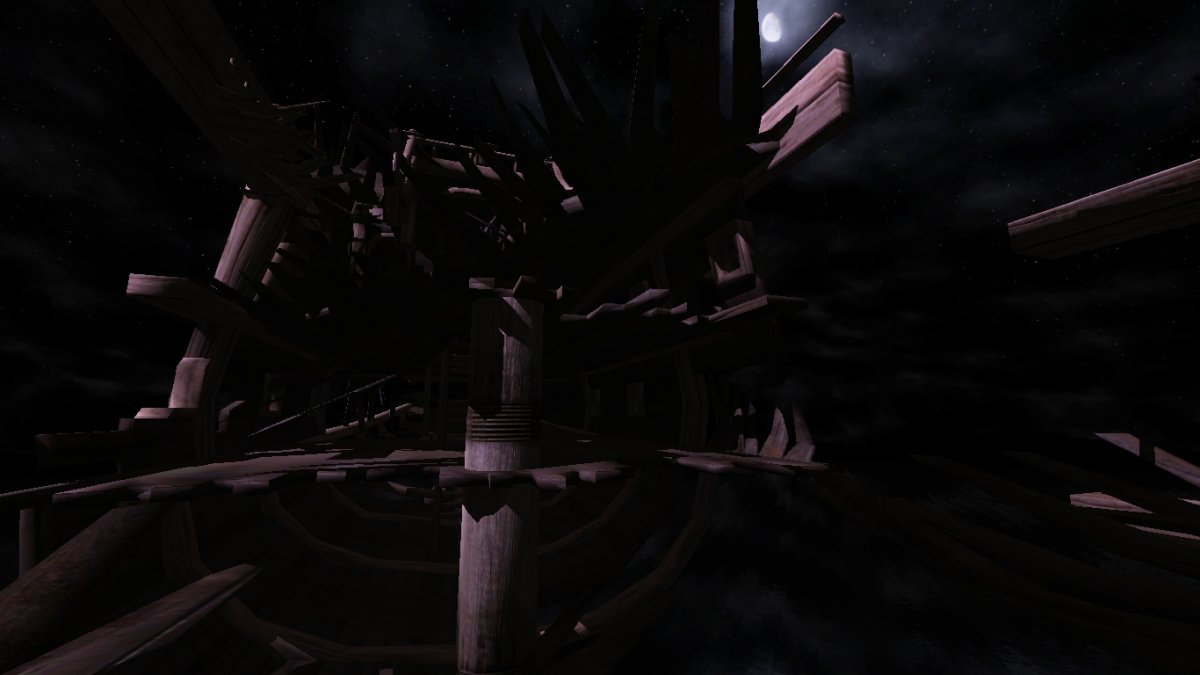
You can never know what treasures you might find in the depths of SVN: (Such as a wrecked ship hull by Dram. Clearly it was never intended for the player to walk inside it, so there's still a lot of work left to make this playable.)
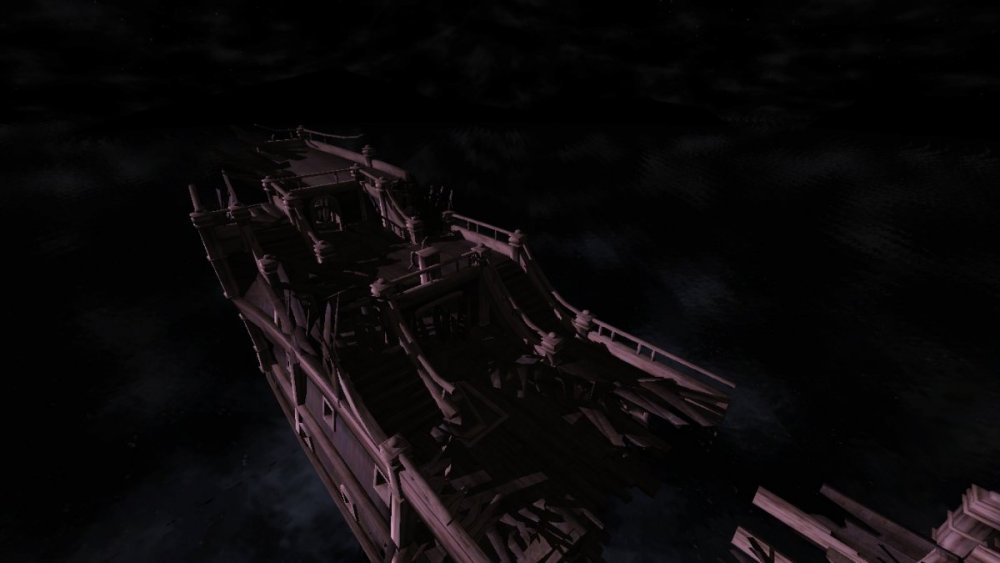
 1 point
 -
The third and final mission has the plot written, and the map (which is almost 3 different maps) 60% done. There is some beautiful work there already completed, but far too much work remains for me to ever finish it. I'm going to be packaging the three sections up for adoption this summer (which is going to be a big task given all the custom assets). Anyone here who wanted to try and bring it across the finish line would have my full support.1 point
-
On slanted doors: I figured it out! It is the BINDING that resets the object rotation axis. In the picture above is a model door prefabs, which have been rotated 45 degrees so that they are slanted. They have rotate 0 90 0 and 0 -90 0. So rotate 90 degrees along z axis. If you now open them, they will open along the WORLD z axis, which is not correct. If I add a goblet (or any model), rotate it 45 degrees, just like the doors, and BIND the doors onto the goblet, they start turning according to the GOBLET z axis (which is now rotated). The slanted doors open as they should. Test map for analysis: https://drive.google.com/file/d/0BwR0ORZU5sracWR4eHNzdGFKR1E/view?usp=sharing Enjoy! I am still quite certain that the AI cannot use the door. But one more mystery solved.1 point