oDDity
-
Posts
6090 -
Joined
-
Last visited
Everything posted by oDDity
-
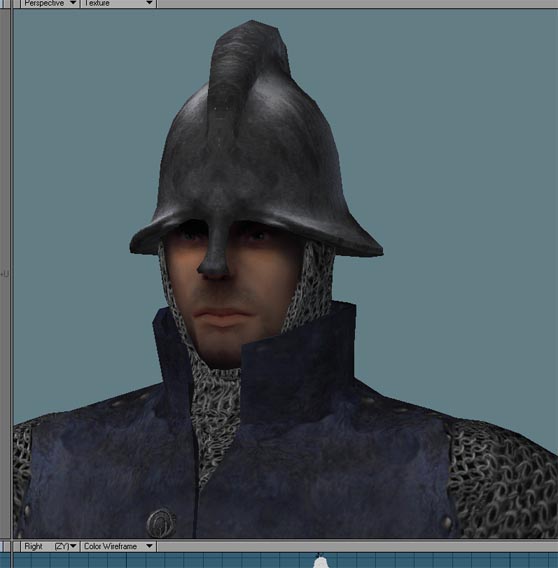
Well acxtually, yes, it is normally better to start from scratch, evenm with a complex 40 piece mesh like the builder guard. THat's what I did yesterday, I reduced the 25,000 poly builder to 3800 polys, and it still looks (pretty) good. THe qemLOSS plugin I mentioned takes a high res object, say 1000 polys, you type in how many ploys you want to reduce it to, say 100, and it'll leave you with a 100 triangles pretty much in the shape of the original. I hate using it though, it's really messy. THe only part of the builder guard I used it on was the head, and this was only becasue I had already uv mapped the head and the newest version of qemLOSS (3) keeps near perfect vertex map coords when reducing. Still, I had to spend about 45 minutes tweaking abnd twiddling at the reduced head mesh, merging/deletong polys and points, and add new ones elsewhere to get it looking good. There is no way I can 'explain' how to get a low poly mesh looking it's best with as few polys as possible, you just have to go by eye. Objects like bowls and spheres are particularly difficult to getlooking good in low poly, since you ten to see it edge on (from the top) the whole time, and so you need a certain amout of polys to keep the silhouette looking smooth and stop it looking angular. A normal map can't hide that.
-
Well, never expect anything but honesty from me, that's all, call it a character flaw if you like You CAN model huge detailed tables and chairs, this is the whole point of using normal maps, however, it's often better just to do the small detail with textures and normal map the texture. Fortunatley we have a very talented fruniture texture right here on the team. THe low poly versions of most furniture should be kept under 500 polgons (triangles) as a rule, though there are always exceptions. As for charcaters, I'm currently converting the Builder guard into doom, and it'll probably be around 4000 polys. THis is as high as it should get. This is a pretty complex model consisting of 40 separate pieces. With a simpler character like a zombie, or a maid it should be more like 2000 - 2500. OF course, the high resolution version of the charcater can be as many polys as you want. Model in as much detail as you like. The normal map will then show that detail up on the low resolution version of the model. You can use qemLOSS (get version 3 if you haven't already) to reduce the models to low poly versions, but it's usually makes a total mess of the mesh and I find I have to spend a lot of time merging polys and using the add edges tool (great plugin that) to fix the mesh up. qemLOSS is also very wasteful with polys. You'll find you can usually tweak it by hand and get may 40 percent less polys and keep the mesh looking just as good. A lot of the time with simpler objects it's easier just to model the low poly version from scratch using the high res objct as a template (I know you don't like to use templates) but the low poly version of the model must fit very tightly around the high res version to get the best results from the normal map.. Set smoothing in the surface editor to 180 for the objects. Making low poly triangulated models look good with normal maps takes practice (I'm still learning about it myself) A good idea is to take a look at the doom lwo models and their texture and normal maps to see how they're put together. BTW how to you UV map? DO you know the trick of using a morph map to tweak the object out to a flat plane and then you can do a planar UV with perfect result, rather than try to tweak the points in the UV editor?
-
Of course, and in Unreal Tournament as well...a lot of big dev houses use lightwave for their modeling.
-
....
-
Yes, it is really exciting the first time you see a model you made in the game and can run around it) Don't worry about being so entusiastic and relentlessly cheerful, it kind of makes up for the fact that I'm generally a miserable bastard
-
ASk at the www.hothardware.com forum, a bunch of technogeeks there can answer any possible hardware related question.
-
Why don't you just use the lightwave object in doom?
-
So your .mtr file looks like this? (with different paths obviously) I don't have any shadowing roblems with that model when I import it to doom.
-
did you add the line: noSelfShadow to the material file?
-
IO uploaded the fixed object. It probably is the same problem with the chair. If you select an object in a 3d app and copy it then paste it, you end up with two objects sitting on top of each other so perfectly that they look like one object. A real waste of polygons:/ And now we know they don't render correctly in Doom wither.
-
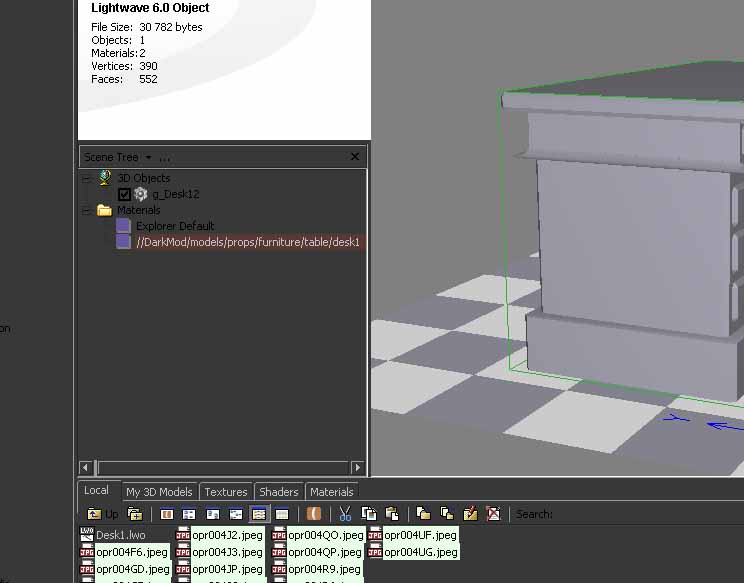
BT, I checked it out, the problem was that the ourtside desk drawers had duplicate polygiones on top of them like each drawer has been copied and pasted on top, so if any one else has this problem, now you know what tyo check for)
-
Hehe, ok, well I look forward to seeing one of you models in the game with a normal map then I'm currently working out all the parameters for material files and shaders (there's a fucking list the length of your arm) and the best use of normal maps and spec maps, and how they relate to the best low poly model design. I'll post any useful info up when I discover any.
-
Domarius, it's just one area light rendered with with radiosity. None of the objects have any texturing, I just turned up the specularity on the porcelean and added a simple procedural bump, and I just a neat little trick of mine by using a grid procedural in the specularity channel to simulate a large window causing the specular hit. ( The graininess comes for the fact that I didn't leave it to render for long enough, but I like that touch of gritiness. Obviously the glass on the inkpot has tranparency and quite a hefty refraction index, and I may have simulated a kind of fake fresnel effect using gradients on the relection nd transprency channels, and umm...the quill feather and apple leave are just a few polys with an alpha map of a feather and leaf on the tranparecny channel. I can't remmeber it exactly, it all happened in about 5 minties one morning :/ . edit:I can upload the onjects and scene if oyu want to check it out.
-
Put it on the FTP and I'll check it out.
-
Anf the moral is, build your own comp and install your own pirate version of XP pro)
-
http://www.atitech.ca/developer/NormalMapperUI121.zip There you go Atti) I'm sure it's pretty straightforward to use.
-
vAnd an expensive looking one for the loot item?
-
Anyway, the first part of the charcater tut is up on the FTP now, it's only 13 mb (not bad for a 30 minute AVI), and you'll need the Divx codec to view it. It's pretty low quility becasue of the heavy compression, it seems it misses a few second every so often as it jumps ahead, but you're not missing anything, it's just a little irritating. I was going to do a few shorter tuts on modeling simpler objects as well, I doubt many of you will actually attempt a chracter anyway.
-
We could keep that for the LSD special edition of the mod. I actually quarted that model before Uv mapping it, since you wanted as as much space for each UV as possible, it messes the normal map up in places by overlapping UVs but it's a trade. You can certainly make the parts with the white alpha invisible, (that's usualy how it's used) I'm not so sure how you use the alpha to apply a glass shader though.
-
I like it) At this rate we'll have all the models well before anything else.
-
Ok, I'll do those 3 chests.
-
Lol, there is no lightwave watermark, and there is zero chance of getting into trouble even if we were all using warez version of whatever software we have. It's not like this is a commercial project, and who's going to be looking at our files besides us anyway. Use deep exploration for converting model formats. THere's a free trial on offer, so you don't have to steal it. XSI, Maya and max all have free version specifically for game modders to use, Lightwave is little behind the times, but I'm sure it won't be long before they do the same. Lightwave free version is shit ATM, you're only allowed a few hundred vertices in a layer:/
-
I'll upload it soon, I managed to compress it down to 25 Mb so hopefully I can sucessfuly transfer it now. It's only part one btw, there will proabably be 3 or 4 parts in total. edit:Actually, By winraring it I just got it down to 13 MB )
-
I just had a thought (and not a pleasant one) Who's gong to get the stupendously difficult job of modelling the ubiquitous crate? :lol: edit: I think we're going to need a new poll.
-
... also I'm not sure we should so blatantly copy the 'spread eagle' city watch insignia frm T3.