

Nosslak
-
Posts
679 -
Joined
-
Last visited
-
Days Won
3
Posts posted by Nosslak
-
-
Looks pretty good, but you could easily fix the smoothing/shading problems by just dropping in an edgesplit modifier and setting the angle to something like 70/80 degrees (and/or marking all the hard edges manually [CTRL+E>Mark Sharp]). You're making some nice progress so keep going. With a custom shader that used vertex blending to add in dirt/paint this could really be taken to the next level, but that's probably not easy to implement.
Good luck!
-
Some useful information. Def files sound a lot like ODF files from my modding back in the Zero Engine (aka Star Wars Battlefront) or just like post-compile QC files (Source related). So I take it ASE files can be used directly with the engine and no further compiling is needed? Seems a good deal simpler then Source's backward export to this version just to compile that to this version that the engine can use. So yeah, it looks like I will be visiting the modeling specifics page a lot when trying to make some meshes. Since I mainly work with levels only, I would likely just be making static architecture props or some physics props. The one thing that really concerns me now is the measurements from Radiant units to XSI units. In Source each unit is the equivalent to one XSI grid square so that is made easy for that line of work. Last time I was exporting ASE files (working in Unreal) I managed to make jar sized props out of my stuff I tried to make so that doesn't bode well for me when I look at how this could end up. Doesn't help that I seem to be the only XSI user here.
Try importing one of the character models for scale and use that as reference.
-
I guess I'll try out this software called xNormals - which seems to be able to bake a texture and its different maps to a model, so that I don't have to retexture all again after making it lo poly. I don't understand how I can apply my bump maps and stuff to a recompiled low res model after it has lost all of its uvw informations anyways...

Yeah, xNormal is awesome. If you've textured it with polypaint in Zbrush just uncheck the box for your highpoly model(s) that says "Ignore per-vertex-color" in xNormal and then check "Bake base texture" under "Baking Options" and you'll get those textures right back.
I wouldn't just decimate it with ZBrush as this will result in poor topology so it might not deform well during animations. I would probably just manually try to optimize the highpoly (assuming that has proper topology) or otherwise rebuild it from scratch on top of the highpoly, but that's just me. I'm not sure how much facial animation TDM is using but if nothing else you might want to animate it for something else in the future.
Otherwise I think it all looks good. Well done!
-
The feet feel a bit small but otherwise it looks good.
-
I think it's starting to look good but I'll have to second the requests for bigger hands, feet and alpha planes for the hair. I do have some critique of my own as well:
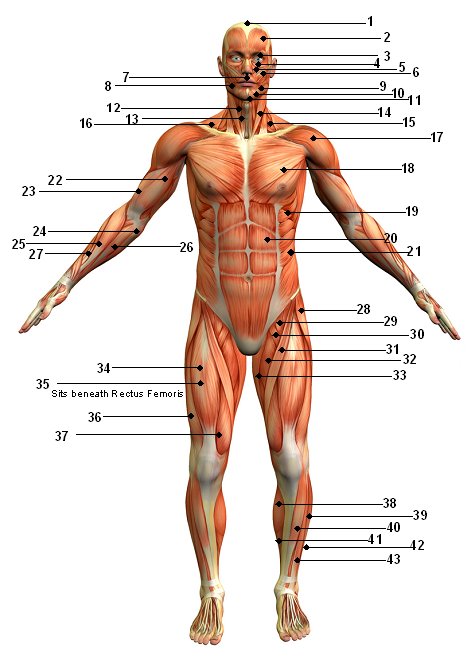
1. I think his crotch/pelvis needs to be reworked a bit (here's a good reference), as the legs shouldn't just join together like that. It might already be fixed but it's something that bothered me a bit on the older pics, and it's hard to tell from the angles of the new pics (I'm on a crappy lappy so I can't check the interactive display).
2. His knees look weak, so make them a bit thicker.
3. His face looks more pitiful than ferocious/scary, try changing the eyes/brows a bit to fix this. He also need more defined and colored lips, as well as a colored inside of the mouth.
4. The texture needs more color variation and contrast. Here's a werewolf with an IMO better color-scheme.
5. Fur is hard to texture (I've tried and failed multiple times), but try to make some bigger clumps of fur as that will probably look better. Here's a tutorial for making big hair styles, some of that should carry over to fur as well.
6. Skin isn't all that easy to texture either. I've found that using a cavity map (basically an AO map that picks up smaller details, if you use xNormal you can easily generate one) you can often get pretty good results. All you need to do to get started is turn down or off AO for the skin-parts, blur your cavity map (not too much) tint it a bit red (to simulate a bit SSS) (it is important that the cavity and base texture doesn't have the exact same color with only brightness changes) and overlay that on your texture. Then you should also paint in some (subtle) color changes on elbows, knees, knuckles and such. I've only textured some human characters with caucasian skin but it should translate over to darker skins too.
I hope I didn't sound too harsh, I just want this model to live up to it's full potential.
-
Looks nice, but the fingers needs to be a lot thicker in my opinion.
-
I never tried to make vegetations (except a quick cat tail) but there is something that always catches my eye, the lighting. If there were a way to make the inner leaves darker it could probably do the trick. But baking occlusion directly on diffuse (color) will force the texturer to map each leave on a different position in UV space, which will lower the leaf texture's resolution. I never knew how D3 shaders work so I can't think of anything more sophisticated, like light map shaders and such.
You could bake the AO to the vertices and also bend the vertex-normals of the leaves to alter the lighting so that tree-crowns look fuller, that should get you pretty far.
-
I've got some pointers that could help improve your models:
- Do try to bake some ambient occlusion to your models preferably from a high-poly model along with other maps (such as normals, cavity, curvature, etc), but if not at least bake some directly from the lowpoly as that'll give your models a lot more depth.
- If you have to use photo-textures try to use some that are as flat as possible where you'd preferably get the bigger shapes from a highpoly bake.
- Do use smoothing groups/split polys to make sharper edges where you've got sharp angles (i.e every angle greater than maybe 70 or 80 degrees).
- Do try to add more logical details such as scratches along exposed edges
I'd recommend you take a look at xNormal and try to incorporate that into your workflow. Even if it takes a lot longer to make highpolys the resulting models will often be well worth the extra time invested.
-
Yeah, I think something got messed up in converting (it was originally a blend file) - I baked a new normal map from the diffuse in Gimp and its not it, its the smoothing groups for sure, but I literally tried every variant possible within Modo (several smooth angles, splitting the model, even adding chanfers), this is a bit too much work for this one in particular, if Xcen wants to upload the corrected LWO conversion he has that would be fine, I can also send him the other textures so we can have a couple more skins for the table.
Try applying/freezing transformations (scale, rotaions and translations) (might be called something else in Modo, but that is what both Blender and Maya respectively call it), I think I had a similar issue with one of my old models that got fixed by just doing that.
-
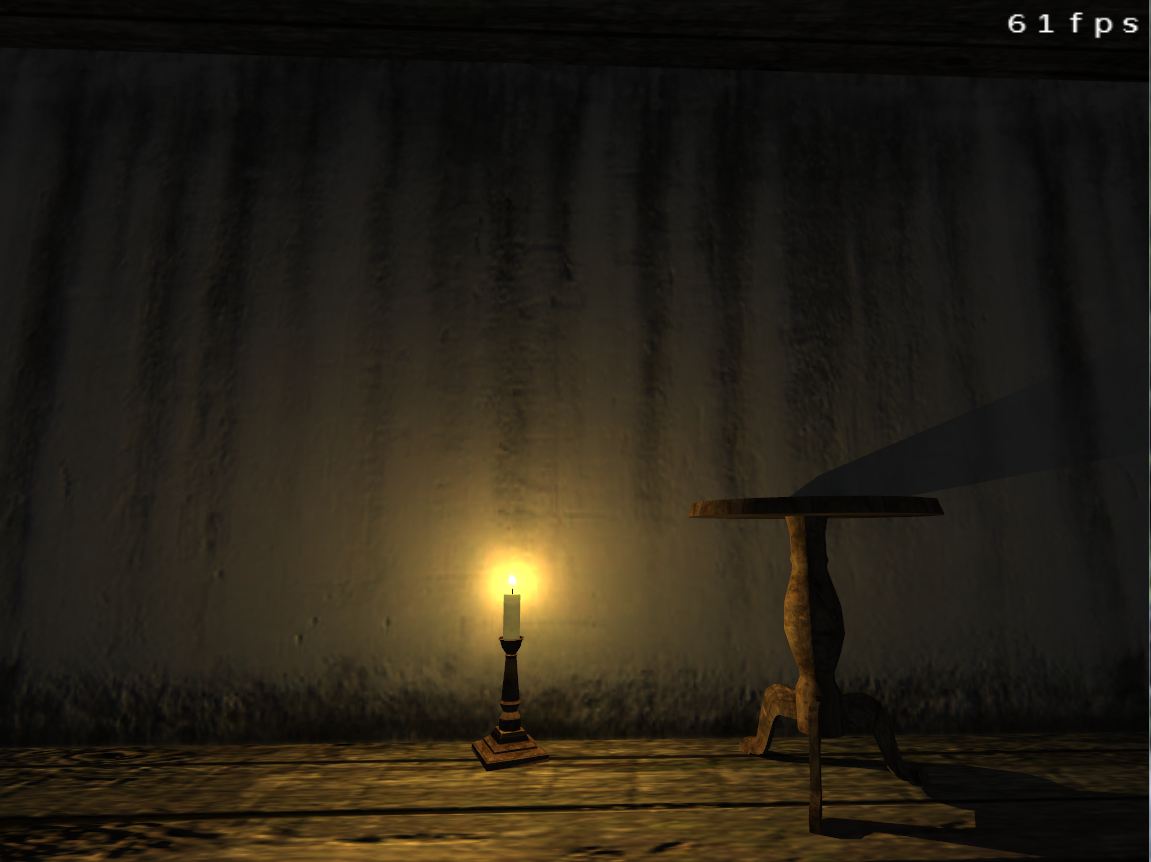
Here is a basic test I just did with a low res plaster texture from CGtextures -

Is that use ao combined with normals? If so you shouldn't use that to control the diffuse light, only the ambient and/or specular, otherwise it'll look very dirty. You can read about it here:
http://wiki.polycoun...to_a_Normal_Map
I think it'd be a suitable effect to use between planks in a wall texture, but not for a concrete wall.
-
@Bikerdude: Give Crazy Bump a try for normalmaps. Just create a greyscale image in Photoshop first, then use it in Crazy Bump.
Try out nDo2 instead, it'll give you even better results and more control as well as the ability to paint normalmaps directly in Photoshop with a live 3D viewer.
-
 1
1
-
-
Rebb - thanks a lot for putting this shader together, it really helped me as I was a bit lost there.
 I couldnt put the shader provided by Rich to work with the model, but I was wondering about the second blend diffuse map in yours, for the back; it lists the same image as the front one. It is said in the original thread that they should be different, otherwise you wont get to notice the transparency? I did pointed at a different image, but I just wanted to check because if possible we could save in file size and work just by using the same diffuse.
Here's some info from polycount on how to make the second diffuse texture:
-
Why can't it? Maybe I'm reading it wrong, but the info bar at the top of Blender says around 3300 vertexes and a similar number of faces. With render subdivision level 2 it jumps to 500000. I'm probably making some newbie mistakes in the geometry of those spirals as it was my first time working with the spin and screw tools. I made a profile in the shape of the letter S made up of 10 vertexes and screwed it at the default 9 step. Some of the edge loops could be removed, but that would mean redoing the places where the spiral ends for a third time.
What Blender counts at the top is faces which means it'll count a triangle, quad, pentagon, hexagon, etc as 1 face when on the graphics card what really matters is the number of triangles (2 triangles/quad, 3 triangles/pentagon, 4 triangles/hexagon). You'll need to add a decimation modifier for each model and then add up that count (it converts all the faces to triangles before counting).
-
Select the bottom vertices in edit mode (just Box select them, doesn't need to be exact), hit O for proportional editing, choose falloff type and then you can just scale or translate the vertices downwards.
-
Add modifier -> edge split -> split angle 90 -> apply
In Blender everything looks fine. Ingame the bottom of the head is reversed and two tris are distorted.
Already tried flip direction, recalculate normals and splitting manually.
Any ideas?
It should work right off the bat. I'd check the unwrap, if it's just those two triangles it should be possible to restore it to it's original state perfectly.
I think the metal part could look a lot better with some scratches along the edges in the appropriate places (just use a square brush with random rotation and size in Photoshop). Also the wood is way too shiny, especially for older unpolished wood, so make the specular value something very dark for that.
-

Looks good, but the 90 degrees angles need split edges (select your edges, CTRL+E, Mark sharp and then just add an edge split modifier). If it's a unique texture it could use some baked AO as well.
-
It might be too late to change, but I think you should try to make the knees and elbows a little thicker. It would probably make his limbs look more interesting and it would be more realistic (as there's more bone there so it would be less sunken in). I think the armpit should be moved down a little bit too.
-
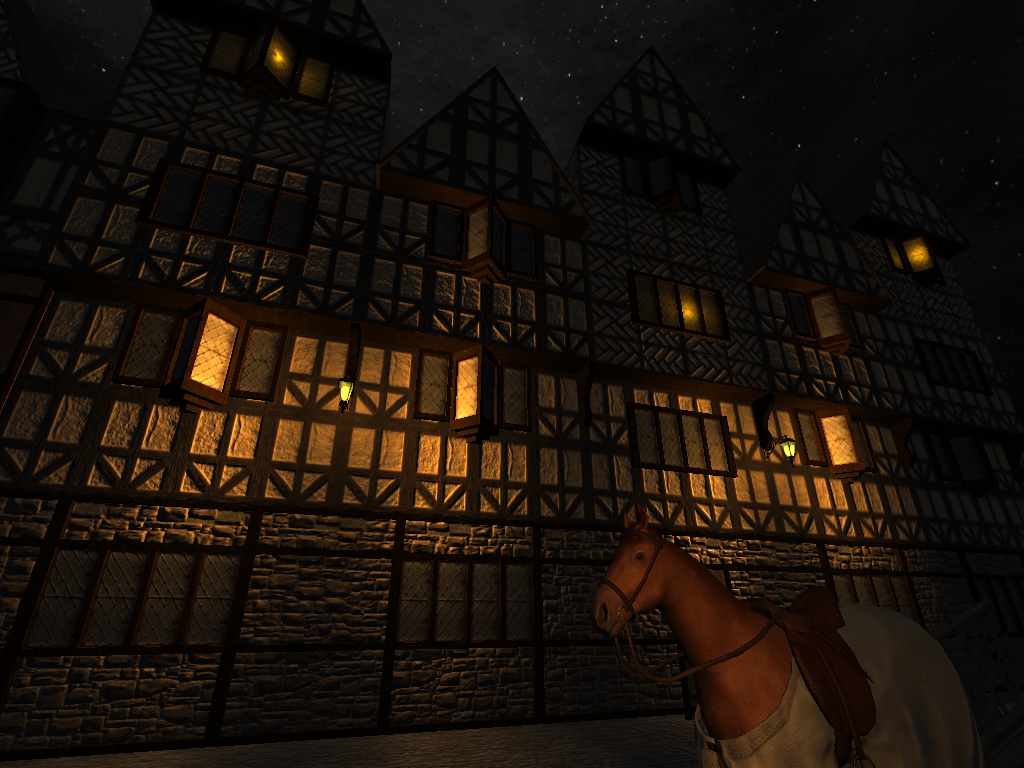
About 95% finished. Should be able to start beta testing in a few weeks.

Looks good, but in my opinion it's too flat. I'd try extruding the second floor outwards a little bit.
-
Well, i would like to take a look too if you dont mind, maybe a whole character is too much for me but i woyuld like to take a look at that head, it looked really nice and maybe i can learn/do something with it?
You can find it here:
https://dl.dropbox.com/u/2000935/Zombie%20model.rar
To be honest it's not particularly good. If I were to continue my work on it I'd probably redo large parts of it.
-
what happened to Noss' zombie model? He has made some progress on that afair.
If someone wants the zombie model I started on I can upload it somewhere. It's not all that fancy (basically just a very starved basemesh with a somewhat detailed but non-zombified head and an unwrapped lowpoly zombie with a basic and boring texture). I also made a rig and a very basic (read: crappy) limping walkcycle with Blender. I won't be able to work on it in a long time as I am and will be very busy with other stuff several months forward.
-
Yep, or you can simply point to a any existing texture, in the paths inside the model's ASE, thanks for reminding me. Just dropped by to say that I (think) successfuly created the shadow mesh!, you can see its not pixel perfect with the model (because of the chanfers, thats actually how I confirmed it was the shadow mesh working in game), and the profile is a lot flatter, but its barely noticeable at all, and its only about 160 tris, so should work better.

For the shadowmesh you only need to care about the silhouette and that it's fully contained within the visible lowpoly, it doesn't matter if the shading looks like shit or not. IOW you can remove all the bevels at ~90 degree angles and you'd be able to save a lot of polys. You should also keep in mind that this model will probably mostly be lit from above so you could probably remove a lot of polys to make the feet a bit blockier (you could probably remove every second horizontal loop on them) and it would very rarely be seen.
-
-
I'm not sure how your texture looks but if you're making a texture that'll be unique for this bench that won't be usable elsewhere (eg a non-tileable texture [like this] that couldn't be used for a say a stone-table or chair) you might as well try to bake some normals for it. It would be really simple. Here's what you need to do:
- Make a highpoly. All you'd need to do for this is apply some kind of subdivision surface effect (smoothing) on the older highpoly model that you posted the render of (you'd want this one as it doesn't seem to have any triangles or n-gons only quads).
- Optimize the lowpoly by removing the bevels at the ~90 degree angles and instead make these angles sharp (in Blender you'd mark them as sharp, in Max and Maya you'd use smoothing groups, if nothing else you can just split the edges). You might also want to separate the UV-islands at the sharp angles as it might make it look better.
- Make a cage for the lowpoly (this will then be used for instructing xNormal how it should render the texture). This is just the same as the lowpoly model just scaled up along the normals to completely encompass the highpoly. This mesh need to have the exact same topology and amount of vertices as the lowpoly model).
- Export all these parts (highpoly, lowpoly and cage) as OBJ or FBX.
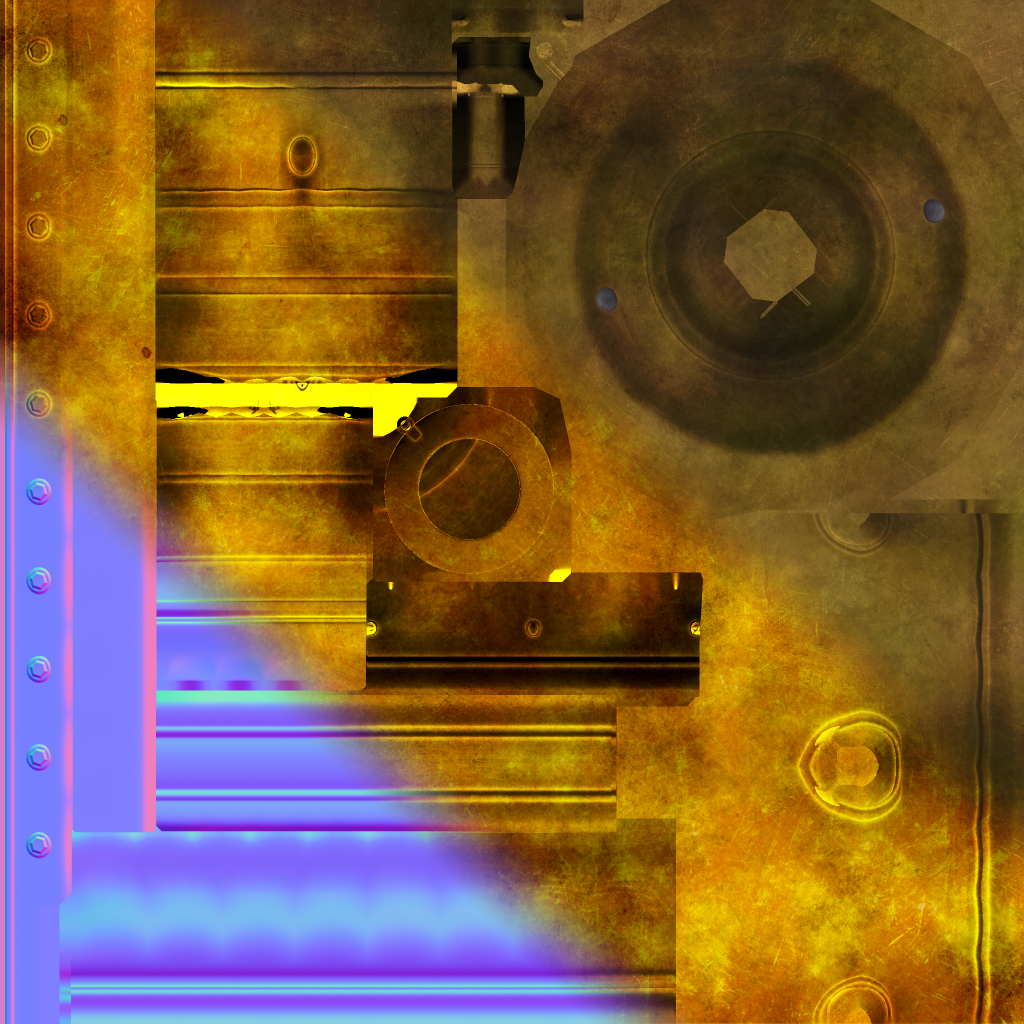
- Import these into xNormal and bake your maps (I'd recommend Normal, Ambient Occlusion, Cavity, Ray Fails [so that you can clearly see if your cage misses something] and Curvature maps).
- Combine the maps in Photoshop or Gimp (you could multiply the AO and cavity maps and then play around with the blue channel [edge highlights] of the curvature maps).
- And you're done.
Good luck!
- Make a highpoly. All you'd need to do for this is apply some kind of subdivision surface effect (smoothing) on the older highpoly model that you posted the render of (you'd want this one as it doesn't seem to have any triangles or n-gons only quads).
-
1074 polys seems to be way too much for that. If you'd just remove the red edges that I've marked for you here you should be able to easily shave off a couple hundred tris without any discernable difference (remember that it's only the silhouette that's important).

If you were to bake from a highpoly you could easily fake the bevels with the normalmap and save even more polys. All you'd need for that would be a smoothed highpoly version of this and a cage and you'd be all set.
Beware: Valve/Steam small print BS...
in Off-Topic
Posted
If you issue a chargeback against Steam they will ban your account, meaning that you'll no longer be able to play any of your games. It's a pretty shitty situation where we are completely powerless unfortunately.