

Nosslak
-
Posts
679 -
Joined
-
Last visited
-
Days Won
3
Posts posted by Nosslak
-
-
Serpentine is also working on improving our textures, but he is the only one basically atm (IIRC), so any help is welcome!
We have f.i. very good stone textures (I found some really good grey granite yesterday) but we have some "large rock" models that use a horrible blurry/stretched texture f.i. (I am not sure if the models are LWO, we can't replace them easily. If they were ASE...) Can you work with LWO?
Maybe we should give you contributor status, we have already an internal thread discussin models that need love

I'm not all that good at making textures, but I think I can improve/remake some of the old ones. One important part of texture creation for me is the ambient occlusion map and if I'm not allowed to use that it will seriously handicap me and probably make my textures look like crap.
I'm using Blender which seems to have an importer for it. I have never used it so I don't really know how awesome it is.
About that contributor status; I'd love to become a contributor. I'm not sure if that gives me any additional responsibilities. If it means I will have to devote more time to The Dark Mod I should probably tell you that school starts for me soon and that I won't be able to make models as fast then.
* I guess the glass texture is one we already have? 256 seems good enough and we reuse an existing material, anyway.* specularity can be much lower (does it even have morethan uniform specularity? I think 512x512 is ok, might be even 256x256
* normalmap - as high as possible (it provides all the little details)
* diffuse - with the almost uniform material you have here, I'd say 1024x1024 would be enough, if only the lamphead 512x512 might be even enough.
It would help to see the model in game, tho, as it can be tricky to decide "whats good enough".
I'll try to get it in-game, but I have no experience with Doom 3 so it might take a while.
To play Devil's Advocate:
That lamp post is in two pieces hieght wise, so it does use 2048 pixels vertically.

(and it's 'skinny' so it doesn't take alot of pixels around.)
I have no idea what this means.
One option would be to have smaller lower res versions of same textures specifically for smaller objects, but that somewhat kills the purpose of having generic textures.I'm not really sure how all this works but couldn't you just make a script or something that calculated the models volume/diameter based on the collision model (for speed) and then compared it to the originals and chose an appropriate LOD/DDS size?
Also, were you looking at the textures in the model viewer? Or in the models/props/textures directory, or in dds/models/props...The ones inside the models directory are low res 'editor images' in jpg format. DDS are the ones used in game.
Oh, my mistake. I thought the model viewer showed it in the best quality, then perhaps it isn't as bad as I thought.
I also think 2048 sounds a lot, the reason I made them in that size was just so that I could eventually use it in some other game and/or in my portfolio. I never thought you'd be interested in it un-resized.
BTW how many units high are the characters (just so I'll get the right scale)?
-
Yeah, we use a lot 512x512 textures in places where we really shouldn't (anything that occupes a lot of screenspace) and to make up for it we use a lot of 256x256 (or even 512x512) in places where we really shouldn't, either (like for anything that occupies little screenspace, like cups and candle holders and so on. The result is a lot of blurry textures mixed with a lot of very sharp textures, creating an odd experience. Unfortunately, we do not have "detail texturing" that could remedy this..
Anyway, 2048 is nice to have, we can always downscale it (actually, come to think of it, we could just ship the 2048, anybody with less graphic power can tell D3 to downscale textures to 1024 or less already..)
Yeah, I looked through the model archive and to be completely honest a lot of those textures were just horrible. They were very low-res and did basically just consist of one color with a bunch of noise slapped on top of it. I could perhaps take a look at some of it and try to improve them. Just tell me if there's any one in particular.
152 polys for the lamp + 24 for the glass. 2048^2 diffuse, normal, specularity and alpha for the lamp, 256^2 diffuse for the glass.
What resolution would be good to use for this texture set?
-
The diffuse for the lamp should be 1024x0124 - otherwise it will be blurry on large screens (and the glass diffuse is much sharper, it uses only half the pixels but occupies a lot less screenspace).
I guess the diffuse compresses well as DDS anyway, so the extra pixels won't hurt us.
Btw, fine piece of work

Thanks! Baddcog, mentioned in my other thread that 512^2 is pretty common and that the character used 1024^2, so I just assumed I would have to use a 512 texture set. I got lucky this time as I made the textures at 2048^2 resolution.
We have glass textures which pretty much have the exact same diffuse - so I wouldnt worry too much about that, best to just reuse if its not on the same texture map(just keeps things tidy, easier to fix, easier on material files and benefits from changes in normals etc)
(I have no idea how to set up the materials in modeling tools however)
Looks lovely otherwise!
Thanks! And about that texture; I am actually using your glass texture. It was a little hard to find but after a while I found it hidden in a pk4 file and just extracted it. I have no idea how to set up the materials in Dark Radiant either but I'll go and try to learn how it works.
-
Ummm I think this might be to do with Aero again, try disabling it in the DR options under Compatibility. Restart DR after that.
It helped. Thanks!
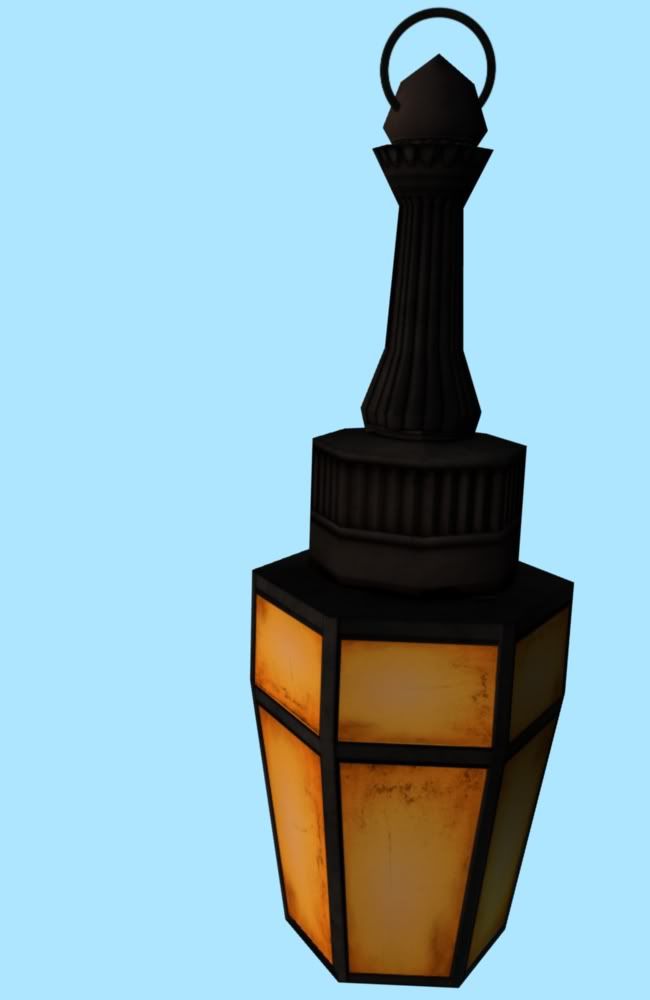
I'm finished with the lamppost version (if there's not anything you'd like me to add/change):

945+72 (glass) polygons, 512^2 pixel diffuse, normal, alpha and specularity; 256^2 pixel diffuse for the glass.
I'll go work on the other versions now.
-
It might be that you need to zoom out on some of the bigger models. Use the mouse wheel should bring them into view.
I don't think that's the problem. When it worked I was just browsing around looking for something that sounded interesting and I found hellcage in what I think is the Doom 3 files and clicked on it and a preview with a 50% gray background came up. Then I tried to preview some other stuff, both from Doom 3 and Darkmod but I couldn't get the previews to work. So do you guys know how to fix it?
Here's how it looks:
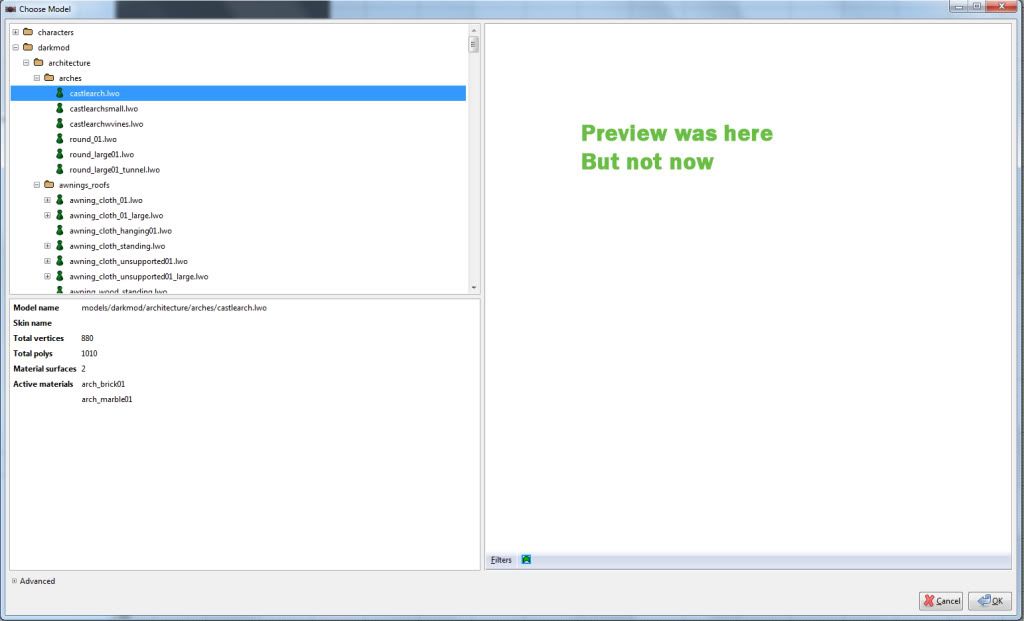
It doesn't seem to work for entities either.
-
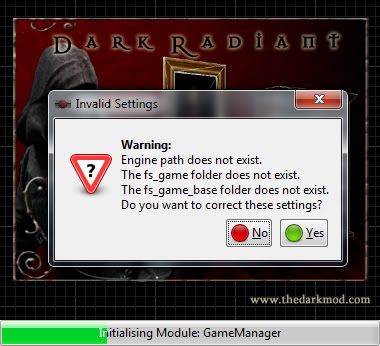
Is the mod in
C:\Games\Doom 3\darkmod ? if so putting darkmod in the fs_game_folder should find it.
Yes, it is. But I have already tried that, do I have to place Dark Radiant in the Doom 3 folder as well? I don't think it matters but I'm using the 64 bit version.
OMG, I failed again. I wrote Doom3 when it should have been Doom 3. It works now. Thanks anyway.
Also a quick question: How do I preview the models and such that's in the model browser? I accidentally previewed a part of a cage but I can't get any previews for anything else. How do I do it?
-
You need to DL the Mod and the editor. Seriously, do that and you'll have all the content, plus you can look in the editor to see what models there are.
Plus you can play FM's. Don't you want to do that?
I have done that but I don't think Darkradiant is finding Doom 3, even though I have specified the right path for Doom 3 (C:\Games\Doom 3) and written darkmod or thieves_den in both of the boxes below the engine path. Here's how it looks:
anyway, don't get confused:
textures are what you paint. (bitmaps)
materials are combinations of textures (diffuse, spec, normal- plus sounds, frob highlights, illumination ,etc..) in a text file
skins are just a text file that referneces a model and which materials can go on it so mappers can choose th elight or dark one when they add it in their map.
defs are text files that add props together to make an entity (light model + light source + sounds)
Thanks, I thought a texture and skin was the same thing.
about the shadows (you really need to play the game)The light source has a texture (all doom lights are square by default). The textures we use make them look round and also have lines in the for things like the bars that hold the glass in place (your lamp will need a new texture because of the 3 lamp thing
That texture 'fakes' a shadow for the map. Looks fine 95% of the time (better than the lamp casting a shadow). The other 5% looks pretty good if you just use a cone for the shadow mesh, from the ground up to just below the bottom of the light source. But as I said only a few of our lamps even have that and I don't think it's going to change.
It really isn't even too noticeable if a guard with a light walks by them (if they have no shadow mesh), you really have to look to notice. I notice because I have been working on getting the best effect for a few years
Players wont be looking foe those things so they wont notice unless somebody says something.
I have played the game, just not a lot. It seems that I misunderstood you, but we actually meant the same thing or that's what it seems like anyway.
Oh, that's really nice! Well done.
Good point. In 4 or 5 years, hardware may be advanced enough to handle several higher polygon objects on screen.
Thanks! I wanted to make a big texture so that if needed I could use it in some other project that used a more modern engine.
-
Looks really nice.
Dark is fine, you can always make a lighter version too. Skins are easy to do. Everyone likes dark and dirty, in fact a mapper asked me to make a dirty skin of mine... But a nice cleaner skin would be nice for ritzy parts of town.
Just make 2 materials. In one have a dark diffuse, your normal and spec, in the second have a lighter diffuse, but same bump and spec.
Thanks. Skins aren't so easy to do for me, though. I always find it very challenging to make the texture feel alive (if that makes sense), but you guys like it so it seems I got through it this time.
As far as shadows, it looks like all our electric lamps are just gonna be noshadows on tex, and a shadow mesh really isn't needed. Only a few of my lamps have them, and the latest greatest I could come up with was a cone for the shadow of the pole. It casts a shadow but 'diffuses' out at the top. If you want to do one I'd do it that way. Then if a lamp/torch guard walks by it'll cast something for the pole, but the lamp heads rarely cast shdow on anything anyway, and with trying to not shadow glass... they can be ugly.They can also cast shadow down from the lamp and give the player a shadow to hide in which is awkward considering you hide in a light source.
I'm not completely sure what you mean but as far as I've understood it you're saying that there will be no texture applied to the light, it will just shine through the framing as if nothing is blocking it? I think it'd look a lot better with a textured light.
Looking very nice there - love to see models that look like they were made to be low poly rather than gimped down.
Thanks!
As for the texture, please submit your high res version and highpoly mesh with the final model as they are always great to have around.While you're working with this mesh it may also be a nice idea to make a wall mounted version with a similar style and perhaps one that can dangle from the roof, 'sets' of items like this will add greatly to TDM however if you don't feel like it, don't worry rather keep doing what you enjoy!
Great idea, I'd love to do some variations on them. I knew it wasn't a waste of time to make such a high-res texture and if I make these other variations I can remove some uinnecassary geometry, re-UV the mesh and then just bake the old textures to it. It should be pretty quick to make the variations as I think I've got a all the parts I need already, I'll just need to rearrange them a bit.
Good point, a wall version would be sweet. And you could take that top portion off the pole, slap it ontop of the lamp, and maybe put a big ring through it. (then people can hang from a chain)
And with a big long metal thing on top it would look completely different from anything we have, yet still match the set good.
Great, I'll do that later when I'm finished with this version, which I foresee will be tomorrow. In the mean time you can try to think up something else that would be needed.
Also is there some kind of list/repository with all the models that you already have so that I don't end up doing something you already have? I was thinking of maybe doing a grandfather clock (or whatever they're called). I suspect you already have one, but I have no way of knowing.
Oh and another thing, could you please post the different textures that would be used for the glass part of the lamps?
-
Ok, so I've started the texturing process. Here's the result:
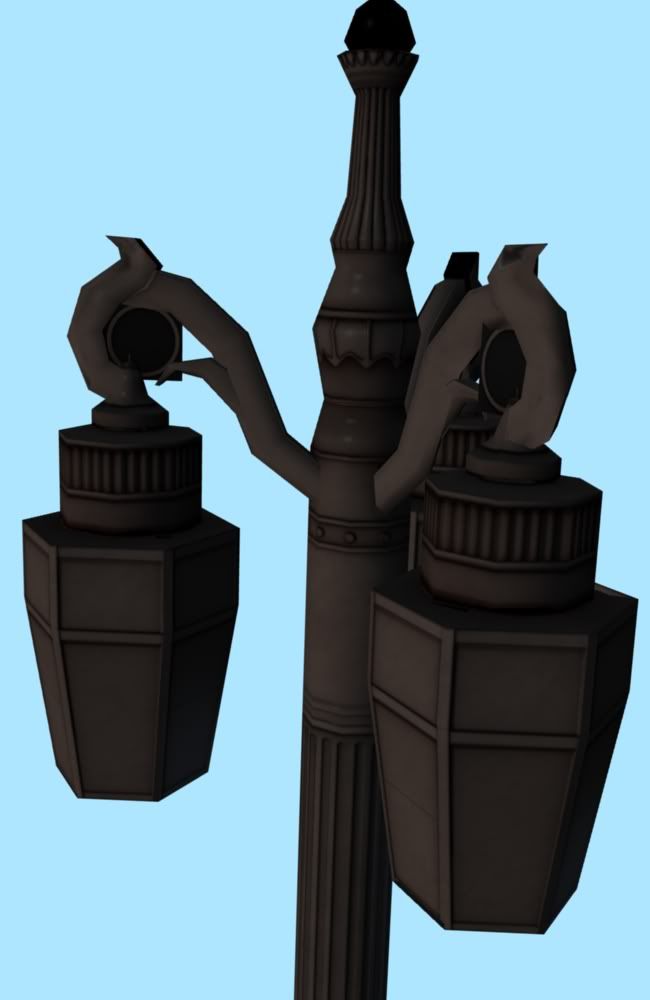
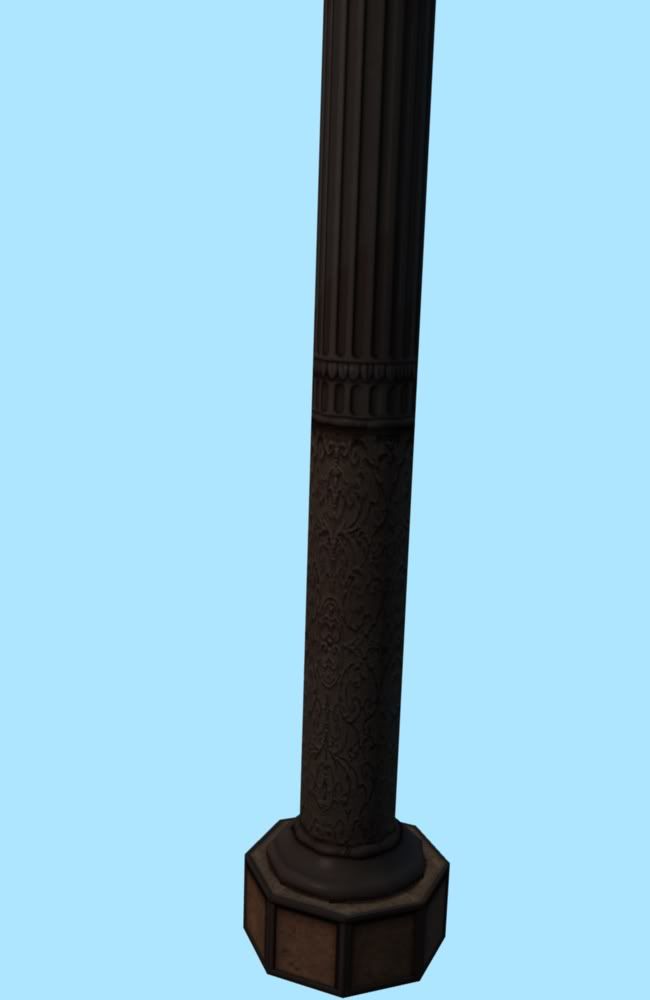
The textures are all 2048^2 pixels but I will resize them later to 512^2. Also I haven't started any work on the alpha that's why you see some black planes on the arms.
I was planning to make it a pretty dark gray color but it feels like that would look very boring and un-interesting so do you have any ideas for color/material?
-
You got a pretty wasteful uv map, I'd deffinately try to fill it in better, I could probably get 25% better useage there

It's not as wasteful as you think. If you look at the screenshot a little bit closer you'd see that the arms aren't normal mapped and that is just because I wanted to bake them separately, but they will be included in the top right corner.
Artifacts are hard to say, it's a simple enough shape that you 'shouldn't' need a cage.
Have you tried different ray distances? it's possible that maybe it's just falling short there. I'm deffinately not an expert on normal maps, I tend to try different settings until I get the best result I can, then end up editing them in photoshop sometimes. And I don't know Blender at all, I use XNormal, it actually lets you load a cage, a hi and a low.... Not sure how/if Blender handles cages.
--
Does your high poly go into the low poly right there?
If so just shrink the verts on the low to be inside, bake, then expand the verts again.
I have failed maybe 19 out of 20 times at making a proper normal map so I just gave up after the first try, sorry. But you were right, I just had to change the ray distance (the other times I have tried altering the ray distance but most often it haven't help at all.
-
OK, great to have that cleared out. I thought I saw some tutorial on how to do it somewhere but I might be confusing that with something else.
I've begun the baking process and, as anticipated, there were artifacts, as always.
In the other thread we talked about cages a little, do you think it would help if I made a cage for it?
-
So I cannot use different UV-layout?
-
I think I'd rather just keep them all on one texture sheet. But the big question here is: Can I have one UV-layout for the diffuse, normal and specular maps and then another one for the alpha map. I want to do this because that'd enable me to make some way more high-res alpha mapping on the places that needs it (as opposed to having it split equally all over the model).
-
Yeah, you can have several meshes, just export as one.
Each material needs it's own mesh.
I name them accordingly as I work.
glass mesh gets glas tex
window trim (alpha) mesh gets window trim tex
lamp pole mesh gets lamp pole tex
collision mesh gets collision tex
shadow mesh gets shadow tex
The are all seperate meshes so unfortunately they HAVE to have sharp edges between them (probably not an issue).
The ONLY way to get sharp edges is to seperate the meshes.
You should try and keep as few seperations in the uvmap as possible, all seperations create more verts, but I don't think they necessarily make sharp edges, I think if the mesh is one piece then the uvmap splits (normals) are still smoothed.
I don't think you need to worry about texture LOD, as using dds will give you mipmaps (smaller and smaller versions of your tex) automatically. Which is in effect an lod system built into dds.
ALL LOD models need uvmapped, it's a pain.
Model looks good though, I think it's gonna look really good in game.
I don't really understand. Does this mean that I will give the lamp framing it's own texture map completely independent from the poles? What I mean is will I give it its own diffuse, normal, specular and alpha maps and then give the pole its own diffuse, normal and specular maps?
-
Did you mean 1013 polys, or is this not the "lower lowpoly" but the "higher highpoly"?
I failed. Yeah, I meant 1013 polys. 10 000 would be crazy for that.
Yeah, the glass should be its own surface/mesh, so we can switch the material (aka skin) for it independent from the lamp. F.i. heathaze glass, normal glass, opaque glass etc. depending on what the mapper wants or the LOD system might f.i. switch distance lamps to normal glass etc.OK, that's what I though too. Thanks!
EDIT: Do you have a LOD system for textures? If you do what is the smallest texture sizes it will use? Also can I use another texture layout for the alpha map?
-
Last week I stumbled over MeshLab again, the previous times that I'd seen it, I thought it was either commercial or industrial software, but it's actually open and very slick. It's intended for research use mostly, however from playing around it does seem to have some very interesting options and does a great job with the different forms of decimation and optimization that it offers. Over all I think if you're into modeling and have a mind for experimentation and technical things, it could be a quite powerful tool (tho it cant be used without another modeling tool for actual export and most likely UVing.)
Seems cool, I'll give it a try.
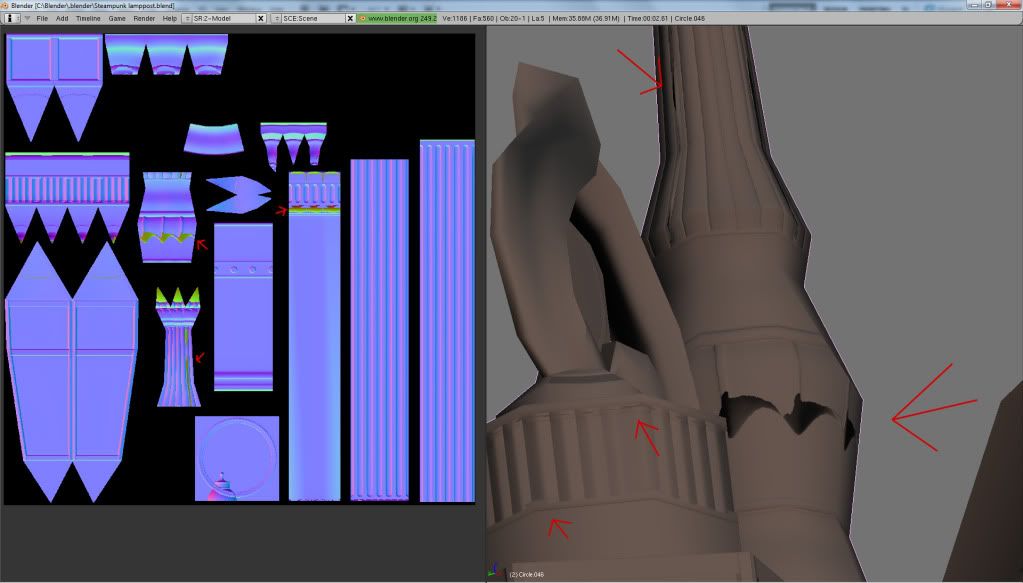
This is what I'd do to the low.
The red are areas to cut. Those details are so small you really wont notice them in game, and that's around 100 polys. The normal map should show those just fine.
The orange just kindof represents where I'd seperate the polys from each other to force hard lines (based on your hi poly).
and honestly, I think it'll look better without those rings. I just don't think they fit the style of it very well and instersect the top piece of the lamp head kindof weird..
I think I'll keep the rings but thanks for the other tips though, it helped me remove around 100 polygons just as you said.
No need. The high res model is only necessary to bake the normal map.
Well, I didn't really mean the highpoly, I meant the slightly higher poly mesh for the lod system.
I'm completely finished with the modelling now and will go unwrap it. Here's how the even lower lowpoly looks like now:
1013 polygons.
Quick question: In Doom 3 or Dark Radiant do I have to split the UV at every part that I want to have a sharp edge and do every place that I split the UV at get a sharp crease?
Quick question 2: Were I supposed to include the glass part of the lamp in the same unwrap or should it be unwrapped all by itself?
-
You must or I will see to it that you are at the very least ostracized and possibly even hounded!


Oh noes!
Nosslak, If you really want to get into the whole dark mod groove, then I highly suggest you play theif 1 and 2, if not theif 1, then theif 2 which is the best in my opinion. I think there are packs that upgrade the quality of models and textures or though personally I haven't bothered.
If you want to play a mission that looks great for a theif game, don't go past "Rose Cottage"
http://www.youtube.c...h?v=DwaxIgz7__k
And conspiracies in the dark is also very cool
http://www.youtube.c...h?v=Su8qxAEVso8
These are my favourite missions. Trust me, you will actually learn something about the unique style of gameplay that is offered by thief. TDS may look pretty, but give thief 2 a chance to grow on you.
I was sceptical about playing system shock 1 because of the doom-like graphics, but I played it and finished it recently and couldn't be happier for opening my mind, it was unique and addicting, a hidden gem! I'd rather play it than a newer game like dead space anyday. not that I didn't enjoy that game
Wow, that first one really do look great. If it wouldn't have been for the interface then I'd never have guessed that mission was for one of the old Thief games.
I will try the first Thief as soon as possible though.
-
Don't worry too much about polys. You should in fact make a low-poly with about 1000 tris as you had done, but also add a "medium" poly version with say 2000 polys. This is a very good showcase object for TDM, which is also very big, so having 2000 or even 4000 polys on it is better than having only 1000 and having it look like crap from closeup (the best normalmap can't hide that you have not enough polygons to make it appear round). We have many much much smaller models that already use several hundred polys, so having a streetlamp having 1000 seems ridiculous low.
Ok, so should I make a more dense mesh or not? I'm not really sure who's the leader yet so I'm not sure who to listen to the most. I will still have to unwrap and texture both of them individually though, right?
We will not use many of these lamps in a given scene, so their polycount is not as critical as you might think (and contrary what some other people here say.Also, D3 has no problem pushing excess polygons - I just tested a scene with about 7 million polygons and my system still rendered 10..18 FPS. A few thousand polys more or less won't make any difference. What makes a critical difference is shadowcasting polys. These should be as low as possible while still capturing the silhouette.
Yeah, but Baddcog told me in my other thread that a lot of the people who might be interested in the mod have really bad computers that barely can run Doom 3. So not everyone might have a computer as good as yours.
I'd like to see a wireframe. I can already see two spots that you could shave some and really not lose any shape.
Ok, there you go:
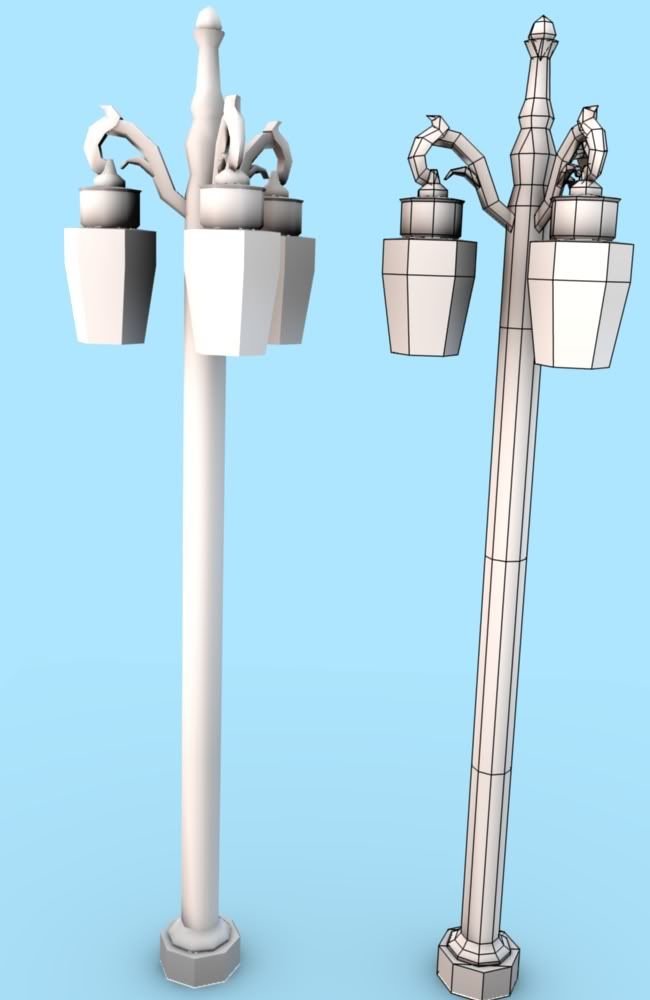
1027 polygons and that is without the alpha planes which I'll add later, which will at most most add 24 triangles, depending on if I'll do double planes or just singular (double planes will supposedly make it look like it has got some depth. Oh and the subdivisions that doesn't add anything to the shape on the pole are there for texturing purposes.
Tels is just over excited about his LOD work
lol. I think 1000 is fine and with a good normal map bake it'll look great in game and as I said before, it is at the top of the polycount for any lights we have currently, so it's not like you're 'cutting corners'.Bake that thing and lets get it in game!
One final question though, that part of the lamp that is supposed to emit the lamp, the one that is supposed to use another material and all that, should that be a part of the same mesh?
Looks really nice! I wish I could do something like that, but as they say: some people have it and some people don't.

Wow, thanks a lot, man.
-
Yup, should be fine
Looking very nice!
Looks great!
Thanks!
I don't know, but didn't that just remove a lot of the necessary detail on the base? I think those grooves and rings gave the lamp its charm. Or maybe I am missing something and they are brought back with normalmaps or something like that..
I wanted to keep those too, but I just didn't have enough polygons to spare, but hopefully the normal map will be able to project most of those back onto the lowpoly anyway.The silhouette will still look the same but it may look like the details are there on the lowpoly, as the normal map alters the way it is lit.
-
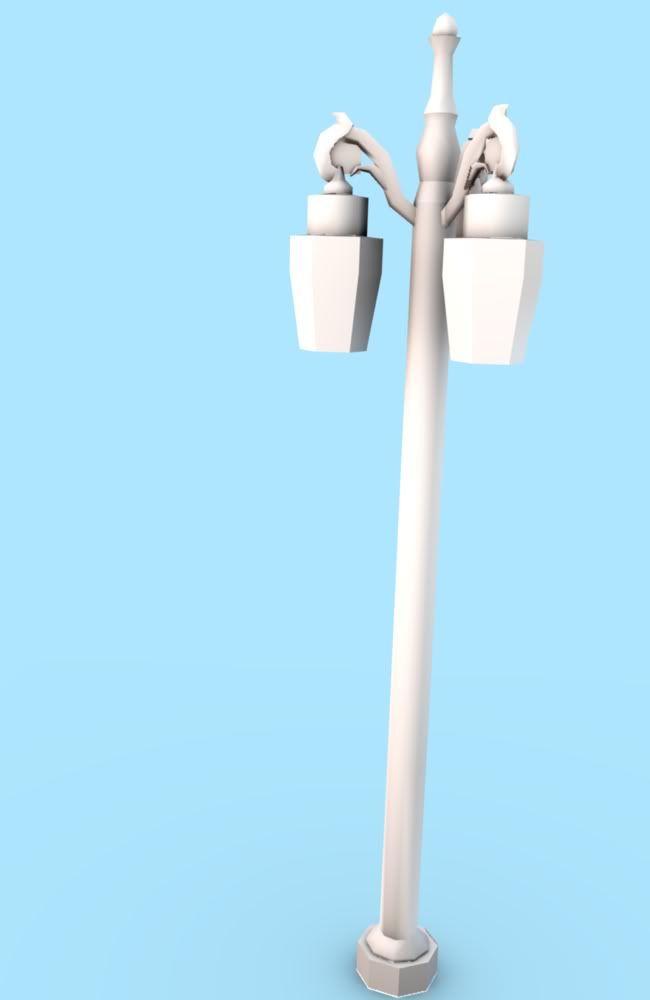
Ok, the lowpoly is pretty much finished now. It's not as lowpoly as I had hoped, but it'll have to do. Here it is:
I will make the ring on the arms as an alpha mapped plane, that's why it's not included.
It landed on 1087 polygons, so I'm not sure it's usable in the game, but I can't shave off many more polygons and still keep the shape. I will try to optimize it some more but I doubt I'll be able to get it below 1000 triangles.
Will it still be usable?
-
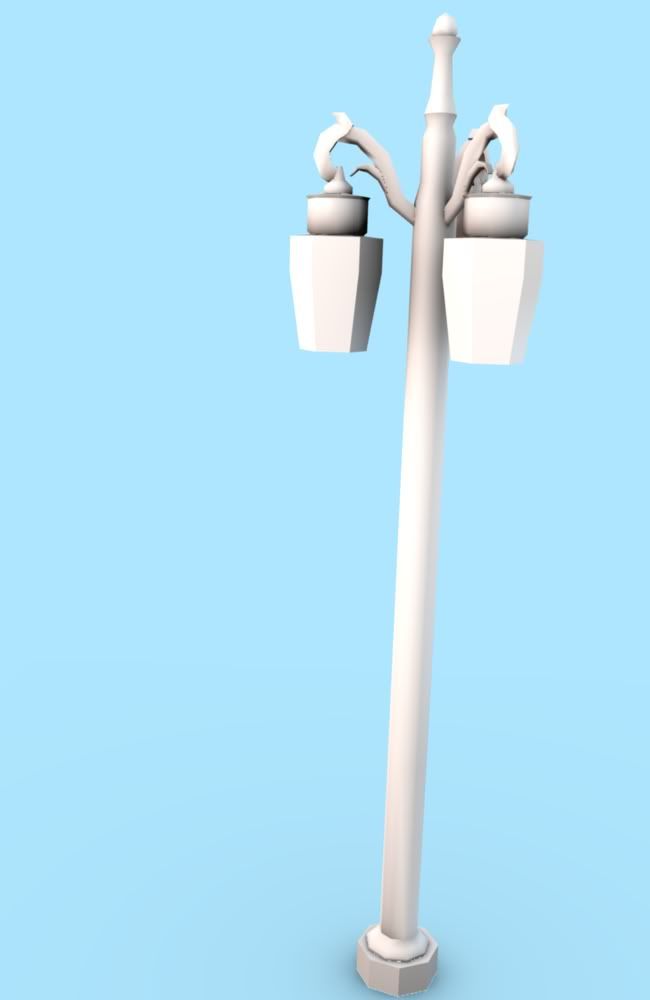
Ok, I think I'm finished with the highpoly now. Here's the short version:
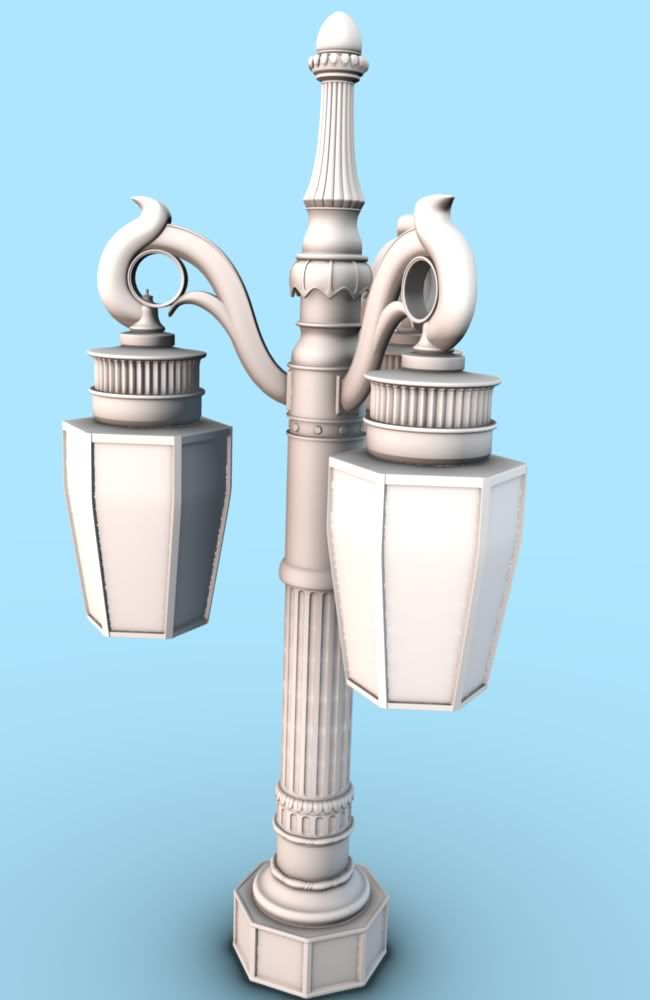
Here it is in it's full glory:
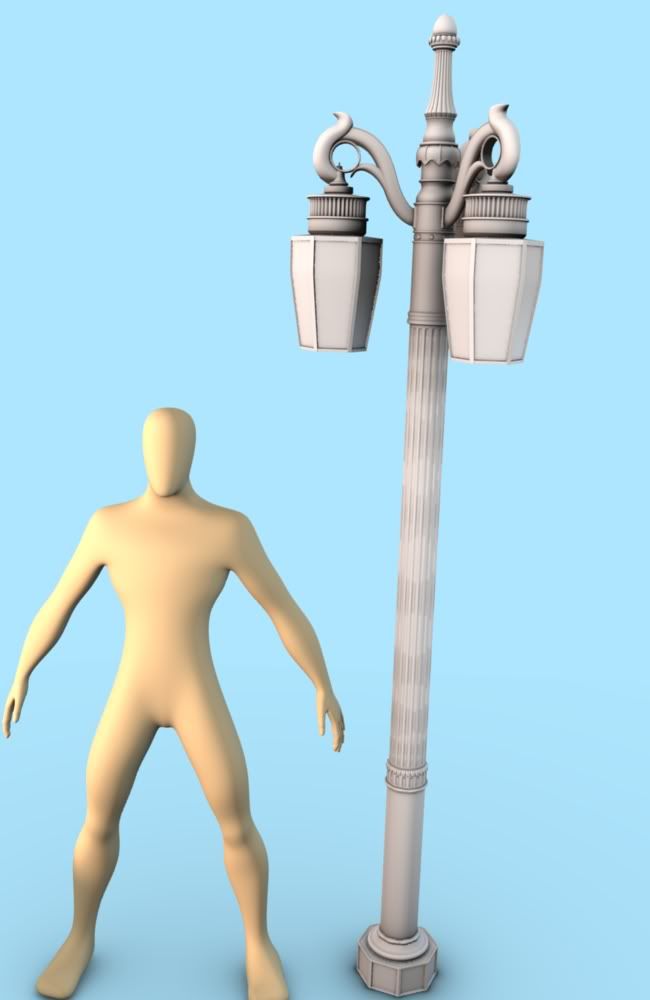
Full - featuring the nekkid man
edit: It's really hard to both keep most details, make it somewhat smooth and keep it below 1000 polygons but I think I'll be able to just make it without exceeding the limit.
-
i'M NOT KIDDING, BUT IF YOU HAVEN'T PLAYED t1 & t2 BECAUSE OF 'DATED GRAPHICS' ... I hate caps lock.
They are great games despite, but it you wander over to TTLG.com where alot of us Taffers came from you'll see there is quite a large fan base for Thief games. Something like 500+ missions for T2 alone.
Alot of those people run older hardware, and while they are into Thief they may not be into 'gaming' so much. I play L4D and TF2... so I know alot of people on Steam buy all the new games right away and all that, but Thief fans don't really all fit into that catagory.
Alot of them just don't have the expendable income either, especially when the main game they play still has great missions being made for it all the time.
Alright, I'm sorry. I'm usually not such a graphics whore, but I've got some limits. I will give those games a chance and try them though.
Anyway...
There is a photoshop plugin to export dds and I think also one for Gimp.
And yeah, shadow and collision meshes only need a material applied, don't need uv'ed
Awesome!
-
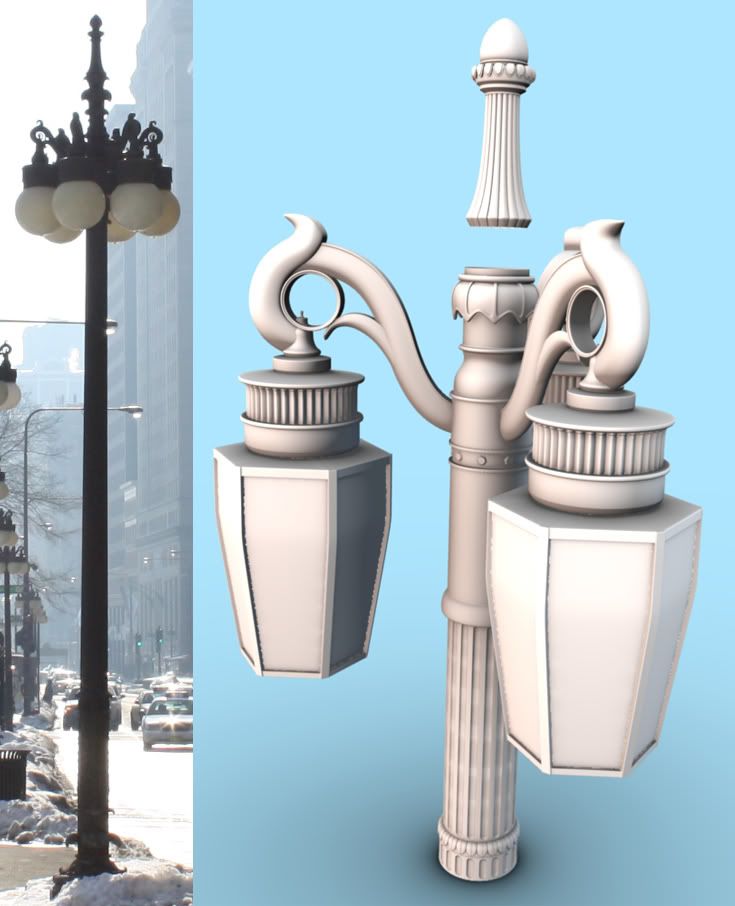
Looks really good but the complexity worries me performance-wise. But probably a lot of that could be replaced with good texturing and a normal map. Have you examined any of our existing lights?
Nah, I haven't really looked at anything yet. Baddcog told me kind of how they worked, though. Basically I should make a shadow mesh that will be used when the lights turned off, I should make the material úse a noshadow property and I should map the framing around the lamps to an alpha mapped cylinder which will let another cylinder with the light materials shine through.
Looks good. The bit on the top could even be made into a separate object - a wrought iron decoration for rooflines (maybe elongated as a pole?), entrances and the side of gates (where a similar object was often used to protect the stones from traffic).
If there is any interest in this then this could be done very easily when I'm finished with the texturing.
The steps are generally...
1. Model a high poly model.
2. Model a low poly model around it.
3. Bake a normal map from the high poly model onto the low poly model.
But since he doesn't know how to UV map, he can't really do step 3.
Yeah, that's basically the workflow I was shooting for. I can unwrap and texture my models I'm just not very good at it and most of the time the problem lies in the fact that my generated normal and ambient occlusion maps turn out crappy for some unknown reason, but I will persist, one day I will make it work.
-
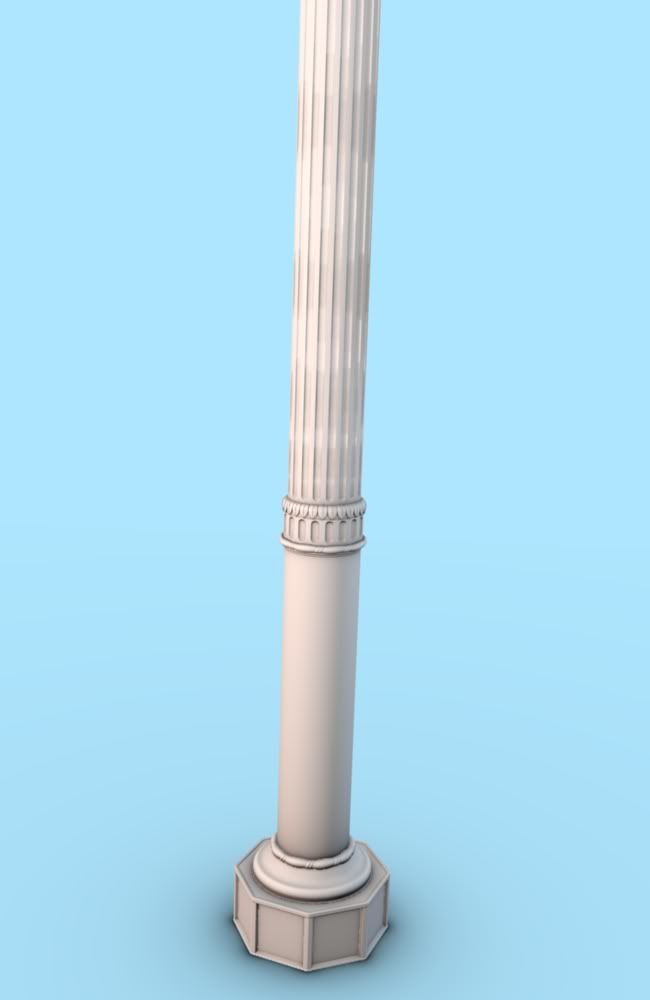
Hi I'm a new modeler here. My introduction thread's over here:
I've started working on the highpoly version of a lamppost and here's how that looks:
I will stretch out a part of the pole to make it longer later.
So what do you guys think?
Nosslaks stuff
in TDM Editors Guild
Posted · Edited by Nosslak
Nope, I meant in regular Doom/Darkmod units (it's pretty easy to set up Blender to replicate those).
I was trying to import a builder character but it was in MD5 which Blender can't import without a plug-in. I'll try to find some plug-in for md5 later, though.
I was very stubborn. I wanted to do it myself, but after trying for maybe 40 minutes or something with no success (even though I used the tutorial on the wiki) I had to give up. You should have it in your inbox by now. I think I got pretty close to actually making it work, not sure though.
It's almost completely parallel to the grid, I accidentally placed the arms just a little bit away from the center. If needed I can make it rotate it so that it is completely paralell, but I sent it to you before I understood what you meant.
Haha, yeah thanks!