

Nosslak
-
Posts
679 -
Joined
-
Last visited
-
Days Won
3
Posts posted by Nosslak
-
-
I'm pretty busy with school right now and it doesn't look like I'll get a lot of free time any time soon. I've got projects lined up for the summer and the schedule for school seems pretty busy after the spring break as well. I'll try to finish the zombie somewhat soon (I haven't started on the sculpting yet, partly because I can't seem to get the head to look dead enough but also because of time), but I can't promise anything with the masks.
-
Well, I've put hundreds of models/textures in the mod compared to literally single digits of other people, so if that's funny laugh away. I've seen tons of speculation and claims made but I know better than to accept them as truths until I see proof.
Multiply might mean it SHOULD be the same across platforms, but that doesn't mean results will be equal.
I haven't used it as a blending filter in Doom 3 so I admit that I might be wrong. I just don't see why iD would change the meaning of multiply from what it means in every other program, when it is such a simple command to execute codewise and would be so useful as a blendfilter. I don't think they would've called it multiply if they had changed the behavior. However it is true that you have more experience than me with the engine, so if you say it works differently I will respect that as I haven't tried it myself.
Don't fuck with Nosslack, he is greater then you and I mean it.

Relax, we're all friends here.
-
Yes, in photoshop having pure white might be better. But the render engine is not photoshop.
What you do when you use the multiply filter in Photoshop and every other application is that you literally multiply the original color with the new one (converted to a set of floats between 0 and 1) and show the result. If it is called multiply it should be the same in all applications.
-
I thought about that a few days ago. I determined this would be a bad idea, because the ground underneath will not have any AO mapping, so the result would be a large contrast that would only serve to magnify attention to the seam where the model intersects with the ground. If I wanted to do this it would be fairly easy to bake. All non-active selection meshes are applied to the AO bake onto the low poly. so theoretically I could add a simulated scene of stuff (if they're close together) and just select it all with the lowpoly as the active selection and bake the WHOLE thing onto the lowpoly. I don't like this because the benefits are minimal and the AO map becomes useful for a single model in a single spot in a single FM. would be a shit ton better if dmapping supported an AO bake feature for the entire damn map.
Good thinking, I didn't consider that at all.
-
As far as how much 'white' it has...
You may not actually want any white. You'll need to do some blend tests and see how it is in game. Like overlaying/multiplying layers over an AO in photoshop, white could actually turn everything pure white/black. You'll probably want a bit more of a mid grey range with no extremes.
(that can always be tweaked in photoshop really quickly though)
If he's just going to multiply the AO he should strive for 100% white in completely unoccluded areas.
It might be a good idea to add a planematerial to occlude the base a bit. Also if you baked this in Blender make sure to apply a 100% white material (the default is 80% and might be the reason that your AO is so gray) to the models (lowpoly and/or highpoly not sure) before you bake as Blender bakes in the diffuse color in the AO for some reason.
-
question to somebody knowledgeable on the team: is it acceptable to cover seams by vertex painting, or is this just a blatant and unnecessary waste of end user system resources? (dunno how light or heavy vertex painting is on performance).
You should try to hide the seams as much as possible when you unwrap the model and if possible you should try to place seams on otherwise hard edges or in seldom seen areas (bottom of objects, armpits of characters etc). If this still isn't enough you are supposed to be able to somehow essentially take a printscreen of the model, paint away the seams on the printscreen in GIMP (might work in Photoshop, I've never done this at all) and then project that fixed texture back on to the model. I've never done this as most seams aren't too visible on my models to start with and you'd have to work one layer at a time AFAIK with this method (it was a couple years ago since I read about it so it might be good now). Why would you want to use vertex paint?
edit - more general question: do arrows hit the collision mesh? I feel like I should probably know the answer to that already, lol.
Yeah, arrows hit the collisionmesh (that's what I've been told at least). So if you make a wooden object (or anything else that arrows might get stuck onto for that matter) take care to not have the collision model stick out too much (the arrow might float in the air in that case).
-
thanks for this. I will check out highpoly baking, i was unaware it was a field of study all its own. The analogy is a good one, now I just need to learn how to bring the whole thing together into a final product.
This part I learned from some tuts online. the uv/image editor has a nice little "stretch" property that color codes based on stretching, and you can apply a uv test grid of checkered boxes to the mesh to see how it maps out in real time. When the boxes are uniform shape and size across the mesh, and the stretching overlay is mostly dark blue, your job is done. Can't wait to get that done on 86000 polys. Looks like i'll be getting some time in learning to use the 'pin' tool.
You don't need to unwrap the highpoly. When you're baking you're basically telling the software to shoot out a ray along the normal of every pixel for every triangle and then the last thing that your ray hits is what gets projected down. So there is no need to unwrap the highpoly. I usually unwrap the highpoly (very quickly without any regard for stretching or anything) for models that have lots of material that could be tedious to paint by hand. I just use 3 or 4 solid colors that I then bake down and uses as masks for all the different materials.
Now that I've learned of the sheer awesomeness of the Decimate modifier, it looks like i'll be going through 3 mesh stages. rough initial low poly, high poly, final low poly. What I'm still not sure of now is how I am going to layout the UV's of the high and final low polys so that they both fit the AO map in all the right places without excessive stretching in either mesh. I suspect the katsbits tutorial might have some detail on that subject.The Decimator really isn't all that full of awesomeness. As Arcturus said earlier it will destroy your loops (this shouldn't be much of a problem here, but on a mechanical model it can be disastrous) and it looks like it completely destroys your unwrap (I've just done 2 quick tests so I might be wrong). You'll probably be better off just optimizing it manually while trying to avoid the seams. The only thing I ever use the Decimator for is to just count my triangles (the "fa:" value up top doesn't suffice as it just counts faces without any regard for if they are triangles, quads or whatever), but it's not even all that good for that as it just updates when you go out editmode and it hardens all your normals (so if you want to preview the model you need to render or turn the modifier off).
-
stalagmite: take 2!
IMG
I think this one is coming along much better, but its a hell of a lot more work.
Yeah, that looks a lot better. It takes longer but the results speak for themselves.
My only crit is that I think it should be a bit thicker at the bottom than the top segments. Also, I don't know if you're planning it already, but when you get to the bottom segment make sure to try to align the surface as much as possible to flat plane so it won't stick out all too much against the ceiling of a cave. I realize it's not the best of explanations so if needed I can whip out a picture.
-
Finished the highpoly of my first model, a stalagmite. I'm not sure if the detail is too extreme for the AO, because i've never tried before. Excuse the EXTREMELY poor lighting, i haven't figured that out yet in Blender.
Try importing it into this testscene that I made for SimpleNoob. That should give you a lot better lighting.
I do see that this is your first model but I still feel like it could use a lot of work. I really feel that it needs some bigger shapes. First of all if possible one should always use some kind of reference images, if you look at that and think about how a stalagmite is made (water full of minerals dripping for thousands of years on the same spot) there really should be a lot more vertical strokes in the form. I think it needs to be pointier and thinner at the top too. Your texture just looks like some procedural textures overlaid on each other right now as they do not form any major shapes or have any colors (I know that'll change). I can also recommend xNormal for baking your textures as it's free and IMO gives better results that Blender (especially if you use cages on more mechanical models).
-
So uh, this list is pretty out of date by the looks of it... any chance of a tidyup by Springheel or anyone who knows the score?
I updated the list a bit 2 year ago or so. I didn't add any new models though, all I did was remove broken links and suggestions for some of the models I've already made, so it's still very outdated but at least it's a bit better.
-
Looking better all the time Noss!
Keep it up!

Thanks!
Nosslak, can we build it so that the hands/feet are attachable? Then you could have some with fingers, some w/o, some with a stump etc. Even if this does maybe makes animation problems, it would be good for static displays (heap of bodies etc).
While I suppose it'd be technically possible, I don't think it'd look all that good. The problem would be that this would create a big, noticeable seam where one model ended and the other began. I think it could work with the fingers but I don't think it'd look all that good for the feet. If anything I think we should use several different models with pre-defined settings as that'd make it possible to eliminate the seam problem entirely.
-
Are you intent on putting in the extra work to get pupils moving around and eyes blinking? All that's really needed here is a suitable replacement. I'm not objecting to making improvements but I do hope you see the irony in making the most lifelike character in the game a zombie.
Yeah, I do see the irony in that, so yeah, I'll just skip the eyes, eyelids and all that and save my 300 triangles then.
You can easily go up to 5000 polys without any concern, and even more with a good shadowmesh.
I don't think I need more than maybe 3.5k to make it look good, so that's what I'll try to go for.
You could even lose a couple fingers
I'd rather not make them too unique as it would then be obvious that they're just clones when in a group.
The nose is really bugging me though, it seems the whole head ios too tall, then the nose is caved in but the end is still there and intact...
The nose will be changed when I get to the sculpting phase. I was planning to just give him a cut/rotten off nose, so I really don't know why I modeled it as a regular one. I did model the head after photo references so it shouldn't be too tall but I'll try comparing it with another photo ref.
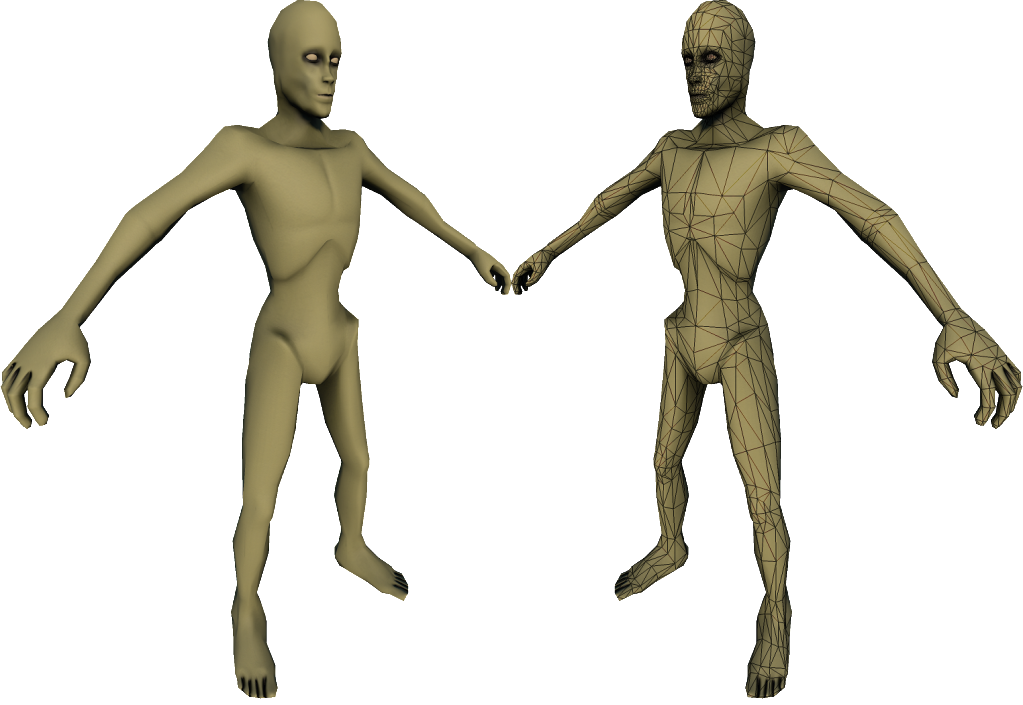
I'd much rather see an open mouth and teeth, maybe tongue flopping around.. rotted off tip of nose and even some toes, even if only a separate big toe.I'll see what I can do with the open mouth, but I don't really know if it'll actually be necessary to model the toes as they look pretty good with just a normal and AO map like this (outdated model, I have fixed a lot of the proportional problems and optimized him but the old texture doesn't work with the newer model):
-
The body looks good but that head looks way too detailed for something that's eventually going to be normal mapped. The silhouette is the only thing that should demand geometry. Small features like the nostrils, lips, and eyelids are better expressed in the texture. Also if you're looking for other places to reduce polygons, you can merge fingers. It looks good with them but zombies don't need that level of articulation.
Yeah, you might be right, the head might might be a bit too detailed (but then again faces need to be detailed as people tend focus on those). Will the zombie ever be able to rotate his eyes (ie look in another direction from the one he's facing)? If not I won't need my eye sphere or eyelids as geometry which would save about 350 polygons. I did manage to lower the PC down to 2.9k so it's a bit of an improvement already there. I don't think I'll merge the fingers because we are living in the year 2012 and we can afford 10 fingers.
OTOH; in that time and age, 3K polies is nothing. How many zombies are there on the screen at the same time? The target for other games seem to be in the 7K..10K range.
(It would be better if we could have LOD, then we could have a 10K model for close and a 2K model for >15m. But I am not sure this is possible with the engine)
Yes, this is how I reasoned too. If we are building for the future we should make it a bit more detailed than the D3 one (which is just 1200 polygons without the clothes).
-
Posted this in the Untethered Dark Mod thread but I might as well post it here too:
http://www.youtube.com/watch?v=tVxwZI0Bfmo
I'm sorry that it's so lowres, I just used the default settings for recorddemo and avidemo as it was just a quick test to see if I could get an animated mesh into TDM. Here's a better image:
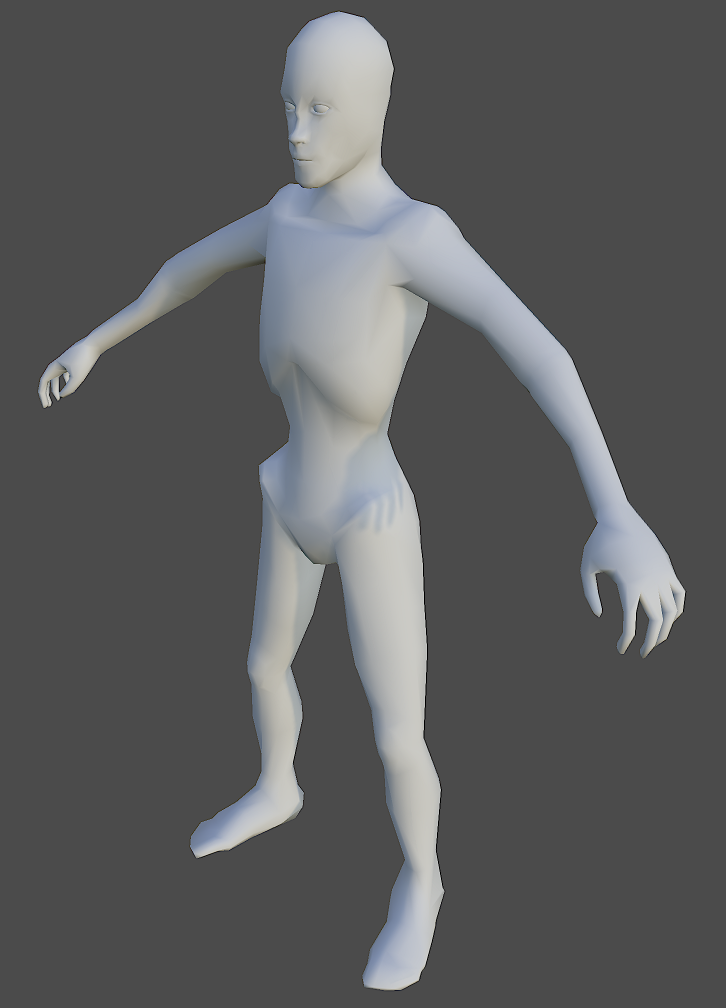
He doesn't have any texture because I fixed a few things on him which broke my unwrap. I'll also try to get him to look a bit more dead with an open mouth.
How many polys can I use for him? Right now he clocks in at about 3100 polys and I don't think I can lower that number without sacrificing form/detail.
-
 1
1
-
-
I know that, I have 4 classes on my university, teaching me how to model and use 3DsMax. Im just confused about baking normalmaps, creating shadowmeshes and exporting all to DR. I understand, that it is better to continue creating your awesome models, than spending time on tutorial.
Thanks for the link, Ill take a look.
that seems pretty good about baking textures (AO, normals and vertex colors). It should teach you about most of things you need to know about baking textures. What I don't think he mentioned (I skipped through some of it) is that your low- and highpoly needs to be placed in the exactly same location and the lowpoly needs to have unique UVs (any mirrored parts need to be moved out of the UV-range before baking). But it's not all that hard.If you want to make a shadow mesh you just need to make a mesh as lowpoly as possible but with a silhouette that matches the regular model as closely as possible but is not intersecting at all.
To import the models into Doom 3 just follow Trepanings videos and you should be good to go (TDM uses a bit more complex materials but you still only need to change the texture paths and the surface types).
-
Sorry, my bad, I haven't gotten around to revisit this topic - real life just had me occupied the last weeks. It's definitely on my "5 things to do before v1.08" list
I am trying not get demotivated by remarks about our missing zombies too much...You shouldn't get too demotivated as the zombie is progressing. I still need to sculpt him and make some adjustments to his overall form (like making the ribcage smaller at the top), but I wanted to see if I could import it properly into TDM before I worked too much on it. The animation isn't particularly good either as I had to redo it twice because I first made it in Blender 2.62, which apparently have shitty MD5 support (it has plug-ins for it but the model spazzed out when I used them), then I had to redo it all in Blender 2.49 (good support but non-compatible with 2.49+ animations) but I had forgotten to make it the right size so I had to remake it once again in the right scale. So yeah, the animations will get better.
-
1
-
-
I would really like to model something, but a simple a-z model guide is missing. I know that Ive asked for the guide before, and there we are again, more work for sbdy.. But if someone skilled just taked 3Ds max and created cube (low poly), smooted a bit(high-poly), showed how to bake normalmap, add texture, create shadowmesh and import all to DM I would be really gratefull. (nosslak promissed to me the guide before, but he run to some problems..).
Yeah, I vaguely remember talking about making a tutorial/overview for the royal orb that I was making a long time ago. I did run into some problems with that one. At the time I baked my textures with both xNormal (normals and AO) and Blender (basic material colors for masks) and for some reason the textures wouldn't line up properly (I used a pretty intricate pattern on the highpoly so masking the right materials by hand were pretty much out of the question). I had no idea how to fix this (now I do, I unwrap the highpoly crudely and bake the colors to the low in xNormal) but the tutorial I had planned were meant more as a sort of overview where I outlined the steps I took pretty clearly, but you would still need to know how to model some basic shapes and how to navigate the interface. I'm sorry if you were waiting for this tutorial and I forgot to say that I abandoned it.
I second the Blender Cookie and Trepaning suggestions as well.
-
Here's one of the best mods for it that I've played:
FO3 Wanderers Edition is supposedly good as well, I haven't tried it though.
You really need some music mods as well as the 15-20 songs or so get really old after a few hours.
Also I'd say that New Vegas is a much better game as I found FO3 pretty generic in comparison.
-
Looks pretty good, the only thing I feel is missing is a preview of the final results at the start.
Phase 2 covers...deep breath...roughing up the stone wall, using the free transform tool to tilt, skew, and rotate the stones for even more roughness, making shadows using Gaussian blur layers, using various pictures culled from CGTextures to make your stone wall, using layers and alphas to darken some of the stones for variety, painting a random shadow layer for extra goodness, and other miscellaneous stuff.
Why don't you just use outer glow set to a black color with normal or multiply as the blending mode for the shadows between the stones? It'd give you one layer less to look at and be very flexible (if you add stones they'll be shadowed automatically.
Also it might be useful to teach readers to name their layers and/or move them into groups as it is a pain to come back to an old texture with a lot of unnamed and ungrouped layers a couple months later.
EDIT: How do I get a darker Photoshop like the one you've got? I can't seem to find anywhere to change the theme.
-
You can easily test changes in real-time by using the reloadimages console command.
I wasn't aware of that. Oh well, I can't tab out of TDM anyway so it doesn't matter much to me.
-
Why wouldn't it be just as easy to see them in the editor?
You copy/paste a similar material, rename it, paste your names in. make a test map in editor (cube/hollow/apply texture and light, add spawn) go in game... Would take 20 minutes to make a test map you can reuse over and over. And it's ready to go, you learn how to do it.
no offence Nosslak but have you even put one model in the game yet? After all this time? And it's so easy to do, once you do it once you are set.
I see no reason to lead other people into the same path of testing in a different enviro than where it will be used, then finding someone else to put it in game.
I don't do any initial testing in-game as it is much quicker to just run a script for Photoshop that saves my textures and then have Marmoset (Blender is pretty good as a model-viewer too) auto-reload them so that I can easily see if my change was for the better or for the worse. I don't know what kind of computer you have but for me it'd take a couple minutes to save all textures in the right locations, then launching TDM and starting the right mission. The first approach is almost instantaneous (maybe 5 seconds wait) while the other would take at least a minute every single time you want to see how it looks. I'm not sure how you like to work with your textures, but I for one like to see them in action all the time under the building process to verify that they still look as good as I want.
Also, yeah, I have put a model in the game. I think I were the one who put both the privacy screen and the spyglass (I weren't the one who made it moveable though). I realize it's not a lot but I have done it.
I've attached the test-scene below (you'll need to change the extension from .txt to .rar), use it if you want to. All you need to do is select the textures for the right slot, tick the check-boxes for every texture you want and hit F12 to render (escape to go back).
-
I have a set of three coloured plaster textures (red, green and blue) I have been meaning to contribute since forever -- used to be X-tiling, but there is now a regularly tiling version. As featured in this shot:
The other two are identical but in a different colour. I'll try to submit it when I have a bit of time. Actually, I've got a lot more source images, but barely have the time to edit, let alone do this other stuff.

Why don't you make the texture a colorme material instead? It would save memory and give more freedom to mappers to choose what color they want.
@STIFU
I was wondering if I needed Blender – nice to know I don't. I looked at the texture tutorial (it was the comment about removing seams being "usually the hardest, most time consuming step" that prompted me to offer help) but my brain still seizes up with the diffusemap/normalmap terminology.
Testing my textures is the next step, but I'm likely to have loads of noob questions. I'll fire up DR later tonight if I get the chance and report back with nooby-q's/screams of pain/etc etc.
You don't have to use Blender or anything but I would recommend that you use a 3D editor to preview the textures before you import them into the mod. If you want I can set up a simple test-scene in Blender for you.
-
Should I make the zombies head attached to the body or should it be separate (changeable)? I think we've got both ATM. Also should they (body and head) share textures?
-
I don't think you really understand how I was planning to work on this. I was just planning to make a base-mesh (what you've seen so far) and then take that into ZBrush to sculpt some muscles onto him for real. The mesh I am currently working on is very simple and shouldn't have that much detail, it should basically only have the major shapes and some nice and even topology so that I can work with it in ZBrush. Here's how the mesh looks without smoothing:
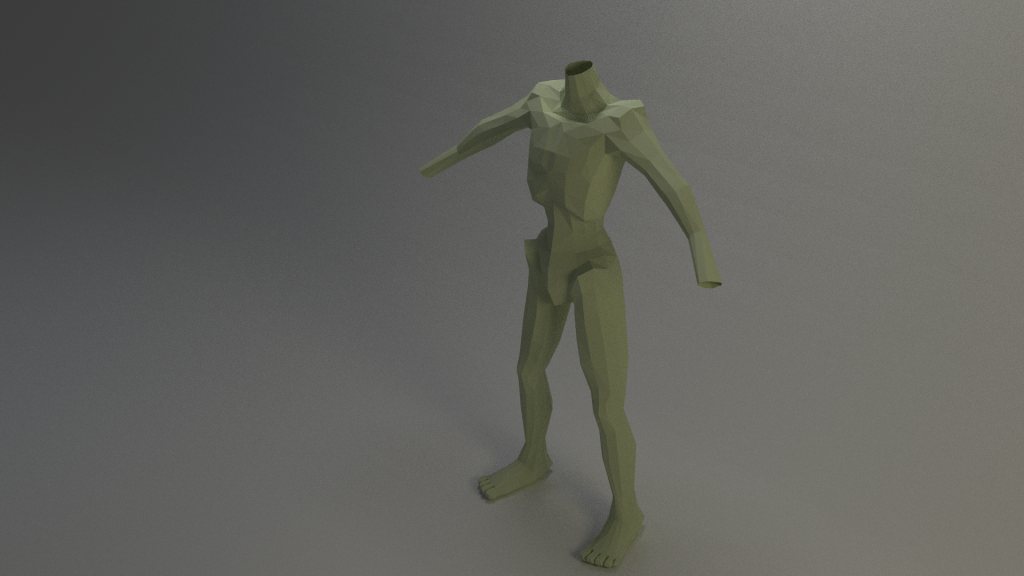
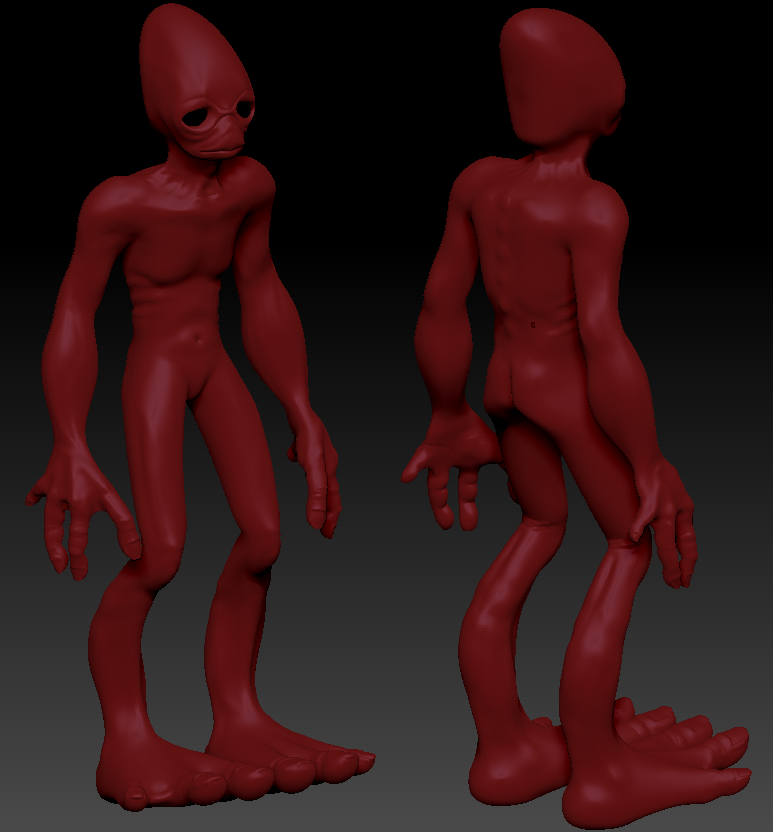
When I'm done it'll hopefully have the same amount of muscle definition as my last character.
Ungoliant's mapping questions
in TDM Editors Guild
Posted
Supposedly it should help if you first subdivide the mesh a fair amount with the subdivision surface modifier first and then use the multi-res modifier beyond that. I haven't sculpted a lot in Blender but that's what I've heard is good for performance. The only thing I ever sculpt in Blender is heightmap terrains (where Blender is better than ZBrush because of better axis-lock) and very simple sculpts (like a pumpkin). Otherwise if you want/need performance with a lot of polys (like 1 million polys or more) you should really get ZBrush. ZBrush isn't particularly easy to learn as it's got a pretty weird interface that in places don't make any sense to me, but once you learn the interface it is a very powerful program.