squill
-
Posts
709 -
Joined
-
Last visited
Everything posted by squill
-
The fastest way is to indeed parent constrain the pads to the shoulders like i did in the vid for the upper arm. It's a small tweak to add to the animation rig and we'd still have individual control over the pad joints if needed. Constraining is not the same as re-parenting joints, contrains are easy to add or remove. Us animators must be aware to animate the shoulder controls if an arm rises above a certain height and i've seen a few animation which only uses the upper FK arm controls.
-
i'm not suggesting we should create cartoony animation or slipstick humor, that wouldn't fit our characters. I can't recall the guards in TDS but i don't think we'll see the guards goofing around or making jokes all the time. Although some drunken guards would be fun
-
i made it a bit on the long side, it's 8,5 seconds while most idles are no longer then 3 or 4 seconds. As a result if you load up the idle_animation test map it gets cuts off in the middle because the intervals are set to 6. This nose wipe action may be a bit comical but i don't think some humor would hurt our characters. I'm more for stylized character animation which reads clearly then fully realistic moving humans. I agree you don't want to see the same idle over and over again. But is there an option to determine the random factor of the idles? Like you can set a value of 20 or 30% that an idle animation will play while other generic idles which are shorter or less expressive will get a higher percentage.
-
ok ...i 'll keep this in mind. Does the orientation of the root joint influence the bounding box or is it just the translation?
-
idle anims are something i like to do besides the general actions which need to be done. Idle_sit is present, the sleep version is blocked but i'm first finishing the idle_turns. This and next week i'm having a very busy week, but i'll see if i can squeeze some time to finish these sequences. If animations are still in progress but ingame we should set them to "revise". I assume if the "assigned to" tab is empty no one is working on that particular anim.
-
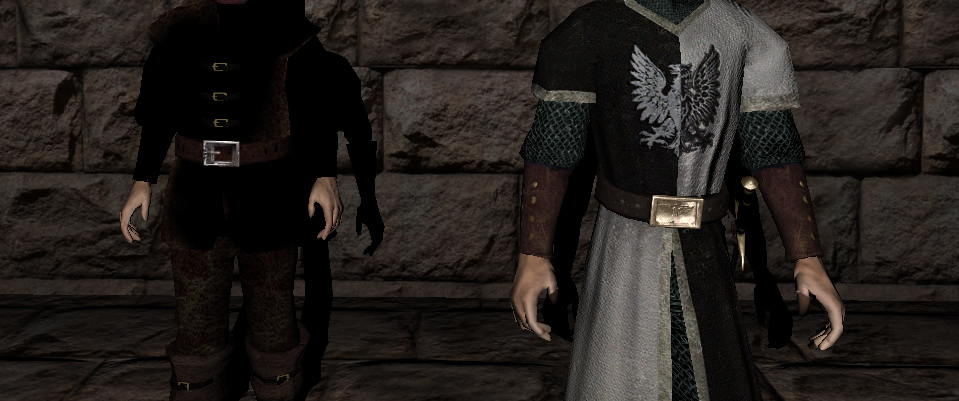
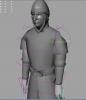
it does look more menacing once a guard stands in front of you like that. I remember from the first 2 thief games i didn't want to get close to the guards because that sword was almost right in your face once you stood in front of them.
-
i was thinking about this, because the pauldron joints don't move along the arms you could animate them separately or you could parent contrain those joints to the arms/shoulder joint. extreme example with a arm parent contrain: sneeze the pauldrons clips thru the body in this example but with a few small tweaks you could make it work. Otherwise you could also add a dummy object to the pauldron joints on the proguard for visual reference.
-
welcome to game animations. Previewing animations in Maya is one thing but actually seeing them ingame is another. Game engines sometimes use different interpolation methods for keyframes. The result might not always be the same then what you see in Maya. I don't know how Doom 3 handles the interpolation but i usually find my animation look too smooth once i see them ingame. the tools are also a bit dated because we're missing a decent animation editor to preview animations. Unreal Engine 3 has a very nice editor to preview and connect animations although i'm curious what id tech 5 brings on the animation front.
-
yeah i know. Ideal would be to have 2 shelf buttons, one to save a pose and another to apply that pose. There are some tools around to save and load poses but they either aren't working properly or have to many complicated options for such simple actions. at work i sometimes used some shelf buttons to apply these kind of poses for characters but i'm not that into mel to write my own. You can read out a lot from just checking the script editor after each action you make in maya and create your own custom shelf buttons to simplify actions. Anyway this is one(working) method to distribute new changes on our animations. I'm searching for new methods and open to suggestions.
-
exactly
-
it's seems you forgot to the delete the pose clip in the trax editor..am i right?
-
just the arms in the idle pose. In your animations this means only the starting and end pose need to be updated. i've updated the idle animation(not yet exported) and the idle_pose in the proguard's clips folder.
-
i can add a similar idle pose to our current animations, hopefully it's the last change we need to add, although it's a small change to do and it will save some time from creating multiple animations for different sized characters.
-
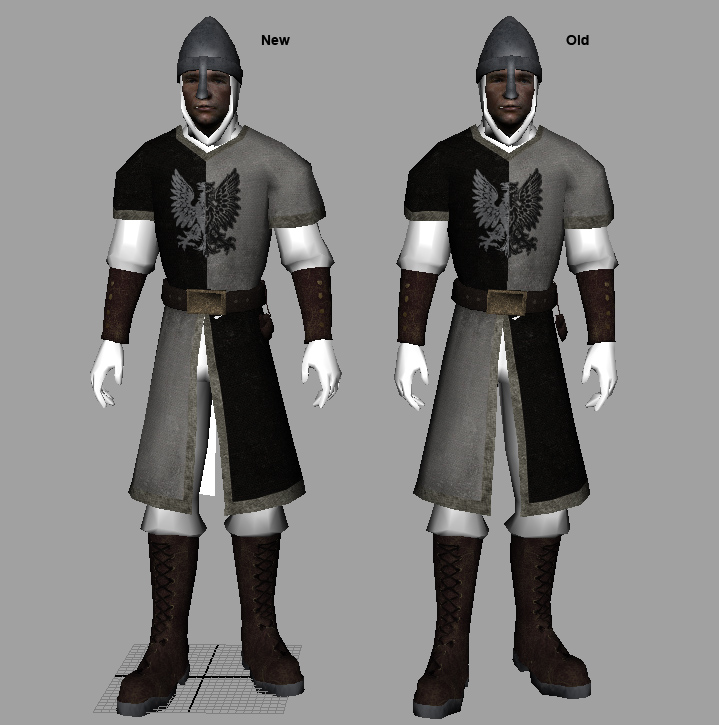
i just checked the thug model: if the thug model is the one with the widest hips we should be save on the citywatch. edit: oops the missing textures on the arms make it a bit hard to see but there should be enough space. Also reminds me to update the hands on the proguard.
-
i could turn the arms and especially the hands for that pose more to the outside, just like greebo already proposed but it would be nice to have some reference so we can see it ingame. When are you going to put the new citywatch/thug ingame?
-
only the head is being used for head animations. what do you want to change?
-
i would make a combination, add some subtle rotation to the hips and keep the upper body like it was in the first clip.
-
i've added this to the wiki. add new poses if you think the foot needs to be rotate inside you can change it. If you change for example the value of Rotate Y to 10 just let me know because we need to add it to all the animations using the combat pose which is faster to change then replacing that pose again with a pose_clip.
-
I've set it up this way but it doesn't make a difference for animating. It may not be consistent but you normally only use y-rotation on the lower arm. simple image to demonstrate a gimbal on our character. I deliberately first rotated Y then X and you see the 2 meet up which causes you to lose the X-rotation on the side. That's why rotation orders are important to setup correct. In this case XYZ works fine for the upper arm but change it ZXY and you'll see what happens.
-
what is different? I rarely come across a gimbal lock using the gimbal rotation mode. But another tool to fix a gimbal lock is using the Euler filter (Curves -> Euler filter) in the graph editor, although it doesn't always work. also you'll soon get to see a gimbal lock once you have to turn your character to a difference axis. Most of our animations are faced on the X axis which shouldn't cause any trouble if you stick to gimbal rotation mode.
-
the stretching happens when 2 clips in the trax editor are placed over each other because they both influence the character ctrls or you have keys on your character and loaded the pose clip in the trax editor which has the same effect. Either way, to attach the pose to the character set you only have to drag it once on the trax editor and then delete the track in the trax editor and pose in unused poses(visor). The pose in "character poses" is the one which you can use to "apply pose" on the beginning and end frame. if you have autokey on and choose "apply pose" it automatically sets a key for the new pose, knowing having all keys on the same frame.
-
to avoid gimbal lock i always use gimbal mode for the rotation manipulator. This shows you exactly what every axis does when you use rotations. Also if you notice you need some different order for your rotations you can change the rotation order of the controller (open attribute editor -> Transform Attributes tab -> Rotate order)
-
yeah it's probably still pointing towards a local texture file. In the hypershade are already some textures which point to the proper textures although you'll have to change the path to your local folders.
-
You don't need half frames to create "high quality" animation. Good animation comes from good timing, strong poses and knowing how to move in and out of those poses (animation principles). I take on the traditional way (2D) when it comes to 3D animation. A frame is basicly just like a drawing, only we don't have to draw 24 frames for 1 second of animation. The computer only just draws the frames for us between poses (keyframes) that you would normally have to draw in 2D animation. If you place the keys on the right frames and control the curves in the graph editor you have enough control to edit your animation and create very subtle movements. Again i'm talking about the graph editor but it's an essential tool to refine your animation. It makes the scene very messy when you have keys all over the place and scaling or looping makes it even harder. For games it's also nicer to work with frames per second because coders usually think in seconds, minutes or hours If i need to scale an animation, i could do this using the scale option in the graph editor(edit -> scale) or select all frames on the timeline between frame 0 and the last frame to scale it manually. There's an option called snap (RMB on timeline -> Snap) which snaps all keys back to whole frames between the first and last frame.
-
you can update the idle pose using the method i explained here: If you used the idle anim as a base like idle torch, i think it's best to copy the keys from the arm holding the torch and paste them on the updated idle anim. Am i correct you haven't yet uploaded all new anims to the model_src folder?