
nbohr1more
-
Posts
12751 -
Joined
-
Last visited
-
Days Won
261
Posts posted by nbohr1more
-
-
Wouldn't it be cheaper to play a video clip (forgot which format Doom 3 uses) of the guard's shadow in the window?
(Edit: ROQ video)
(Edit two: Yep a scripted GUI could even react to the guard position and play one of multiple ROQ's ... pacing back, pacing forth, idle, etc)...
(Edit: Yup, Yup, Yup)
-
I wouldn't say that Pandora's Box is "pure relax" but it was fun... So that seems to be true of Jesps' work ... it's consistently fun
 ...
...Yeah. (About the numbers) I figured so. I think you could've left everybody guessing though...
 a little mystery...
(going to play Crown again soon...)
-
Can one of the textures be a "clear" alpha-test texture and therefore pass through a little real background detail?

-
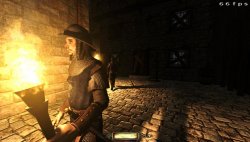
Great emergent gameplay!
During one of my early runs I alerted the two guards in the first big room and at the last second discovered the water for an escape route (only to escape to a cannibal...
 )
) Yeah the dark humor in this one is great. I got a chuckle from the electrocution room...
One thing that I think will continue to puzzle me is whether the drunken math notes are really a secret code for something hidden in the mission...
-
I think the point is 'you are going to do this and show US when?'
I'd certainly like to
 (best case scenario).
But really these are just wild speculations. I've read about various graphic techniques at beyond3d.com for years but I will admit that it has been a superficial "education" as most of the details relate to how well future hardware will render this or that. My process is to throw out these steps and find out if they are possible. If they are I keep track of them for when I actually have the skill to use them. Sometimes when I am really lucky someone like Plasticman will post how he's successfully used the "Strombine" method for one of his maps.
The light baking excerpts were brought up because they highlight the problems importing large models. This would be the same type of problem if you were importing large models so that walls could have (for example) large swaths of eroded plaster.
I was really was hoping to hear other peoples takes on what they do when they want large detailed surfaces and some of the trick's they've used. Also war stories about some difficult workflow and whether it paid-off or not.
Or (even better) have some of my fellow speculators come out of the wood-works and post their own crazy ideas.
You have such a great eye for making the most of spartan detail that it's hard to argue for methods to improve anything when you can provide such great examples that require little to no exotic methods. But I also know that the Doom 3 engine is still full of untapped potential and I am looking for those who have begun their plans to scale that mountain.
-
So my latest thought on the matter would be a workflow like this:
1) Create your Prefab
2) Export as an ASE Model into Blender
3) Draw an outline around it's base
4) Flatten out (unwrap) all the UV Mapped textures into one image with the outline acting as a geometry reference
5) Modify the look and perhaps Normal Map the whole structure from a more complex version
6) Flatten out (unwrap) the new Normal Map and Texture
7) Cut it up into the original UV Mapped tile shapes using step 4 as a reference
8) Replace the Textures on your Prefab with the new ones...
-
One of the things that breaks the immersion of many 3d games is the over-use of repeated tiled textures. This can be mitigated with "Texture Sets" but usually only for flat geometry.
Since I have come to the conclusion that this concept is a perpetual obsession of mine. I have decided to create a thread that collects my hair-brained ideas and some of the more insightful replies I've gotten about the topic.
Please share your thoughts or your own workflow.
Baddcog:
You can already do that though.Just instead of making one tiling texture you have several. Alot of textures are already this way although TDM doesn't really have them.
Say you have your base brick (512x512), then you have the same one with dirt along the bottom, and one with drips along the top. Now you have a 'set' of vertical tiles that tile horizontally. (You can even have another with a window in it so when you go horizontally the seams match but they look different)
So you just need to make a set like that, but instead of being concerned with dirt/drips top and bottom you instead would want modified normal maps that have cracks running up through all 3 (of course the diffuse also needs to match). So really painting the cracks on terrain is going to give you 3 normal maps AND 3 diffuse maps (you don't want stones painted across the crack bumps... you want painted cracks through the stones to match the crack bumps).
So could optimize by only making the cracked texture 256 wide, and still the regular map could 'tile' up next to it.
You can do this using Blender, Zbrush, skulptris, Max, Photshop, Gimp, Xnormal, crazybump.... Right tool for the job.
I do believe someone was also working on trying to get 'megatextures' into DR though I'm not sure where that went. But basically it would be like having one huge side of a building texture instead of a combo of textures like I described.
From the Light Baking thread:
AluminumHaste:
This has been brought up before, even by me, but not with this particular instance. Although I have to point out again, that everything would have to be a model, which would not allow you to visportal properly. You could, I suppose separate areas with brushes and visportal that way, but those brushes would not have the baked lighting on them and would look weird juxtaposed against the nice models.I downloaded and ran that guys map and yeah no visportalling is done.

STiFU
Why shouldn't it be possible to visportal it? You just have to surround the model-rooms with brushwork, so that each room is sealed and split them up with visportals intersecting with the models (No brushwork ever visible this way). You will have to make sure though that the models don't extend over multiple zones, because a model won't be rendered as soon as its origin is not within an active portal. As an example, you can have a look at NHAT 3 (forest). Goldy built the terrain with patches, which I converted to models in order to perform the vertex blending on the small path throughout the terrain (that and adding some more details to the path). The model was split into multiple models, one for each portal-zone, so that visportaling works.But there is still the problem that these baked textures won't affect the lightgem, as it has been said numerous times in other threads already.
So you may only use it selectively on unreachable places or in a very subtle fashion. Myself in TDM Missions... :
....would it be possible to create "Texture Sets" groups of individual textures that when combined properly will create a complex pattern like a big patch of brickwork being exposed from behind weathered clay but across several texture tiles in a complex fashion?I guess decals could do that too...
More decals?
From Parallax Mapped Visportal Patches:
Step 1: Create a basic Castle with (perhaps) some low-poly gaps representing damage(Texture the Castle make it look as good as possible)
Step 2: Export the Castle into Blender
Step 3: Clone the Castle then modify the cloned copy into an extreme high-poly version with tons of little cracks and separated blocks/bricks making sure that some of the original texture work is still present
Step 4: Cut the High-Poly and Low-Poly Castles into components and create Normal Maps for the most detailed portions where things are crumbling
Step 6: Identify the deepest cracks in the High-Poly Castle
Step 7: Enlarge the Geometry of these cracks to the point where you can noclip into them when imported into Doom 3
Step 8: Fly into the Giant-Size cracks and capture an Environment Shot (part one of the Cube Map process)
Step 9: Shrink the Cube Map in Gimp (etc)
Step 10: Replace some of the texture work with the more detailed texture and normal map work
Step 11: Replace the deepest cracks with the Cube Maps (Interior Maps)
Step 12: Oh No! The Cube Maps look "wrong"!
Step 13: Stretch the proportions of the 6 environment shots so that the central "shot" is pinched a bit (lots of fiddling)
Step 14: After an eternity... Great crumbling castle with Cube Maps providing the illusion of deep detailed cracks
-
I get the impression that you don't have a clue what you're talking about.
I suspect that, given your abilities, that you have this impression about a great number of folks
I will say that I am confused about why there are two ways to modify surface normals and this confusion is why I got my hopes up.

My apologies.
-
The way I conceive it is that in theory if you were a super-genius you could take a bunch of texture-tiles and imagine how they would UV map. As a super-genius you could then manually create a custom Normal Map for each texture in such a way that when they are assembled it looks like one large Normal Map.
This process is the reverse.
You modify virtual geometry and then bake the changes to a bunch of Normal Map segments.
(Now from Baddcogs further explanation it would have two types of baking...)
-
Yeah, I'd like a Tels FM too.
I am just really looking forward to v1.03 so I'm biased
-
Tels has a legitimate excuse to bow out...
(Don't let aidakeeley badger you back into making an FM ...) -
I know it's a pipe-dream. I just fear that we'll only ever see "Tiled" Normal Maps on Buildings or large structures (caves?) because there's no way a modeled building would render with decent performance (especially compared to one made of brushes which has parts that can be culled)...
-
Not exactly:
The Normal Map does not have as many variables to alter as a normal texture.
Just as Rich_is_Bored pointed out, you can algorithmically modify the Normals in a Spherical pattern.
Once you have these abilities you can crudely sculpt normals.
I agree that advanced users can use Blender for this purpose but the thing that Blender cannot do (AFAIK) is make multi-brush prefabs (or architecture) with normals that span brushes. It has to be converted to a Model.
-
-
Yeah... I'm not asking for full-blown Sculptris
 but a simple re-sizable sphere deform would be great for smoothing geometry and adding large deforms. If you were crazy you could use the sphere deform to make REALLY detailed stuff but it would be VERY time consuming and frustrating. I just want a poor-mans version
 -
To put things another way (an extreme over-exaggerated way...
) what if Arcturus could have "sculpted" the normals of his marvelous normal map directly on the surface he applied it to in Dark Radiant? -
There's really no difference in using brushes/patches/models for details. It's all tris. So as performance goes it doesn't matter, things that do matter:
I agree that triangles are triangles but Normals are not triangles and do have a performance advantage.
No matter which of the three techniques you use silhouettes are going to be an issue unless you ignore sane poly-count rules. The look of each technique would be produced by the texture and lighting rather than anything that is intrinsic to their make-up (again, triangles are triangles). I agree that Models and Patches are easier to texture but neither of them appear to be the primary building block in Dark Radiant. The look of shading is primarily due to the Normals. If you can make normals that span multiple brushes than you have virtually eliminated their major shortcoming.
Having Normal editing in Dark Radiant would mean that more buildings and world geometry would have large, complex, unique implied surface geometry rather than having every normal map simply be a tile.
Wouldn't it be cool to paint or sculpt normals like cracks in wall or complex embossments?
Basically all brush shapes that are complex need to be a func_staticRight again... but this technique precludes the need to increase the complexity of the brush work. In fact you can have the boxiest shapes in the world but use Normal Mapping to give them complexity (within reason... taking into consideration silhouette issues...)
-
The reason for this is that it's very hard to make sweeping normal map changes across multiple texture tiles. You can make all the tiles into one big texture then normal map that externally but keeping each separate texture tile means that you can have complex multi-brush multi-tile normals (and you can work out the visportal advantages of keeping as much as possible as Brushes rather than Models
).Plus you can virtually eliminate the need for Patches that don't have visible silhouettes.
-
I guess if you textured the patch the same as what was done with the brush work then the Normal Map damage would be minimized and you could control the look better. Then you would just need to remove the Normal Maps from the Brush Work before export.
Again, an abstracted editor method that lets you do this (possibly even edit the actual Normals in real-time?) and that automatically slices up the editing into multiple textures... would be Heaven.
If it could work the way I imagine every modified Normal would be written back to a copy of the original texture. Then the next time the map is compiled the modified texture copies would be used in place of the originals.
-
I was kinda wishing for an in-Dark Radiant way to modify Normal Maps across multiple selected Brushes or Patches.
I think you could still kinda do this though:
1) Create a Patch
2) Stretch the Patch to conform to the contours of your Brush Work
3) Modify the Patch to include the new details and contours you seek
4) Export the Patch as an ASE
5) Export you Brush-Work as an ASE
6) Renderbump
The problem here is... "Does the Renderbump inheret the original Normal Maps from the textures on your Brush Work???"
(Other problem: Patch editor is not quite a sculpting tool...)
-
It would be texture data no? (Normal Map?)
I see the confusion here. I'm referring to editing normals for the textures on Brush Work rather than a Model...
-
Feature request submitted as 0002328.
-
Should I submit a request for this feature in Bug-tracker or is it way too silly ?
-
Sorry if this is a foolish question but...
"Would it be possible to create a sculpting tool for Vertex Normals in Dark Radiant?"
I suspect it would work like:
1) Load the selected textures into a temporary memory space
2) Sculpt the normals
3) Bake the results to new textures
Please discuss Linux distros here.
in Off-Topic
Posted
I used to be a Vector Linux junkie. I recall that there weren't many native packages so I had to find Slackware compiled equivalents or RPM's (I learned what dependency hell meant ...). I guess they've got a package manager now but Ubuntu is so dominant that it's not worth the extra speed of Vector.
I should try a newer Live CD to make sure I'm not missing something...