R Soul
-
Posts
185 -
Joined
-
Last visited
-
Days Won
9
Everything posted by R Soul
-
Buttons made smaller: Each button is a distinct model, with its own place on the UV map to allow for subtle differences in each button (marks etc). Depth and side detail added: My next task will be to make a single one. Hopefully I can find space in the current UV map without having to double its size. edit: the blender file, which contains the high-res objects that generate the normal and AO maps, is nearly 300MB.
-
Yes. The face is 66 tris. I'll add sides to give it some depth.
-
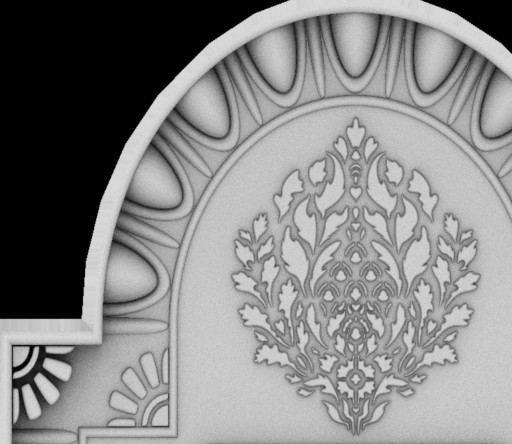
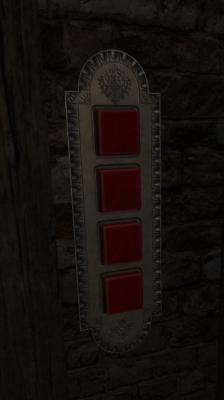
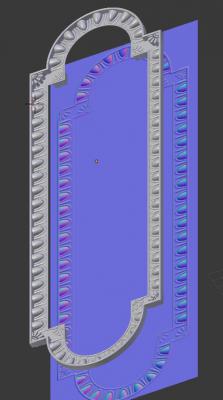
The base texture is metal\flat\simple_grey01. I applied a subtle Gaussian Blur. I might also have lowered the already low saturation. The detail was made by creating 3d shapes. A few posts above you can see the main border. The repeating ovals were made from squashing and chopping a high-res sphere and then having the object repeat itself. The corner pieces, and the pattern in the semicircles, were traced over images I found online. My initial intention was to find black and white images, use Inkscape to convert them to SVG, which Blender can import and store as its own native curves object. The face triangulation led to very poor results, so I used them solely as a visual reference and traced my own shapes around them before bevelling the edges and applying a subdivide modifier. This object now has over 3 million triangles. That object was used to generate two images: Ambient Occlusion and a Normal Map. Sample of the high-res AO map: I shrunk that down an added it to the base metal texture (low opacity). The specular map is nothing special, just a high contrast version of the diffuse.


-
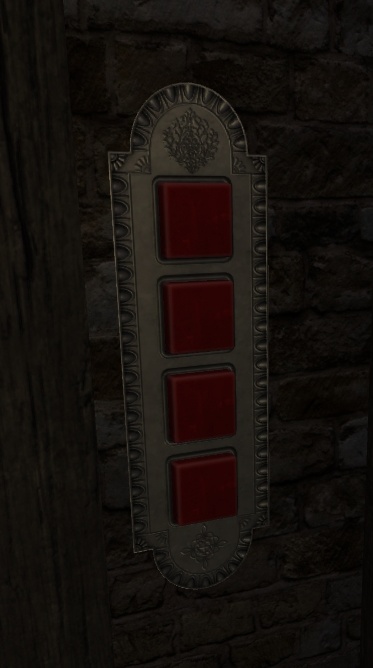
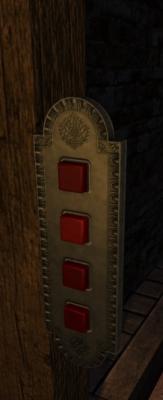
WIP: This is using the original buttons, but I think they're too big. To fit in to the object I initially made I've had to squeeze them together more than I'd like. I'm in favour of making the buttons smaller, but I could instead make the panel taller to give them more space. Any preference?
-
This could work: https://freesound.org/people/Soundscape_Leuphana/sounds/207506/ You could also try combining it with this: https://freesound.org/people/Doctor_Jekyll/sounds/254064/
-
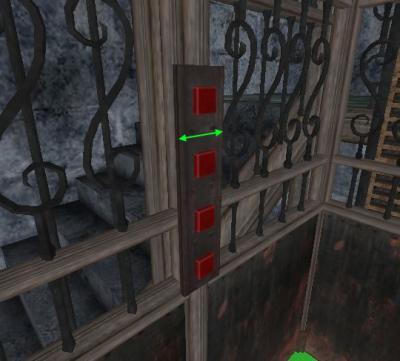
Oh. I thought you wanted the backplate to be no wider than the girder to which it's attached. 7 it is then.
-
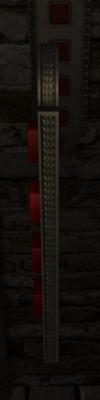
Yes, I can make them smaller. In Blender I'll scale the backplate to some width, and the depth and height will be relative to that. Here I've highlighted the dimension I'm asking for. Not width as it is now, but the width you'd like it to be.
-
Can you suggest suitable dimensions, mainly the width?
-
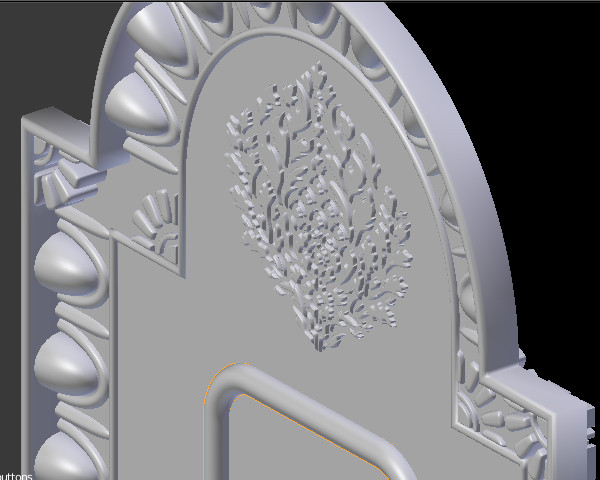
I had a look at the borders around those plates and made a 3D object from which to generate a normal map. I may have gone a bit over the top: It has 2.7 million tris.
-
I can have a go. Any pictures I can use for ideas? And some dimensions.
-
If you need smaller ones, and the model scaler can't do it, I'd be happy to remodel them.
-
Bump. I made a few changes and improved the normal map. The download link is the same as above. See here for a screenshot: http://forums.thedarkmod.com/topic/19468-tutorial-combining-tdm-textures/?p=423511
-
The god or the planet?
-
Thanks for the advice. I've tried making a pk4 file. It's mostly fine, but in order to update the asset I have to close both TDM and DR. Regarding a file manager, I've just had a look at one called FreeCommander, which has a folder synchronization tool. That can delete files, but it won't delete empty folders. They can be deleted by the main interface, but it's a slightly inelegant process. The asset's files would be in some intermediate folder, and in the FM folder. FC could be used to remove them. I can see that being easily useful for trying out and then removing an asset. For managing the user's own ones it'll also be fully functional, but possibly error prone. It could be easy to, for example, edit an mtr file in the intermediate folder and then wonder why there was no change in TDM. Still, I think it's worth a go.
-
Is there an easy way to evaluate custom assets without integrating them into the FM? If you have a new asset (either made by you or downloaded from someone else), it will probably have multiple files in multiple folders (e.g. models, materials, textures...). If your FM already has custom assets, the files/folders of the new one will get mixed in with what's already there. If you don't like the object, or it's your own and you want to package it to be shared, finding all the relevant files could be a bit of a chore, and prone to errors. As far as I know, assets can go in the current FM folder or the main TDM folder. The latter isn't ideal because it already has a prefabs folder and a new asset may get mixed in there. We could make a new FM for it, but I think it's best to be able to evaluate it in your actual FM to see if it's a good fit.
-
RPGista: Just to be clear, those Blender videos I've posted are only for generating static models. The moveable versions are straight down only, although they could be positioned so they appear to continue from one of the static models. Obsttorte: Thanks. I know about subfolders but I'm wasn't sure of the best structure to use. I've gone with the general formation (straight/types of curve) as root folders and within them are the models of varying lengths. Download file replace, same link as before: http://www.mediafire.com/file/jlkp94ok3ac3rr8/Chain3_RS.zip Anyone who's already added any of the these chains to their FM should extract the updated file, change the model property of each chain entity to point to the 'subfolder' version and then delete the 'chain3' files in the main 'dungeon' folder.
-
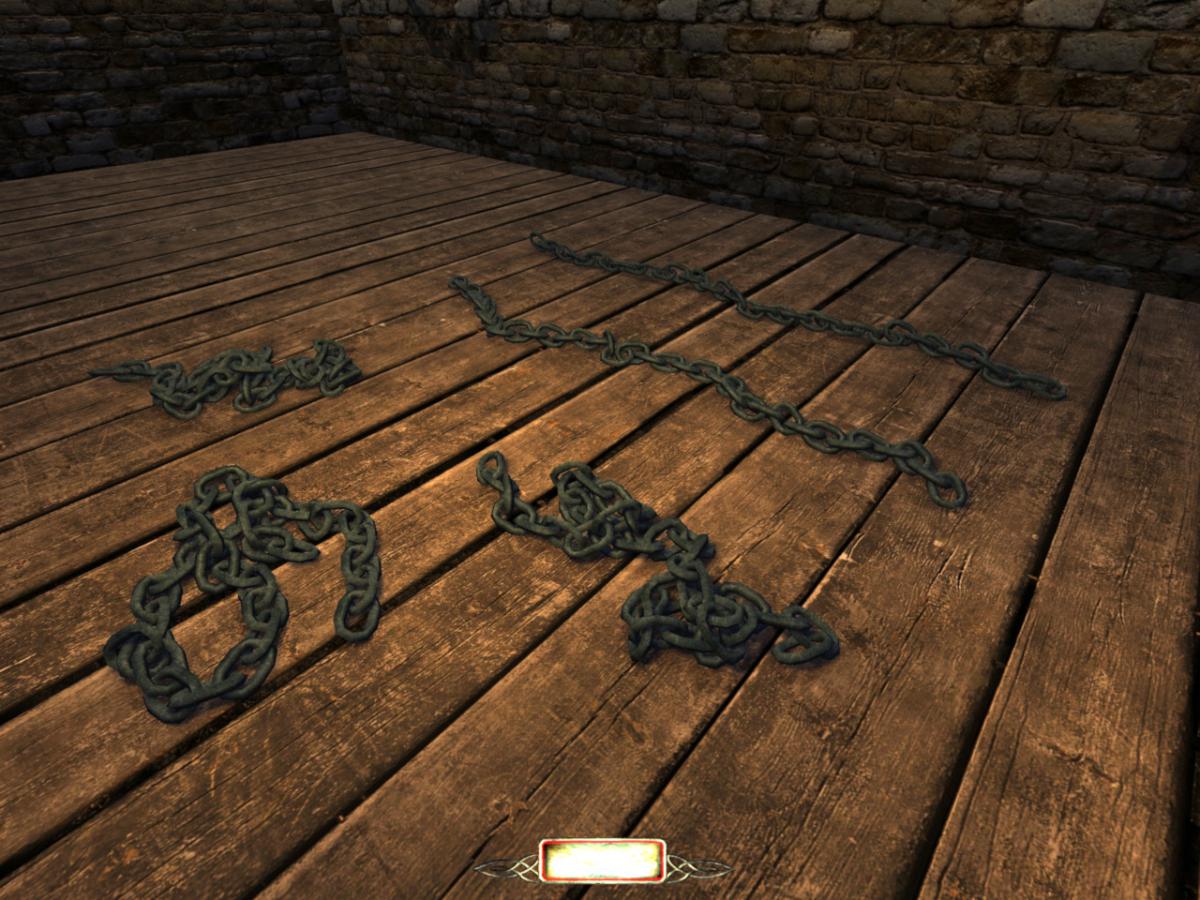
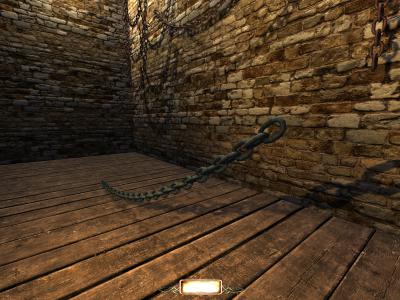
I made a breakthrough. I wanted to have some variations of a chain that's fallen down onto a flat surface, but no matter what variables I tried it was very hard to stop the links flying apart due to the physics system being unable to do the calculations. It turned out to be because my links were very low poly, whereas the ones in the Youtube example videos were very high poly. In Blender each link is its own object, and the mesh is one of the things that it contains (it also contains materials, properties, modifiers etc). When an object is duplicated (Shift-D), its mesh is identical, but it's a new thing, so modifying one will have no effect on any others. That's like in DarkRadiant when some brushes are converted to a func_static, which is then duplicated. Although it looks the same to us, each mesh is unique in memory/the file system. In many ways that's safe because one object can be tweaked to suit a specific need, but it also makes it a chore to edit them all. In DarkRadiant we can have multiple entities using the same model, which is better for memory, editing and possibly performance. Blender also allows objects to use the exact same mesh: duplicate using Alt-D instead of Shift-D or select an existing object and choose another mesh (https://docs.blender.org/manual/en/dev/editors/properties_editor.html#main-view) With all links using the same mesh, it's much simpler to use high poly links when running the physics calculations, and then replace them with a low poly links before exporting. Screenshot of the collapsed models: The two long ones were the best I could manage before learning how to share one mesh among all links. The three compact ones were only possible using the new method. These all have simplified collision models. For each of these collapsed chains, there's a variant where one of the links at the end is broken, and the skins file has been updated to include them all. Updated download link: http://www.mediafire.com/file/jlkp94ok3ac3rr8/Chain3_RS.zip I'm getting concerned about the folder structure. There are now 26 files in the 'dungeon' directory. Also, something I worked on today: This was also only possible by being able to make switch all links from high poly to low poly.

-
Could you have used the Shalebridge Cradle forum?
-
Double post and proud. I've just updated the above file. The readme has been updated and the skin file has been modified to include the new static chain (and the single link) and to have these materials show up as 'matching skins' for the swinging entities. edit: minor update - two of the short curved chains were using flat shading. I've updated them to make them smooth. Same link as above.
-
Thanks.
-
I got swinging chains working (long and short versions), added simplified collision models to the static models, and have added a new one of those: (This could be used for a boat or some other large object that is being held in place) For the swinging chains, I used this video to see how to associate bones with vertices, and this tutorial to generate the TDM files. At first I had a bit of trouble getting things to work properly, and was getting all sorts of errors. Then I must have found (or stumbled upon) the correct method and things went more smoothly from then on. The skin property can be used on the swinging ones, but I'm not sure if there's a way to list skins for entities as we can with models. Here is the updated file: http://www.mediafire.com/file/jlkp94ok3ac3rr8/Chain3_RS.zip (Same link as before)
-
When a model has skins, we can go to Choose Model, find it, and expand to see a list of skins. Can the same be done with entities?
-
Thanks for the replies. "Getting Characters and their Anims into Doom" seems to deal with converting Maya files to md5. With Blender I can export directly to md5. I started looking the existing chain and found its definition in tdm_base01.pk4\def\tdm_rope.def. I copied that into its own file and replaced the model/anim references. There's a reference to an .af file. I looked at the original one (tdm_defs01.pk4\af\) for the chain which started with instructions to use the inbuilt AF editor The models page has Setting up Ragdolls for Custom Joint Hierarchies (filed under S for Setting) I'll have a go at following the instructions tomorrow.
-
I just did a test and it seems that neither 'automatic keyframe' nor setting the 'activate keying set' is necessary. In my case I set a keyframe for the rotation (only) of a bone at frame 1, and set another keyframe/rotation at a later frame and the md5anim looked the same as it did when I initially performed the two steps you mentioned above. It looks like auto keyframing is down to user choice. It stores scale and location as well as rotation, but looks like the latter two are the only things that is supported in the md5anim system. I can't see what difference the active keying set makes, so I think that's also down to whatever the user prefers.
-
I imported an existing md5mesh into Blender and copied its features (bones and vertex groups with matching names), but have yet to look at getting it into TDM. Is there any documentation out there that say how to do it?