R Soul
-
Posts
185 -
Joined
-
Last visited
-
Days Won
9
Everything posted by R Soul
-
I'm willing to have a go at making a swinging version. I had a brief look at a rope in the training mission and it looks like I have to create a mesh with bones defined. Blender has md5 import/export plugins so I'll see how it goes.
-
I've updated the link in the first post. There's now a set of double length ones, all in the same format as the shorter ones. There's also a single link for helping to connect a group of these, for example draped over some poles. I also forgot to mention these come with a skins file so you can vary the appearance. Screenshot, with a rusty skin applied to all: Download link in first post. Here's a video showing how the hang was made, followed by moving the ends closer together to get a steeper curve. Note that the second part takes a lot longer than the first. That's the best way to stop the thing flying apart due to the physics going mental:
-
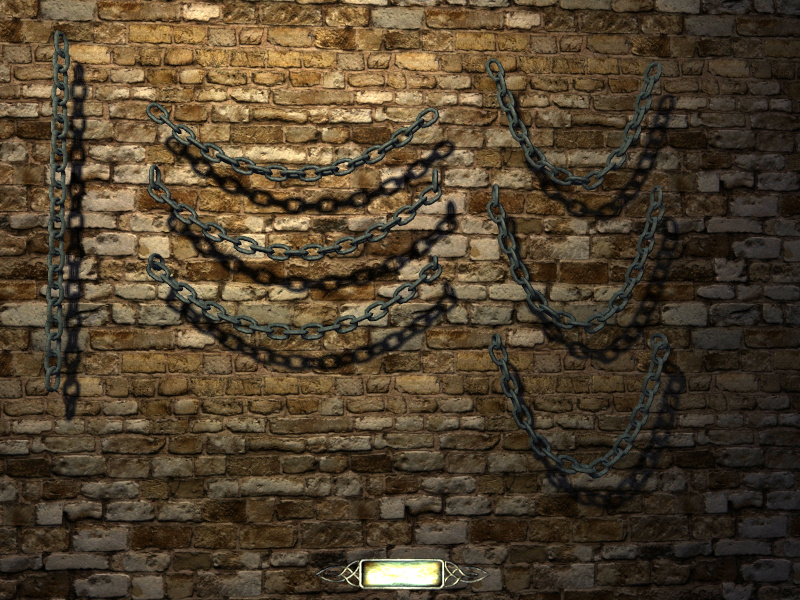
These chains were made after looking at the chain_highpoly model and noticing unnecessary sharp UV seams. These ones appear more smooth. Note that they are NOT drop-in replacements for any existing models. They were made with Blender's physics engine to get realistic curves. Variants: Chain3: hanging straight down. Chain3_bent_1: hanging with gentle curve Chain3_bent_1_h_hoops: suspended from horizontal hoops to embed in a surface. Chain3_bent_1_v_hoops: same as above but with vertical hoops. Chain3_bent_2: hanging with sharp curve Chain3_bent_2_h_hoops: suspended from horizontal hoops to embed in a surface. Chain3_bent_2_v_hoops: same as above but with vertical hoops. Download: http://www.mediafire.com/file/jlkp94ok3ac3rr8/Chain3_RS.zip I'm also open to suggestions for other things (e.g. longer ones). How's it hangin?

- 23 replies
-
- 10
-

-
Increase entity window viewport?
R Soul replied to Springheel's topic in DarkRadiant Feedback and Development
Hover the mouse at the bottom of the value input field:
-
Making a chain using Blender's physics engine (to get it to hang right): At any frame the object can be merged and exported as a static mesh. We can also use the array and curve modifiers, but the latter distorts each mesh. More info in the video description.
-
As part of my penance I had a go at making the normal map in Blender using a high poly object. Low poly button base object (the push button part is a separate object): High poly version: I added a ridge around the button and the corners of the main base object. Generated normal map sample: I also tweaked the low poly version to make all of its corners sharp. In game, with the new normal map applied: I'd like to add some roughness for the rust. I had a look at nJob and its tool for converted a normal map to a height map (which Blender can use to make real height). I tested it using the above normal map and the result isn't quite right, but I think for something as random as rust, it won't be a problem.

-
I recently looked at the long chain model, and noticed the UV mapping caused lighting glitches, especially when scaled down and with the plain iron skin applied. I had a go at remapping it and things have improved, but it'll be a lot of bother to make each link match the original (they may have been positioned manually, or with an offset/rotate with some randomness). This version won't be a drop in replacement, but have a look and let me know what you think: chain2.txt (download and rename to chain2.zip)
-
It was never there! It was a lie! edit: Nice to see it's been fixed.
-
Ok, no problem. Much appreciated.
-
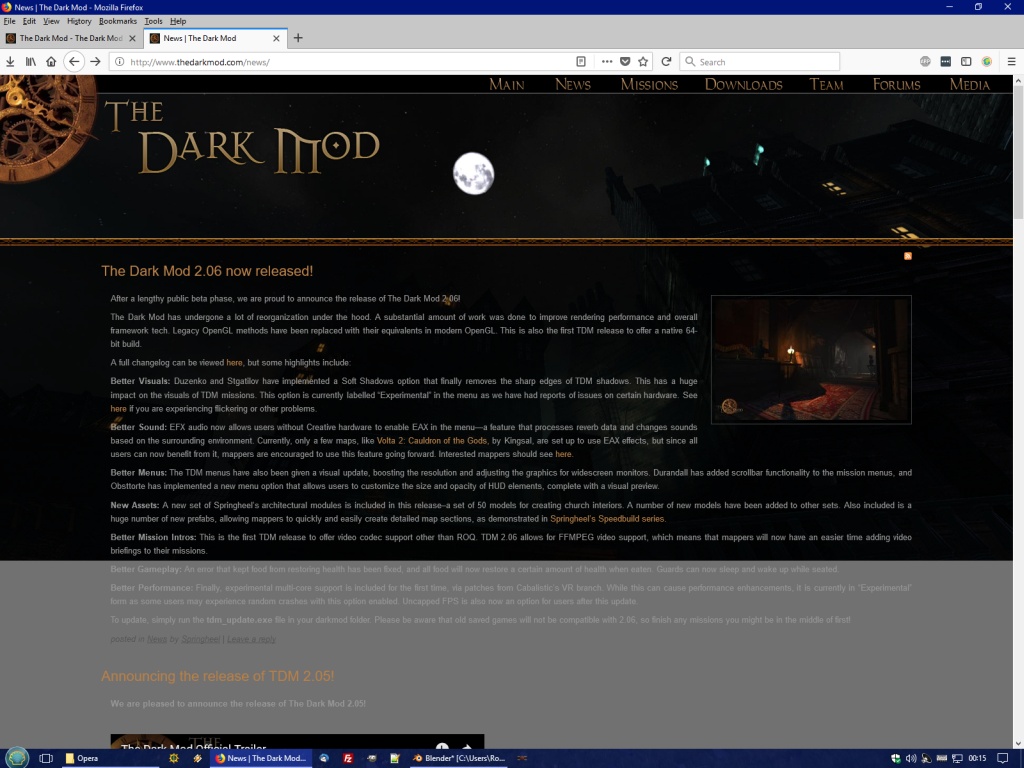
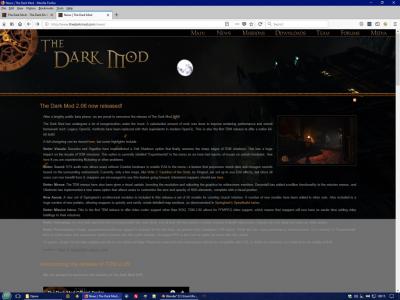
Hi. When I view the TDM website I see this: I can scroll down, but the grey bar remains in the way. My browser is Firefox but I've also tried it in Opera and IE and it looks the same. Resolution: 1600x1200.
-
Regarding the pointfile, I read a useful tip (I think it's on the wiki): If the line (which shows the leak) doesn't make sense (i.e. it doesn't take you to an obvious leak) the problem could be a model whose origin is outside the sealing brushes.
-
Thanks for the continuing input everyone. It's better now that people are saying why some things are wrong. I just about understand why combining normal maps as layers could produce the wrong result, but not how to get the correct result. While searching (with DuckDuckGo instead of Google) I found this, which also explains the problem (in tiny writing). I see that Judith's started a texturing thread, so I'm sure that will be a better place to go for more accurate information. I don't know enough about that to want to put it in. I think that's beyond the scope of the tutorial. I think it should focus on the textures themselves. Material files and folder structures are mentioned elsewhere.
-
After putting in the time and effort to come up with a technique, and post a step by step tutorial with screenshots, it's rather dispiriting to be told the result is underwhelming, and that one part of it isn't correct, without an alternative being suggested.
-
Here's an article about a very personal "diary" from the late 19th Century in rural France: http://www.bbc.co.uk/news/stories-44265475 The first topic discussed is too sad for a TDM mission (these are made for entertainment after all) but other topics could certainly be used to varying degrees of importance to the main mission.
-
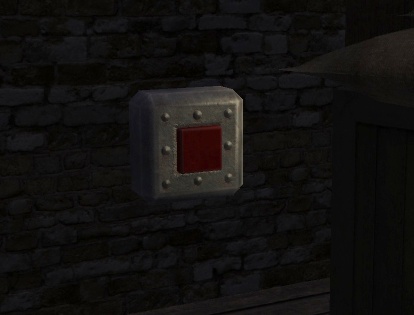
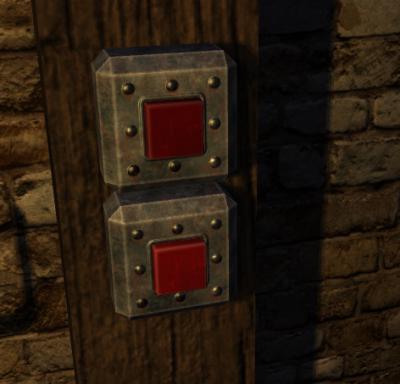
Recently I wanted to combine some existing TDM textures, but it was immediately apparent that the normal and specular maps would also have to be worked on. I came up with a reliable way of keeping all the edits in synch. The tutorial is here: http://wiki.thedarkmod.com/index.php?title=Combining_Textures I used this technique to make the metal texture for this red button.
-
New button. See this thread: http://forums.thedarkmod.com/topic/19444-red-button-custom-sound/

-
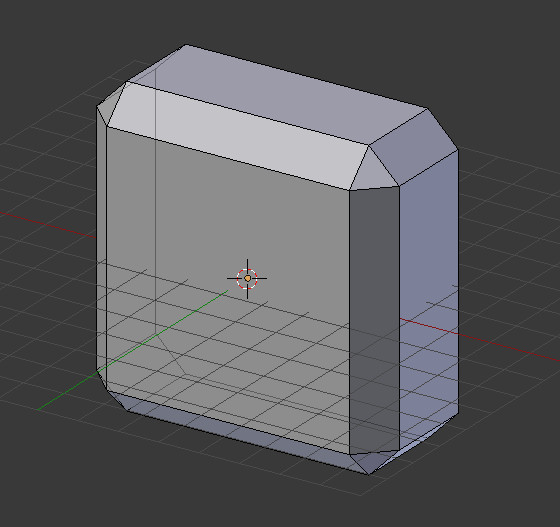
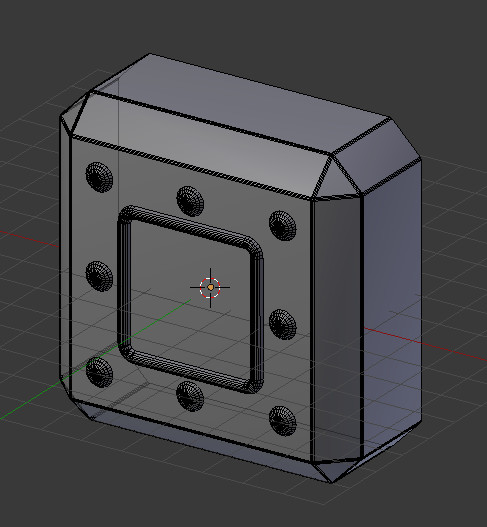
HI all. I decided TDM needed a big red button, so I made one. I also thought the sound could be better, and I found something good on freesound. The metal housing texture was made using several from TDM's existing set. The red button texture is rubber from textures.com Download: http://www.mediafire.com/file/hhe6yecs8cgvcm6/RedButton1.7z The object comes with a prefab so that the new sound and relative positions of each part are correct. It's location will be mechanical\switches\RedButton1 The button has a NoDraw plane. At the moment TDM doesn't allow skins to replace nodraw, but if that problem gets resolved, this button will be ready.
-
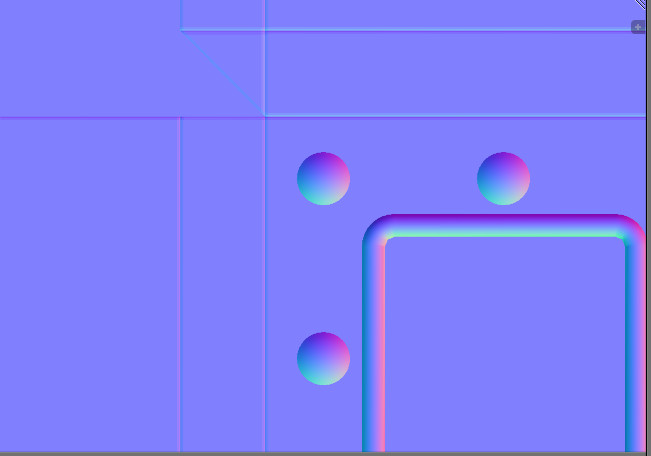
The metal housing is 512x512, with another 512x512 for the button itself. I've reduced the total size to 512x256 and scaled down the two models to 0.75. It's still big enough to look chunky, but shrinking the model more or less cancels out the loss of texture resolution. It's not my intention to release a reskinable labelled button. It's a plain button with support for an optional label. The texture scale is correct (fits the nodraw plane perfectly) Thanks, although I would have preferred the opposite Skin example: skin tdm_button1_test { model models/darkmod/mechanical/switches/button1_press.lwo textures/common/nodraw textures/darkmod/stone/brick/old_worn_blocks_003 }
-
I'm currently making a custom button, in the style of the one we see in "the other game", but I've hit a snag. I want to provide the option of using a skin to give the button a label (e.g. floor number for a lift). The metal housing and the button are in one texture, with one material, so it seemed logical to create a plane over the button with the material textures/common/nodraw. I've already made a few skin files so I know how they work. My intention was to allow the nodraw material to be replaced, but when I try that I can't see the replacement. In DR the plane is solid white, and in game it's invisible. I could only get the skin to work when the default material was a conventional one (e.g. a brick wall), which defeats the purpose - I'd like the button to be blank by default, and I don't want the user replacing the entire button texture because it's 1024 x 512. Can a plane be genuinely unrendered unless a skin changes its material?
-
Thanks for the explanation. I think I'll make use of the autosmooth value now; it's better than having lots of manually split edges.
-
Which one? This is the one I was using until a few hours ago: http://www.ewocprojects.be/lwoexport.html The one in the link to Chedap's thread (which I've now started using) is a modified version which has better support for sharp edges. The reason I've asked which exporter you're using is that another one may handle materials differently. For either of the exporters I've mentioned, you do this: In Blender, you need to assign materials to faces (not just textures) (it's probably unwise to use lots of materials per object though). Those material names must be valid TDM material paths (the shader name you see when you select something in the material browser in DarkRadiant), e.g textures/darkmod/roof/shingles_red_flat. It doesn't matter what textures the Blender materials have, but it helps if they match the TDM textures (I wrote a Blender addon to make that easier).
-
I don't quite follow what's being said here, but when I want a face to have sharp edges, I select it and press Y to separate its vertices (which could be thought of as the opposite of remove doubles). When exporting the .lwo, I have the 'smoothed' box is checked, and 'remove doubles' and 'recalculate normals' are unchecked.
-
I wasn't, but I am now. Thanks to both of you.
-
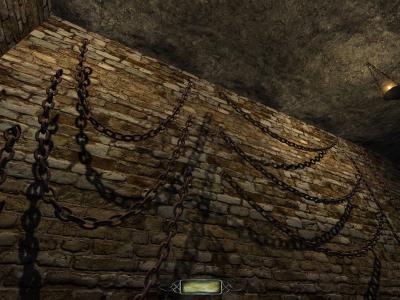
Can someone tell me why this light looks wonky? The objects below seem to be illuminated correctly, but why the strange shadow effect on the ceiling? The light is a prefab: lights\hanging_oillamp_lightdown. The light has a texture which is just a soft disc, so I can't see why the shadow is wrong. Changing the texture doesn't eliminate the shadow. The default is "lights/biground_candleflicker_shadow", which looks like the explanation, but changing it to "lights/biground_candleflicker" makes no difference.

-
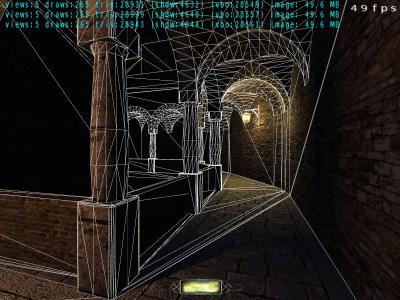
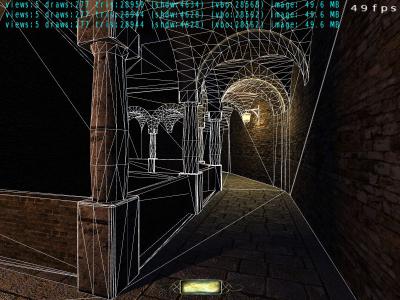
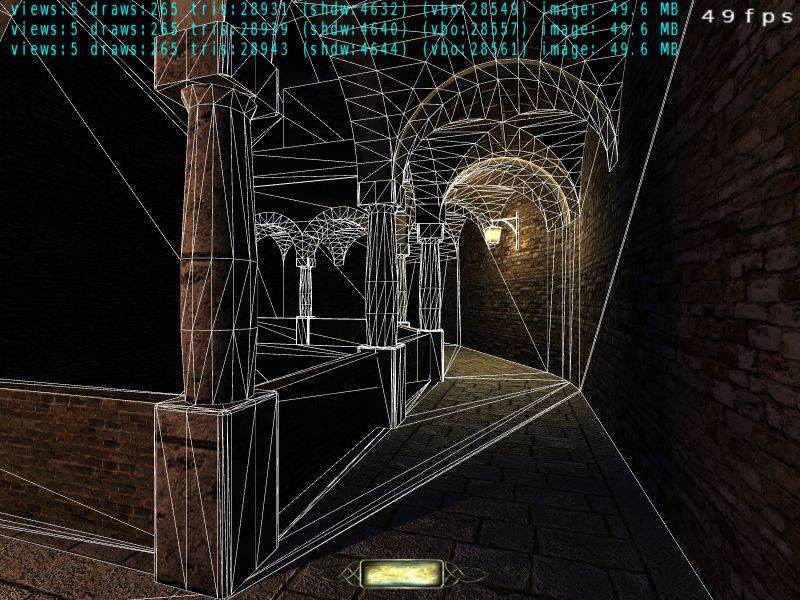
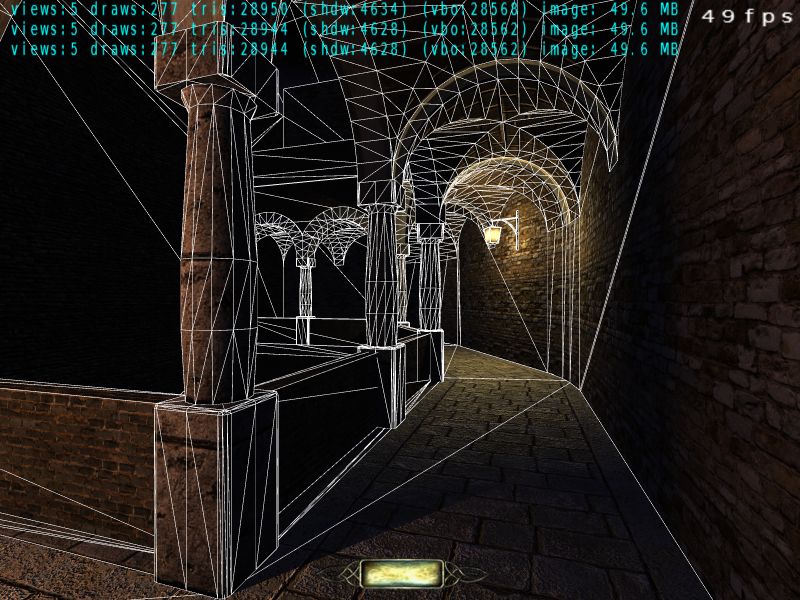
Thanks for the responses. My situation has nothing to do with limits; the map is quite small. I followed a hunch and deleted the pillar models and the triangles on the ground became much simpler. The model has a custom shadow mesh (with a noshadows material for the visible model). Here are three images showing different setups. 1: The initial setup (custom shadow mesh, path made from brushes): 2: Real shadow, path still made from brushes: 3: Shadow mesh, path converted to func_statics: It bothers me that the shdw number goes down when I use real shadows. I'd expect it to go up.