rich_is_bored
-
Posts
885 -
Joined
-
Last visited
-
Days Won
18
Everything posted by rich_is_bored
-
You should use the Hanna Barbara technique. Place an object over the seam. For instance in a forest you could use a log. In an alley, a pile of trash. If I remember correctly they worked fine in Doom 3. Try making a test map in Doom 3 with those options. If it works there then it's likely an issue with TDM itself.
-
Imagine you have a small cardboard box and the intention of unwrapping it so you can run it through your printer like a piece of paper. You are going to need to separate the box along a few edges so it will lay flat. Selecting edges and marking them as seams designates where to "tear the box" during the unwrap operation. If you logically mark seams, there is no reason why you can't select the whole model and unwrap it. But I believe he did it this way to demonstrate that there is more than one way to skin a cat. Generally you want to unwrap a model with as few seams as possible so that the texture "seamlessly" flows around corners. The more seams you have the more opportunities you have for a texture to be misaligned. It toggles box select better known as a rectangular selection. You also have "c" for circle select where you can "paint" a selection and CTRL + LMB for lasso select. In step 62 the seat of the chair is unwrapped as one piece and shows up in the bottom left corner of the UV window. The unwrap operation tries to prevent selected faces from occupying the same UV space so that they all sample their texture from a different part of the image. If that is not the desired outcome it is possible to move the corresponding vertices in the UV window so the top and bottom overlap and therefore they both will sample from the same part of the image. Alternatively you can unwrap the top or bottom independently as two separate pieces.
-

Alignment of patches in DarkRadiant
rich_is_bored replied to SneaksieDave's topic in TDM Editors Guild
You can get pretty close to a perfect circle if you add a few columns to the default cylinder and move the points around to distribute them evenly. Here's prefab just to illustrate... circle_zip.txt -
That's an unfair comparison. I could model the chair in that tutorial in five minutes if not less than that. It's a matter of experience and when you have none it takes a little while to do things.
-
So, what are you working on right now?
rich_is_bored replied to Springheel's topic in TDM Editors Guild
You can make faux shadows with "textures/common/shadow" or by painting a projection image for a spotlight. Either solution will work with the lightgem. -
ASE Export Script for Dark Radiant
rich_is_bored replied to rich_is_bored's topic in TDM Editors Guild
Just to be certain there are no issues here I've re-uploaded the script. I've just tested it with DR 1.3.2 and it produces valid ASE files that can be loaded back into DR. I thought I covered installation in the first post but to go over it again you place ase_export.py in your "DarkRadiant/scripts/commands" folder and the next time you launch DR, aseExport will be available in the scripts menu. Just select the brushes and or patches you would like to export, and go to Scripts > aseExport. -
So, Blender Is A Bit Of a Clusterfuck
rich_is_bored replied to aidakeeley's topic in TDM Editors Guild
*.ASE or *.LWO will work. -
I've always found it tedious to organize the start menu. Every program has it's own idea of where it's shortcut should be located. Some end up nested in folders and others are stuck in the root programs folder. Then you need to devise a categorization scheme as the default folders aren't very intuitive. For instance, what makes a program an "accessory"? I like the new system much better. I don't have to worry about how the programs folder is organized. I hardly ever see it as I know what I'm looking for and I just start typing the name of the program. Add to that the ability to pin frequently used programs to the task bar itself and the start menu doesn't really even get used.
-
So, what are you working on right now?
rich_is_bored replied to Springheel's topic in TDM Editors Guild
Ye old BioShock. -
ASE Import Script for Blender 2.53 Beta
rich_is_bored replied to rich_is_bored's topic in TDM Editors Guild
It's something to think about. I can always tack options on at a later date. Did you know you can pack image files inside of a blend file? Technically it's possible for a plugin to retrieve all the relevant images from the PK4s, pack them into the blend file, and map them to the proper channels. GLSL mode with a diffuse, specular and normal map loaded can yield objects that look almost exactly as they would in game... http://www.doom3world.org/phpbb2/viewtopic.php?p=217674#p217674 Of course that's far beyond the scope of an ASE import plugin and I'm not prepared to invest that kind of time but it's a cool idea. -
ASE Import Script for Blender 2.53 Beta
rich_is_bored replied to rich_is_bored's topic in TDM Editors Guild
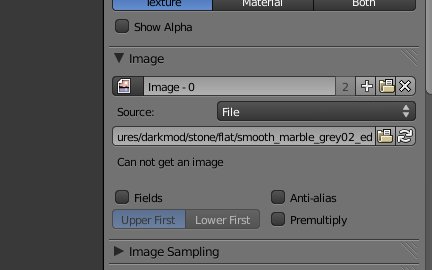
Actually in the latest version of the script (which has not been made available yet) I preserve the *BITMAP path by storing it as an image reference, which just so happens to be the intended use. Of course in this case "textures/darkmod/stone/flat/smooth_marble_grey02_ed" for example may reference a non-existent image file but Blender doesn't prevent you from making a bogus reference. It raises a benign warning.
-
Is an additional inventory item needed? It seems you guys are trying to simplify key selection by making it more complicated. How about a context aware solution? If you have the required key in your inventory the door opens and if some sort of feedback is required the game can cycle through the inventory and select the required key for you. You retain all the separate keys while eliminating the need to cycle through them. Thoughts?
-
Combine the models into a single file. Use a skin to set the materials of objects you want to hide to nodraw.
-
It's important to note that the engine isn't looking for a TGA file when it looks at the bitmap line although your modeling application might. Instead it's looking for a material shader reference. Purgatory is just a prefix that I preface all my shader references with that tends to work for me. There several options that work such as... *BITMAP "//base/models/mapobjects/myModel/myShader" *BITMAP "//doom3/base/models/mapobjects/myModel/myShader" *BITMAP "//purgatory/purgatory/doom/base/models/mapobjects/myModel/myShader" The thing to take note of is that in each case the part in bold is the same. It is that part which is a material shader reference. In your case I assume that you have a material shader named "textures/outside/outfactory_new5" so you should change the bitmap line to read... *BITMAP "//purgatory/purgatory/doom3/base/textures/outside/outfactory_new5"
-
LOD - Level Of Detail where the geometric detail of models is reduced based on distance. In the mod linked above a terrain mesh is dynamically reduced based on distance. In terms of general props, this can't be done dynamically. Instead you have to produce several versions of the same prop each with less detail and the engine swaps them out. Two problems arise. First, nobody is making terrain meshes for their FMs. Second, all the props would need additional lower detail models.
-
So, Blender Is A Bit Of a Clusterfuck
rich_is_bored replied to aidakeeley's topic in TDM Editors Guild
Wings 3D Google Sketchup Gmax There may be others. And I have to mention that I have no experience with any of them so you may find the documentation isn't good enough and/or they don't export to a TDM friendly format. -
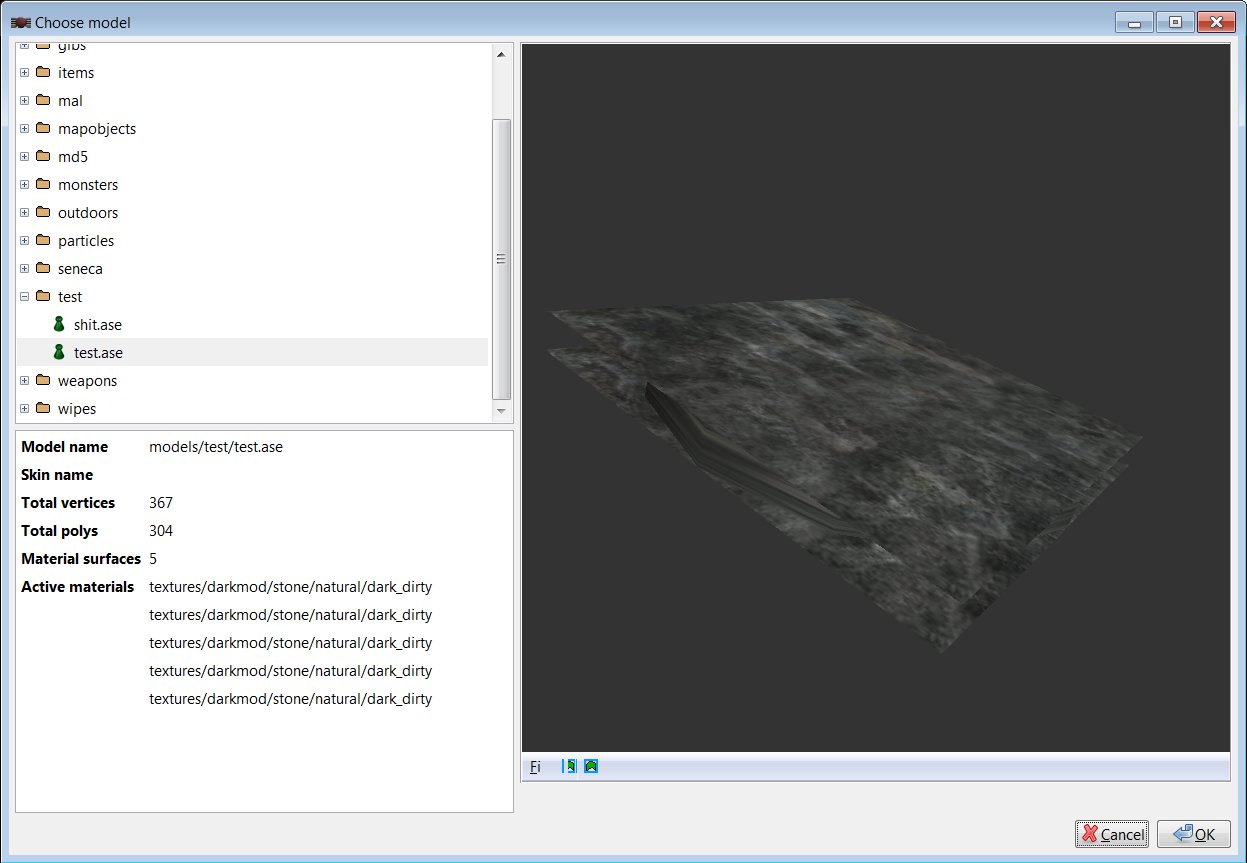
In the ASE files I've compared yours with I have ... *MATERIAL_SHINESTRENGTH 0.0000 ... where you have nothing. In your file I see ... *MATERIAL_TWOSIDED ... and ... *MATERIAL_SOFTEN ... where I have neither. Also worth noting is that for the materials with a diffuse stage (about 5 of 20) there is no indentation. Those without a diffuse stage probably aren't used and could be deleted. For testing purposes I changed the bitmap line in your files to *BITMAP "\\purgatory\purgatory\doom\base\textures\darkmod\stone\natural\dark_dirty" And I see this in the editor I'm thinking you need to change the bitmap line to point to a material shader. I'm not sure any other changes are necessary.
-
What format are you using? ASE? Post an attachment.
-
Anything and everything to avoid Blender eh?
-
You can center the view on whatever is selected by pressing "." on the numpad.
-
It took me two years to get comfortable. I modeled a coffee cup my first day. Blender isn't CAD. Nor is Lightwave, 3DSMAX, Maya, or any other modeling package. In CAD, you describe shapes mathematically using curves and boolean operations. While similar operations are available in modeling packages you work primarily with polygons and when you do use curves and the like you eventually convert those shapes into polygons. By default Blender uses right click but that along with all the keyboard shortcuts can now be changed. You can even use input presets that more closely match the controls of other modeling applications if you so choose. I can think of a few practical uses for that like maybe a gear. Did you know Modo also has a "select every other" operation? I'd love to see how you invoke it by mistake though. Be sure to narrate your video and tell me what you're doing and what you expect to happen. Animation is a completely separate mode called "Pose Mode". No tools are compromised. Mistakenly entering "Pose Mode" and not being able to model is understandable. I can take a screen shot and draw a circle around the file menu if you'd like but it's in the top left corner as it would be in any other application. There is no edit menu. I'm not sure what you'd expect to find there. There is a View menu as well but it's attached to each viewport allowing you to toggle things on and off on a per-view basis. No. The workspace can be changed quite drastically. I'd find a video to demonstrate but I'm pressed for time. I agree with this point. Glad you found something that works for you. Sorry to you had such a horrible experience.
-
Anyone got a patched version of DooM 3 torrent link?
rich_is_bored replied to Rapishes's topic in Off-Topic
Everyone here CAN get something without paying for it. It's not like you possess exclusive torrent finding knowledge. I'm pretty sure anyone with half a brain knows all they need to do is use the word "torrent" in a Google search. The difference between us is that you're willing to jump through hoops to get a crippled version of the game for free while I'm willing to part with 20 dollars if I can bypass all the bullshit and just play. -
At it's heart all modeling applications are the same. It's all vertices and polygons. The tools might have different names and they may be accessed in different ways but they all do the same things. I started modeling with Lightwave back in 2004. At first I struggled with it. It took 2 years and a couple hundred dollars in training materials before I knew enough to feel comfortable. I would have stuck with Lightwave if it weren't cost prohibitive. But I'm just a hobbyist and with Blender the upgrades are free and frequent. At the time the UI was nasty but they've done a great deal of work improving it over the last few years. At any rate, if you expect to install Blender and suddenly know modeling inside and out you're mistaken. You have to practice regularly and it helps if you drop some money on training materials although there are some decent free sources. I'd love to have some insight as to what is giving you all trouble. But I don't think it's possible for a novice to put it to words without omitting essential information. Would it be too much trouble to ask you guys to record narrated video captures of the things you're trying and failing to do in Blender so that people can better help you? Ultimately it's not that Blender sucks. It's just that you don't know how to use it.
-
My mistake.
-
Actually that's a Dark Radiant export plugin. For the time being, people will have to use 2.49 and greebo's ASE export plugin.