rich_is_bored
-
Posts
885 -
Joined
-
Last visited
-
Days Won
18
Everything posted by rich_is_bored
-
For mock-up purposes sure. Two colors would look something like this... But I'm apprehensive to expand the color range. We don't yet know what color shirt will be used and it may be cheaper to stick to a single color. One option to help distinguish between the foreground and background elements is the use of pattern fills like this... Which method is preferred? What color shirt will be used? What color(s) should the logo be? Are there any other details I have missed?
-
No problem.
-
id Tech 4 has breakable glass. It's called func_fracture or something like that. Assuming that functionality is still present in TDM it's just a matter of an FM author using it. On the flip side, it's not practical to turn everything with a glass texture into a func_fracture. Performance would go to hell not to mention a thief really shouldn't be smashing windows and making a bunch of noise unless it's absolutely required.
-
Use the clipper tool. Step 1. Size 3 brushes to fit around the model's dimensions. In this case that's 32x88x120. Step 2. Create 2 12x12 brushes in the corner openings then use the clipper tool to shave off the unnecessary diagonal halves. Also place a caulk brush under the door since models don't seal the map.
-
Yep. I did a manual trace over in Inkscape. I'd be fine with making changes. Vectors are a breeze to edit but I need detailed suggestions. "it's wrong" won't do me a bit of good.
-
Technically you could just download the 1.3.1 patch and extract doom3.exe from within. I know you can do it with 7zip anyway.
-
There is no quick and easy solution. Generally you try to identify things you can exploit. For instance, the lead bits which you're trying to isolate are dark. A curve or level adjustment might get you 90% of the way there. Posterize might work as an alternative. It depends how illuminated the glass is. Also the features you're most interested in might be better defined in one of the separate color channels. But you have to examine them to find out. Photoshop offers a few more options, namely changing the color mode to something like LAB or HSL but filters and adjustments aren't everything. The results aren't always ideal and you may have to clean the image up. Worse still, you may have to do some manual painting.
-
 You should be able to mask out portions of the environment map using the maskcolor and maskalpha keywords but don't take my word as gospel.
 -
The problem is the profile of the lead vs the glass. The gaussian filter is rounding off what should be a sharp edge. If you create the height map in an image editing application you'll have more control over the result. For example, say you have isolated the glass and lead into white and black areas... When you apply a gaussian filter it blends the whole thing together and you lose the sharp edges... But if you take that blurred dot and apply a bit of a curves adjustment... ... you can cutoff values that extend beyond the intended bounds while approximately retaining the original shape. Then all that needs done is to feed the image into a height map to normal map converter like NVidia's normal map plugin.
-
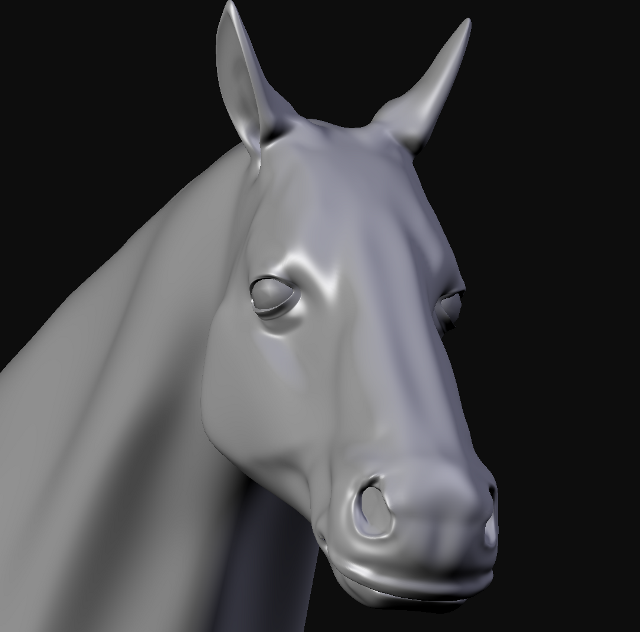
I've been playing a lot of TDM (great work everyone) and Mount & Blade Warband and as a result have been working on a horse model in my spare time. You can follow the progress here if you're interested... WIP Thread I will be releasing this to the public upon completion so you all are welcome to use it in your FMs or include it in TDM proper. I'm not sure how far I'll go with it. I may stop with modeling. I may continue on to animate it. I may go so far as to write AI for it. Time will tell.

-
I'm pretty sure the menu can't be helped until the Doom 3 source is released. All GUIs are fixed at a 3:4 aspect ratio. Now you could if you were so inclined, edit each GUI by squishing and repositioning all the elements so that when it's stretched back out it appears correct at a 16:9 ratio. However, by doing so you'd reduce the clarity so it's a trade off.
-
I would guess that it needs to be added to the shader, in which case the shader stumpy posted above should look like this (note the addition of Parm4)... lights/biground_candleflicker { { forceHighQuality map lights/biground1 colored zeroClamp red ((.05 * sintable [(time * ( 2 + Parm3 ) ) + Parm4 ]) +.95) * Parm0 green ((.05 * sintable [(time * ( 2 + Parm3 ) ) + Parm4 ]) +.95) * Parm1 blue ((.05 * sintable [(time * ( 2 + Parm3 ) ) + Parm4 ]) +.95) * Parm2 } }
-
A few of the flickering light shaders from vanilla Doom 3 made use of the shaderparm "parm4" as an offset value. All you had to do was assign the light a "parm4" key/value pair and just use different values for each light. Behind the scenes the light shaders incorporate the value assigned to parm4 into the mathematical expression that controls the flickering. I can't recall if it was handled internally by the engine or if it was implemented on a per shader basis. Editing or creating a new light shader may be required. Shaderparms are covered pretty well here if need be... D3W Discussion Although I should mention that if editing the shader is required then the changes should be incorporated into a DM update as it will add new functionality without breaking existing maps.
-
Fan Mission: No Honor Among Thieves (2010/04/29)
rich_is_bored replied to Goldchocobo's topic in Fan Missions
It's too late now but that entire effect could have been encapsulated into an FX declaration. They aren't well documented but for those curious... FX (decl) -
They've got a pretty decent system on Woot today and I was reminded of this thread. The price is the same as the back to school special you found but there are a few things worth noting... it's bundled with an operating system it has a quad core it has 1TB of the hard drive space it has 6GB of memory The only downside is Woot only offers one product per day so if you don't act today you'll lose out.
-
Actually you can use alpha blended transparency in id Tech 4. The problem however is that when you do so it skips the interaction shader so the surface will be full bright and unaffected by lights and shadow. For those curious the material stage keyword of interest is blend with a parameter of blend. Yes that's "blend blend". You can get around the illumination problem by using the RGB keyword in your material shader to darken the texture. And if you feed it a shader parameter you can change it on a per-entity basis. Couple that with a script object, and a few targeted lights and you could approximate the illumination value much like the way global ambient lighting is faked for all the existing dark mod textures.
-
I was dicking around with Inkscape while waiting for a download to finish. This is about an hour and a half's work... https://docs.google.com/leaf?id=0B3KUZe06PPyDNWRkN2FjMjEtYzAyNi00YmQxLTg0NDUtM2U4ZDI4OTZhOWI2&hl=en It can be viewed in browser provided you are not using Internet Explorer and you can edit it if you download Inkscape.
-
I've completed an ASE import script for Blender 2.53 Beta. Download Just place import_ase.py into your scripts/io folder and ASE will show up under File > Import the next time you start Blender.
-
If you're not afraid to write a script then GlovePie is the program for you... http://sites.google.com/site/carlkenner/glovepie
-
ASE Export Script for Dark Radiant
rich_is_bored replied to rich_is_bored's topic in TDM Editors Guild
If you're willing to sacrifice per-vertex control then yes the script could be adapted to skip the "use a modeling program" step by looking at the material applied to each face, interpolating vertex colors where there are seams, and exporting a material shader based on the two in use. But that's a very condensed version of the process under ideal conditions. In practice such a script would be very complicated and time consuming to write. If we both started today, you'd probably know how to vertex paint before I finished writing the script. -
You really should locate the images used for existing sign models and use them as templates. It's not much trouble. Just place a sign model in a box map, compile it, and use r_showsurfaceinfo to find out what the name of the material shader is.
-
A prefab would be useless without the custom gui to go with it. Here's a mockup in pk4... download Just place the pk4 in the darkmod directory and type... map guitest.map ... in the console. I should mention that it seems you can't use any arbitrary key/value pair like I thought. It must be named gui_parmX where X is a number. In this case, since I only need 1 value I used gui_parm1.
-
If you replace the line... text "New Church" ... with ... gui::street ... then you can reuse the gui for every street sign. All you need do to change the street name is assign a "street" key/value pair to each func_static with the street sign gui applied. If you need an example I can do a quick mockup.
-
I've been working on an ASE export script on and off over the past few days and now have something to show for it. The script needs to be placed in the DarkRadiant/scripts/commands folder to show up in the scripts menu. Download It iterates over everything selected and exports all brushes and patches. This should make vertex blending terrain a cinch. Just construct terrain however you please, export it, load it into a modeling program and vertex paint it.
-
I don't see the point in building a completely new rig here. All he needs is a bigger case, a video card, and a power supply. If it seems overwhelming, treat it like 3 simple upgrades. Do them one at at time starting with the case, then the power supply, and finally the video card. Each time check to see that the system starts up and everything works. You'll learn plenty from this experience and later if you're feeling confident, which you should because this is easy stuff, then you can build a computer from scratch.