Leaderboard


Popular Content
Showing content with the highest reputation on 01/31/21 in all areas
-
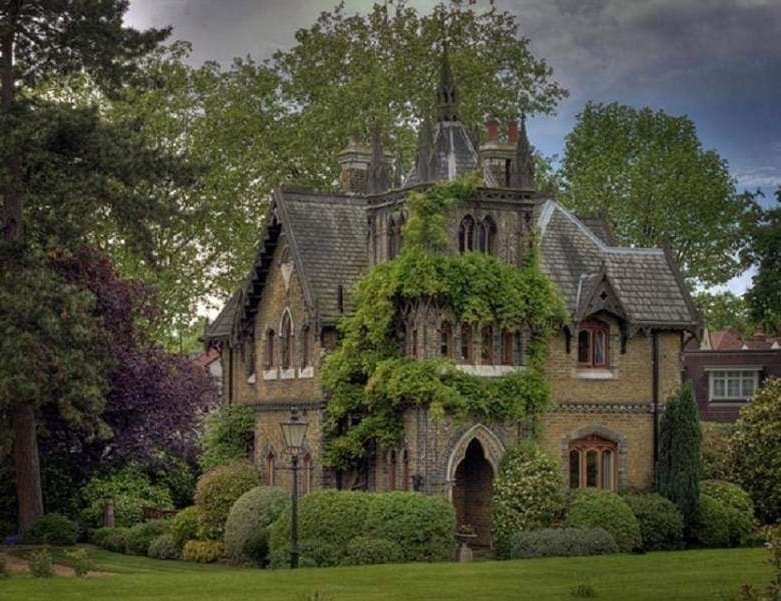
Holly Village, Highgate, North London 1865
 2 points
 -
Old quake based engines perform well because they have baked lighting and quasi-2D path-finding and scripted physics. Doom 3 / iDTech4 have real-time moving lights, real-time physics, and full volumetric path-finding. There is currently some investigation regarding the addition of "Light Probes": https://bugs.thedarkmod.com/view.php?id=5239 https://docs.unity3d.com/Manual/LightProbes.html which would offer similar performance benefits as light-mapping for static lighting.1 point
-
Ubuntu Focal package is up.1 point
-
Lately, I've been researching mirrors and real-time reflections, as in most missions I've seen them super clear and 100% reflective. It turns out there are better ways to do it. I wouldn't recommend real-time reflections in general, as there are quite numerous limitations on their use, and they're quite resource-heavy. But there are ways to make them look good. I'll go with the cubemap version, if the model ends up in my FM.1 point
-
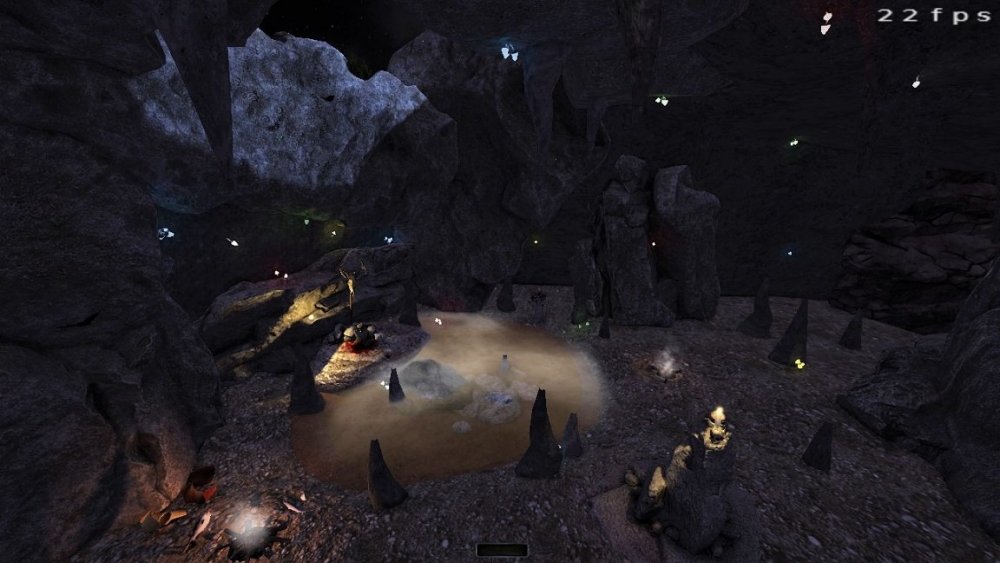
Hard to follow up some of the recent screens people have been posting, but here's a little something for my beta testers to reassure them I've not forgotten about them! Part of a new area, really going for a natural feel with some pagan vibes, might be hard to notice but I've got some of @STRUNK's new bats flying around and they cast a great shadow in the moonlight as they pass by the cave opening (it's in the screen but looks way better in person!) Ignore the fps counter; I've got a misbehaving VP in the area.
 1 point
 -
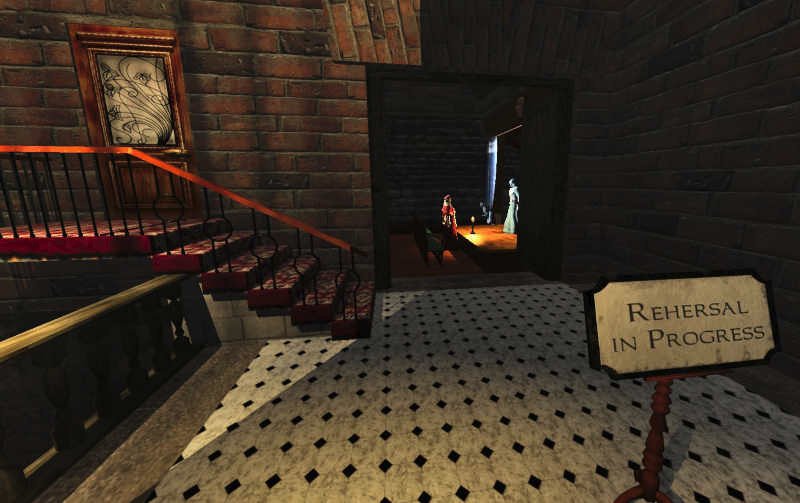
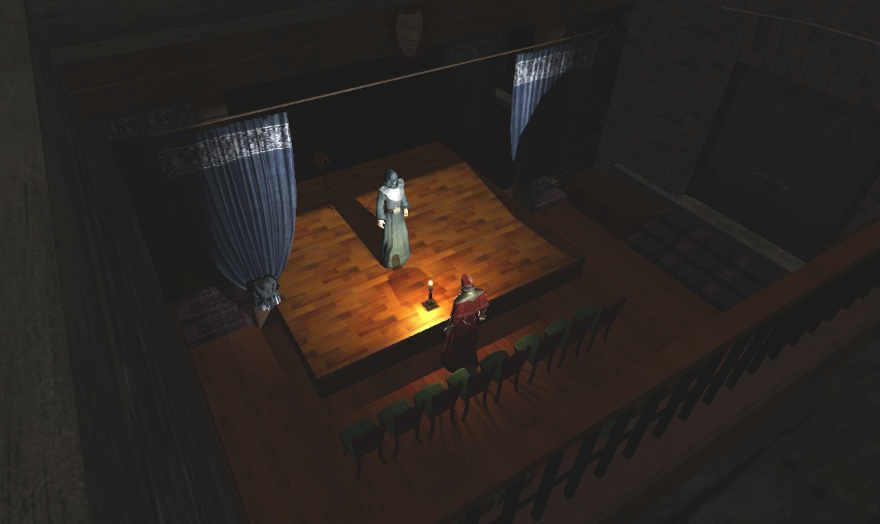
And for the holiday season, more Stolen Heart WIP pics, this time of the music hall, where a priest coaches an acolyte in song. When the game is released, you'll find it's a Latin chant, a Builder version of a 13th century plainsong by Thomas Aquinas. Thanks be to @AndrosTheOxen, who voices both roles including the singing!
 1 point
 -
Obsttorte was interested in what I learned while making the LQD with the modular building technique, so I'll write some words about it here. What is modular building? It is about reusing every piece you build. In the old building technique you make things by hand. Then you move elsewhere and make things by hand. Every time you start from scratch and do a lot of work until you have a small area that looks good. In Modular Building Technique (MBT), you make parts you need by hand, make them into .ase models and then clone them. You spend a lot of effort to make a single pretty detail piece. Once it is done, you can easily clone it. Also you can easily make derivatives of the existing piece. Ie. first make a wall. Then use the wall and make it into a 90 degree corner. And a wall with a doorway. And a T-junction. And a Wall with niche etc etc. Every piece you make, you create with the intent of making it reuseable. It takes a bit longer to make a single piece, but once you have a library of pieces, you can create good-looking rooms in few moments, just by cloning and bashing the modules in place. Some history I first thought about large scale modules, whole rooms and corridor pieces. The module would contain everything: worldspawn walls (the sealing geometry) and the details. In LQD the first floor was built with this principle. The corridors were repeatably cloned: straight corridor module, straight corridor module, straight corridor module, 90 degree corridor module, straight corridor module, T-junction module and so forth. When I reached the 2nd floor in LQD I started build smaller modules. Straight wall model piece, 90 degree wall model piece... Like seen in the LQ's study and this tutorial, for example. I personally feel this small module approach was far better than the large module one. The reason is you get more from the pieces: build sealing geometry, then clone the models in. Or the other way around if you prefer. Cloning entire rooms (mixture of worldspawn and models) is a bit clunky and error-prone. It is easier to make the location from several small reusable model pieces and then draw the sealing geometry around it. How to build modular? 1) Decide a grid size. This is THE MOST important phase. Try out different scales and decide what size factor your map will be. In LDQ I decided that the grid will be 144x144. It felt right for a castle. 2) Design the pieces so that they fit together and in to the grid. Here is a single example, which shows how the module pieces fit with the grid. Remember to leave room for sealing world geometry! That is, the worldspawn walls and floors marked in the screenshots below: The above example is in 2d. I mean the module pieces touch in XY plane. If you design your pieces properly, you can also make them fit in the vertical dimension too. That means you can mix and match pieces you build to have more variety: wall type A, ceiling type B and so forth. See below how the ceiling module fits on top of the wall modules. Pay special attention to the texture alingment. Remember, that the textures cannot be shifted anymore in an ase-module piece. Thus the texture alignment must fit nicely when the module is designed. 3) Build! Once you have the pieces ready, all you need to do is clone them and create the room. You might want to make the pieces into ase-models for lower memory impact (a model is loaded only once, cloning func_statics will eat more memory) and to protect your func_statics from DR corruption bug. 4) Decal modules! You can also make decal modules. When I built the wall modules seen in the screenshots above, I also retextured them with dirt decals and saved them into ase models too. This means I can simply clone a decal module on top of the actual module, thus griming it up with a single cloning. See screenshot below, actual module and it's decal counterpart. This simplifies griming things up a lot! You can also make modules for various other things, like wall damage, windows, vaults and the like. When you need a piece, you build it, make it into a module and place it. Then when you need a similar piece later, you just clone and place. No point in doing wall damage by hand, as you can just quickly clone a piece you made earlier and paste it all around the place: 5) Skins! Note also that this is not the limit. By writing a skin file, you could have variation within the modules, like the wall paper in the screenshot below: Summary All in all, you spend a lot of time designing the pieces. I would recommend building the pieces in a separate modules.map. This way you have a factory: you build pieces there, it is quick to dmap and jump in-game to inspect you work. Once you are sure your piece is perfect, you make it into an .ase model. Then open your map and mash the pieces you have together quickly and minimal effort to create a good looking location. Keep on mapping with the pieces until you need a new one. Then go back to you module factory and build a new piece. Make sure it is perfect, make it into a model and continue. Look at the wall in the above screenshot. Building that by hand via the traditional way would take a while. In the modular way, once you have built a single unit of that 3 unit wall, you can built the whole wall in seconds. Or any wall of any lenght! That is the power of the modular approach. Good looking details with low amount of work. Downside is that you are locked to a grid and you need to spend a lot of time with the modules initially. Also you need to have the discipline to plan your map a bit so that you won't waste time building modules you don't want or need. Special considerations: Note the part where the different modules touch each other. Pay special attention to this spot. You have to be very careful how you align your textures. There should not be a seam there. You could avoid the seam making the texture 'mirror' between the touching module brushes. This is very critical part in your module design so pay attention to it. Larger modules can be good too. For example, the spiral staircase towers (there are two in LQD) were a single module containing all the worldspawn and func_static walls. I made one tower and then just cloned it and placed it into the other location. Two towers at the expense of one. If I'm gonna map in the future, I'll just grab the tower from LQD and retexture. Assuming the next map uses same grid, that is... And one more benefit. Sticking to the grid makes later adjustments really easy. In LQD, there is the bedroom that was converted to a storeroom next to LQ's study. Initially this room was just sitting in the end of the corridor and there was no access from the spiral staircase tower into it. When I was drawing the in-game maps I felt that there should be an third option for accessing the second floor. Then I just added a corridor module between the store room and the staircase. Changed the wall modules into doorway wall module and the connection was ready. Hopefully this helps other mappers to explore alternative mapping techniques.1 point