Search the Community
Searched results for '/tags/forums/light/' or tags 'forums/light/q=/tags/forums/light/&'.
-
What Stgatilov mentioned about the psychological aspect of some lights being breakable and others not is going to be the toughest hurdle for you to overcome with this idea. Realism with the clear glass casing idea is nice, but you are still fighting against the rigid Thief programming that electric lights are always unbreakable. It needs to be very obvious, perhaps best identifiable at a glance, that it can be broken by the player. Consider how all explosive barrels in video games are red: it immediately differentiates them from regular set dressing barrels. I don’t believe that I would be able to consistently identify or interpret a clear glass bulb as different from any electric light. Add a red stripe to them, give them a specific recognizable light texture, make them look inherently damaged, etc. You may need to sacrifice a degree of realism in order to communicate what is thus far a contradictory mechanic to the player effectively.
-
The room is suppose to be inaccessible, I think you got up somewhere I didn't intent for players to get to. Light hint: Stong hint:
-

Allow broadhead arrows to break glass lamps
MirceaKitsune replied to MirceaKitsune's topic in The Dark Mod
It might then be best to add it to new light models designed for the purpose. The visual cue should be making them more glassy and fragile looking: Existing lamps look pretty solid, we can argue those were made of reinforced glass built to withstand powerful impacts, something something Inventors Guild... in contrast we'd have a few lamps with very transparent glass that show the light bulb inside, their design shows their fragility and makes it clear those are meant to be shot. -
Inn Business It's business, at an inn, over three nights. Development screenshots: Download: https://drive.google...dit?usp=sharing Update 1.48 uploaded March 8th, 2014, one change: patches key rarely not being frobable in one of its possible spots Big thanks to my beta testers: Airship Ballet, Kyyrma and AluminumHaste! Development supporters of note: Sotha, Springheel and Obsttorte. Also thanks Sotha, for urinating in my mission. ;-) And thanks Kyyrma for the title screen! My appreciation to all forum/wiki contributors, without whom, this wouldn't exist. Thanks to positive commenters on my previous mission too, extra motivation helps! :-) Note this uses campaign features, what you use the first night, impacts subsequent nights. And to quote a tester, "...the level is maybe best experienced in more than one sitting". If you do pause between nights, please be sure to save, you can't begin partway through effectively. (If you accidentally start a night you already completed, just fail the kill objective to switch to another night.) If your frame rates are too low facing the cemetery, please reduce your "Object Details LOD" setting. It was designed with "AI Vision" set to "Forgiving", to be able to sneak through with minimal reactions, if you want more/less, adjust your settings accordingly. There are several random, conditional aspects, and ways of going about things, so others might have slightly different experiences. Post here if you discover hidden objectives for extra points! My condolences to loot completionists, I made a bit on the third night hard, you've got your challenge cut out for you! Speaking of which, there's a TDM bug that mission complete totals too high, here are the real amounts per night: 2026/970/202. Oh, there is something that in the U.S. would be rated PG, in case you play with kids in earshot. I hope you enjoy playing it, feel free to let me know you did, and I'm glad to respond to inquiries (like how stuff was done, nothing was scripted). (Note which night you are referring to if it's something specific.) (Please remember spoiler tags to not expose things meant to be discovered by playing.) Like so: [spoiler]secrets[/spoiler] Developed for TDM 2.01. PS: Thiefette, good news, no spiders! Springheel, if you find an optional objective you can skip...you might find it immersion breaking. Others, no undead! There are a couple other interactive critters though. :-) Edit note: Some posts below were from users of an unreleased version of TDM 2.02 which broke several things, they do not reflect regular game-play.
-
Breakable lights might be an interesting concept so long as they are not implemented retroactively. Add a loud sound or other punishment for breaking them as you see fit, but it would still change the difficulty and design intended by level authors if you applied it to all previously made levels. I would also suggest that if you instead intend to make breakable variants of existing light models that you add a clear visual indicator that the light is breakable, otherwise it would require explicit messaging to the player that electric lights are breakable in that particular FM. I’m hesitant to see something of this sort added as it is in stark contrast to Thief precedent, but I would be more supportive of it if it was added carefully and responsibly.
-
I'm no graphics nerd, but I can barely tell the difference between the two. What I can tell from messing around a bit: soft shadows of low quality look like garbage with both maps and stencils (EDIT: wrong, I didn't realize I was looking at shadow maps for a volumetric light shadow. Stencil definitely looks better). increasing soft shadow quality decreases performance in both implementations. I think the CPU/GPU of the end user would influence which is gives better performance both maps and stencils can produce a pixelated shadow if you look close enough. (EDIT: wrong. Again, was looking at a volumetric light shadow). I tend to use maps, because for whatever reason I seem to get a few more FPS out of them. As a mapper, I am certainly NOT interested in endlessly tweaking a scene to make the shadows look perfect. I just don't care enough. If they look shockingly bad I will put some effort into it though (which will probably mean just disabling them for the offending entity). It's rare that I feel this is necessary though. So I guess I don't really get the argument that stencils are amazing and maps are crap. I just don't see it or am too dense to notice. (EDIT: indeed I was being dense. I was comparing shadow maps with shadow maps because I was looking at a volumetric light shadow). Also, in my last couple of missions I had graphical bugs that only showed up with stencil shadows enabled. It would be nice to not have to deal with that all the time.
-
TDM 15th Anniversary Contest is now active! Please declare your participation: https://forums.thedarkmod.com/index.php?/topic/22413-the-dark-mod-15th-anniversary-contest-entry-thread/
-
Script: Per limb damage, skill system (WIP)
MirceaKitsune replied to MirceaKitsune's topic in Art Assets
Looks great, thank you! That looks even better: It's where DeusEx had its player status screen, feels even more like TDM with DX characteristics now I think I placed it above the light gem as that's where player info was technically being stored, with the new subtitles covering that position the move is a great decision. By the way: If anyone wishes to continue and improve this mod, I'd appreciate seeing your remixes of it. I had it mostly finished last time on my end; I think the main issue was upgrades require items to be placed on maps, augmentations may not work on every FM without a way for them to automatically spawn in random places... my imagined solution was to also offer upgrades based on loot gathered or other achievements but I never got around to adding that. -
As my custom assets work has increasingly shifted from models towards scripting, I'll open a new thread here to contain any scripts that I write which can be reused in other missions, starting with the A ) Presence Lamp This is a Lost City-style lamp that brightens and dims depending on the presence of the player or an AI. It fades between 2 colours and can trigger its targets whenever it switches fully on or off, so it should also be viable in various other situations. The standard setup consists of the following: - a trigger_multiple brush. The spawnarg "anyTouch" controls whether AIs, too, are able to activate it - a presence lamp, highly recommended with a colorme skin - one presence light, or any other light with appropriate spawnargs The targeting chain is trigger brush -> lamp -> light When the player or an AI stands in the trigger_multiple brush, the lamp switches on and starts a short timer. Subsequent triggers reset the timer. If the timer runs out because no one's standing in the trigger brush anymore, the lamp switches itself off. Notes - Multiple trigger brushes can target the same lamp, and one trigger brush can target multiple lamps. However, each presence lamp can only target one light, so if you want i.e. a bouncelight you'll need to hide an additional silent presence lamp somewhere and target it from the same trigger brush. - The lamp and the light use their own colour spawnargs respectively, since setting 0 0 0 on a lamp would make it appear pitch black. - Technically the trigger brush can be exchanged for anything else that triggers the lamp every 0.5s (this number can be changed via "update_interval" on the lamp), i.e. a trigger_timer. - This was originally named the proximity lamp and was one of many scripting jobs for The Painter's Wife. I've renamed it to "presence lamp" because the mapper may place the trigger brush(es) wherever he wishes: proximity to the lamp is not a factor. Credits go to Bikerdude for putting together the crystal lamp models. Download Presence Lamps - Google Drive Place or extract the .pk4 into your FM archive, then look up the presence lamp prefabs. If you already are using other custom scripts, remember to add the presence lamp's .script to your tdm_custom_scripts file. B ) Teledoor This is a Skyrim-style door which opens just a bit into a black_matt "void" before teleporting the player to a different area of the map, which may represent the other side of the door. This is used for connecting physically separated map areas with each other, such as when there's an exterior/interior split of a building or ship to allow for more mapping freedom. [Full Thread] C ) Mass Teleport This is a teleportation setup designed to seamlessly teleport the player and any moveables between two identical-looking areas. This allows the mapper to link 2 physically distant areas with each other while maintaining the illusion that they're connected. The teleportation zones should be free of AIs as they can't be teleported like this. [Post] D ) Automaton Station A station for Sotha's automatons (includes the automatons) which can be switched on and off by patrolling automatons. (Part of core assets as of 2.10) [Post] E ) Camgoyle A sentient turret originally made for the FM Written in Stone. It's based on the new security camera entity and augmented with scripting to allow it to fire magical projectiles at the enemies it detects. People are more than welcome to use it and to convert it into something else, such as a mechanical turret. [Post] [Download] F ) Audiograph The audiograph is an Inventor's Guild device for playing back recordings stored on spindles, which are small metal cylinders the player can pick up and store in his inventory. [Post] G ) Turret A new companion to security cameras familiar to Thief players. It will become active as soon as an enemy is detected by a targeted security camera, firing projectiles to fend off the intruders. Similar to the security camera and the camgoyle sentry, turrets are highly customisable in their behaviour and appearance. [Thread] G ) Fog Fade Dynamically change fog density depending on what location the player is in. [Thread]
- 36 replies
-
- 11
-

-
Ah, pity I wasn't reading the forums back in February. I'm fond of that game, along with Bugbear's other early title, Rally Trophy. I was never too good at FlatOut, but it was always a hoot to play.
-
Ever since I worked on "Chalice of Kings" with Bikerdude, I have wanted to get flame particles with new particle glares into the core mod. My reasoning was that the candles have glares and the un-glared torches look mismatched. This proposal was met with mixed reactions, so (knowing the history of TDM feature proposals...) I have created a technical demo. You may download it here: zzz_flameglare.pk4.txt (fixed) Just rename without the .txt extension at the end and place it in your Darkmod directory. Here are some screens. Using particles for this is probably the wrong way to go now that Duzenko has an emissive light feature in his branch: http://forums.thedarkmod.com/topic/19659-feature-request-emissive-materialsvolumetric-lights/


-
Changelog of 2.12 development: release212 (rev 16989-10651) * Training Mission reverted to 2.11 state, except for text changes about new controls. beta212-07 (rev 16982-10651) * Fixed save/load of turrets. * Fixed some more cases of camera clipping during force-crouched mantle (6425). * Fixed crash if player wins twice in quick succession (6489). * Added angRotate script event. * Fixed church_altar prefab (6285). beta212-06 (rev 16970-10644) * Fixed light leaks workaround dropped after save + load (post). * Force doors which connect visportal to cast shadows regardless of light flow (post). * Improved candle vs junk detection for new frob controls (6316). * Fixed player getting stuck at start of "One Step Too Far" (post). * Fixed warning on spawning atdm:env_ragdoll_tdm_spider. * Fixed wrong skin in mechanical/switches/switch_rotate_lever prefab (6479). * Fixed double slash in lady02 subtitle decls (post). * Fixed rotated versions of safe03_wall prefab (6268). * Tweaked fogging of health potion. * Fixed overbright skins for nature bushes (6478). * Fixed Grandfather_clock_victorian_01 model (6383). * Removed pause from looping sound machinery/machines/m3_loop (6384). * Fixed broken func_portals in Training Mission (4352). * Minor improvements in Saint Lucia mission. * Doubled game scripts memory limit (post). * Improved normal map of long banners (6355). beta212-05 (rev 16950-10635) * Fixed player seeing through ceiling when mantling into crouched state (6425). * Improved how frobbing works on junk items (6316). * Toggled states of player movement are saved and restored properly (6458). * Fixed back image loading optimization. * Added canCloseDoors spawnarg on AI, which allows to block closing only (6460). * Rats and spiders are non-shoulderable by default (6456). * Increased wait in screenshot_viewpos macro command (6331). * Added forest models from The Valley abandoned mission. * Fixed frobstage on sign models (6457). * Added vine arrows to training mission (4352). * Improved Merry Chest prefabs (6459). * Fixed normal map of dirt_packed_muddy (4668). * Fixed nails in door_boarded_up01 model. * Fixed attachments of atdm:fireplace_place_base (6474). * Fixed editor image of blocks_large_sandstone, rough_grey_dirty_sepia_grey_trim (6281, 6464). * Added editor image for grey_dirty_trim material. * Adjusted tooltip for auto-search bodies. beta212-04 (rev 16932-10626) * Added massive package of subtitles for AI sounds (6240, thread). * Fixes in envshot command (5796). * Added nature/dirt/ash_and_coals texture (6441). beta212-03 (rev 16902-10623) * Improved subtitles layout and location ring picture (p1 p2). * Fixed broken remote render with soft stencil shadows. * Added color buffer clears to fix remote render breaking skybox (6424). * Fixed warning generated by remote render (6424). * Fixed min_lod_bias being ignored if no other LOD settings is specified (6359). * Now changing LOD settings effects objects with min_lod_bias immediately (6359). * Fixed text & background alignment in mission lists (6337). * Fixed gaps in chandelier models (6433). * Added missing editor texture for carpet/runners/ornate_red_black03_end (6435). * Further expansion of listRenderLightDefs and listLightEntityDefs commands. beta212-02 (rev 16889-10613) * Fixed underwater rendering due to missing doublevision shader (post). * Exclude more lights from the new light portal flow optimizations (5172, 6321). * black_matt is now fully black, no tiny green bias (post). * Fixed lockpick interruption when mouse cursor switches between door and handle. * Extended listRenderLightDefs and listLightEntityDefs commands. * Fixed church_altar.pfb (6285). * Added window01_curtains01.lwo in separate parts (6356). * tdm_open_doors now opens locked doors too. * Fixed rare case of getting NaN in spline mover. * Added r_skipEntities cvar, similar to "filter entities" in DR. * Added editor spawnargs for volumetric light properties (6322). * Fixed radius override and added position override for script-based stims. * Fixed warnings with wrong virtual function overrides. beta212-01 (rev 16879-10584) * Fixed player falling through elevator when shouldering a body (6259). * Rebalanced volume of all player footsteps (6348). * Fixed weird animation when mixing drawn bow and main menu (2758). * Fixed all kind of issues with bc_teatray material. * Added alternative frob controls mode tdm_holdfrob_drag_all_entities for dragging on hold. * Fixed non-actor entities always getting full splash damage. * Hide console before screenshot with screenshot_viewport command (6331). * Added tdm_subtitles_ring cvar to disable subtitles location ring. * Added mission.cfg as a temporary way for mission to override non-archived cvars (5453). * Cvars "pm_lean_*" are no longer archived (6320). * Removed some cvar overrides from atdm:player_base. * CFrobLock now supports script events: Lock, Unlock, ToggleLock, IsLocked, IsPickable (6329). * Simplified flee script event, supported fleeing from non-actor entity and fleeFromPoint. * Fixed crash on some non-standard cases of flinderize. * Can set spawnarg "douse 0" on damageDef to not extinguish lights from splash damage. * Added setFrobMaster script event. * Added script-based stim type, which triggers only when stimEmit script event is called. * Added on/off script events to func_emitter entity. * Added setSmoke script event to change particle decl for a func_smoke. * Added hasInvItem script event to check if player has some item. * Added launchGuided script event to start guided projectiles. * Added getInterceptTime script event for shooting projectile and running target. * Added "bounce_sound_min|max_velocity" spawnargs to control projectile bounce sounds. * Added "postbounce_*" spawnargs to change projectile properties after bounce. * Fixes to moor guard ragdoll (6345). * Fixed wench AI sounds (6284). * Added new experimental entityDef for an automatic turret. * Official missions no longer pretend to be part of 3-mission campaign (6338). * Removed AI PAIN messages console spam. * Removed excessive "s_volume 0" from base loot entityDefs (6346). * Replaced symbol on the proguard's belt. * Default value of com_maxfps increased from 144 to 300. * Improved idEntityPtr, fixed some warnings. dev16854-10518 * High mantle animation has become much faster (6343). * Crouching while on ladder/rope now causes player to slide instantly. * Added "forceShadowBehindOpaque" hack to workaround shadow leaks in old missions (5172). * Fixed and revised underwater "double vision" effect (6300). * Add scratch images have alpha = 1, which fixes some mirror materials (6300). * Added warning if material output color depends on input alpha, fixed it in core assets (6340). * Support several independent user addon scripts (6336). * Fixed missing headbob and footsteps at very high FPS (4696). * Fixed player hanging mid-air in a jump at very high FPS (6333). * Don't crash if player's head does not exist (6326). * Added "fade in fast" options for frobhelper (6342). * Removed "show tooltips" option, now it is always on (6344). * Added default spawnarg values to "text" debug entityDef (6325). * Fixed some uninitialized values, float overflows and NaNs across the code. * Reorganized covered furniture models from Seeking Lady Leicester (6289). dev16842-10488 * Major changes in frob/use controls: holding frob does different thing now (6316, thread). * Fixed some electric lights not spawning. * It is no longer necessary to specify extension to reference PNG image. * Added cvar tdm_show_viewpos and command screenshot_viewpos (6331). * Fixed hanging when light is moved through a plane with many visportals (3815, thread). * Fixed multipage readables stuck on empty page, improved page flipping (6313). * Fixed WAV sounds playing in main menu, all sounds are streaming now (6330). * Fixed light leaks along scissor rectangle boundary with soft stencil shadows (thread). * Better subtitles location visualization (6264). * Changed position of subtitle blocks and subtitle font (6264). * Internal refactoring of idImage class (6300). * Fixed rare bug in renderworld raycasting... might happen with particle collisions. * Fixed warnings in newspaper_bridgeport0X core readable GUI (6245). * Added vec4 GUI keyword (6164). * Renamed pm_lean_toggle cvar to tdm_toggle_lean. * Improved "head bob" and "mantle roll" settings in main menu. * Updated FFmpeg to 4.4.4 (6314). Known issues: * Various problems after image refactoring: underwater, mirrors, etc. dev16829-10455 * Allowed to mantle while carrying/manipulating an object (5892, thread). * Allowed to change weapon while mantling or on rope/ladder (6319). * Several leaning improvements (6320, thread). * Parallel shadow-casting lights are deprecated, use parallelSky instead (6306). * Added many menu settings for autoloot body, blackjack helper, and other (6311). * Deleted option for autolooting bodies with one item per frob, added menu setting (6257). * Added cvar to modify all head bobbing settings (6310). * Fixed some corner cases with multiloot (6270). * Fixed frob helper's "always visible" mode (6318). * New&fixed versions of atdm:lamp_electric_square_3_lit_unattached (6315). * Fixed UV map on Stove models (6312). * Reworked r_showPrimitives + deleted code for rendering from CPU buffers. * Shortened name of end-mission autosaves (6294). * Consistent names of various arrows. Known issues: * Some electric lights don't spawn. dev16818-10434 * Fixed projectiles flying through player and enemies sometimes (6292). * Lights with noshadows spawnarg pass through walls again (5172). * Disabled portal flow culling optimization for parallel lights (5172, 6306). * Faster light-entity interactions matching if light is noshadows due to spawnarg (6296). * Compression of images to DXT1/3/5 is done in software (6300). * Cleaned up rounding math routines (6300). * r_showportals 2 is easier to understand now * Changed rules for getting start areas of parallelSky light (6306). dev16814-10408 * Optimized portal flow culling for shadowing lights (5172). * Extended dmap diagnostics to info_portalSettings, improved editor descriptions (6224). * Added test commands: tdm_open_doors and tdm_close_doors. * Minor adjustments to ear-cutting algorithm in dmap. * Minor refactoring in image compression code (6300). dev16809-10394 * r_shadowMapSinglePass is enabled by default now. * Fixed lack of shadows in volumetric lights under r_shadowMapSinglePass (6271). * Fixed interaction rendering on materials with polygonOffset (5868). * Optimized code for finding light-entity interactions on large maps (6296). * Optimized moving shadowing lights: don't create interactions in unreachable areas (5172). * More refactoring in backend: tonemap shader (6271). * Added more covered furniture models (6289). * Added wall models from Seeking Lady Leicester (6293). Known issues: * Some noshadows lights no longer pass through walls. dev16801-10370 * Supported -durationExtend for inline subtitles (6262). * Added blue noise dithering to tonemap shader, which fixed color banding of fog (6271). * Optimized away unnecessary render copy under "useNewRenderPasses 1" (6271). * Refactored blend and fog lights into new backend architecture. For troubleshooting, reduce cvar useNewRenderPasses to 1 or 0 (6271). * Added 30 case to max FPS selection in settings menu. dev16792-10357 * Fixed particles bound to animated joints (6099). * idVec3 is no longer initialized to zero by default (6280). * Integrated Address Sanitizer tool and fixed a few found bugs (6280). dev16789-10349 * Deleted old backend completely + some cleaning (6271). * Fixed map icon wrong name (thread). * Now light entities support noPortalFog spawnarg (6282). * Support fonts aspect ratio correction (6283). * Fixed playerstart customization (thread). * Refactored "render pass" part into new backend architecture. For troubleshooting, try cvar "useNewRenderPasses 0". Also "textures/particles/blacksmokepuff" now works (6271) * Now arithmetic expressions in materials support min/max functions (6271). * Minor initialization cleanup (6280). dev16785-10319 * "r_shadowMapSinglePass 1" now respects noselfshadows flag (6271). * Continued refactoring in shadow maps and render-pass shaders (6271). dev16783-10307 * Backported new rendering backend to uniforms, should work like the old one now (6271). * "Auto" lockpicking difficulty now unlocks pin from after one cycle (6256). * Added "auto-search bodies" feature under tdm_autosearch_bodies cvar (6257). * Added r_shadowMapAlphaTested cvar for single-pass shadow maps (6271). dev16781-10289 * Added first version of direction and volume cues to subtitles (6264). * Allow subtitles to extend duration of sound sample (6262). * Improved slot allocation algorithm for subtitles, a subtitle no longer changes slot (6264). * Fixed bug that stereo sample plays for 2x duration due to length confusion. * Upgraded libpng and rebuilt third-party packages. * Internal fixes of depth bounds test asserts. dev16778-10275 * Allow limited mantling with a shouldered body (5892). * Fixed toggle creep and improved settings layout in the menu (6242). * Fixed bounding boxes of animated entities and particles, enabled r_useEntityScissors by default (6099). * Trigger call_on_exit before call_on_entry when switching locations. * Don't expand bounds of surfaces with turbulent deform (5990). * Removed "gui" spawnarg on GUI message to avoid first frame (6117). Known issues: * Particles bounds to animated joints broken. Changelog of earlier versions can be found here. Source: 2.12 beta testing thread
-
I hope I'm not proposing some unfeasible idea that was already imagined before, this stuff is fun to discuss so no loss still. Riding the wave of recent optimizations, I keep thinking what more could be done to reach a round 144 FPS compatible with today's monitors. An intriguing optimization came to mind which I felt I have to share: Could we gain something if we had distance-based LOD for entity updates, encompassing everything visual from models to lights? How it would work: New settings allow you to set a start distance, end distance, and minimum rate. The further an entity gets the lower its individual update rate, slowly decreasing from updating each frame (start distance and closer) to updating at the minimum rate (end distance and further). This means any visual change is preformed with frame skips on any entity: For models such as characters animations are updated at the lower rate, for lights it means shadows are recalculated less often... even changes in the position and rotation of an entity may follow it for consistency, this would especially benefit lights with a moving origin like fireplaces or torches held by guards which recalculate per-frame. Reasoning: Light recalculation even animated models or individual particles can be significant contributors to performance drain. We know the further something is from the camera the less detail it requires, this is why we have a level-of-detail system with lower-polygon LOD models for characters and even mapmodels. Thus we can go even further and extend the concept to visual updates; Similar to how you don't care if a far away guard has a low-poly helmet you won't notice, you won't care if that guard is being animated at 30 FPS out of your maximum of 60, nor if the shadow of a small distant light is being updated at 15 FPS when an AI passes in front of it. This is especially useful if you own a 144 Hz monitor and expect 144 FPS: I want to see a character in front of me move at 144 FPS, but may not even notice if a guard far away is animating at 60 FPS... I want the shadows of the light from the nearby torch to animate smoothly, but can care less if a lamp meters away updates its shadows at 30 FPS instead. The question is if this is easy to implement in a way that offers the full benefit. If we use GPU skinning for instance, the graphics card should be told to animate the model at a lower FPS in order to actually preserve cycles... does OpenGL (and in the future Vulkan) let us do this per individual model? I know the engine has control over light recalculations which would probably yield the biggest benefit. Might add more points later as to not make the post too big, for now what are your thoughts?
-
Changelog of 2.12 development: release212 (rev 16989-10651) * Training Mission reverted to 2.11 state, except for text changes about new controls. beta212-07 (rev 16982-10651) * Fixed save/load of turrets. * Fixed some more cases of camera clipping during force-crouched mantle (6425). * Fixed crash if player wins twice in quick succession (6489). * Added angRotate script event. * Fixed church_altar prefab (6285). beta212-06 (rev 16970-10644) * Fixed light leaks workaround dropped after save + load (post). * Force doors which connect visportal to cast shadows regardless of light flow (post). * Improved candle vs junk detection for new frob controls (6316). * Fixed player getting stuck at start of "One Step Too Far" (post). * Fixed warning on spawning atdm:env_ragdoll_tdm_spider. * Fixed wrong skin in mechanical/switches/switch_rotate_lever prefab (6479). * Fixed double slash in lady02 subtitle decls (post). * Fixed rotated versions of safe03_wall prefab (6268). * Tweaked fogging of health potion. * Fixed overbright skins for nature bushes (6478). * Fixed Grandfather_clock_victorian_01 model (6383). * Removed pause from looping sound machinery/machines/m3_loop (6384). * Fixed broken func_portals in Training Mission (4352). * Minor improvements in Saint Lucia mission. * Doubled game scripts memory limit (post). * Improved normal map of long banners (6355). beta212-05 (rev 16950-10635) * Fixed player seeing through ceiling when mantling into crouched state (6425). * Improved how frobbing works on junk items (6316). * Toggled states of player movement are saved and restored properly (6458). * Fixed back image loading optimization. * Added canCloseDoors spawnarg on AI, which allows to block closing only (6460). * Rats and spiders are non-shoulderable by default (6456). * Increased wait in screenshot_viewpos macro command (6331). * Added forest models from The Valley abandoned mission. * Fixed frobstage on sign models (6457). * Added vine arrows to training mission (4352). * Improved Merry Chest prefabs (6459). * Fixed normal map of dirt_packed_muddy (4668). * Fixed nails in door_boarded_up01 model. * Fixed attachments of atdm:fireplace_place_base (6474). * Fixed editor image of blocks_large_sandstone, rough_grey_dirty_sepia_grey_trim (6281, 6464). * Added editor image for grey_dirty_trim material. * Adjusted tooltip for auto-search bodies. beta212-04 (rev 16932-10626) * Added massive package of subtitles for AI sounds (6240, thread). * Fixes in envshot command (5796). * Added nature/dirt/ash_and_coals texture (6441). beta212-03 (rev 16902-10623) * Improved subtitles layout and location ring picture (p1 p2). * Fixed broken remote render with soft stencil shadows. * Added color buffer clears to fix remote render breaking skybox (6424). * Fixed warning generated by remote render (6424). * Fixed min_lod_bias being ignored if no other LOD settings is specified (6359). * Now changing LOD settings effects objects with min_lod_bias immediately (6359). * Fixed text & background alignment in mission lists (6337). * Fixed gaps in chandelier models (6433). * Added missing editor texture for carpet/runners/ornate_red_black03_end (6435). * Further expansion of listRenderLightDefs and listLightEntityDefs commands. beta212-02 (rev 16889-10613) * Fixed underwater rendering due to missing doublevision shader (post). * Exclude more lights from the new light portal flow optimizations (5172, 6321). * black_matt is now fully black, no tiny green bias (post). * Fixed lockpick interruption when mouse cursor switches between door and handle. * Extended listRenderLightDefs and listLightEntityDefs commands. * Fixed church_altar.pfb (6285). * Added window01_curtains01.lwo in separate parts (6356). * tdm_open_doors now opens locked doors too. * Fixed rare case of getting NaN in spline mover. * Added r_skipEntities cvar, similar to "filter entities" in DR. * Added editor spawnargs for volumetric light properties (6322). * Fixed radius override and added position override for script-based stims. * Fixed warnings with wrong virtual function overrides. beta212-01 (rev 16879-10584) * Fixed player falling through elevator when shouldering a body (6259). * Rebalanced volume of all player footsteps (6348). * Fixed weird animation when mixing drawn bow and main menu (2758). * Fixed all kind of issues with bc_teatray material. * Added alternative frob controls mode tdm_holdfrob_drag_all_entities for dragging on hold. * Fixed non-actor entities always getting full splash damage. * Hide console before screenshot with screenshot_viewport command (6331). * Added tdm_subtitles_ring cvar to disable subtitles location ring. * Added mission.cfg as a temporary way for mission to override non-archived cvars (5453). * Cvars "pm_lean_*" are no longer archived (6320). * Removed some cvar overrides from atdm:player_base. * CFrobLock now supports script events: Lock, Unlock, ToggleLock, IsLocked, IsPickable (6329). * Simplified flee script event, supported fleeing from non-actor entity and fleeFromPoint. * Fixed crash on some non-standard cases of flinderize. * Can set spawnarg "douse 0" on damageDef to not extinguish lights from splash damage. * Added setFrobMaster script event. * Added script-based stim type, which triggers only when stimEmit script event is called. * Added on/off script events to func_emitter entity. * Added setSmoke script event to change particle decl for a func_smoke. * Added hasInvItem script event to check if player has some item. * Added launchGuided script event to start guided projectiles. * Added getInterceptTime script event for shooting projectile and running target. * Added "bounce_sound_min|max_velocity" spawnargs to control projectile bounce sounds. * Added "postbounce_*" spawnargs to change projectile properties after bounce. * Fixes to moor guard ragdoll (6345). * Fixed wench AI sounds (6284). * Added new experimental entityDef for an automatic turret. * Official missions no longer pretend to be part of 3-mission campaign (6338). * Removed AI PAIN messages console spam. * Removed excessive "s_volume 0" from base loot entityDefs (6346). * Replaced symbol on the proguard's belt. * Default value of com_maxfps increased from 144 to 300. * Improved idEntityPtr, fixed some warnings. dev16854-10518 * High mantle animation has become much faster (6343). * Crouching while on ladder/rope now causes player to slide instantly. * Added "forceShadowBehindOpaque" hack to workaround shadow leaks in old missions (5172). * Fixed and revised underwater "double vision" effect (6300). * Add scratch images have alpha = 1, which fixes some mirror materials (6300). * Added warning if material output color depends on input alpha, fixed it in core assets (6340). * Support several independent user addon scripts (6336). * Fixed missing headbob and footsteps at very high FPS (4696). * Fixed player hanging mid-air in a jump at very high FPS (6333). * Don't crash if player's head does not exist (6326). * Added "fade in fast" options for frobhelper (6342). * Removed "show tooltips" option, now it is always on (6344). * Added default spawnarg values to "text" debug entityDef (6325). * Fixed some uninitialized values, float overflows and NaNs across the code. * Reorganized covered furniture models from Seeking Lady Leicester (6289). dev16842-10488 * Major changes in frob/use controls: holding frob does different thing now (6316, thread). * Fixed some electric lights not spawning. * It is no longer necessary to specify extension to reference PNG image. * Added cvar tdm_show_viewpos and command screenshot_viewpos (6331). * Fixed hanging when light is moved through a plane with many visportals (3815, thread). * Fixed multipage readables stuck on empty page, improved page flipping (6313). * Fixed WAV sounds playing in main menu, all sounds are streaming now (6330). * Fixed light leaks along scissor rectangle boundary with soft stencil shadows (thread). * Better subtitles location visualization (6264). * Changed position of subtitle blocks and subtitle font (6264). * Internal refactoring of idImage class (6300). * Fixed rare bug in renderworld raycasting... might happen with particle collisions. * Fixed warnings in newspaper_bridgeport0X core readable GUI (6245). * Added vec4 GUI keyword (6164). * Renamed pm_lean_toggle cvar to tdm_toggle_lean. * Improved "head bob" and "mantle roll" settings in main menu. * Updated FFmpeg to 4.4.4 (6314). Known issues: * Various problems after image refactoring: underwater, mirrors, etc. dev16829-10455 * Allowed to mantle while carrying/manipulating an object (5892, thread). * Allowed to change weapon while mantling or on rope/ladder (6319). * Several leaning improvements (6320, thread). * Parallel shadow-casting lights are deprecated, use parallelSky instead (6306). * Added many menu settings for autoloot body, blackjack helper, and other (6311). * Deleted option for autolooting bodies with one item per frob, added menu setting (6257). * Added cvar to modify all head bobbing settings (6310). * Fixed some corner cases with multiloot (6270). * Fixed frob helper's "always visible" mode (6318). * New&fixed versions of atdm:lamp_electric_square_3_lit_unattached (6315). * Fixed UV map on Stove models (6312). * Reworked r_showPrimitives + deleted code for rendering from CPU buffers. * Shortened name of end-mission autosaves (6294). * Consistent names of various arrows. Known issues: * Some electric lights don't spawn. dev16818-10434 * Fixed projectiles flying through player and enemies sometimes (6292). * Lights with noshadows spawnarg pass through walls again (5172). * Disabled portal flow culling optimization for parallel lights (5172, 6306). * Faster light-entity interactions matching if light is noshadows due to spawnarg (6296). * Compression of images to DXT1/3/5 is done in software (6300). * Cleaned up rounding math routines (6300). * r_showportals 2 is easier to understand now * Changed rules for getting start areas of parallelSky light (6306). dev16814-10408 * Optimized portal flow culling for shadowing lights (5172). * Extended dmap diagnostics to info_portalSettings, improved editor descriptions (6224). * Added test commands: tdm_open_doors and tdm_close_doors. * Minor adjustments to ear-cutting algorithm in dmap. * Minor refactoring in image compression code (6300). dev16809-10394 * r_shadowMapSinglePass is enabled by default now. * Fixed lack of shadows in volumetric lights under r_shadowMapSinglePass (6271). * Fixed interaction rendering on materials with polygonOffset (5868). * Optimized code for finding light-entity interactions on large maps (6296). * Optimized moving shadowing lights: don't create interactions in unreachable areas (5172). * More refactoring in backend: tonemap shader (6271). * Added more covered furniture models (6289). * Added wall models from Seeking Lady Leicester (6293). Known issues: * Some noshadows lights no longer pass through walls. dev16801-10370 * Supported -durationExtend for inline subtitles (6262). * Added blue noise dithering to tonemap shader, which fixed color banding of fog (6271). * Optimized away unnecessary render copy under "useNewRenderPasses 1" (6271). * Refactored blend and fog lights into new backend architecture. For troubleshooting, reduce cvar useNewRenderPasses to 1 or 0 (6271). * Added 30 case to max FPS selection in settings menu. dev16792-10357 * Fixed particles bound to animated joints (6099). * idVec3 is no longer initialized to zero by default (6280). * Integrated Address Sanitizer tool and fixed a few found bugs (6280). dev16789-10349 * Deleted old backend completely + some cleaning (6271). * Fixed map icon wrong name (thread). * Now light entities support noPortalFog spawnarg (6282). * Support fonts aspect ratio correction (6283). * Fixed playerstart customization (thread). * Refactored "render pass" part into new backend architecture. For troubleshooting, try cvar "useNewRenderPasses 0". Also "textures/particles/blacksmokepuff" now works (6271) * Now arithmetic expressions in materials support min/max functions (6271). * Minor initialization cleanup (6280). dev16785-10319 * "r_shadowMapSinglePass 1" now respects noselfshadows flag (6271). * Continued refactoring in shadow maps and render-pass shaders (6271). dev16783-10307 * Backported new rendering backend to uniforms, should work like the old one now (6271). * "Auto" lockpicking difficulty now unlocks pin from after one cycle (6256). * Added "auto-search bodies" feature under tdm_autosearch_bodies cvar (6257). * Added r_shadowMapAlphaTested cvar for single-pass shadow maps (6271). dev16781-10289 * Added first version of direction and volume cues to subtitles (6264). * Allow subtitles to extend duration of sound sample (6262). * Improved slot allocation algorithm for subtitles, a subtitle no longer changes slot (6264). * Fixed bug that stereo sample plays for 2x duration due to length confusion. * Upgraded libpng and rebuilt third-party packages. * Internal fixes of depth bounds test asserts. dev16778-10275 * Allow limited mantling with a shouldered body (5892). * Fixed toggle creep and improved settings layout in the menu (6242). * Fixed bounding boxes of animated entities and particles, enabled r_useEntityScissors by default (6099). * Trigger call_on_exit before call_on_entry when switching locations. * Don't expand bounds of surfaces with turbulent deform (5990). * Removed "gui" spawnarg on GUI message to avoid first frame (6117). Known issues: * Particles bounds to animated joints broken. Changelog of earlier versions can be found here.
-
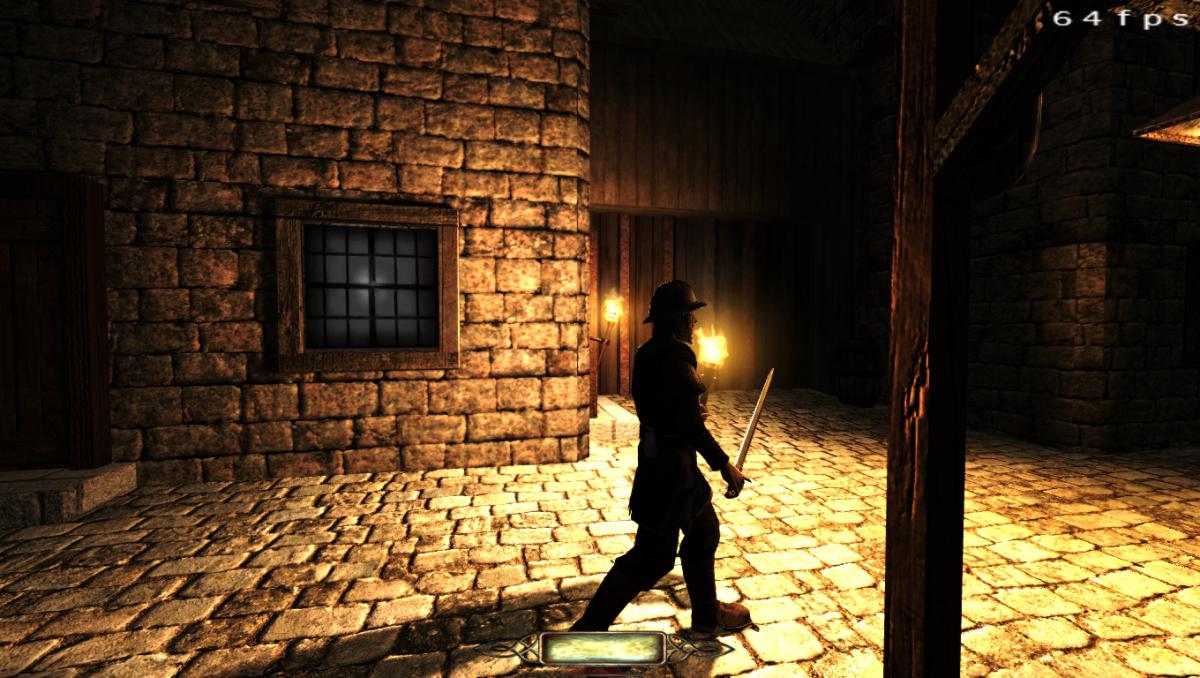
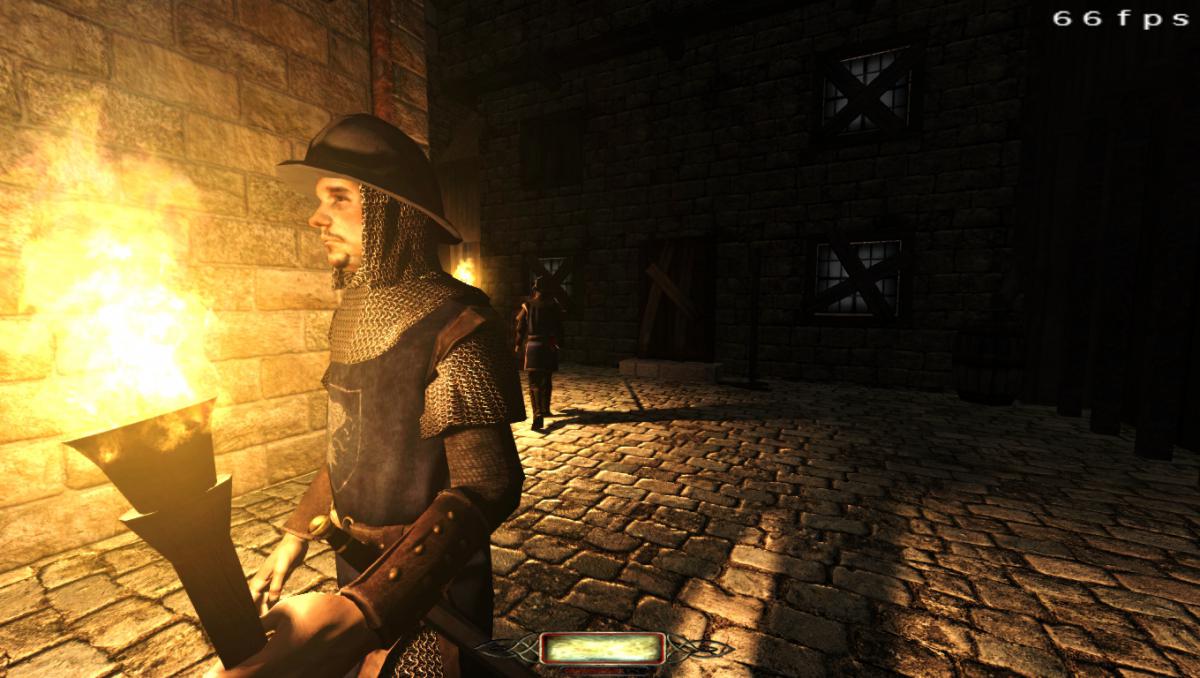
Uploaded with ImageShack.us Infiltrate a keep and steal information. Took me a while to finnish this one, motivation comes and goes! I would like to thank nbohr1more and Pranqster for helping me test the mission and help sort out any problems. Bikerdude for fixing a lighting error. nbohr1more also made the awesome font for the preview att the missions section! And last but no least The Dark Mod team for making all of this possible! All your hard work is much appreciated! Errors and other dissapointing stuff No map Sitting ai will sometimes sit midair if alerted Sleeping ai might also sleep midair if alerted. Crouching on the balcony with your light on may/will cause fps to drop. No title on loading screen (Prefer it that way) Tell me if you spot anymore and i will update. Enjoy http://www.thedarkmo...ndetails/?id=56 http://www.gamefront...ftheo__2__2.pk4 http://www.4shared.c...theo__2__2.html /Theo
-
When talking about a possible libre version of TDM (https://forums.thedarkmod.com/index.php?/topic/22346-libre-version-of-tdm/) it seems we believe all media/gamedata included in TDM is licensed CC-BY-NC-SA. I am not familiar with how the process of adding new media/gamedata works today; I have seen files uploaded to the bugtracker which developers then commit to SVN, but I don't know if there are other ways. It may be a good idea to implement a process that when new components (media/gamedata included in TDM) are added, the contributor is asked to be explicit about the license (a choice which may defaults to their previous preference, for usability). It won't fix the past, but it may help in the future. This will make it easy for contributors to add future data under a more permissive license if they choose. Libre media can be added and its license can be tracked, rather than assumed to be CC-BY-NC-SA. I suggest looking at how Wikimedia Commons has implemented this: the contributor state the source and license at the time the data is uploaded. This can be done either by providing urls or by saying "It's my work and I choose this licsense". The first step could be to add a way to keep track of each filepath in SVN, author, license, sources. Start by setting the value for each file's license to "(default/legacy CC-BY-NC-SA)". Possible implementations for a user interface for new additions are: * Use our own wiki, which runs Mediawiki (same as Wikimedia Commons). I see several benefits of this, but we also need a way to accept uploads of batches, not just single files. * Look at how other open source projects have solved this. There may be more appropriate solutions available. ... but I'll leave the implementation open. Suggestions are very welcome! If the author of each file already in SVN can be tracked, then it may be possible that the author is willing to give a blanket permission for all their past files in one statement, and all their files in SVN can be updated in one commit. A productive contributor willing to release some of their work under a more permissive license could make a big change. If Dark Radiant would support letting mappers search media/gamedata by license (does it already?), it would make it easier for mappers to create a completely libre mission, which would help facilitate a TDM-libre release. If I understand things correctly. This post does not address all details and it may contain misunderstandings or assumptions, but it's a start. Also relevant: * Is there a compiled and maintained list of recommended or deprecated resources for mappers to use? * https://forums.thedarkmod.com/index.php?/topic/20311-external-art-assets-licensing/
-
New script for mappers: my flavour of a fog density fading script. To add this to your FM, add the line "thread FogIntensityLoop();" to your map's void main() function (see the example in fogfade.script) and set "fog_fade" "1" on each foglight to enable script control of it. Set "fog_intensity_multiplier" on each info_location entity to change how thick the fog is in that location (practically speaking it's a multiplier for visibility distance). Lastly, "fog_fade_speed" on each foglight determines how quickly it will change its density. The speed scales with the current value of shaderParm3, using shaderParm3 = 1000 as a baseline. So i.e. if shaderParm is currently at 1/10th of 1000, then fade speed will be 1/10th as fast. Differences to Obsttorte's script: https://forums.thedarkmod.com/index.php?/topic/14394-apples-and-peaches-obsttortes-mapping-and-scripting-thread/&do=findComment&comment=310436 my script uses fog lights you created, rather than creating one for you. Obsttorte's script will delete the foglight if entering a fogfree zone and recreate it later more than one fog light can be controlled (however, no per-fog-light level of control) adding this to the map requires adding a line to your void main() script, rather than adding an info_locations_settings entity with a custom scriptobject spawnarg in my script, mappers set a multiplier of fog visibility distance (shaderParm3), while in Obsttorte's script a "fog_density" spawnarg is used as an alternative to shaderParm3 smaller and less compactly written script fogfade.scriptfogfade.map
-
Hello, everyone! In this multi-part, comprehensive tutorial I will introduce you to a new light type that has been available in The Dark Mod since version 2.06, what it does, why you would want to use it and how to implement it in your Fan Missions. This tutorial is aimed at the intermediate mapper. Explanations of how to use DarkRadiant, write material files, etc. are outside of its scope. I will, however, aim to be thorough and explain the relevant concepts comprehensively. Let us begin by delineating the sections of the tutorial: Part 1 will walk you through four, distinct ways to add ambient light to a scene, the last way using irradiance environment maps (or IEMs). Lighting a scene with an IEM is considered image-based lighting. Explaining this concept is not in the scope of this tutorial; rather, we will compare and contrast our currently available methods with this new one. If you already understand the benefits IBL confers, you may consider this introductory section superfluous. Part 2 will review the current state of cubemap lights in TDM, brief you on capturing an environment cubemap inside TDM and note limitations you may run into. Three cubemap filtering applications will be introduced and reviewed. Part 3 will go into further detail of the types of inputs and outputs required by each program and give a walkthrough of the simplest way to get an irradiance map working in-game. Part 4 will guide you through two additional, different workflows of how to convert your cubemap to an irradiance map and unstitch it back to the six separate image files that the engine needs. Part 5 will conclude the tutorial with some considerations as to the scalability of the methods hitherto explained and will enumerate some good practices in creating IEMs. Typical scenes will be considered. Essential links and resources will be posted here and a succinct list of the steps and tools needed for each workflow will be summarized, for quick reference. Without further ado, let us begin. Part 1 Imagine the scene. You’ve just made a great environment for your map, you’ve got your geometry exactly how you want it… but there’s a problem. Nobody can appreciate your efforts if they can’t see anything! [Fig. 1] This will be the test scene for the rest of our tutorial — I would tell you to “get acquainted with it” but it’s rather hard to, at the moment. The Dark Mod is a game where the interplay between light and shadow is of great importance. Placing lights is designing gameplay. In this example scene, a corridor with two windows, I have decided to place 3 lights for the player to stealth his way around. Two lights from the windows streak down across the floor and a third, placeholder light for a fixture later to be added, is shining behind me, at one end of the corridor. Strictly speaking, this is sufficient for gameplay in my case. It is plainly obvious, however, that the scene looks bad, incomplete. “Gameplay” lights aside, the rest of the environment is pitch black. This is undesirable for two reasons. It looks wrong. In real life, lights bounce off surfaces and diffuse in all directions. This diffused, omni-directional lighting is called ambient lighting and its emitment can be termed irradiance. You may contrast this with directional lighting radiating from a point, which is called point lighting and its emitment — radiance. One can argue that ambient lighting sells the realism of a scene. Be that as it may, suppose we disregard scary, real-life optics and set concerns of “realism” aside… It’s bad gameplay. Being in darkness is a positive for the player avatar, but looking at darkness is a negative for the player, themselves. They need to differentiate obstacles and objects in the environment to move their avatar. Our current light level makes the scene illegible. The eye strain involved in reading the environment in these light conditions may well give your player a headache, figurative and literal, and greatly distract them from enjoying your level. This tutorial assumes you use DarkRadiant or are at least aware of idtech4’s light types. From my earlier explanation, you can see the parallels between the real life point/ambient light dichotomy and the aptly named “point” and “ambient” light types that you can use in the editor. For further review, you can consult our wiki. Seeing as how there is a danger in confusing the terms here, I will hereafter refer to real life ambient light as “irradiant light”, to differentiate it from the TDM ambient lights, which are our engine’s practical implementation of the optical phenomenon. A similar distinction between “radiant light” and point lights will be made for the same reason. Back to our problem. Knowing, now, that most all your scenes should have irradiant light in addition to radiant light, let’s try (and fail, instructionally) to fix up our gloomy corridor. [Fig. 2] The easiest and ugliest solution: ambient lights. Atdm:ambient_world is a game entity that is basically an ambient light with no falloff, modifiable by the location system. One of the first things we all do when starting a new map is putting an ambient_world in it. In the above image, the darkness problem is solved by raising the ambient light level using ambient_world (or via an info_location entity). Practically every Dark Mod mission solves its darkness problem1 like this. Entirely relying on the global ambient light, however, is far from ideal and I argue that it solves neither of our two, aforementioned problems. Ambient_world provides irradiant light and you may further modulate its color and brightness per location. However, said color and brightness are constant across the entire scene. This is neither realistic, nor does it reduce eye strain. It only makes the scene marginally more legible. Let’s abandon this uniform lighting approach and try a different solution that’s more scene-specific. [Fig. 3] Non-uniform, but has unintended consequences. Our global ambient now down to a negligible level, the next logical approach would be hand-placed ambient lights with falloff, like ambient_biground. Two are placed here, supplementing our window point lights. Combining ambient and point lights may not be standard TDM practice, but multiple idtech4 tutorials extol the virtues of this method. I, myself, have used it in King of Diamonds. For instance, in the Parkins residence, the red room with the fireplace has ambient lights coupled to both the electric light and the fire flame. They color the shadows and enrich the scene, and they get toggled alongside their parent (point) lights, whenever they change state (extinguished/relit). This is markedly better than before, but to be honest anything is, and you may notice some unintended side-effects. The AI I’ve placed in the middle of the ambient light’s volume gets omnidirectionally illuminated far more than any of the walls, by virtue of how light projection in the engine works. Moving the ambient lights’ centers closer to the windows would alleviate this, but would introduce another issue — the wall would get lit on the other side as well. Ambient lights don’t cast shadows, meaning they go through walls. You could solve this by creating custom ambient light projection textures, but at this point we are three ad hocs in and this is getting needlessly complicated. I concede that this method has limited use cases but illuminating big spaces that AI can move through, like our corridor, isn’t one of them. Let’s move on. [Fig. 4] More directional, but looks off. I have personally been using this method in my WIP maps a lot. For development (vs. release), I even recommend it. A point light instead of an ambient light is used here. The texture is either “biground1” or “defaultpointlight” (the latter here). The light does not cast shadows, and its light origin is set at one side of the corridor, illuminating it at an angle. This solves the problem of omnidirectional illumination for props or AI in the middle of the light volume, you can now see that the AI is lit from the back rather than from all sides. In addition, the point light provides that which the ambient one cannot, namely specular and normal interaction, two very important features that help our players read the environment better. This is about as good as you can get but there are still some niggling problems. The scene still looks too monochromatic and dark. From experience, I can tell you that this method looks good in certain scenes, but this is clearly not one of them. Sure, we can use two, non-shadowcasting point lights instead of one, aligned to our windows like in the previous example, we can even artfully combine local and global ambient lights to furnish the scene further, but by this point we will have multiple light entities placed, which is unwieldy to work with and possibly detrimental to performance. Another problem is that a point light’s movable light origin helps combat ambient omnidirectionality, but its projection texture still illuminates things the strongest in the middle of its volume. I have made multiple experiments with editing the Z-projection falloff texture of these lights and the results have all left me unsatisfied. It just does not look right. A final, more intellectual criticism against this method is that this does not, in a technical sense, supply irradiant light. Nothing here is diffuse, this is just radiant light pretending the best it can. [Fig. 5] The irradiance map method provides the best looking solution to imbuing your scene with an ambient glow. This is the corridor lit with irradiance map lights, a new lighting method introduced in The Dark Mod 2.06. Note the subtle gradients on the left wall and the bounced, orange light on the right column. Note the agreeable light on the AI. Comparing the previous methods and this, it is plainly obvious that an irradiance environment map looks the most realistic and defines the environment far better than any of the other solutions. Why exactly does this image look better than the others? You can inform yourself on image-based lighting and the nature of diffuse irradiance, but images speak louder than words. As you can see, the fact of the matter is that the effect, subtle as it may be, substantially improves the realism of the scene, at least compared to the methods previously available to us. Procuring irradiance environment maps for use in lighting your level will hereafter be the chief subject of this tutorial. The next part will review environment cubemap capture in TDM, the makeIrradiance keyword and three external applications that you can use to convert a TDM cubemap into an irradiance map. 1 “ Note that the color buffer is cleared to black: Doom3 world is naturally pitch black since there is no "ambient" light: In order to be visible a surface/polygon must interact. with a light. This explains why Doom3 was so dark ! “ [source] Part 2 Cubemaps are not new to The Dark Mod. The skybox materials in some of our prefabs are cubemaps, some glass and polished tile materials use cubemaps to fake reflections for cheap. Cubemap lights, however, are comparatively new. The wiki page linked earlier describes these two, new light types that were added in TDM 2.05. cubicLight is a shadow-casting light with true spherical falloff. An example of such a light can be found in the core files, “lights/cubic/tdm_lampshade_cubic”. ambientCubicLight is the light type we will be focusing on. Prior to TDM 2.06, it acted as a movable, on-demand reflection dispenser, making surfaces in its radius reflect a pre-set cubemap, much like glass. After 2.06, the old behavior was discarded and ambientCubicLight was converted to accept industry standard irradiance environment maps. Irradiance environment maps (IEMs) are what we want to make, so perhaps the first thing to make clear is that they aren’t really “handmade”. An IEM is the output of a filtering process (convolution) which requires an input in the form of a regular environment cubemap. In other words, if we want to make an IEM, we need a regular cubemap, ideally one depicting our environment — in this case, the corridor. I say a snapshot of the environment is ideal for lighting it because this emulates how irradiant light in the real world works. All radiating surfaces are recorded in our cubemap, our ambient optic array as it were, then blurred, or convoluted, to approximate light scatter and diffusion, then the in-game light “shines” this approximation of irradiant light back to the surfaces. There is a bit of a “chicken and the egg” situation here, if your scene is dark to begin with, wouldn’t you just get a dark irradiance map and accomplish nothing? In the captured cubemap faces in Fig. 6, you may notice that the environment looks different than what I’ve shown so far. I used two ambient lights to brighten up the windows for a better final irradiance result. I’ve “primed the pump”, so to speak. You can ignore this conundrum for the moment, ways to set up your scenes for better results, or priming the pump correctly, will be discussed at the end of the tutorial. Capturing the Environment The wiki has a tutorial on capturing cubemaps by angua, but it is woefully out of date. Let me run you through the process for 2.07 really briefly. To start with, I fly to approx. the center of the corridor with noclip. I then type “envshot t 256” in the console. This outputs six .tga images in the <root>/env folder, simply named “t”, sized 256x256 px and constituting the six sides of a cube and depicting the entire environment. This is how they look in the folder: [Fig. 6] The six cube faces in the folder. Of note here is that I do not need to switch to a 640x480 resolution, neither do I need to rename these files, they can already be used in an ambientCubicLight. Setting Up the Lights For brevity’s sake, I’ll skip explaining material definitions, if you’ve ever added a custom texture to your map, you know how to do this. Suffice it to say, it is much the same with custom lights. In your <root>/materials/my_cool_cubemaps.mtr file, you should have something like this: lights/ambientcube/my_test_IEM_light { ambientCubicLight { forceHighQuality //cameraCubeMap makeIrradiance(env/t) cameraCubeMap env/t colored zeroClamp } } We’ll play with the commented out line in just a bit. Firstly, let’s place the actual light in DarkRadiant. It’s as simple as creating a new light or two and setting them up in much the same way you would a regular ambient light. I select the appropriate light texture from the list, “my_test_IEM_light” in the “ambientcube” subfolder and I leave the light colored pure white. [Fig. 7] The corridor in DR, top view, with the ambient cubic lights highlighted. I can place one that fills the volume or two that stagger the effect somewhat. Remember that these lights still have a spherical falloff. Preference and experimentation will prove what looks best to you. Please note that what the material we defined does is load a cubemap while we established that ambientCubicLights only work with irradiance maps. Let’s see if this causes any problems in-game. I save the map and run it in game to see the results. If I already have TDM running, I type “reloadDecls” in the console to reload my material files and “reloadImages” to reload the .tga images in the /env folder. [Fig. 8] Well this looks completely wrong, big surprise. Wouldn’t you know it, putting a cubemap in the place of an irradiance map doesn’t quite work. Everything in the scene, especially the AI, looks to be bathed in slick oil. Even if a material doesn’t have a specular map, it won’t matter, the ambientCubicLight will produce specular reflections like this. Let’s compare how our cubemap .tga files compares with the IEM .tgas we’ll have by the end of the tutorial: [Fig. 9] t_back.tga is the back face of the environment cubemap, tIEM_back.tga is the back face of the irradiance map derived from it. As you can see, the IEM image looks very different. If I were to use “env/tIEM” instead of “env/t” in the material definition above, I would get the proper result, as seen in the last screenshot of part 1. So it is that we need a properly filtered IEM for our lights to work correctly. Speaking of that mtr def though, let’s not invoke an irradiance map we haven’t learned to convert yet. Let’s try an automatic, in-engine way to convert cubemaps to IEMs, namely the makeIrradiance material keyword. makeIrradiance and Its Limitations Let’s uncomment the sixth line in that definition and comment out the seventh. cameraCubeMap makeIrradiance(env/t) //cameraCubeMap env/t Here is a picture of how a cubemap ran through the makeIrradiance keyword looks like: [Fig. 10] Say ‘Hi’ to our friend in the back, the normalmap test cylinder. It’s a custom texture I’ve made to demonstrate cubemap interactions in a clean way. Hey now, this looks pretty nice! The scene is a bit greener than before, but you may even argue it looks more pleasing to the eyes. Unfortunately, the devil is in the details. Let’s compare the makeIrradiance keyword’s output with the custom made irradiance map setup seen at the end of part 1. [Fig. 11, 12] A closer look at the brick texture reveals that the undesired specular highlighting is still present. The normal map test cylinder confirms that the reason for this is the noisy output of the makeIrradiance keyword. The in-engine conversion is algorithmic, more specifically, it doesn't allow us to directly compare .tga files like we did above. Were we able to, however, I'm sure the makeIrradiance IEM would look grainy and rough compared to the smooth gradient of the IEM you’ll have by the end of this tutorial. The makeIrradiance keyword is good for quick testing but it won’t allow you fine control over your irradiance map. If we want the light to look proper, we need a dedicated cubemap filtering software. A Review of Cubemap Filtering Software Here I’ll introduce three programs you can produce an irradiance map with. In the coming parts, I will present you with a guide for working with each one of them. I should also note that installing all of these is trivial, so I’ll skip that instructional step when describing their workflows. I will not relay you any ad copy, as you can already read it on these programs’ websites. I’ll just list the advantages and disadvantages that concern us. Lys https://www.knaldtech.com/lys/ Advantages: Good UI, rich image manipulation options, working radiance/specular map filtering with multiple convolution algorithms. Disadvantages: $50 price tag, limited import/export options, only available on Windows 64-bit systems. cmftStudio https://github.com/dariomanesku/cmftStudio Advantages: Available on Windows, OSX and Linux, free, open source software, command line interface available. Disadvantages: Somewhat confusing UI, limited import options, missing features (radiance/specular map filtering is broken, fullscreen doesn’t work), 32-bit binaries need to be built from source (I will provide a 32-bit Windows executable at the end of the tutorial). Modified CubeMapGen https://seblagarde.wordpress.com/2012/06/10/amd-cubemapgen-for-physically-based-rendering/ Advantages: Free software, quickest to work with (clarified later). Disadvantages: Bad UI, only Windows binaries available, subpar IEM export due to bad image adjustment options. Let’s take a break at this point and come back to these programs in part 3. A lot of caveats need to be expounded on as to which of these three is the “best” software for making an irradiance map for our purposes. Neither of these programs has a discreet workflow; rather, the workflow will include or exclude certain additional programs and steps depending on which app you choose to work with. It will dovetail and be similar in all cases. Part 3 The aim of this tutorial is twofold. First, it aims to provide the most hands-free and time-efficient method of converting an envshot, environment cubemap to an IEM and getting it working in-game. The second is using as few applications as possible and keeping them all free software that is available for download, much like TDM itself. The tutorial was originally going to only cover IEM production through Lys, as that was the app I used to test the whole process with. I soon realized that it would be inconsiderate of me to suggest you buy a fifty dollar product for a single step in a process that adds comparatively little to the value of a FM, if we’re being honest (if you asked me, the community would benefit far more from a level design tutorial than a technical one like this, but hey, maybe later, I’m filling a niche right now that nobody else has filled). This led me to seek out open-source alternatives to Lys, such as Cubemapgen, which I knew of and cmftStudio, which I did not. I will preempt my own explanations and tell you right away that, in my opinion, cmftStudio is the program you should use for IEM creation. This comes with one big caveat, however, which I’m about to get into. Six Faces on a Cross and The Photoshop Problem Let’s review. Taking an envshot in-game gives you six separate images that are game-ready. Meaning, you get six, split cubemap faces as an output, you need six, split irradiance map faces as an input. This is a problem, because neither Lys nor cmftStudio accept a sequence of images as such. They need to be stitched together in a cube cross, a single image of the unwrapped cube, like this: [Fig. 13] From Lys. Our cubemap has been stitched into a cross and the “Debug Cube Map Face Position” option has been checked, showing the orientations of each face. In Lys only panoramas, sphere maps and cube maps can be loaded into the program. The first two do not concern us, the third specifically refers to a single image file. Therefore, to import a TDM envshot into Lys you need to stitch your cubemap into a cross. Furthermore, Lys’ export also outputs a cubemap cross, therefore you also need to unstitch the cubemap into its faces afterwards if you want to use it in TDM. In cmftStudio you can import single map faces! Well… no, you can’t. The readme on GitHub boasts “Input and output types: cubemap, cube cross, latlong, face list, horizontal and vertical strip.” but this is false. The UI will not allow you to select multiple files on import, rendering the “face list” input type impossible.2 Therefore, to import a TDM envshot into cmftStudio you need to stitch your cubemap into a cross. Fortunately, the “face list” export type does work! Therefore, you don’t need to unstitch the cubemap manually, cmftStudio will export individual faces for you. In both of these cases, then, you need a cubemap cross. For this tutorial I will use Adobe Photoshop, a commercial piece of software, to stitch our faces into a cubemap in an automated fashion (using Photoshop’s Actions). This is the big caveat to using cmftStudio, even if you do not want to buy Lys, PS is still a prerequisite for working with both programs. There are, of course, open source alternatives to Photoshop, such as GIMP, but it is specifically Photoshop’s Action functionality that will power these workflows. GIMP has its own Actions in the form of Macros, but they are written with python. GIMP is not a software suite that I use, neither is python a language I am proficient with. Out of deference for those who don’t have, or like working with, Photoshop, I will later go through the steps I take inside the image editor in some detail, in order for the studious reader to reconstruct them, if they so desire, in their image editing software of choice. At any rate, and at the risk of sounding a little presumptuous, I take it that, as creative types, most of you already have Photoshop on your computers. 2 An asterisk regarding the “impossibility” of this. cmftStudio is a GUI for cmft, a command line interface that does the same stuff but inside a command prompt. I need to stress that I am certain multiple faces can be inputted in the command line, but messing with unwieldy prompts or writing batch files is neither time-saving nor user-friendly. This tutorial is aimed at the average mapper, but a coder might find the versatility offered in cmft interesting. The Cubemapgen Workflow You will have noticed that I purposefully omitted Cubemapgen from the previous discussion. This is because working with Cubemapgen, wonderfully, does not need Photoshop to be involved! Cubemapgen both accepts individual cubemap faces as input and exports individual irradiance map faces as output. Why, then, did I even waste your time with all the talk of Lys, cmftStudio and Photoshop? Well, woefully, Cubemapgen’s irradiance maps look poor at worst and inconsistent at best. Comparing IEMs exported from Lys and cmftStudio, you will see that both look practically the same, which is good! An IEM exported from Cubemapgen, by default, is far too desaturated and the confusing UI does not help in bringing it to parity with the other two programs. If you work solely with Cubemapgen, you won’t even know what ‘parity’ is, since you won’t have a standard to compare to. [Fig. 14] A comparison between the same irradiance map face, exported with the different apps at their respective, default settings. Brightened and enlarged for legibility. This may not bother you and I concede that it is a small price to pay for those not interested in working with Photoshop. The Cubemapgen workflow is so easy to describe that I will in fact do just that, now. After I do so, however, I will argue that it flies in the face of one of the aims of this tutorial, namely: efficiency. Step 1: Load the cubemap faces into Cubemapgen. Returning to specifics, you will remember that we have, at the moment, six .tga cubemap faces in a folder that we want to convert to six irradiance map faces. With Cubemapgen open, direct your attention to these buttons: [Fig. 15] You can load a cubemap face by pressing the corresponding button or using the hotkey ‘F’. To ensure the image faces the correct way, you must load it in the corresponding “slot”, from the Select Cubemap Face dropdown menu above, or by pressing the 1-6 number keys on your keyboard. Here is a helpful list: X+ Face <1> corresponds to *_right X- Face <2> corresponds to *_left Y+ Face <3> corresponds to *_up Y- Face <4> corresponds to *_down Z+ Face <5> corresponds to *_forward Z- Face <6> corresponds to *_back ...with the asterisk representing the name of your cubemap. With enough practice, you can get quite proficient in loading cubemap faces using keyboard shortcuts. Note that the ‘Skybox’ option in the blue panel is checked, I recommend you use it. Step 2: Generate the Irradiance Map [Fig. 16] The corridor environment cubemap loaded in and filtered to an irradiance map. The options on the right are my attempt to get the IEM to look right, though they are by no means prescriptive. Generating an IEM with Modified CubeMapGen 1.66 is as easy as checking the ‘Irradiance cubemap’ checkbox and hitting ‘Filter Cubemap’ in the red panel. There are numerous other options there, but most will have no effect with the checkbox on. For more information, consult the Sébastien Lagarde blog post that you got the app from. I leave it to you to experiment with the input and output gamma sliders, you really have no set standard on how your irradiance map is supposed to look, so unfortunately you’ll have to eyeball it and rely on trial and error. Two things are important to note. The ‘Output Cube Size’ box in the red panel is the resolution that you want your IEM to export to. In the yellow panel, make sure you set the output as RGB rather than RGBA! We don’t need alpha channels in our images. Step 3: Export Irradiance Map Faces Back in the green panel, click the ‘Save CubeMap to Images’ button. Save the images as .tga with a descriptive name. [Fig. 17] The exported irradiance map faces in the folder. These files still need to be renamed with appropriate suffixes in order to constitute a readable cubemap for the engine. The nomenclature is the same as the table above: “c00” is the X+ Face, to be renamed “right”, “c01” is the X- Face and so on. Right left, up down, forward and back. That’s the order! This is all there is to this workflow. A “cameraCubeMap env/testshot” in the light material will give us a result that will look, at the very least, better than the inbuilt makeIrradiance material keyword. [Fig. 17] The map ended up being a little bright. Feel free to open Fig. 4 and this in seperate tabs and compare the Lys/cmft export with the cubemapgen one. A Review of the Workflow Time for the promised criticism to this workflow. I already stated my distaste for the lack of a standardised set of filtering values with this method. The lack of any kind of preset system for saving the values you like makes working with Cubemapgen even more slipshod. Additionally, in part 2, I said that Cubemapgen is the fastest to work with, but this needs to be qualified. What we just did was convert one cubemap to an irradiance map, but a typical game level ought to use more than a single IEM. Premeditation and capturing fake, “generic” environment cubemaps (e.g. setting up a “blue light on the right, orange on the left” room or a “bright skylight above, brown floor” room, then capturing them with envshot) might allow for some judicious reuse and keep your distinct IEM light definition count down to single digits, but you can only go so far with that. I am not arguing here for an ambient cubic light in every scene either, certainly only those that you deem need the extra attention, or those for which the regular lighting methods enumerated in Part 1 do not quite work. I do tentatively assume, though, that for an average level you would use between one and two dozen distinct IEMs. Keep in mind that commercial games, with their automated probe systems for capturing environment shots, use many, many more than that. With about 20 cubemaps to be converted and 6 faces each to load into Cubemapgen, you’ll be going through the same motions 120 whole times (saving and renaming not included). If you decide to do this in one sitting (and you should, as Cubemapgen, to reiterate, does not keep settings between sessions), you are in for a very tedious process that, while effective, is not very efficient. The simple fact is that loading six things one by one is just slower than loading a single thing once! The “single thing” I’m referring to is, of course, the single, stitched cubemap cross texture. In the next part, I will go into detail regarding how to make a cubemap cross in Photoshop in preparation for cmftStudio and Lys. It will initially seem a far more time-consuming process to you than the Cubemapgen workflow, but through the magic of automation and the Actions feature, you will be able to accomplish the cubemap stitch process in as little as a drag-and-drop into PS and a single click. The best thing is that after we go through the steps, you won’t have to recreate them yourself, as I will provide you with a custom Actions .atn file and save you the effort. I advise you not to skip the explanations, however. The keen-eyed among you may have noticed that you can also load a cube cross in Cubemapgen. If you want to use both Cubemapgen and Photoshop together to automate your Cubemapgen workflow, be aware that Cubemap gen takes crosses that have a different orientation than the ones Lys and cmftStudio use. My macros (actions) are designed for the latter, so if you want to adjust them for Cubemapgen you would do well to study my steps and modify them appropriately. For the moment, you’ve been given the barebones essentials needed to capture an envshot, convert it to an irradiance map and put it in your level at an appropriate location, all without needing a single piece of proprietary software. You can stop here and start cranking out irradiance maps to your heart’s content, but if you’re in the mood for some more serious automation, consider the next section.
-
This is what I personally know about it: No diffuse means "skip the diffuse path code for this light" essentially means don't add/mix this light color/texture color info unto the surface, only use it as a simple b&w light. No specular is essentially the same but for specular textures, it skips the specular component/code/calculation and makes the light less heavy by removing the specular effect. About performance impact, for today GPU's, I don't think is as important as it was in 2004, but still, I'm sure it does have a small impact on performance, for the better of course, specially if done for many lights, but will also make them way more unrealistic. Btw lights with both no diffuse and nospecular, were used for the "projected shadows" or lights used to project fake "shadows" unto surfaces, this was used in Doom 3 to simulate basic, shadow mapping, for rotating fans and grid materials that use alpha textures, all because stencil shadows ignore those. Now that TDM has real shadow mapping, IMO such lights are less necessary and I wouldn't recommend their use for such effect. Thou lights with no specular and no normal mapping, are still useful for some effects, like simulating casting colored light from painted glass, like something bellow, and they are faster then normal lights:
-
@snatcher I understand that when you feel your work doesn't live up to your goals that you don't want it out in the wild advertising your own perceived shortcomings but that leads to a troubling dilemma of authors who are never satisfied with their work offering fleeting access to their in-progress designs then rescinding them or allowing them to be lost. When I was a member of Doom3world forums, I would often see members do interesting experiments and sometimes that work would languish until someone new would examine it and pickup the torch. This seemed like a perfectly viable system until Doom3world was killed by spambots and countless projects and conceptual works were lost. I guess what I am trying to say is that mods don't need to be perfect to be valuable. If they contain some grain of a useable feature they might be adapted by mission authors in custom scenarios. They might offer instructive details that others trying to achieve the same results can examine. It would be great if known compelling works were kept somewhere safe other than via forum attachments and temporary file sharing sites. I suppose we used to collect such things in our internal SVN for safe keeping but even that isn't always viable. If folks would rather not post beta or incomplete mods to TDM's Moddb page, perhaps they would consider creating their own Moddb page or allow them to be added to my page for safe keeping. Please don't look at this as some sort of pressure campaign or anything. I fully understand anyone not willing to put their name next to something they aren't fully happy with. As a general proviso, ( if possible \ permitted ) I just want to prevent the loss of some valuable investigations and formative works. The end of Doom3world was a digital apocalypse similar to the death of photobucket. It is one of my greatest fears that TDM will become a digital memory with only the skeletons of old forum threads at the wayback archive site.
-
Congrats on the release! Remember to check ThiefGuild as well as the DarkFate forums (via Google Translate) for additional feedback.
-

Allow broadhead arrows to break glass lamps
grodenglaive replied to MirceaKitsune's topic in The Dark Mod
Adding a switch breaks it. It would require a workaround since the switch acts like a trigger, similar to the arrow. Interestingly If you turn it off and on again the bulb shatters, but the light also comes on. -
Just curious, based on this discussion: http://forums.thedarkmod.com/topic/19239-soft-r-gamma/?p=427350
-
Allow broadhead arrows to break glass lamps
MirceaKitsune replied to MirceaKitsune's topic in The Dark Mod
Oh wow, that is amazing! It must require a custom script I imagine? Didn't think that was possible even with one and the S/R system, that's very impressive. Definitely curious about a few things: Does it distinguish between collisions with the glass and frame? If the arrow hits a metal part it shouldn't do anything, it should only break if the glass in particular was hit. If the lamp is triggered by a switch, does flipping it no longer turn the light on once it's broken? Can you use a broken skin rather than model? With some lamps it would be easier to only change the skin and replace the glass, of course both should be supported based on what works best for each lamp. -
Complaint From Players The player must pick up candles before extinguishing them, and then the player must remember to drop the candle. The player must drag a body before shouldering it (picking it up), and the player must remember to frob again to stop dragging the body. The player finds this annoying or easy to make mistakes. For players who ghost, some of them have the goal of returning objects back to their original positions. With the current "pick up, use item, and drop" system, the item might not return easily or at all to its original position. For example, a candlestick might bounce off its holder. (See player quotes at the bottom.) Bug Tracker https://bugs.thedarkmod.com/view.php?id=6316 Problems to Solve How can the "pick up" step be eliminated so that the player can directly use or interact with the item where it is in the game world? How can so much key pressing and mouse clicking be eliminated when the player wants to directly use an item? How can candles be extinguished and lanterns toggled off/on without first picking them up? How can bodies be shouldered without first dragging them? Solution Design Goals Make TDM easier for new players while also improving it for longtime players. Reduce tedious steps for common frob interactions. Make it intuitive so that menu settings are unnecessary. Do not introduce bugs or break the game. Terms frob -- the frob button action happens instantly. hold frob -- the frob button is held for 200ms before the action happens. (This can be changed via cvar: 200ms by default.) Proposed Solution Note: Some issues have been struckthrough to show changes since the patch has been updated. Change how frobbing works for bodies, candles, and lanterns. For bodies: Frob to shoulder (pick up) a body. Second frob to drop shouldered body, while allowing frob on doors, switches, etc. Hold frob (key down) to start drag, continue to hold frob (key down) to drag body, and then release frob (key up) to stop dragging body. Also, a body can be dragged immediately by holding frob and moving the mouse. For candles/lanterns: Frob to extinguish candles and toggle off/on lanterns. Hold frob to pick it up, and then frob again to drop. Frob to pick it up, and then frob again to drop. Hold frob to extinguish candles and toggle off/on lanterns. For food: Frob to pick it up, and then frob again to drop. Hold frob to eat food. For other items: No change. New cvar "tdm_frobhold_delay", default:"200" The frob hold delay (in ms) before drag or extinguish. Set to 0 for TDM v2.11 (and prior) behavior. Solution Benefits Bodies: New players will have less to learn to get started moving knocked out guards. With TDM v2.11 and earlier, some players have played several missions before realizing that they could shoulder a body instead of dragging it long distances. Frob to shoulder body matches Thief, so longtime Thief players will find it familiar. Second frob drops a shouldered body. Players still have the ability to both shoulder and drag bodies. Compatible with the new auto-search bodies feature. Dragging feels more natural -- just grab, hold, and drop with a single button press. There is no longer the need to press the button twice. Also, it's no longer possible to walk away from a body while unintentionally dragging it. Set "tdm_frobhold_delay" cvar to delay of 0 to restore TDM v2.11 (and prior) behavior. Candles: New players will have less to learn to get started extinguishing candles. With TDM v2.11 and earlier, some players didn't know they could extinguish candles by picking them up and using them. Instead, they resorted to throwing them to extinguish them or hiding them. Hold frob to extinguish a candle feels like "pinching" it out. Once a candle is picked up, players still have the ability to manipulate and use them the same way they are used to in TDM v2.11 and earlier. For players who ghost and have the goal of putting objects back to their original positions, they'll have an easier time and not have to deal with candles popping off their holders when trying to place them back carefully. Set "tdm_frobhold_delay" cvar to delay of 0 to restore TDM v2.11 (and prior) behavior. Solution Issues Bodies: Frob does not drop a shouldered body, so that might be unexpected for new players. This is also different than Thief where a second frob will drop a body. "Use Inv. Item" or "Drop Inv. Item" drops the body. This is the same as TDM v2.11 and earlier. This is the price to pay for being able to frob (open/close) doors while shouldering a body. Patch was updated to drop body on second frob, while allowing frob on doors, switches, etc. Candles: Picking up a candle or lantern requires a slight delay, because the player must hold the frob button. The player might unintentionally extinguish a candle while moving it if they hold down frob. The player will need to learn that holding frob will extinguish the candle. The player can change the delay period via the "tdm_frobhold_delay" cvar. Also, when the cvar is set to a delay of 0, the behavior matches TDM v2.11 and earlier, meaning the player would have to first "Frob/Interact" to pick up the candle and then press "Use Inv. Item" to extinguish it. Some players might unintentionally extinguish a candle when they are trying to move it or pick it up. They need to make sure to hold frob to initiate moving the candle. When a candle is unlit, it will highlight but do nothing on frob. That might confuse players. However, the player will likely learn after extinguishing several candles that an unlit candle still highlights. It makes sense that an already-extinguished candle cannot be extinguished on frob. The official "Training Mission" might need to have its instructions updated to correctly guide the player through candle manipulation training. Updating the training mission to include the hold frob to extinguish would probably be helpful. Similar Solutions In Fallout 4, frob uses an item and long-press frob picks it up. Goldwell's mission, "Accountant 2: New In Town", has candles that extinguish on frob without the need of picking them up first. Snatcher's TDM Modpack includes a "Blow / Ignite" item that allows the player to blow out candles Wesp5's Unofficial Patch provides a way to directly extinguish movable candles by frobbing. Demonstration Videos Note: The last two videos don't quite demonstrate the latest patch anymore. But the gist is the same. This feature proposal is best experienced in game, but some demonstration videos are better than nothing. The following videos show either a clear improvement or that the player is not slowed down with the change in controls. For example, "long-press" sounds long, but it really isn't. Video: Body Shouldering and Dragging The purpose of this video is to show that frob to shoulder a body is fast and long-press frob to drag a body is fast enough and accurate. Video: Long-Press Frob to Pick Up Candle The purpose of this video is to show how the long-press frob to pick up a candle isn't really much slower than regular frob. Video: Frob to Extinguish The purpose of this video -- if a bit contrived -- is to show the efficiency and precision of this proposed feature. The task in the video was for the player to as quickly and accurately as possible extinguish candles and put them back in their original positions. On the left, TDM v2.11 is shown. The player has to highlight each candle, press "Frob/Interact" to pick up, press "Use Inv. Item" to extinguish, make sure the candle is back in place, and finally press "Frob/Interact" to drop the candle. The result shows mistakes and candles getting misplaced. On the right, the proposed feature is shown. The player frobs to extinguish the candles. The result shows no mistakes and candles are kept in their original positions. Special Thanks @Wellingtoncrab was instrumental in improving this feature during its early stages. We had many discussions covering varying scenarios, pros, and cons, and how it would affect the gameplay and player experience. Originally, I had a completely different solution that added a special "use modifier" keybinding. He suggested the frob to use and long-press frob to pick up mechanics. I coded it up, gave it a try, and found it to be too good. Without his feedback and patience, this feature wouldn't be as good as it is. Thank you, @Wellingtoncrab! And, of note, @Wellingtoncrab hasn't been able to try it in game yet, because I'm using Linux and can't compile a Windows build for him. So, if this feature isn't good, that's my fault. Code Patch I'll post the code patch in another post below this one so that folks who compile TDM themselves can give this proposal a try in game. And, if you do, I look forward to your feedback! Player Complaints TTLG (2023-01-10) Player 1: TDM Forums (2021-03-13) Player 2: Player 3: TDM Forums (2023-06-17) Player 4: TDM Discord (2021-05-18) Player 5: TDM Discord (2023-02-14) Player 6: Player 7: Player 8:
- 324 replies
-
- 12
-
-