Search the Community
Searched results for '/tags/forums/poor model texture alignment/' or tags 'forums/poor model texture alignment/q=/tags/forums/poor model texture alignment/&'.
-
So I have two textures that I created for a roulette table I made in DR, but the bloody textures is appearing incorrectly in DR and in-game. The transparents bits are appearingh black, and whites bits transparent. Could someone have a look and see what the hell I have done wrong please? -mega
-
Sign out of TDM forums, close browser, re-open later, "Huh...I'm still signed in?"
- Show previous comments 1 more
-

Its a cookie thats keeping you logged in.
-

Another visitor! Stay a while; stay forever!
-

We´re like a Shalebridge Cradle: what comes in must never leave

-
I finally grew tired of this wood panel's poor bump map: and created a new one: Should I check it into SVN, or let a bumpmap expert create the replacement? Thanks
-
I'm playing around with DarkRadiant and can't seem to import a new texture. It doesn't display in the media browser. I'm using Gimp and it's plugins for all the processing. =Texture creation= - create Diffusemap from image at 1024x1024 -- save as 'wall_01.tga' -- save as DDS (Compression DXT1, Mipmaps yes/no?) - create Normalmap from image -- save as 'wall_01_local.tga' (uncompressed) - create editor image -- save as 'wall_01_ed.jpg' =Texture locations= For Diffusemap: /DarkMod/maps/mymod/dds/textures/darkmod/plaster/wall_01.dds --(can I add the original TGA texture here instead? Wiki is not clear) For Normalmap and editor image: /DarkMod/maps/mymod/textures/darkmod/plaster/wall_01_local.tga /DarkMod/maps/mymod/textures/darkmod/plaster/wall_01_ed.jpg Also? /DarkMod/textures/darkmod/plaster/wall_01_local.tga /DarkMod/textures/darkmod/plaster/wall_01_ed.jpg --(wiki mentions this is for 'mapping' but it's not clear if it's required?) =Material File= textures/darkmod/plaster/wall_01 { stone qer_editorimage textures/darkmod/plaster/wall_01_ed diffusemap textures/darkmod/plaster/wall_01 bumpmap textures/darkmod/plaster/wall_01_local } + ambient info and map location (textures/darkmod/plaster/wall_01) Is this the correct process? Am I missing something obvious?
-
working on a new project: tdmlauncher. for more info http://forums.thedarkmod.com/topic/18310-the-dark-mod-launcher/
-
Taken from discussion started here (internal link). The issue of alignment of patches upon creation needs some TLC. Currently it's inconsistent and confusing -- some patches are created aligned up-down, others aligned with the current ortho view. Some decisions need to be made for less clear-cut cases. Please provide any thought out opinions on the matter below, then hopefully we can get a single consistent tracker entry out of it. ---- The request is that all patches be created axis-aligned from current ortho view. Currently, they're inconsistent in alignment, top down or sideways. What this would mean is, regardless of current alignment, whatever ortho viewport currently has focus (?) determines which way the patch is created: 1. Simple mesh: If looking "down"/vertically (in a global sense), the patch is created as if laying on the ground, as if it were a floor or carpet. If looking "sideways"/horizontally (in a global sense hereafter) the patch would be up on a side, facing the ortho came, as if it were a wall. Note: This patch already works as described. ---- 2. Bevel: If looking down, create the bevel on its "side." That is, looking in XY view, the mapper would see the curve bending 90 degrees. If looking horizontally, create the bevel "standing up" (as an arch). Thus, the mapper similarly sees the curve. Curved side up please (standing), as an arch, not down (sitting) as a bowl. Arches are much more common. In both views, the "curve is seen" by the mapper, not the "spine" of the patch. A benefit of this is that it immediately shows the mapper, "hey a curve to work with!", as opposed to "uh what is that rectangle with a line through it?" And the mapper can start shaping immediately. If they made it rotated to what they want, they can easily turn it without transforming through other axis or simply delete, rethink, and recreate it. Note: Currently, this does the opposite of this request; it instead shows the "spine" of a bevel in the active ortho. Yes, this conflicts with the previous tracker request for bevel creation, but that was operating under the assumption that bevels were the only patches that would see change in this matter, so "better than nothing." It was shortsighted, I admit. A single consistent system for all patches would be more beneficial and not confusing. ---- 3. Cone/Cylinder: We need a decision here. Are all cones and cylinders created "standing?" That is, longways up-down? Or should they be rotated with the view? To do so is more consistent with the request, and of course more functional. But, should they be axis-aligned with the ortho view (that is, looking down the length of the cone or cylinder), or anti-axis-aligned, which "shows the curve" as above for bevels? Whoever makes the most logical argument for one choice or the other gets a gold star. ---- 4. End caps: Currently creates them "laying on the side" regardless of ortho alignment. Suggestion is that they be oriented axis aligned with ortho view as with the request for bevels above. That is, the mapper always "sees the curve" from their current ortho view, upon creation. ------------------- Thoughts and opinions requested.
-
Learning and experimenting with LOD spawnargs for meshes. Even one LOD model and e.g. turning off shadows for LOD stage 2 can really make a difference when it comes to scene complexity. I love it!
-
Can someone point me to the thread with this info, as I cant seem to find it. I vaguely remember that this could be done with a shaderparm? and the texture would only moved when triggered..?
-
I love the texture changes in 1.08. The original visportal texture was one hell of an eye sore!
- Show previous comments 1 more
-

+2
-

My pleasure - Please be on the lookout for other editor textures which look bad. Shout when you find some
-

Thank you serpentine! I also love the unique ladder textures too. Eg climbable foilage, climbable chains. Its great fun finding all these neat little changes in DR.
-
The Black Parade is coming! http://www.ttlg.com/forums/showthread.php?t=146501 Woo-hoo!
- Show previous comments 8 more
-
I suppose making a campaign as an individual and building for Thief Gold go hand & hand. You need to be pretty obsessed to do either. XD
-

I'm just very happy to see how much work still goes on with the original Thief games. Good mods = long life after release!
-

Magnificent!
-
Hot T2 update: http://www.ttlg.com/forums/showthread.php?t=146446
-

What? The mysterious saviour is back to make our Thief lives happier again after such a long absence? I can't believe it's true! Wow thanks so much!
-
He's like our own Game of Thones mystery crow that leads us to secret treasures.
-
Or to an old tree with lots of zombies around.. xD
-
-
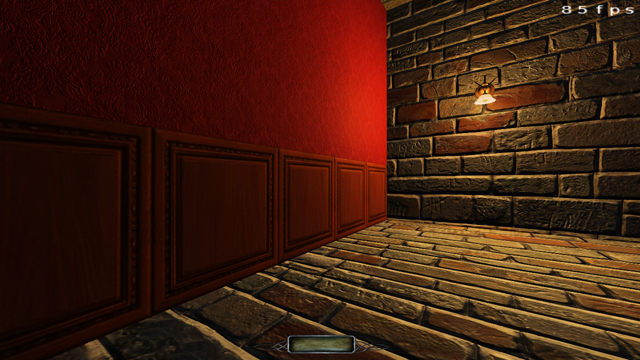
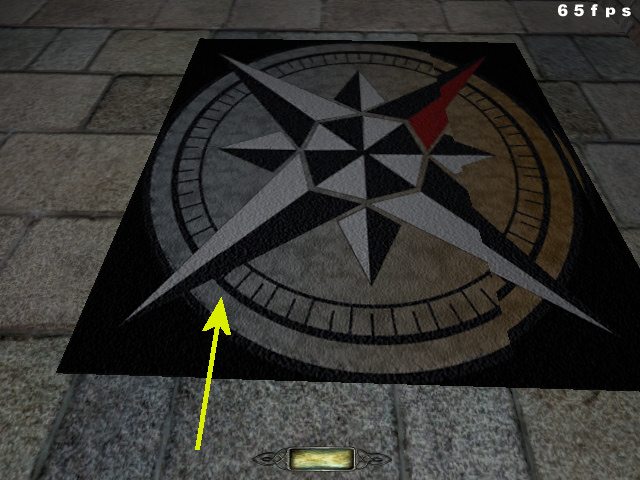
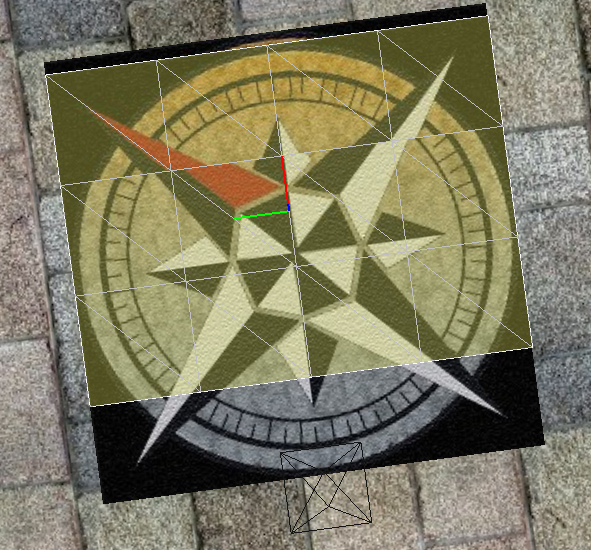
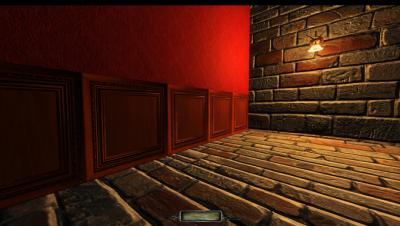
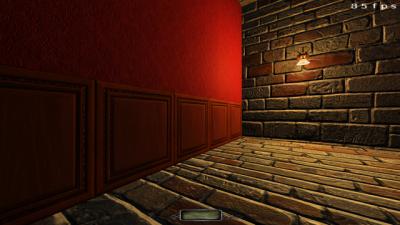
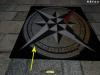
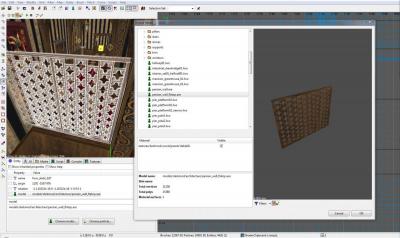
No guarantee I'll continue with this as I don't know yet how practical it might be but thought it worth blogging progress and gettings suggestions, input from others. Basically, texture blending doesn't work on brushes and patches but it does on models. If you know how to model you can make your own custom terrain but most mappers won't so I'm seeing if it is practical to make some generic models panels that can be overlaid, eg, over the edge of a grass/stone path, snow/cobbles, ash/fireplace, to soften the edges. The panels are just flat surfaces much like patches but they behave differently to patches so you cannot just adjust them to fit where you want; they are fixed models. My idea is to make a range of lengths and curves like a model railway that you join together and overly where needed. Also planned are heaps for dirt, ash, etc. You might even need to plan your path etc by laying these down first then making your brush/patchwork later. Dunno yet. I know nothing yet. Once done, the mapper can easily duplicate the model(s) he wants and change the two textures to any pair that he wants so no need for thousands of combinations. They are also tiny files - 17K was this one) This next test is to verify if I can get the model texture scale to match the terrain texture scale, and more importantly, get them to join seamlessly. The answer is yes. I'm using the compass image as a test because I can easily detect alignment and other errors. In the first image below you see in-game a brush set into the floor with the compass texture set at default 0.5 scale 'natural'. Laid upon it is a model test panel with the same texture and scale. You might think you can see the join but that is a glitch in my model and the actual model edge is invisible - it merges seamlessly I'm glad to say and is approximately along the line that the yellow arrow is pointing. In the next image you see the same in Dark Radiant with the model highlighted. One thing I didn't tell you. As well as the glitch in the model, I also had to rotate the texture 90 degrees on the brush to align. Dunno why but I should be able to just rotate it on the model later so that won't be needed. The brush is 128 x 128. The model is 128 x 96. Reason is that I figured 32 solid grass, 32 solid stone, 32 in the middle would be gradient. Again, I have no idea if that is the best way to do it. Maybe just the 32 gradient is enough. And how wide should this overlap be anyway for general use? 32 is about a man's stride I guess.

-
So I created a Persian wall, but the poly/tris count is insane, despite making the majority of it out of patches and reducing the tessellation to as low as possible. Before I ask someone to look at this for me, if there any way (other then the can-o-worms that is Blender) that I can use to said amounts. The poly/tris count atm is 15/21k, prefabs - mega Just an fyi - I only had 3 instances of this model and a cut down prfab and it caused the the to crash with a malloc error
-
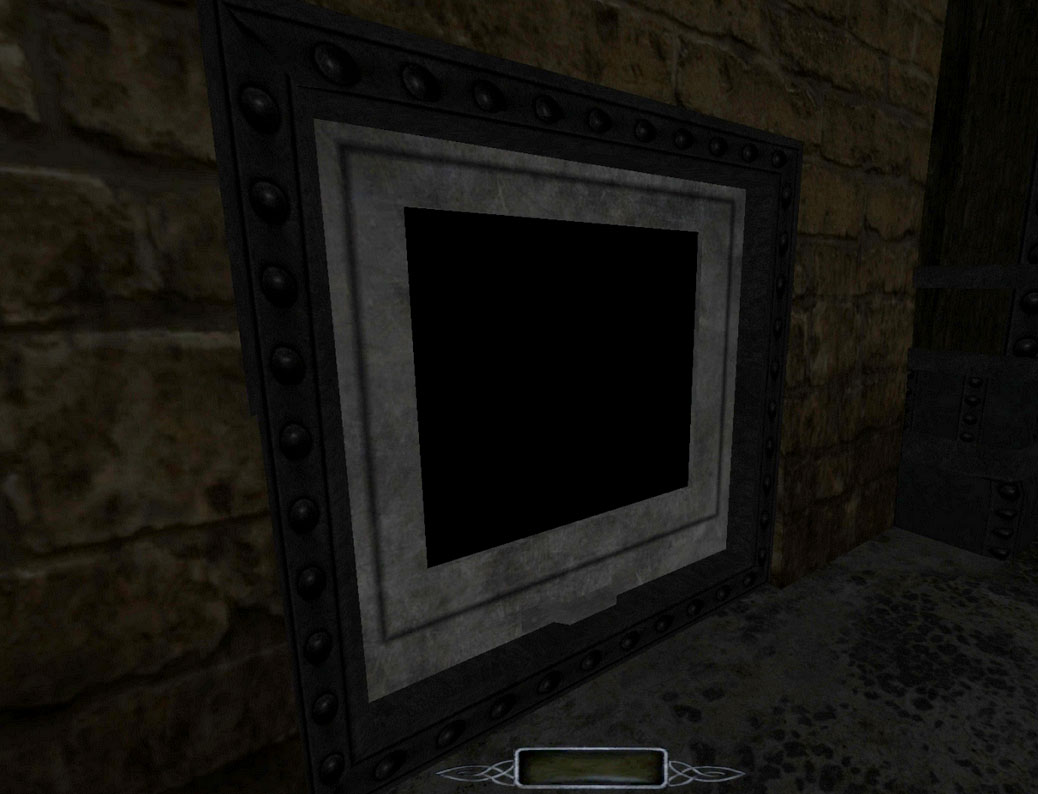
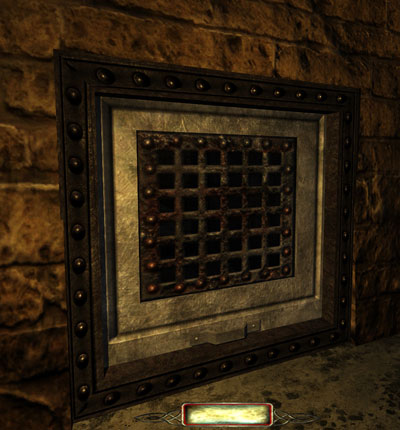
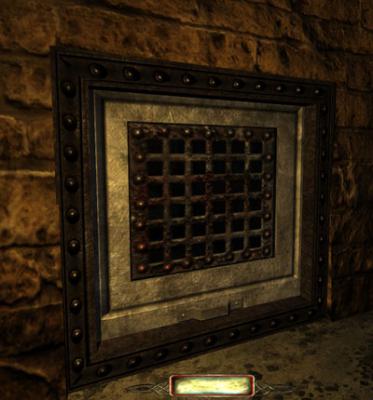
During beta-testing, I had one tester report a black texture, but everyone else see is properly. The texture has an alpha channel, but that is the only unusual thing about it I can think of. Anyone able to test this, just add the entity movers/doors/atdm:mover_door_industrial01_grate to your map and see how it appears to you. Below is how it looks to me, and how it looks to Xarg:

-
I'm wondering if anyone ever checks new posts in the Fan Missions Forums? I've posted 4 questions asking for help for 4 different missions that I can't finish because I"m stuck, and I don't get any help. I posted a question this morning so I don't expect an answer right away for that one. Its frustrating because I would like to finish them. I've read through the posts for each mission and I'm not getting anything from them. If there's someone who could help me I'd really appreciate it. Thanks I guess I'm spoiled from the TTLG forums.
-
Is it just me or does the TDM Forums favicon look whack?
- Show previous comments 1 more
-
Yes I was annoyed by that, too!
-
Glad I wasn't the only one noticing that.
-
Will drop Taaaki a message.
-
Hi all, me again Now that I've learned how to take screenies on DM (thanks to Aluminumhaste) I wanted to post one that I took but I got an error saying that the image ext that I used was not allowed in these forums, It was .jpg so I changed it to .png and I got the same error again. They're on Photobucket.
-
Hey All, Does anyone have any coloured plaster and coloured broken plaster textures with material files and bump mapping? I'm working on a new map, in Venice, and it needs a lot of those sorts of textures, and we have so few coloured concrete textures. I need some oranges, yellows and ochres mostly. Preferably aged, and broken, though I can work around it if it's not broken, but I desperately need some to make it look convincing. If you've got some, could you post a link here for me please? Due credit of course. Thanks Neon
-
As I would like to put in a request for a version with a shorter chain and without a chain - - models/darkmod/lights/non-extinguishable/lamp_hanging02.ase
-
A long time ago I asked someone if they could help me with getting a Dark Mod character skeleton for my modeling project but I abandoned it for a long time. A while ago I picked it up again and finished the model. So here it is. A Mantian huntress. Inspired by the Bugbeasts in Thief 1. I had the idea that they have an insect colony type society, except where the gender roles are reversed. A single male king and a whole hive of female drones and warriors. They live in huge jungles far outside The City, but a few of them remain in the ranks of pagans. They have peculiar feet that are great for climbing trees and hanging upside down to ambush prey. They have a thin and flexible but sturdy exoskeleton and sensitive eyes that can see a wide angle. Their pinkie fingers are shaped like deadly scimitars that can stab, cut and slice with ease. Even with a normal map the polycount is pretty high. About 30k quads, but I'm sure that can be lowered with a little work. Textures are diffuse, normal, specular amount and specular color. FYI the model is not yet rigged with a Dark Mod skeleton, just a temporary one for posing. Trying to bind it to an MD5 mesh skeleton can prove difficult due to MD5 models being in a T-pose and my character being in an A-pose. Model and render made with Modo 901
- 27 replies
-
- 16
-

-
Hey, I've noticed a lot of sites with good free models, and was wondering what stands in the way of using some of these free to use ones? Especially .gsm and .3ds models.
-
In Doomedit you can simply align a texture by clicking on one brush, and then MMB click on the other brush. How do I do this in DR?
-
https://www.youtube.com/watch?v=rLtVh_1Bwfw
-
- 1
-