Search the Community
Searched results for '/tags/forums/reason/' or tags 'forums/reason/q=/tags/forums/reason/&'.
-
Synology DSM 5.0 broken - http://forums.thedarkmod.com/topic/16190-synology-dsm-50-heads-up/
-
- Show previous comments 1 more
-

Part two is recorded. Now I only need to add the subs and rip it down. Should be on youtube tomorrow.
-

can't wait.
-
I didn't know that first trick setting up the base, so thanks for that.
-
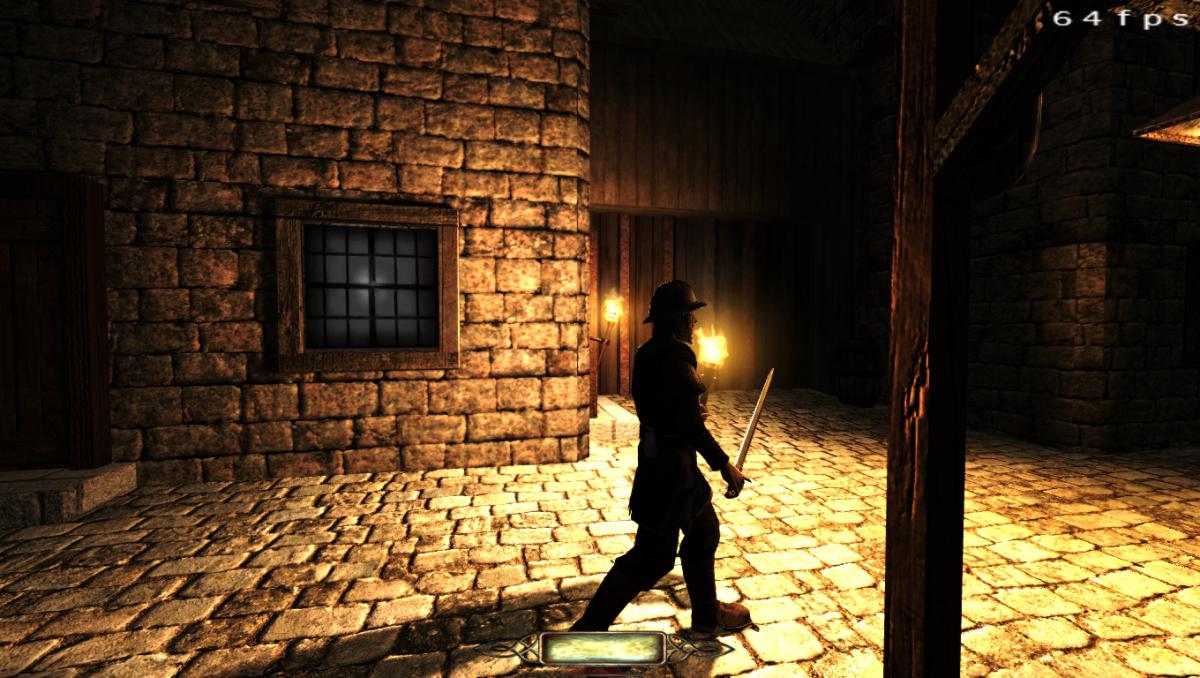
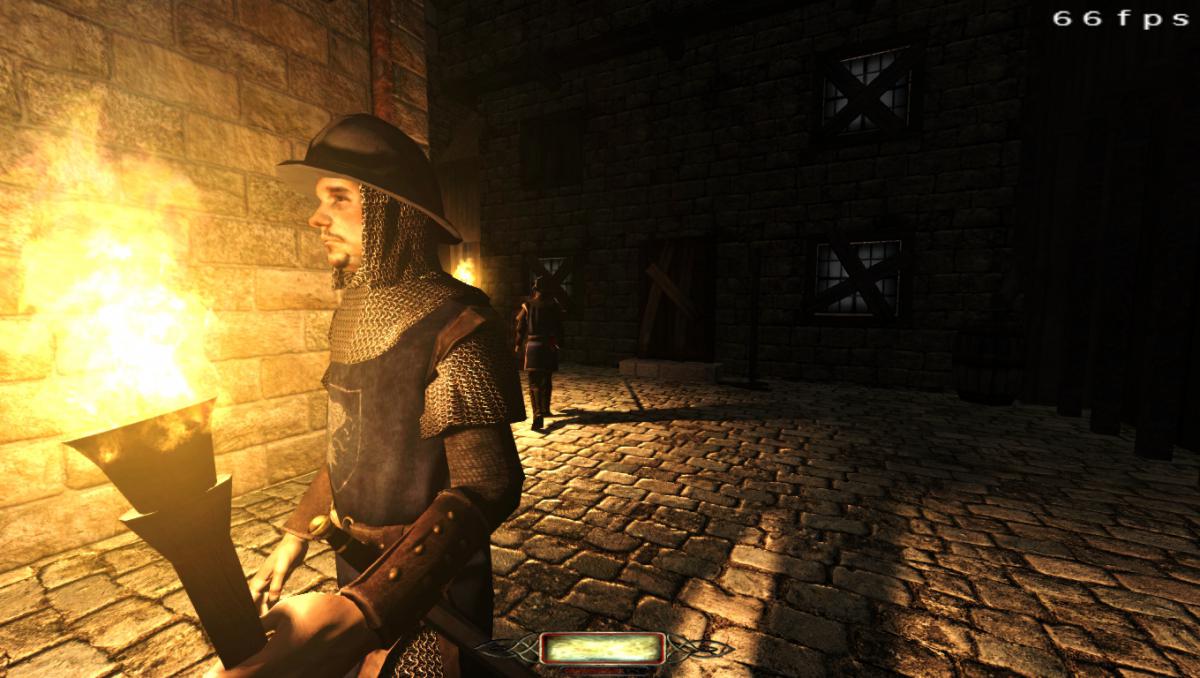
Ok so I think I might have found the reason for the performance delta between my wife's computer and mine. While working on getting the Nvidia card working, I manually set the 1st PCIe slot to x16 Gen4, whereas it was at 4x Gen3 before. HWinfo confirms this: (PCIe v4.0 x16 (16.0 GT/s) @ x16 (16.0 GT/s)) Now in Scroll of Remembrance at the start, I get 140 fps. Must have been bandwidth starved at 4x Gen3 PCIe.
-
@snatcher I understand that when you feel your work doesn't live up to your goals that you don't want it out in the wild advertising your own perceived shortcomings but that leads to a troubling dilemma of authors who are never satisfied with their work offering fleeting access to their in-progress designs then rescinding them or allowing them to be lost. When I was a member of Doom3world forums, I would often see members do interesting experiments and sometimes that work would languish until someone new would examine it and pickup the torch. This seemed like a perfectly viable system until Doom3world was killed by spambots and countless projects and conceptual works were lost. I guess what I am trying to say is that mods don't need to be perfect to be valuable. If they contain some grain of a useable feature they might be adapted by mission authors in custom scenarios. They might offer instructive details that others trying to achieve the same results can examine. It would be great if known compelling works were kept somewhere safe other than via forum attachments and temporary file sharing sites. I suppose we used to collect such things in our internal SVN for safe keeping but even that isn't always viable. If folks would rather not post beta or incomplete mods to TDM's Moddb page, perhaps they would consider creating their own Moddb page or allow them to be added to my page for safe keeping. Please don't look at this as some sort of pressure campaign or anything. I fully understand anyone not willing to put their name next to something they aren't fully happy with. As a general proviso, ( if possible \ permitted ) I just want to prevent the loss of some valuable investigations and formative works. The end of Doom3world was a digital apocalypse similar to the death of photobucket. It is one of my greatest fears that TDM will become a digital memory with only the skeletons of old forum threads at the wayback archive site.
-
Congrats on the release! Remember to check ThiefGuild as well as the DarkFate forums (via Google Translate) for additional feedback.
-
That suggests that a window is being created but for some reason you can't see it. Do you have (or have you ever had) more than one monitor connected to this laptop? Is it possible the window is appearing on a different "screen" (perhaps one that is no longer connected or working)?
-
Just curious, based on this discussion: http://forums.thedarkmod.com/topic/19239-soft-r-gamma/?p=427350
-
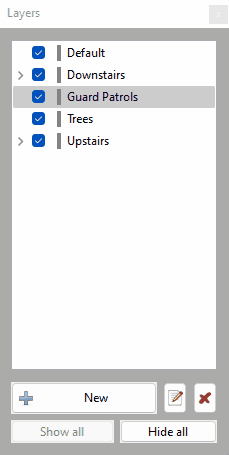
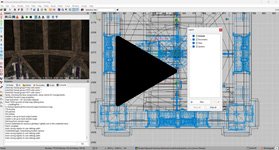
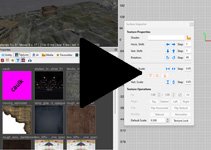
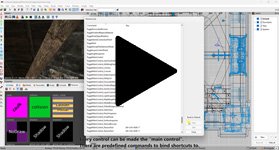
DarkRadiant 3.6.0 is ready for download. What's new: Feature: Selection Focus (Ctrl-F) Feature: Add Radiant.findEntityByName script method Feature: Media Browser shows a thumbnail preview when selecting folders Feature: Map is remembering layer visibilities between loads Fixed: ModelDefs are shown in T-pose Fixed: Patch vertices are the wrong colour Fixed: Shader Clipboard source gets cleared on 'copy shader' operation Fixed: Nodes of hidden layers are still visible after loading the map Fixed: Can't close properties window Fixed: Merge Action rendering is broken Fixed: After using ToggleMainControl_Camera, the center panel is grey after restart Fixed: When using ToggleMainControl_Camera, arrow keys cannot be used to move the viewer Fixed: Property Panel not remembering undocked/closed tabs Fixed: Texture Tool not updating during manipulation Fixed: Orthoview ignores filters for surfaces in models Fixed: Blue dot when selecting one face removed Tweak: Conversation Editor: double-click opens selected conversation Tweak: Preference option to disable drag select in camera view Tweak: ESC key should clear the resource tree view filter text Tweak: New layers function: tooltip popup getting in the way Feature: Selection Focus (see video) Windows and Mac Downloads are available on Github: https://github.com/codereader/DarkRadiant/releases/tag/3.6.0 and of course linked from the website https://www.darkradiant.net Thanks to all the awesome people who keep using DarkRadiant to create Fan Missions - they are the main reason for me to keep going. Please report any bugs or feature requests here in these forums, following these guidelines: Bugs (including steps for reproduction) can go directly on the tracker. When unsure about a bug/issue, feel free to ask. If you run into a crash, please record a crashdump: Crashdump Instructions Feature requests should be suggested (and possibly discussed) here in these forums before they may be added to the tracker. The list of changes can be found on the our bugtracker changelog. Have fun mapping!
- 12 replies
-
- 14
-

-

-
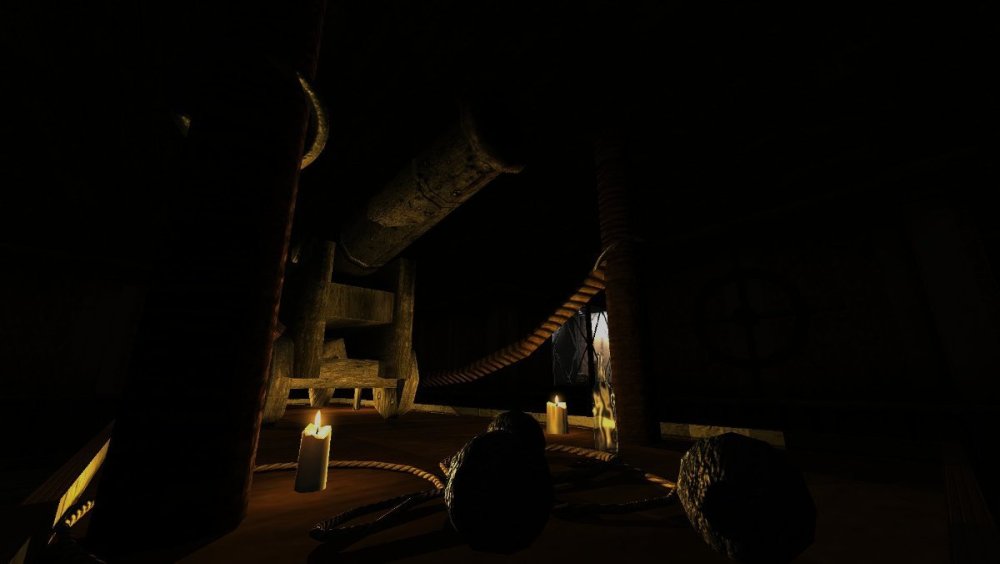
Ever since I worked on "Chalice of Kings" with Bikerdude, I have wanted to get flame particles with new particle glares into the core mod. My reasoning was that the candles have glares and the un-glared torches look mismatched. This proposal was met with mixed reactions, so (knowing the history of TDM feature proposals...) I have created a technical demo. You may download it here: zzz_flameglare.pk4.txt (fixed) Just rename without the .txt extension at the end and place it in your Darkmod directory. Here are some screens. Using particles for this is probably the wrong way to go now that Duzenko has an emissive light feature in his branch: http://forums.thedarkmod.com/topic/19659-feature-request-emissive-materialsvolumetric-lights/


-
 Version 2 now available for download. The main fixes are these pesky frob issues. I wasn't able to determine the cause, but assuming it was something to do with the scripts, I've rearranged things a little bit so they are no longer needed. Also I would normally wait a while longer before releasing a fix, but this issue seems to have affected a few people. Apologies again, it never came up in beta for whatever reason. @nbohr1more could you please add to the mission database? Changelog: https://github.com/FrostSalamander/lt3/releases/tag/2.0 Download: Github: https://github.com/FrostSalamander/lt3/releases/download/2.0/faffairs.pk4 Proton: https://drive.proton.me/urls/JPRPJQH8Z8#Pl2a52TQy0WA
 -
DarkRadiant 3.4.0 is ready for download. What's new: Feature: Allow Layers to be arranged into a Tree Fixed: Readable Editor displays "shader not found" in view Fixed: Undoing snap to grid with prefabs causes crash Fixed: Include doc in building instructions Fixed: Decal textures causes DR to crash - (textures/darkmod/decals/dirt/long_drip_pattern01) Fixed: Skin chooser: double click on materials list closes window Fixed: Selecting and deselecting a filtered child brush through layers leaves the brush selected Fixed: Material editor re-sorts stages on pasting image map resulting in wrong material stages list and wrong selected stage Fixed: Crash on start if engine path is choosen (Doom 3) Feature: Layers can now be arranged to form a hierarchy Windows and Mac Downloads are available on Github: https://github.com/codereader/DarkRadiant/releases/tag/3.4.0 and of course linked from the website https://www.darkradiant.net Thanks to all the awesome people who keep using DarkRadiant to create Fan Missions - they are the main reason for me to keep going. Please report any bugs or feature requests here in these forums, following these guidelines: Bugs (including steps for reproduction) can go directly on the tracker. When unsure about a bug/issue, feel free to ask. If you run into a crash, please record a crashdump: Crashdump Instructions Feature requests should be suggested (and possibly discussed) here in these forums before they may be added to the tracker. The list of changes can be found on the our bugtracker changelog. Have fun mapping!
-
DarkRadiant 3.5.0 is ready for download. What's new: Feature: More customisable layout, all windows and panes can be dragged and arranged Layouts like Embedded, Regular and Splitpane are superseded and have been removed Tweak: The LayerControlPanel's tooltip popup is now less annoying Tweak: Clarify distinction between Shadow render mode and other render modes Fixed: Show/hide Light Volumes for combined entities inconsistent Fixed: Currently applied particleDef not selected in Particle Selector Fixed: Layer visibility checkbox not reacting to double-clicks Fixed: Cannot toggle visibility of layers in Linux Fixed: Drag-and-dropping layers is not working in Linux Feature: Customisable Layout (click to see the videos) Windows and Mac Downloads are available on Github: https://github.com/codereader/DarkRadiant/releases/tag/3.5.0 and of course linked from the website https://www.darkradiant.net Thanks to all the awesome people who keep using DarkRadiant to create Fan Missions - they are the main reason for me to keep going. Please report any bugs or feature requests here in these forums, following these guidelines: Bugs (including steps for reproduction) can go directly on the tracker. When unsure about a bug/issue, feel free to ask. If you run into a crash, please record a crashdump: Crashdump Instructions Feature requests should be suggested (and possibly discussed) here in these forums before they may be added to the tracker. The list of changes can be found on the our bugtracker changelog. Have fun mapping!
- 85 replies
-
- 16
-
-
-
Hi! Just noticed a weird thing. I've been playing the No Honor Among Thieves fan mission, the first two missions so far, and in both of them, bodies of knocked out guards would change position after a while (after I moved away from the body and returned later). Say, I knocked out a guard and stuffed the body to the side of a corridor near the wall, when I returned after some time from another part of the level, the body was in the middle of the corridor. This has happened a few times, mostly with bodies placed near walls. I'm not sure if it's just this mission, or a general problem though (this is a the first FM I played recently).
-
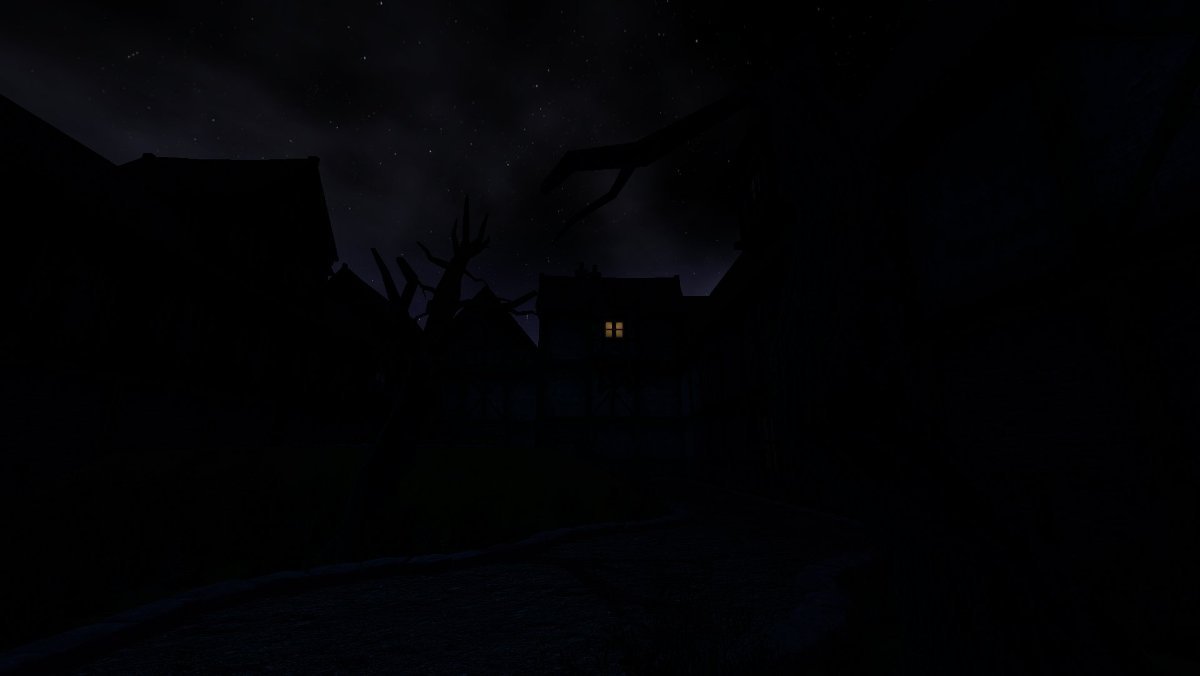
"...to a robber whose soul is in his profession, there is a lure about a very old and feeble man who pays for his few necessities with Spanish gold." Good day, TDM community! I'm Ansome, a long-time forums lurker, and I'm here to recruit beta testers for my first FM: "The Terrible Old Man", based on H.P. Lovecraft's short story of the same name. This is a short (30-45 minute), story-driven FM with plenty of readables and a gloomy atmosphere. Do keep in mind that this is a more linear FM than you may be used to as it was deemed necessary for the purposes of the story's pacing. Regardless, the player does still have a degree of freedom in tackling challenges in the latter half of the FM. If this sounds interesting to you, please head over to the beta testing thread I will be posting shortly. Thank you!
- 6 replies
-
- 10
-
-
Urinating AI is finished and available. Enjoy! http://forums.thedarkmod.com/topic/14969-sothas-animations/page__view__findpost__p__329579
-
 What a mission. All my favorite ingredients - verticality, story, secrets, optional objectives - in a setting previously unseen in TDM as far as I recall. Sneaking about felt incredibly fresh, almost like a different game. And the doors with the little latches! Unlocking shortcuts and passages was most enjoyable, which is good as it's a big mission with lots to explore. The Ministry was pretty challenging to stealth through with all the cameras, particularly the one on the top floor. Found 9 secrets out of 10 and a bit over 5k loot. The problem with the unfrobbable lever in the fireplace and the two display cases also happened to me. For some reason, when I started the mission again and noclipped over to the fireplace lever and the two display cases in the jewel shop, all of them could be frobbed. I guess I must have done something weird in the playthrough to change that.
 -
TDM 2.12 is ready for beta test This is how to get beta versions: Upgrade from any version (fast): 1 - Start tdm_installer in darkmod folder. 2 - On the first screen, check "Get custom version" and click "Next". Choose the first name in beta/2.12 list, should look like "beta212-NN". 3 - Click on "Refresh" button to ensure that it is not going to download too much stuff. 4 - Continue installing with "Next". Fresh install (slow): 1 - Create darkmod folder anywhere you like. 2 - Download the TDM Installer from downloads section of the website. Extract tdm_installer executable from the downloaded ZIP and place it into your darkmod folder. 3 - Start tdm_installer (in case of Linux, first edit file permissions to allow executing it). 4 - On the first screen, check "Get custom version" and click "Next". Choose the first name in beta/2.12 list, should look like "beta212-NN". 5 - Continue installing with "Next". In general, upgrade is recommended over fresh install. If you don't want to lose your current TDM installation, then you can copy the whole TDM directory and upgrade the copy. This way you can have both 2.12 beta and 2.11 at the same time. At the end of installation, tdm_installer resets your config by renaming darkmod.cfg to darkmod_{datatime}.cfg. This is a recommended procedure on upgrade, otherwise you are likely to have issues due to old config. If you need your old config for some reason, you can always find it in darkmod folder. 32-bit builds of TDM are deprecated, so they are not present in beta versions. They will be added at the very end of beta phase. Notes 1 - Please try to be specific when reporting a problem. What you were doing, where you were when the problem occurred, can you reproduce it, etc. This wiki article provides many suggestions for good bug reports. 2 - Make sure to check every mission for update just before playing it. We expect to apply small tweaks to missions during this beta phase. 3 - This effort is to find out if we broke anything in TDM with our 2.12 changes, if a new 2.12 feature isn't working correctly. We won't be trying to fix bugs that have been around for a long time. Instead, we will create an issue in bugtracker (if not yet present), to fix it after beta. 4 - If you find something wrong, it would be helpful if you report whether the issue happens in 2.11 too. By the way, you can easily get 2.11 version: just copy your darkmod folder and run tdm_installer on the copy, selecting "release211" on the custom version screen. Thank you for testing !
- 213 replies
-
- 10
-
-
-
I've been asked to post about the increased mantle speed in 2.12 as some folks have been curious about the change. After a lengthy internal discussion along with testing and input by several mission authors, it was agreed internally to increase the mantle speed. But during 2.12 beta testing, we would like feedback on any bugs or issues that you find. The reason for the change was to address feedback from players that mantling was "painfully slow", "slow and clunky", "mantling sucks - it's just slow", and so on. Several mission authors supported making mantling faster, and so the dev team decided to tweak the mantle speed. There were multiple implementations with the final implementation being a compromise. Also, the dev team studied some parkour techniques to ensure that the mantle phases and timings were good enough. The changes include: The original mantle phases were kept as that is what longtime TDM players are used to, and only the duration of some phases were reduced. Changed the pull animation so that it has both acceleration and deceleration rather than just deceleration. Tweaked the swaying back and forth a bit to work better with the increased speed. When the player in forced into the crouch position at the end of a mantle, crouch near the end of the mantle rather than the beginning in order to remove the sudden "dip" of the player's view. A majority of dev team members were against adding a menu setting, so being able to toggle between the old and new mantle speeds will not happen. It is recommended that you try out different "Mantle Roll" values as some prefer "0.1" and others prefer "0.5". We hope you all enjoy this adjusted mantle speed, especially the overhead mantle, which is now more consistent with the other mantle types. Bug tracker: https://bugs.thedarkmod.com/view.php?id=6343
-
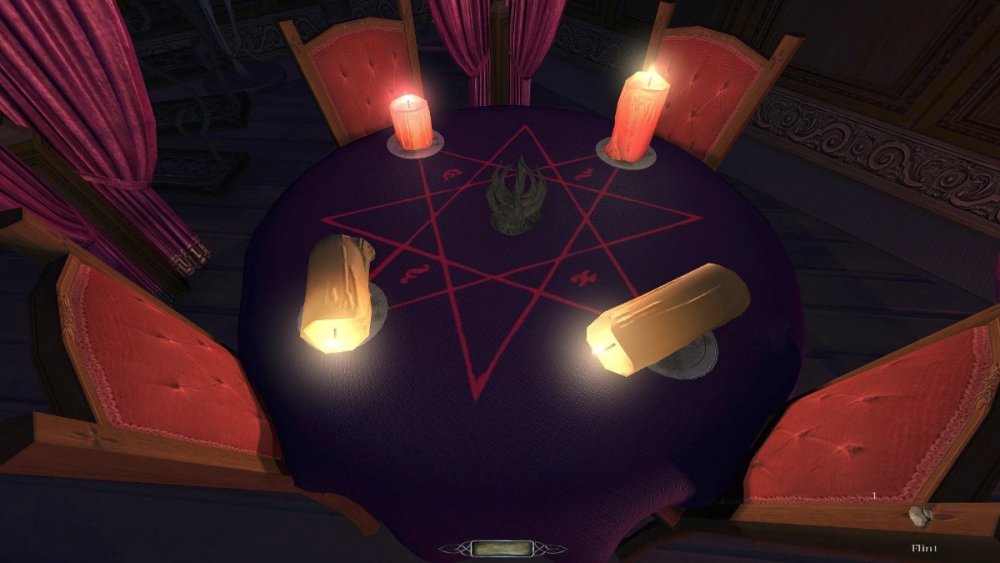
I admit that I was skeptical myself at first, but once I tried it in game, I changed my mind. So, I recommend applying the patch to a local build and give it a go in game. It's definitely better experienced than thought about. Regarding the candle puzzle in "Seeking Lady Leicester" (SLL), I agree that this proposed change will make that a bit more difficult, but I disagree on the reason why. The released version of SLL has a flint in the inventory to ignite them, so accidentally extinguishing candles shouldn't be much of a problem. Instead, I think the reason for player frustration would be that the unlit candles highlight, showing they can be frobbed, but when the player does frob, nothing would happen. They might not realize the candles can be picked up with a long-press frob. @Wellingtoncrab and I had a discussion about that exact puzzle during the design of this feature. So, what convinced me that it wasn't really a problem? I tried it in game. Players will learn how unlit candles look and behave when frobbed. Like @ChronA said above: "When most players click a candle 99.8% of the time they don't want to move it, they want to put it out." I decided it was better to optimize for what players expect most often and do most often rather than optimize for rare cases. Players already rage in frustration that they have trouble extinguishing candles or don't realize that they can. Another quote from a player on Discord: "I'd even say the "some players didn't know you could extinguish candles by using them" thing is "almost any new player and a lot of old ones too", since I once had an extended conversation about exactly how immersion breaking and weird it was to have to extinguish candles by dropping them, and literally not a single person brought up the fact that [extinguish candles by using them] was possible." During beta testing, the struggle that some beta testers had with the candle puzzle was not knowing about object manipulation. They didn't know about the "Parry/Manipulate" keybinding, or they forgot about object manipulation because they did the training mission roughly 5 years ago and had not needed to do it in a mission afterwards. So, "long-press frob to pick up" is in the same class of player interaction as object manipulation. In other words, the same problem already exists in TDM v2.11. I couldn't find the original screenshot from one of the SLL beta testers, but here's one similar, showing that the player didn't know about object manipulation: If this is truly in a released mission, I'd like to know about it. We can problem solve for that case if it does in fact exist. I don't think we should concern ourselves with something hypothetical, though. And, I disagree that we should make or keep controls cumbersome for the player in order to add challenge. I agree with @ChronA here. I don't think players are playing TDM for that type of challenge. The patch includes the following cvar: "tdm_frobhold_delay", default:"300" The frob hold delay (in ms) before drag or pick up. Set to 0 for TDM v2.11 (and prior) behavior. When "tdm_frobhold_delay" is set to 0, candles and bodies have the same behavior as TDM v2.11. As of a few moments ago, bodies didn't quite have the same behavior. But based on your feedback, I updated the patch (linked above) to make bodies behave that way. Thank you for your feedback.
-
[Feature Proposal] Frob to Use World Item
Wellingtoncrab replied to Daft Mugi's topic in The Dark Mod
I don't really see a reason this would be an issue in SLL. It be nice to see the feature in a dev build so more players (like me) can test it. Sort of like how we did testing with the frob highlight. I also don't see a reason why there would be a compatibility issue either. Leveraging this sort of short press/long press for different commands on the same input already exists for gamepads in the TDM controller config. As daft says in his post if the delay CVAR is set to 0, then there is no delay for the additional command and the original behavior for all the interactions is restored. But again it’d be nice to try it. -
It always boggles my mind how many people claim to "believe" in the Bible, yet they haven't actually read more than a couple verses. Or it can do the reverse.... "The best cure for Christianity is reading the Bible." - Mark Twain, American novelist (1835 - 1910)
-
I actually would like to know what could be a reason that it shows a frobhelper where there's nothing to frob. This is a mystery to me.
-
Welcome to the New Mappers Workshop! This is a communal workshop for new mappers who have never made a TDM mission before. Each week or two I will make a tutorial video and help to guide everyone through the process of creating a small, complete mission. I'm hoping the participants will feel free to ask questions, no matter how small--we're all here to learn from and encourage each other. Since I expect this thread to get fairly busy, I'm going to be heavy-handed about removing off-topic content. ====================================================================================================================================================================== Lessons often include links or other written instructions; direct links to the lessons are collected below: Lesson 1: Planning http://forums.thedarkmod.com/topic/18945-tdm-new-mappers-workshop/?p=407999 Lesson 2: Visportals http://forums.thedarkmod.com/topic/18945-tdm-new-mappers-workshop/?p=408253 Lesson 3: Your First Room http://forums.thedarkmod.com/topic/18945-tdm-new-mappers-workshop/?p=408484 Lesson 4: Decorating Your Rooms http://forums.thedarkmod.com/topic/18945-tdm-new-mappers-workshop/?p=408785 Lesson 5: Connecting Your Rooms http://forums.thedarkmod.com/topic/18945-tdm-new-mappers-workshop/?p=409215 Lesson 6: Outdoor "Rooms" http://forums.thedarkmod.com/topic/18945-tdm-new-mappers-workshop/?p=409322 Lesson 7: Creating Doors http://forums.thedarkmod.com/topic/18945-tdm-new-mappers-workshop/?p=409547 Lesson 8: Functional Props (ie, entities) http://forums.thedarkmod.com/topic/18945-tdm-new-mappers-workshop/?p=409731 Lesson 9: Immersive Details (sound/particles) http://forums.thedarkmod.com/topic/18945-tdm-new-mappers-workshop/?p=410258 Lesson 10: Advanced Brushwork (ladders/water) http://forums.thedarkmod.com/topic/18945-tdm-new-mappers-workshop/?p=410667 Lesson 11: AI http://forums.thedarkmod.com/topic/18945-tdm-new-mappers-workshop/?p=411192
- 339 replies
-
- 11
-
-
- Show previous comments 4 more
-

Awesome work Biker!
-
Gonna test this tonight.
-
That looks amazing.