Search the Community
Searched results for '/tags/forums/no lights/' or tags 'forums/no lights/q=/tags/forums/no lights/&'.
-

Allow broadhead arrows to break glass lamps
Amadeus replied to MirceaKitsune's topic in The Dark Mod
This kind of mechanic would break a ton of existing FMs. Some (I dare say even most) mappers often choose electric lamps so that they can't be extinguished or turned off, forcing the player to time their movements through the light. There are of course switchable electric lights, but that is up to the author on how they want to implement those. It would definitely be fun to see an FM implement this Splinter Cell-style mechanic, where the mapper has designed their map to function in such a way, but to add this as a core feature would break the gameplay of countless maps -
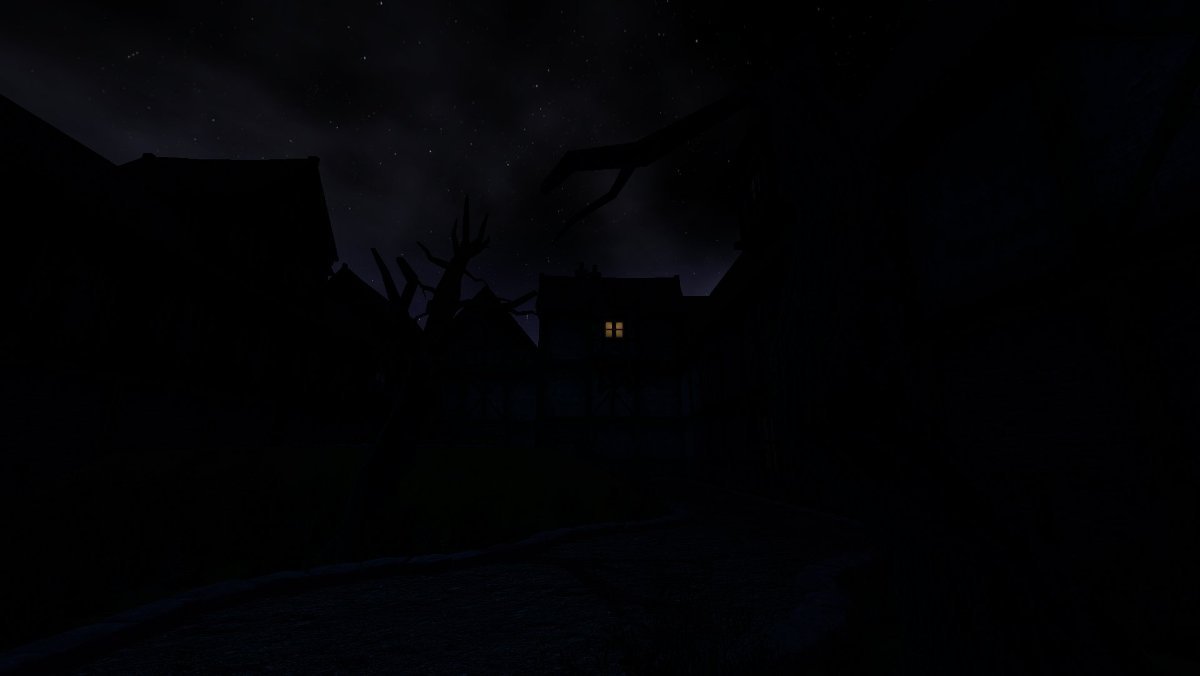
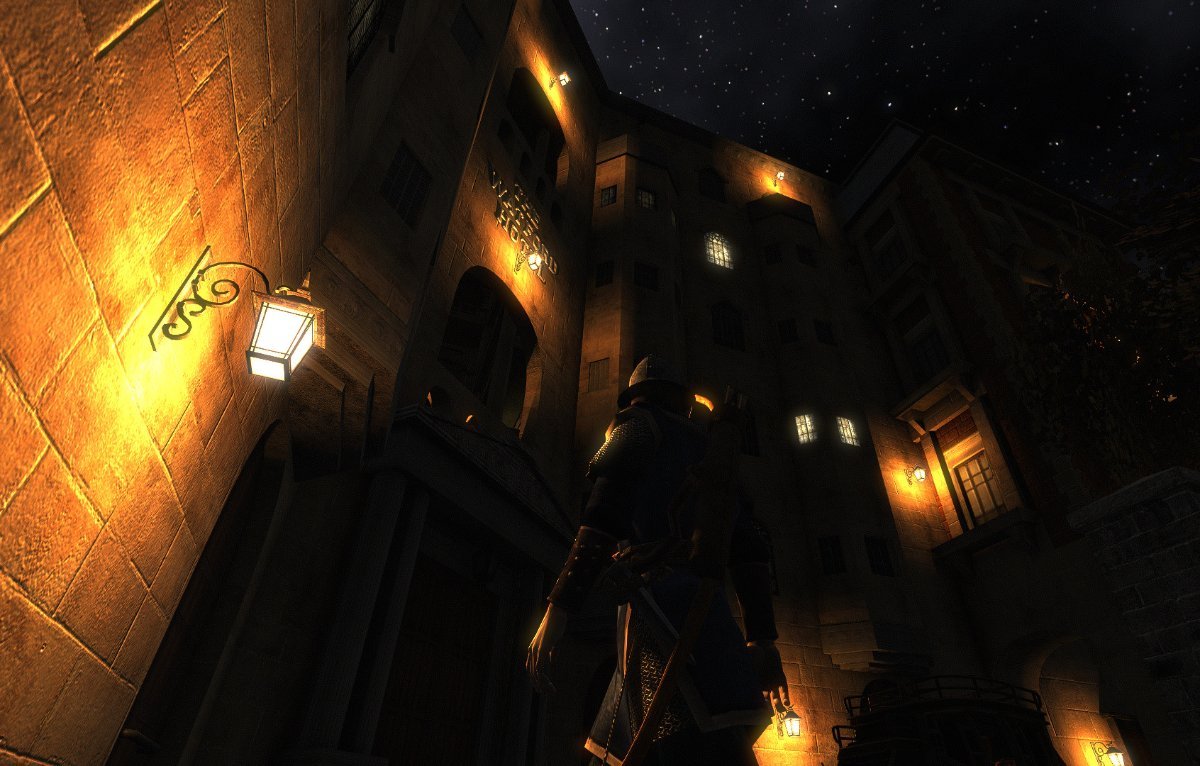
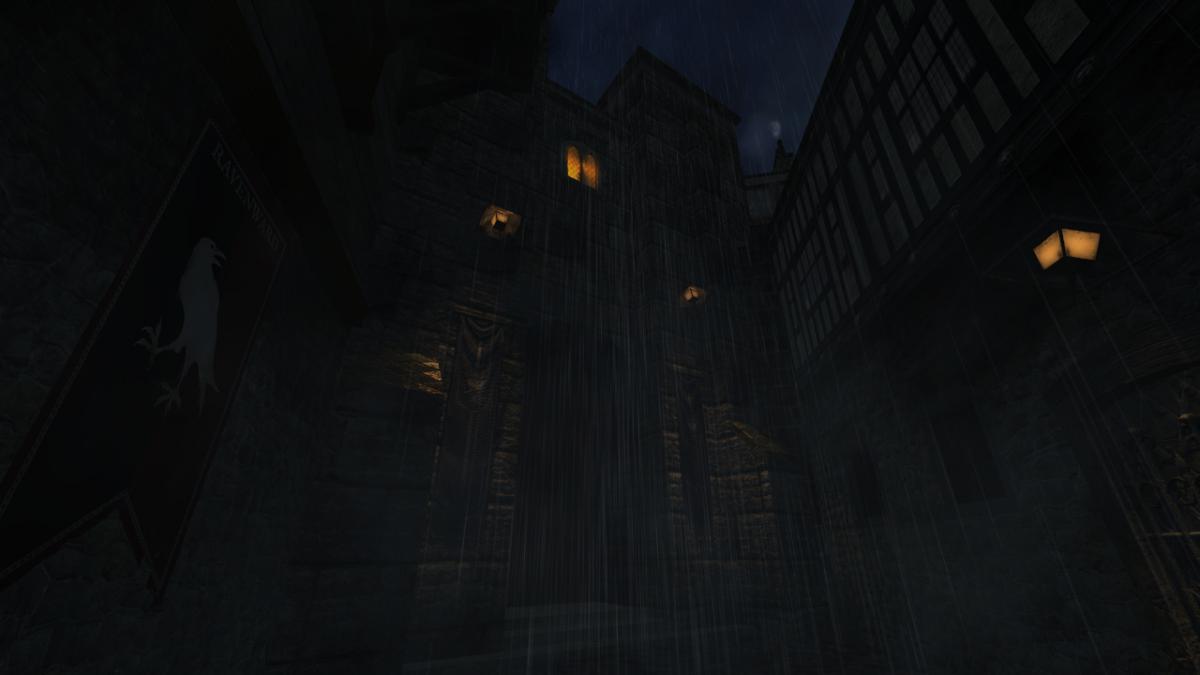
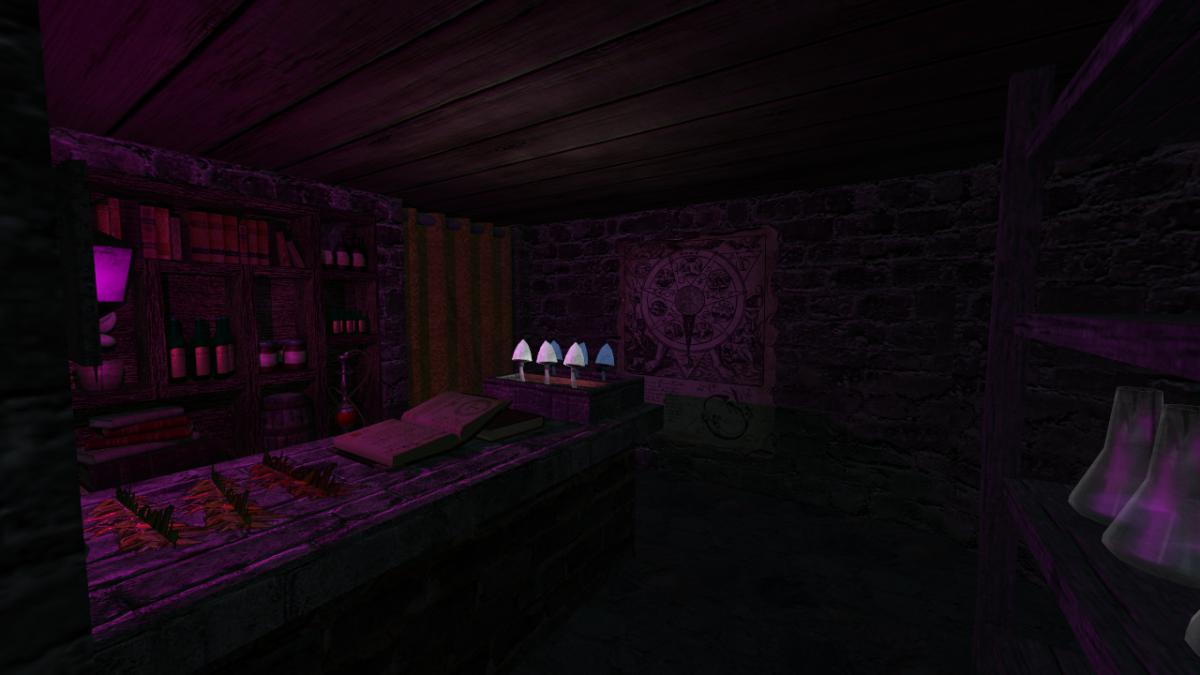
Welcome to the Snatcher's Workshop. Come on in, we may have something for you today. Feel free to look around. We trade everything here. --------------------------------------------------------------------------- We realize new ideas and take existing ideas for a spin. For fun. Somewhere in this post you will find a download with mods. Good care was put to make all mods as little intrusive as possible to make them compatible with as many missions as possible. This set of mods will never break your game but some features won't be available in a handful of missions (the reasons are known). Feel free to report here what works and what doesn't. TDM Modpack vs. Unofficial Patch The TDM Modpack and wesp5's Unofficial Patch are incompatible since both the Pack and the Patch use a similar approach to mods. With the release of recent versions of the TDM Modpack I consider the most relevant features of the Unofficial Patch have been matched, superseded, improved, or simply implemented in different ways. More importantly, the TDM Modpack is not only tightly packed and it has a minimal impact in your install but it achieves more by altering less core files, meaning more compatibility and less maintenance. One can, of course, argue. TDM Modpack v4.0 Compatible with The Dark Mod 2.12 ONLY A lightweight, stable, non-intrusive, mission-friendly Modpack for The Dark Mod that includes many enhancements and a new set of tools and abilities for our protagonist: peek through doors, blow and ignite candles, whistle to distract enemies, mark your location, an invisibility-speed combo and more. Mods included in the pack do not alter your game or any of the missions in any relevant way. The pack includes enhancements to the core game and additions that can be used in missions but at the same time respects the vision of the mission creators. It is up to you to make use of any of the new tools and abilities or not. Please note that sometimes authors include in their missions their own versions of core files and as a result, some mods are not available in some missions. All missions will play fine regardless. Release posts: v4 series: v4.0 v3 series: v3.8 | v3.6 | v3.5 | v3.4 | v3.3 | v3.2 | v3.0 v2 series: v2.8 | v2.7 | v2.6 | v2.5 | v2.4 | v2.2 | v2.0 v1 series: v1.8 | v1.6 | v1.4 | v1.2 | v1.0 What's included in the pack? -:- APP: GENERIC MOD ENABLER -:- Credits: JoneSoft License: Free for unlimited time for Home users and non-profit organizations. Description: A portable, freely distributable Mod enabler/disabler. This application is required to run mods safely and it is included in the pack. At the heart of the Modpack resides JSGME (JoneSoft Generic Mod Enabler), an application that allows players to enable and disable mods with one click. JSGME has been around for more than a decade and it is to be fully trusted. Refer to the install instructions section at the bottom for full details. -:- MOD: AUTO COMMANDS -:- By activating Auto Commands some key bindings will be set automatically. F1, F2, F3 and F4 keys are not used by the game and we are reserving them for mods: - F1: Cycle through the Skills category - F2: Cycle through the Tools category - F3: Switch between Loot and Stealth stats - F4: Direct shortcut to "Penumbra" None of these categories or shortcuts can be set to any hotkey in-game currently, so we are using the built-in autocommands.cfg file to set up the keys. It may be the case you already make use of the autocommands.cfg file to configure other things to your needs or liking therefore consider yourself warned. Enable Auto Commands if you plan on using Core Essentials and/or the Skill Upgrade. -:- MOD: CORE ESSENTIALS -:- A pack that includes a variety of mods from the best modders of TDM: ~ FAST DOORS Credits: Idea and programming by Obsttorte. Treatment by snatcher. Availability: All missions except Noble Affairs, Seeking Lady Leicester, Shadows of Northdale ACT II, Snowed Inn and a handful of lesser missions. Description: Being chased? In a rush? No problem: doors open and close faster when running. Topic: Slam doors open while running ~ QUIET DOORS Credits: An idea by SeriousToni (Sneak & Destroy mission). Mod by snatcher. Availability: All missions except Noble Affairs, Seeking Lady Leicester, Shadows of Northdale ACT II, Snowed Inn and a handful of lesser missions. Description: A vast number of doors play more subtle, sneaky sounds for a quieter, stealthier experience. This applies to doors that come with default sounds but only when manipulated by the player. Topic: Decrease volume of open/close door sounds triggered by player ~ LOOT ANIMATIONS Credits: Original idea by Goldwell (Noble Affairs mission). Programming by Obsttorte. Treatment by snatcher and wesp5. Availability: All missions except Noble Affairs, Seeking Lady Leicester, Shadows of Northdale ACT II, Snowed Inn and a handful of lesser missions. Description: Moves the loot towards the player before putting it in the inventory, underlining the impression of actually taking it. This mod comes with a subtle new loot sound that goes along nicely with the animation. ~ DYNAMIC LOOT INVENTORY Credits: snatcher. Availability: All missions except Noble Affairs, Seeking Lady Leicester, Shadows of Northdale ACT II, Snowed Inn and a handful of lesser missions. Description: When picking up loot this mod displays the loot info in the inventory and shortly after reverts back to the last non-loot item selected. ~ SMART CONTAINERS Credits: Obsttorte (source code updates), Dragofer (similar attempts), snatcher. Availability: All missions. Description: To facilitate looting, the bottom of many containers (chests, jewellery boxes, etc...) gets automatically disabled at the beginning of the mission and only the lid remains frobable. ~ STEALTH MONITOR Credits: kcghost, Dragofer, snatcher. Availability: All missions. Description: Display some stats (Suspicions / Searches / Sightings) and the Stealth Score during a mission. Bring up the "Loot" inventory icon and press "Use" or just press F3 repeatedly if using Auto Commands. ~ STEALTH ALERT Credits: snatcher. Availability: All missions. Description: Completing a mission without being seen is something that can be done with some practice and patience. This mod will play an alerting chime whenever you are seen so that you don't have to monitor the Stealth stats all the time. ~ BLINKING ITEMS Credits: snatcher. Availability: All missions. Requisites: Console command r_newFrob must be 0, which is the game default. Description: Items within frob distance that go into the inventory (plus static readables) emit a subtle blink. This pulse can help you identify some valuable items that otherwise are difficult to detect. Topic: New Frob Shader ~ SMART OBJECTS Credits: snatcher, Dragofer. Availability: All missions. Description: Sometimes it is difficult to tell if an object is being held or not. Three dots will be displayed on screen whenever you grab an object, unless the object has name, in which case the name of the object will be displayed. In addition, objects (except AI entities) do not make or propagate sounds on impact while being manipulated. Topics: No impact sounds while holding an object / Nameless objects... a missed opportunity ~ SHADOWMARK TOOL Credits: snatcher, Obsttorte. Availability: All missions. Description: Our protagonist's lucky deck! When the item is selected the player can drop and throw playing cards to mark a location. Cards can be retrieved. AI will not normally mind a single card lying around but cards can sometimes be noticed. Topic: Find more details in this post ~ ALT FOOTSTEPS ON WATER Credits: SeriousToni. Availability: All missions except Hazard Pay, Noble Affairs, Shadows of Northdale ACT I and ACT II, Snowed Inn, Volta 2: Cauldron and a handful of lesser missions. Description: Alternative sounds of footsteps on water for our protagonist (walk / run / land). Topic: New Footstep sounds ~ OTHER ADDITIONS Re-worked Inventory menu (more compact). Semi-transparent backgrounds for the in-game Inventory Grid and Objectives screen. Alternative high mantle sound for our protagonist. Revamped and extended "Mission Complete" audio theme. -:- MOD: SKILL UPGRADE -:- A new "Skills" category is added to the inventory on mission load and the category includes the below abilities: Did you know? When using Auto Commands you can press F1 to access the "Skills" category and F4 to quickly access "Penumbra"... ~ SKILL: OBSERVATION Credits: Dragofer, snatcher, wesp5 Availability: All missions. Description: When the "Peek Door" item is selected the player can peek through any regular door. Select the item in the inventory and "Use" it on a door. Topic: Peek through (almost) every door ~ SKILL: MANIPULATION Credits: Dragofer, wesp5, Obsttorte, snatcher. Availability: All missions. Description: When the "Blow / Ignite" item is selected the player can blow out and light up candles and oil lamps. Select the item in the inventory and "Use" it on small flame sources. Topic: Extinguish small lights with a blow ~ SKILL: COMBINATION Credits: OrbWeaver, MirceaKitsune, datiswous, wesp5, snatcher. Availability: All missions. Description: When the "Alchemy" item is selected the player can alter the properties of broadhead arrows by applying different reagents. Select the item in the inventory and "Use" it repeatedly to cycle through the different arrow types. Topic: Alchemy to alter arrow properties? Arrow types: Shadow arrow compound or "Darkdust": Widely believed to be a myth, little to nothing is known about anti-light matter. Where did our protagonist get his formula from? When this substance is subject to strain the particles implode and the residual component absorbs light until it dissipates completely. Flare arrow compound or "Starlight": A recipe based on luminescent mushrooms and other exotic herbs. The resulting powder produces, for limited time, a dim but steady blue-ish glow when mixed with the right reactive. A high concentration of the active mixture can cause a burning sensation to the eyes. ~ SKILL: DISTRACTION Credits: snatcher. Availability: All missions. Description: When the "Whistle" item is selected the player can whistle and draw the attention of nearby AI. The more you whistle, the more attention it draws. Select the item in the inventory and just "Use" it. Keep a safe distance. ~ SKILL: ALTERATION Credits: VanishedOne (speed potion), kingsal (invisibility potion), snatcher (alchemy). Availability: All missions. Description: When the "Penumbra" item is selected the player can avoid light sources and run faster than usual for limited time. Health consumed will gradually be restored. Penumbra doesn't muffle the noise you make and it doesn't work when in contact with water. Press F4 to quickly access this ability if using Auto Commands. THE PATH TO UMBRA: How to become one with the shadows -:- MOD: CLASSIC BLACKJACK -:- Credits: Obsttorte, snatcher. Availability: All missions except A House of Locked Secrets and By Any Other Name. Description: A straightforward approach to blackjacking with new rules and mechanics inspired by the original Thief games. Never miss a KO again! - No indicator required. "Classic Blackjack" rules: Some AI are KO-immune and cannot be KOed: * Undead, creatures... * Guards wearing heavy helmets (to respect TDM vision) * Other: set by mission authors for the plot, in example The rest of AI can be KOed, just aim for the head: * Civilians: Can always be knocked out from any direction * Combatants: Can always be knocked out (including when fleeing) from any direction except when in high alert state (normally in combat mode) As reference, you can find in the Wiki the set of rules of the non-modded TDM: https://wiki.thedarkmod.com/index.php?title=The_Dark_Mod_Gameplay#Blackjacking -:- MOD: FLASH GRENADE -:- Credits: snatcher, kingsal. Availability: All missions except Hazard Pay and Moongate Ruckus. Description: Flashbombs are clumsy and loud but as effective as ever. Instead of throwing Flashbombs like a cannonball we now toss them. Instead of exploding on impact Flashbombs now have a fuse. The chances of blinding have been greatly increased. -:- MOD: HUNTER BOW -:- Credits: snatcher. Availability: Most missions (a few missions do things differently but you should never notice). Description: Nock and draw arrows at a faster rate. Extended radius of gas arrow effect. Chance to retrieve rope arrows when missing a shot. -:- MOD: SHOCK MINE -:- Credits: wesp5, snatcher. Availability: All missions. Description: This mod replaces the Flashmines with customized, "High Voltage" electric mines. Remember: mines can be disarmed with the lockpicks! -:- MOD: SIMPLE SUBTITLES -:- Credits: Geep, stgatilov, snatcher. Availability: All missions. Description: A minimalist, imperfect approach to subtitles (you can set the scope of the subs in the audio settings). Topics: Subtitles - Possibilities Beyond 2.11 / English Subtitles for AI Barks Go to the audio settings and set the scope you prefer: Story: Story only On: Story and general speech (Give it a try!) Off: Disable subtitles Features of the mod: Background replaced with a font outline. Audio source widget replaced with a text transparency based on distance (volume) to the source. Yellow font color for story subs for best contrast, light grey font color for anything else. Non-story subs limited to a single instance, so that players aren't bothered too much with non-relevant subs (barks). --------------------------------------------------------------------------- DOWNLOADS / INSTALL / UNINSTALL So, how do I install and play with all this? Quite easy, but pay attention. I don't want you to break your game so we will be using a "Mod Enabler". A Mod Enabler allows you to enable and disable mods at will, with a few clicks. Before moving forward you must know a couple of things: The moment you enable a mod, previous saves will not work. If you want to load previous saves then you will have to disable the mod. If you play a mission with mods, the saves will only work when that exact set of mods are enabled. This above is important in case you deem your current saves precious. Consider yourself informed. DOWNLOADS You can download the TDM Modpack from Mod DB: INSTALL INSTRUCTIONS Download the zip, unzip it, and move contents to your TDM root folder: Folder "MODS" File "JSGME.exe" Go to your TDM root folder and double click on JSGME.exe (yellow icon). The first time you launch JSGME, it will ask for the "Mods Folder Name". Leave "MODS" and click OK. Now to your left you will find a list of mods available. To your right you will find a list of mods currently enabled. To enable a mod, select a mod on the left, and click on the arrow pointing to the right. To disable a mod, select a mod on the right, and click on the arrow pointing to the left. Go and enable the mods you want: UNINSTALL INSTRUCTIONS Quit the game (to unblock files) Go to your TDM root folder and double click on JSGME.ese (yellow icon) Disable all mods found on the right Close JSGME Delete the following: Folder "MODS" File "JSGME.exe" File "JSGME.ini" --------------------------------------------------------------------------- I hope you enjoy the mods. No coin? then leave a like for pirate's sake!
-
They don't work with stencil shadows. If a player has stencil shadows enabled, the volumetric lights have forced shadow maps enabled, while other lights have still stencil shadows. So it will just work. I think it will have a performance hit (also because the mentioned forced shadow maps I assume), but the mission overal is not very demanding? Afaik volumetric lights is enabled with a spawnarg. So via a trigger/script this setting can be changed? Not sure.
-
@snatcher I understand that when you feel your work doesn't live up to your goals that you don't want it out in the wild advertising your own perceived shortcomings but that leads to a troubling dilemma of authors who are never satisfied with their work offering fleeting access to their in-progress designs then rescinding them or allowing them to be lost. When I was a member of Doom3world forums, I would often see members do interesting experiments and sometimes that work would languish until someone new would examine it and pickup the torch. This seemed like a perfectly viable system until Doom3world was killed by spambots and countless projects and conceptual works were lost. I guess what I am trying to say is that mods don't need to be perfect to be valuable. If they contain some grain of a useable feature they might be adapted by mission authors in custom scenarios. They might offer instructive details that others trying to achieve the same results can examine. It would be great if known compelling works were kept somewhere safe other than via forum attachments and temporary file sharing sites. I suppose we used to collect such things in our internal SVN for safe keeping but even that isn't always viable. If folks would rather not post beta or incomplete mods to TDM's Moddb page, perhaps they would consider creating their own Moddb page or allow them to be added to my page for safe keeping. Please don't look at this as some sort of pressure campaign or anything. I fully understand anyone not willing to put their name next to something they aren't fully happy with. As a general proviso, ( if possible \ permitted ) I just want to prevent the loss of some valuable investigations and formative works. The end of Doom3world was a digital apocalypse similar to the death of photobucket. It is one of my greatest fears that TDM will become a digital memory with only the skeletons of old forum threads at the wayback archive site.
-
Congrats on the release! Remember to check ThiefGuild as well as the DarkFate forums (via Google Translate) for additional feedback.
-
New script for mappers: my flavour of a fog density fading script. To add this to your FM, add the line "thread FogIntensityLoop();" to your map's void main() function (see the example in fogfade.script) and set "fog_fade" "1" on each foglight to enable script control of it. Set "fog_intensity_multiplier" on each info_location entity to change how thick the fog is in that location (practically speaking it's a multiplier for visibility distance). Lastly, "fog_fade_speed" on each foglight determines how quickly it will change its density. The speed scales with the current value of shaderParm3, using shaderParm3 = 1000 as a baseline. So i.e. if shaderParm is currently at 1/10th of 1000, then fade speed will be 1/10th as fast. Differences to Obsttorte's script: https://forums.thedarkmod.com/index.php?/topic/14394-apples-and-peaches-obsttortes-mapping-and-scripting-thread/&do=findComment&comment=310436 my script uses fog lights you created, rather than creating one for you. Obsttorte's script will delete the foglight if entering a fogfree zone and recreate it later more than one fog light can be controlled (however, no per-fog-light level of control) adding this to the map requires adding a line to your void main() script, rather than adding an info_locations_settings entity with a custom scriptobject spawnarg in my script, mappers set a multiplier of fog visibility distance (shaderParm3), while in Obsttorte's script a "fog_density" spawnarg is used as an alternative to shaderParm3 smaller and less compactly written script fogfade.scriptfogfade.map
-
Just curious, based on this discussion: http://forums.thedarkmod.com/topic/19239-soft-r-gamma/?p=427350
-
Complaint From Players The player must pick up candles before extinguishing them, and then the player must remember to drop the candle. The player must drag a body before shouldering it (picking it up), and the player must remember to frob again to stop dragging the body. The player finds this annoying or easy to make mistakes. For players who ghost, some of them have the goal of returning objects back to their original positions. With the current "pick up, use item, and drop" system, the item might not return easily or at all to its original position. For example, a candlestick might bounce off its holder. (See player quotes at the bottom.) Bug Tracker https://bugs.thedarkmod.com/view.php?id=6316 Problems to Solve How can the "pick up" step be eliminated so that the player can directly use or interact with the item where it is in the game world? How can so much key pressing and mouse clicking be eliminated when the player wants to directly use an item? How can candles be extinguished and lanterns toggled off/on without first picking them up? How can bodies be shouldered without first dragging them? Solution Design Goals Make TDM easier for new players while also improving it for longtime players. Reduce tedious steps for common frob interactions. Make it intuitive so that menu settings are unnecessary. Do not introduce bugs or break the game. Terms frob -- the frob button action happens instantly. hold frob -- the frob button is held for 200ms before the action happens. (This can be changed via cvar: 200ms by default.) Proposed Solution Note: Some issues have been struckthrough to show changes since the patch has been updated. Change how frobbing works for bodies, candles, and lanterns. For bodies: Frob to shoulder (pick up) a body. Second frob to drop shouldered body, while allowing frob on doors, switches, etc. Hold frob (key down) to start drag, continue to hold frob (key down) to drag body, and then release frob (key up) to stop dragging body. Also, a body can be dragged immediately by holding frob and moving the mouse. For candles/lanterns: Frob to extinguish candles and toggle off/on lanterns. Hold frob to pick it up, and then frob again to drop. Frob to pick it up, and then frob again to drop. Hold frob to extinguish candles and toggle off/on lanterns. For food: Frob to pick it up, and then frob again to drop. Hold frob to eat food. For other items: No change. New cvar "tdm_frobhold_delay", default:"200" The frob hold delay (in ms) before drag or extinguish. Set to 0 for TDM v2.11 (and prior) behavior. Solution Benefits Bodies: New players will have less to learn to get started moving knocked out guards. With TDM v2.11 and earlier, some players have played several missions before realizing that they could shoulder a body instead of dragging it long distances. Frob to shoulder body matches Thief, so longtime Thief players will find it familiar. Second frob drops a shouldered body. Players still have the ability to both shoulder and drag bodies. Compatible with the new auto-search bodies feature. Dragging feels more natural -- just grab, hold, and drop with a single button press. There is no longer the need to press the button twice. Also, it's no longer possible to walk away from a body while unintentionally dragging it. Set "tdm_frobhold_delay" cvar to delay of 0 to restore TDM v2.11 (and prior) behavior. Candles: New players will have less to learn to get started extinguishing candles. With TDM v2.11 and earlier, some players didn't know they could extinguish candles by picking them up and using them. Instead, they resorted to throwing them to extinguish them or hiding them. Hold frob to extinguish a candle feels like "pinching" it out. Once a candle is picked up, players still have the ability to manipulate and use them the same way they are used to in TDM v2.11 and earlier. For players who ghost and have the goal of putting objects back to their original positions, they'll have an easier time and not have to deal with candles popping off their holders when trying to place them back carefully. Set "tdm_frobhold_delay" cvar to delay of 0 to restore TDM v2.11 (and prior) behavior. Solution Issues Bodies: Frob does not drop a shouldered body, so that might be unexpected for new players. This is also different than Thief where a second frob will drop a body. "Use Inv. Item" or "Drop Inv. Item" drops the body. This is the same as TDM v2.11 and earlier. This is the price to pay for being able to frob (open/close) doors while shouldering a body. Patch was updated to drop body on second frob, while allowing frob on doors, switches, etc. Candles: Picking up a candle or lantern requires a slight delay, because the player must hold the frob button. The player might unintentionally extinguish a candle while moving it if they hold down frob. The player will need to learn that holding frob will extinguish the candle. The player can change the delay period via the "tdm_frobhold_delay" cvar. Also, when the cvar is set to a delay of 0, the behavior matches TDM v2.11 and earlier, meaning the player would have to first "Frob/Interact" to pick up the candle and then press "Use Inv. Item" to extinguish it. Some players might unintentionally extinguish a candle when they are trying to move it or pick it up. They need to make sure to hold frob to initiate moving the candle. When a candle is unlit, it will highlight but do nothing on frob. That might confuse players. However, the player will likely learn after extinguishing several candles that an unlit candle still highlights. It makes sense that an already-extinguished candle cannot be extinguished on frob. The official "Training Mission" might need to have its instructions updated to correctly guide the player through candle manipulation training. Updating the training mission to include the hold frob to extinguish would probably be helpful. Similar Solutions In Fallout 4, frob uses an item and long-press frob picks it up. Goldwell's mission, "Accountant 2: New In Town", has candles that extinguish on frob without the need of picking them up first. Snatcher's TDM Modpack includes a "Blow / Ignite" item that allows the player to blow out candles Wesp5's Unofficial Patch provides a way to directly extinguish movable candles by frobbing. Demonstration Videos Note: The last two videos don't quite demonstrate the latest patch anymore. But the gist is the same. This feature proposal is best experienced in game, but some demonstration videos are better than nothing. The following videos show either a clear improvement or that the player is not slowed down with the change in controls. For example, "long-press" sounds long, but it really isn't. Video: Body Shouldering and Dragging The purpose of this video is to show that frob to shoulder a body is fast and long-press frob to drag a body is fast enough and accurate. Video: Long-Press Frob to Pick Up Candle The purpose of this video is to show how the long-press frob to pick up a candle isn't really much slower than regular frob. Video: Frob to Extinguish The purpose of this video -- if a bit contrived -- is to show the efficiency and precision of this proposed feature. The task in the video was for the player to as quickly and accurately as possible extinguish candles and put them back in their original positions. On the left, TDM v2.11 is shown. The player has to highlight each candle, press "Frob/Interact" to pick up, press "Use Inv. Item" to extinguish, make sure the candle is back in place, and finally press "Frob/Interact" to drop the candle. The result shows mistakes and candles getting misplaced. On the right, the proposed feature is shown. The player frobs to extinguish the candles. The result shows no mistakes and candles are kept in their original positions. Special Thanks @Wellingtoncrab was instrumental in improving this feature during its early stages. We had many discussions covering varying scenarios, pros, and cons, and how it would affect the gameplay and player experience. Originally, I had a completely different solution that added a special "use modifier" keybinding. He suggested the frob to use and long-press frob to pick up mechanics. I coded it up, gave it a try, and found it to be too good. Without his feedback and patience, this feature wouldn't be as good as it is. Thank you, @Wellingtoncrab! And, of note, @Wellingtoncrab hasn't been able to try it in game yet, because I'm using Linux and can't compile a Windows build for him. So, if this feature isn't good, that's my fault. Code Patch I'll post the code patch in another post below this one so that folks who compile TDM themselves can give this proposal a try in game. And, if you do, I look forward to your feedback! Player Complaints TTLG (2023-01-10) Player 1: TDM Forums (2021-03-13) Player 2: Player 3: TDM Forums (2023-06-17) Player 4: TDM Discord (2021-05-18) Player 5: TDM Discord (2023-02-14) Player 6: Player 7: Player 8:
- 324 replies
-
- 12
-

-

-
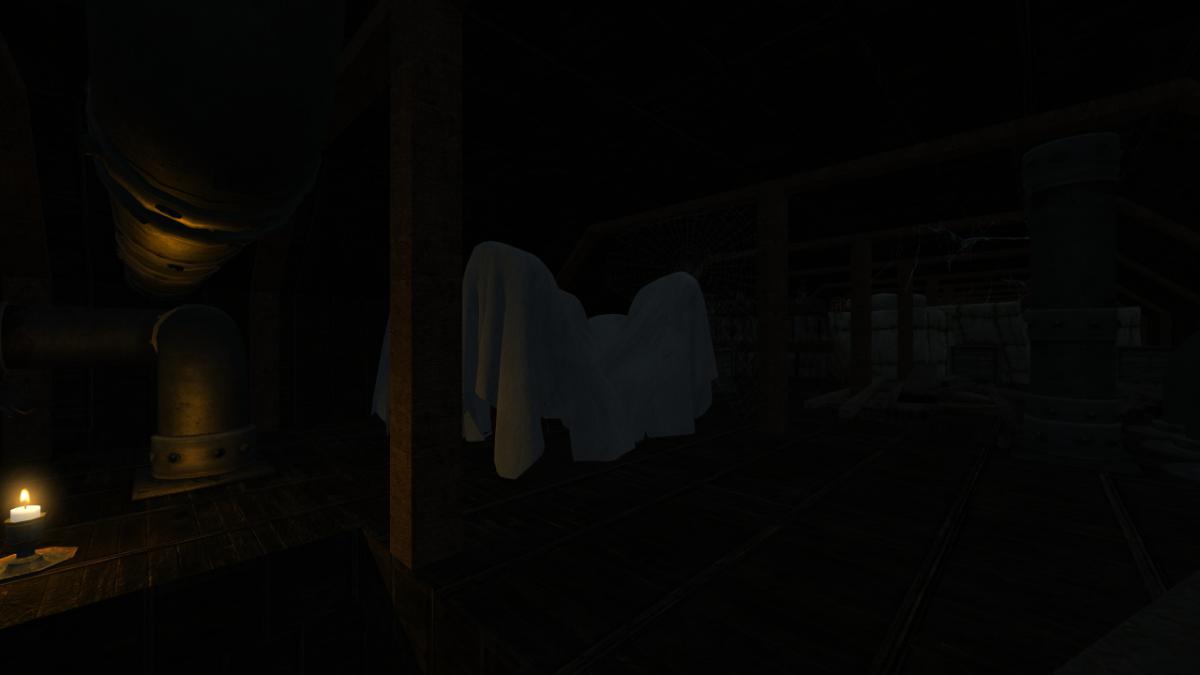
GAMEPLAY * Frob controls have been reworked completely. Previously players were annoyed by having to do three presses to extinguish a light. Also, some player didn't even know that bodies could be shouldered and were limited with dragging bodies. Now simply clicking the frob button performs the action player needs most of the time, and pressing-and-holding the same button performs alternative actions like dragging bodies and extinguishing candles (thread). * Several aspects of mantling has been improved: overhead mantling has become faster, mantling over low obstacles is allowed while carrying an item or a body. Also it is possible to switch weapon while being on rope/ladder or mantling. Pressing crouch button on rope/ladder now starts slide-down immediately. * Some aspects of gameplay can be further simplified. Auto-search bodies is for players who don't want to waste time searching for keys and purses on guard bodies. Lockpicking "Auto" difficulty now indeed trivializes lockpicking (thread). * Leaning animation has been improved with lower head tilt (thread). * Player footstep sounds have been rebalanced. Metal and water sounds were especially painful previously. * Further improvements of subtitles: revised location and font to avoid overlapping with other GUI elements, added directional cue, better slot allocation. Each subtitle is now displayed for at least one second even if the sound is very short. * More settings to reduce camera bobbing/rolling/shaking, which is good for players who feel motion sickness from default camera animations. * Now several script addons can coexist and work independently (thread). ENGINE * Optimized generation of light-entity interactions in rendering frontend. Also greatly optimized shadow processing, especially for moving lights. Unfortunately, many existing missions are not compatible with these changes, so you might see light leaking through walls (mainly with stencil shadows). Please report all such cases, we'll apply workaround on case by case basis (thread). * The "old" and "new" rendering backends are finally merged into one. It is as nice to program as the new backend, and as old-fashioned and reliable as the old backend. Single-pass shadow maps enabled by default and now respect noselfshadow. * Materials with polygonoffset now interact with lights. So static decals can have bumpmap and specular lighting. Note however: dynamic decals still don't interact with lights. * Revised parallelSky lights and marked shadowing parallel lights as deprecated (thread). * PNG image format now behaves equally to other supported formats. In particular, it is not required to explicitly specify its extension, and it can be referenced directly in GUI code. * Added functions min/max to material expressions, which can be useful for clamping. * Fixed minor culling bugs on animated entities and enabled entity scissors by default. * Reduced color banding for fog with some dithering at tonemapping stage. * Finally our C++ code can compress and decompress all texture formats we use, meaning that we no longer depend on occasionally buggy/slow vendor implementations. BUGS * Now both OGG and WAV sounds work the same way and stop playing while in main menu. * Fixed "gui::startSelect" as a feature that allows to choose player starting location in GUI briefing. * Fixed warnings in newspaper_bridgeport0X core readable GUI. ASSETS * Added automatic turrets, to be combined with security cameras (Thread). * Added more covered furniture models (6289). * Added wall models from Seeking Lady Leicester (6293). * New and fixed versions of atdm:lamp_electric_square_3_lit_unattached (6315). * Fixed UV map on Stove models (6312). * Fixed some issues with moor AI (6345).
-
Hi, this mission is crashing on my system and I cannot go on. Playing "Hidden Hands - The lost citadel" Version 6 on Fedora Linux Version 38. I paste the whole output of the console below. Perhaps someone can find the cause for the crash, that would be very nice [stefan@fedora darkmod]$ ./thedarkmod.x64 TDM 2.11/64 #10264 (1435:10264) linux-x86_64 Jan 30 2023 02:02:43 /proc/cpuinfo CPU frequency: 899.998 MHz 900 MHz Intel CPU with SSE & SSE2 & SSE3 & SSSE3 & SSE41 & AVX found interface lo - loopback Found Intel CPU, features: SSE SSE2 SSE3 SSSE3 SSE41 AVX TDM using AVX for SIMD processing. Found 0 new missions and 0 packages. ------ Initializing File System ------ Current search path: [M] /home/stefan/darkmod/fms/hhtlc [M] /home/stefan/darkmod/fms/hhtlc/hhtlc_1b4187d3b30d65cf.pk4 (665 files - 0xf04d8d7e) [C] /home/stefan/darkmod/ [C] /home/stefan/darkmod/tdm_textures_wood01.pk4 (382 files - 0x54c704d0) [C] /home/stefan/darkmod/tdm_textures_window01.pk4 (399 files - 0x50a48869) [C] /home/stefan/darkmod/tdm_textures_stone_sculpted01.pk4 (464 files - 0x3bd63c7c) [C] /home/stefan/darkmod/tdm_textures_stone_natural01.pk4 (141 files - 0x4d0836ff) [C] /home/stefan/darkmod/tdm_textures_stone_flat01.pk4 (302 files - 0x671a22d2) [C] /home/stefan/darkmod/tdm_textures_stone_cobblestones01.pk4 (271 files - 0xc46ab14f) [C] /home/stefan/darkmod/tdm_textures_stone_brick01.pk4 (527 files - 0x1d087cf8) [C] /home/stefan/darkmod/tdm_textures_sfx01.pk4 (69 files - 0x2c673886) [C] /home/stefan/darkmod/tdm_textures_roof01.pk4 (69 files - 0x24547b7) [C] /home/stefan/darkmod/tdm_textures_plaster01.pk4 (142 files - 0x9747529e) [C] /home/stefan/darkmod/tdm_textures_paint_paper01.pk4 (67 files - 0xa4a95a09) [C] /home/stefan/darkmod/tdm_textures_other01.pk4 (127 files - 0x36932451) [C] /home/stefan/darkmod/tdm_textures_nature01.pk4 (286 files - 0x19240606) [C] /home/stefan/darkmod/tdm_textures_metal01.pk4 (509 files - 0x441d098f) [C] /home/stefan/darkmod/tdm_textures_glass01.pk4 (51 files - 0x3f3721e) [C] /home/stefan/darkmod/tdm_textures_fabric01.pk4 (43 files - 0x649daf73) [C] /home/stefan/darkmod/tdm_textures_door01.pk4 (177 files - 0xb0130166) [C] /home/stefan/darkmod/tdm_textures_decals01.pk4 (474 files - 0xe2ff12c6) [C] /home/stefan/darkmod/tdm_textures_carpet01.pk4 (130 files - 0x79bc3d7c) [C] /home/stefan/darkmod/tdm_textures_base01.pk4 (435 files - 0xc07a324) [C] /home/stefan/darkmod/tdm_standalone.pk4 (4 files - 0xb3f36d20) [C] /home/stefan/darkmod/tdm_sound_vocals_decls01.pk4 (32 files - 0x53cda0aa) [C] /home/stefan/darkmod/tdm_sound_vocals07.pk4 (1111 files - 0xa13ec4c2) [C] /home/stefan/darkmod/tdm_sound_vocals06.pk4 (696 files - 0x44c85e78) [C] /home/stefan/darkmod/tdm_sound_vocals05.pk4 (119 files - 0x6cf23214) [C] /home/stefan/darkmod/tdm_sound_vocals04.pk4 (2869 files - 0xd7ec1256) [C] /home/stefan/darkmod/tdm_sound_vocals03.pk4 (743 files - 0xb3f2e0f1) [C] /home/stefan/darkmod/tdm_sound_vocals02.pk4 (1299 files - 0x5092940e) [C] /home/stefan/darkmod/tdm_sound_vocals01.pk4 (82 files - 0xf4d326b2) [C] /home/stefan/darkmod/tdm_sound_sfx02.pk4 (605 files - 0x31673482) [C] /home/stefan/darkmod/tdm_sound_sfx01.pk4 (987 files - 0x97451b7a) [C] /home/stefan/darkmod/tdm_sound_ambient_decls01.pk4 (8 files - 0x9404877c) [C] /home/stefan/darkmod/tdm_sound_ambient03.pk4 (24 files - 0xd28ca9ec) [C] /home/stefan/darkmod/tdm_sound_ambient02.pk4 (163 files - 0x84efad22) [C] /home/stefan/darkmod/tdm_sound_ambient01.pk4 (220 files - 0xee228c81) [C] /home/stefan/darkmod/tdm_prefabs01.pk4 (1017 files - 0x506baa0b) [C] /home/stefan/darkmod/tdm_player01.pk4 (127 files - 0xd983fc45) [C] /home/stefan/darkmod/tdm_models_decls01.pk4 (101 files - 0x146c787) [C] /home/stefan/darkmod/tdm_models02.pk4 (2241 files - 0x42cdbf62) [C] /home/stefan/darkmod/tdm_models01.pk4 (3326 files - 0x829270f2) [C] /home/stefan/darkmod/tdm_gui_credits01.pk4 (49 files - 0xbff51863) [C] /home/stefan/darkmod/tdm_gui01.pk4 (758 files - 0xcbf4fd2d) [C] /home/stefan/darkmod/tdm_fonts01.pk4 (696 files - 0x7c5027bf) [C] /home/stefan/darkmod/tdm_env01.pk4 (176 files - 0x8bd4045b) [C] /home/stefan/darkmod/tdm_defs01.pk4 (194 files - 0xe5f440dc) [C] /home/stefan/darkmod/tdm_base01.pk4 (223 files - 0x9704b43c) [C] /home/stefan/darkmod/tdm_ai_steambots01.pk4 (31 files - 0x26416485) [C] /home/stefan/darkmod/tdm_ai_monsters_spiders01.pk4 (80 files - 0x15c3ef89) [C] /home/stefan/darkmod/tdm_ai_humanoid_undead01.pk4 (55 files - 0x25e463ad) [C] /home/stefan/darkmod/tdm_ai_humanoid_townsfolk01.pk4 (104 files - 0xa6f7c573) [C] /home/stefan/darkmod/tdm_ai_humanoid_pagans01.pk4 (10 files - 0x566fb35a) [C] /home/stefan/darkmod/tdm_ai_humanoid_nobles01.pk4 (51 files - 0x5ca54cab) [C] /home/stefan/darkmod/tdm_ai_humanoid_mages01.pk4 (8 files - 0x5e7a666b) [C] /home/stefan/darkmod/tdm_ai_humanoid_heads01.pk4 (100 files - 0x45ec787e) [C] /home/stefan/darkmod/tdm_ai_humanoid_guards01.pk4 (379 files - 0x9801be8d) [C] /home/stefan/darkmod/tdm_ai_humanoid_females01.pk4 (172 files - 0xc7de4598) [C] /home/stefan/darkmod/tdm_ai_humanoid_builders01.pk4 (91 files - 0x6dea9b57) [C] /home/stefan/darkmod/tdm_ai_humanoid_beasts02.pk4 (229 files - 0x886c9a98) [C] /home/stefan/darkmod/tdm_ai_humanoid_beasts01.pk4 (23 files - 0xba9da54c) [C] /home/stefan/darkmod/tdm_ai_base01.pk4 (9 files - 0x1de319e8) [C] /home/stefan/darkmod/tdm_ai_animals01.pk4 (82 files - 0x6c0fda50) File System Initialized. -------------------------------------- Couldn't open journal files /proc/cpuinfo CPU processors: 2 /proc/cpuinfo CPU logical cores: 4 ----- Initializing Decls ----- WARNING:file materials/puzzle_paintings.mtr, line 228: material 'textures/puzzle/flower' previously defined at materials/puzzle_paintings.mtr:14 WARNING:file sound/ambient.sndshd, line 79: sound 'firstfloor' previously defined at sound/ambient.sndshd:51 WARNING:file sound/soul.sndshd, line 129: sound 'builder_tim_1' previously defined at sound/soul.sndshd:102 WARNING:file sound/video.sndshd, line 12: sound 'main' previously defined at sound/ambient.sndshd:1 ------------------------------ I18N: SetLanguage: 'english'. I18N: Found no character remapping for english. I18N: 1321 strings read from strings/english.lang I18N: 'strings/fm/english.lang' not found. Couldn't exec editor.cfg - file does not exist. execing default.cfg Gamepad modifier button assigned to 6 execing Darkmod.cfg execing DarkmodKeybinds.cfg execing DarkmodPadbinds.cfg Gamepad modifier button assigned to 6 Couldn't exec autoexec.cfg - file does not exist. I18N: SetLanguage: 'german'. I18N: Found no character remapping for german. I18N: 1321 strings read from strings/german.lang I18N: 'strings/fm/german.lang' not found. I18NLocal: 'strings/fm/english.lang' not found, skipping it. ----- Initializing OpenAL ----- Setup OpenAL device and context OpenAL: found device 'ALSA Default' [ACTIVE] OpenAL: found device 'HDA Intel PCH, CS4208 Analog (CARD=PCH,DEV=0)' OpenAL: found device 'HDA Intel PCH, HDMI 0 (CARD=PCH,DEV=3)' OpenAL: found device 'HDA Intel PCH, HDMI 1 (CARD=PCH,DEV=7)' OpenAL: found device 'HDA Intel PCH, HDMI 2 (CARD=PCH,DEV=8)' OpenAL: device 'ALSA Default' opened successfully OpenAL: HRTF is available [ALSOFT] (EE) Failed to set real-time priority for thread: Operation not permitted (1) OpenAL vendor: OpenAL Community OpenAL renderer: OpenAL Soft OpenAL version: 1.1 ALSOFT 1.21.1 OpenAL: found EFX extension OpenAL: HRTF is disabled (reason: 0 = ALC_HRTF_DISABLED_SOFT) OpenAL: found 256 hardware voices ----- Initializing OpenGL ----- Initializing OpenGL display ...initializing QGL ------- Input Initialization ------- ------------------------------------ OpenGL vendor: Intel OpenGL renderer: Mesa Intel(R) HD Graphics 615 (KBL GT2) OpenGL version: 4.6 (Core Profile) Mesa 23.1.9 core Checking required OpenGL features... v - using GL_VERSION_3_3 v - using GL_EXT_texture_compression_s3tc Checking optional OpenGL extensions... v - using GL_EXT_texture_filter_anisotropic maxTextureAnisotropy: 16.000000 v - using GL_ARB_stencil_texturing X - GL_EXT_depth_bounds_test not found v - using GL_ARB_buffer_storage v - using GL_ARB_texture_storage v - using GL_ARB_multi_draw_indirect v - using GL_ARB_vertex_attrib_binding X - GL_ARB_compatibility not found v - using GL_KHR_debug Max active texture units in fragment shader: 32 Max combined texture units: 192 Max anti-aliasing samples: 16 Max geometry output vertices: 256 Max geometry output components: 1024 Max vertex attribs: 16 ---------- R_ReloadGLSLPrograms_f ----------- Linking GLSL program cubeMap ... Linking GLSL program bumpyEnvironment ... Linking GLSL program depthAlpha ... Linking GLSL program fog ... Linking GLSL program oldStage ... Linking GLSL program blend ... Linking GLSL program stencilshadow ... Linking GLSL program shadowMapA ... Linking GLSL program ambientInteraction ... Linking GLSL program interactionStencil ... Linking GLSL program interactionShadowMaps ... Linking GLSL program interactionMultiLight ... Linking GLSL program frob ... Linking GLSL program soft_particle ... Linking GLSL program tonemap ... Linking GLSL program gaussian_blur ... Linking GLSL program testImageCube ... --------------------------------- Font fonts/english/stone in size 12 not found, using size 24 instead. --------- Initializing Game ---------- The Dark Mod 2.11/64, linux-x86_64, code revision 10264 Build date: Jan 30 2023 Initializing event system ...873 event definitions Initializing class hierarchy ...172 classes, 1732032 bytes for event callbacks Initializing scripts ---------- Compile stats ---------- Memory usage: Strings: 56, 9048 bytes Statements: 23155, 926200 bytes Functions: 1358, 177432 bytes Variables: 107720 bytes Mem used: 2149432 bytes Static data: 408 bytes Allocated: 1152120 bytes Thread size: 7928 bytes Maximum object size: 816 Largest object type name: speaker_zone_ambient ...6 aas types game initialized. -------------------------------------- Parsing material files Found 0 new missions and 0 packages. Found 42 mods in the FM folder. Parsed 46 mission declarations. No 'tdm_mapsequence.txt' file found for the current mod: hhtlc -------- Initializing Session -------- session initialized -------------------------------------- Font fonts/english/mason_glow in size 12 not found, using size 48 instead. Font fonts/english/mason_glow in size 24 not found, using size 48 instead. Font fonts/english/mason in size 12 not found, using size 48 instead. Font fonts/english/mason in size 24 not found, using size 48 instead. WARNING:idChoiceWindow:: gui 'guis/mainmenu.gui' window 'QuitGameDialogAskEverytimeOption' has value count unequal to choices count WARNING:idChoiceWindow:: gui 'guis/mainmenu.gui' window 'ColorPrecision' has value count unequal to choices count WARNING:idChoiceWindow:: gui 'guis/mainmenu.gui' window 'OpenDoorsOnUnlock' has value count unequal to choices count WARNING:idChoiceWindow:: gui 'guis/mainmenu.gui' window 'InvPickupMessages' has value count unequal to choices count WARNING:idChoiceWindow:: gui 'guis/mainmenu.gui' window 'HideLightgem' has value count unequal to choices count WARNING:idChoiceWindow:: gui 'guis/mainmenu.gui' window 'BowAimer' has value count unequal to choices count WARNING:idChoiceWindow:: gui 'guis/mainmenu.gui' window 'FrobHelper' has value count unequal to choices count WARNING:idChoiceWindow:: gui 'guis/mainmenu.gui' window 'showTooltips' has value count unequal to choices count WARNING:idChoiceWindow:: gui 'guis/mainmenu.gui' window 'MeleeInvertAttack' has value count unequal to choices count WARNING:idChoiceWindow:: gui 'guis/mainmenu.gui' window 'MeleeInvertParry' has value count unequal to choices count WARNING:idChoiceWindow:: gui 'guis/mainmenu.gui' window 'SCGeneralBind5' has value count unequal to choices count --- Common Initialization Complete --- ------------- Warnings --------------- during The Dark Mod initialization... WARNING:file materials/puzzle_paintings.mtr, line 228: material 'textures/puzzle/flower' previously defined at materials/puzzle_paintings.mtr:14 WARNING:file sound/ambient.sndshd, line 79: sound 'firstfloor' previously defined at sound/ambient.sndshd:51 WARNING:file sound/soul.sndshd, line 129: sound 'builder_tim_1' previously defined at sound/soul.sndshd:102 WARNING:file sound/video.sndshd, line 12: sound 'main' previously defined at sound/ambient.sndshd:1 WARNING:idChoiceWindow:: gui 'guis/mainmenu.gui' window 'BowAimer' has value count unequal to choices count WARNING:idChoiceWindow:: gui 'guis/mainmenu.gui' window 'ColorPrecision' has value count unequal to choices count WARNING:idChoiceWindow:: gui 'guis/mainmenu.gui' window 'FrobHelper' has value count unequal to choices count WARNING:idChoiceWindow:: gui 'guis/mainmenu.gui' window 'HideLightgem' has value count unequal to choices count WARNING:idChoiceWindow:: gui 'guis/mainmenu.gui' window 'InvPickupMessages' has value count unequal to choices count WARNING:idChoiceWindow:: gui 'guis/mainmenu.gui' window 'MeleeInvertAttack' has value count unequal to choices count WARNING:idChoiceWindow:: gui 'guis/mainmenu.gui' window 'MeleeInvertParry' has value count unequal to choices count WARNING:idChoiceWindow:: gui 'guis/mainmenu.gui' window 'OpenDoorsOnUnlock' has value count unequal to choices count WARNING:idChoiceWindow:: gui 'guis/mainmenu.gui' window 'QuitGameDialogAskEverytimeOption' has value count unequal to choices count WARNING:idChoiceWindow:: gui 'guis/mainmenu.gui' window 'SCGeneralBind5' has value count unequal to choices count WARNING:idChoiceWindow:: gui 'guis/mainmenu.gui' window 'showTooltips' has value count unequal to choices count 15 warnings WARNING: terminal type 'xterm-256color' is unknown. terminal support may not work correctly terminal support enabled ( use +set in_tty 0 to disabled ) pid: 4247 Async thread started Couldn't exec autocommands.cfg - file does not exist. Found 0 new missions and 0 packages. Found 42 mods in the FM folder. reloading guis/msg.gui. WARNING:idChoiceWindow:: gui 'guis/mainmenu.gui' window 'QuitGameDialogAskEverytimeOption' has value count unequal to choices count WARNING:idChoiceWindow:: gui 'guis/mainmenu.gui' window 'ColorPrecision' has value count unequal to choices count WARNING:idChoiceWindow:: gui 'guis/mainmenu.gui' window 'OpenDoorsOnUnlock' has value count unequal to choices count WARNING:idChoiceWindow:: gui 'guis/mainmenu.gui' window 'InvPickupMessages' has value count unequal to choices count WARNING:idChoiceWindow:: gui 'guis/mainmenu.gui' window 'HideLightgem' has value count unequal to choices count WARNING:idChoiceWindow:: gui 'guis/mainmenu.gui' window 'BowAimer' has value count unequal to choices count WARNING:idChoiceWindow:: gui 'guis/mainmenu.gui' window 'FrobHelper' has value count unequal to choices count WARNING:idChoiceWindow:: gui 'guis/mainmenu.gui' window 'showTooltips' has value count unequal to choices count WARNING:idChoiceWindow:: gui 'guis/mainmenu.gui' window 'MeleeInvertAttack' has value count unequal to choices count WARNING:idChoiceWindow:: gui 'guis/mainmenu.gui' window 'MeleeInvertParry' has value count unequal to choices count WARNING:idChoiceWindow:: gui 'guis/mainmenu.gui' window 'SCGeneralBind5' has value count unequal to choices count reloading guis/mainmenu.gui. WARNING:unknown destination 'FlareBox::rect' of set command at /fms/hhtlc/hhtlc_1b4187d3b30d65cf.pk4/guis/map/hhtlc.gui:48 WARNING:unknown destination 'FlareBox::rect' of set command at /fms/hhtlc/hhtlc_1b4187d3b30d65cf.pk4/guis/map/hhtlc.gui:53 WARNING:unknown destination 'FlareBox::rect' of set command at /fms/hhtlc/hhtlc_1b4187d3b30d65cf.pk4/guis/map/hhtlc.gui:58 WARNING:unknown destination 'FlareBox::rect' of set command at /fms/hhtlc/hhtlc_1b4187d3b30d65cf.pk4/guis/map/hhtlc.gui:63 WARNING:unknown destination 'FlareBox::rect' of set command at /fms/hhtlc/hhtlc_1b4187d3b30d65cf.pk4/guis/map/hhtlc.gui:68 WARNING:unknown destination 'FlareBox::rect' of set command at /fms/hhtlc/hhtlc_1b4187d3b30d65cf.pk4/guis/map/hhtlc.gui:73 --------- Map Initialization --------- Map: hhtlc ------- Game Map Init SaveGame ------- ---------- Compile stats ---------- Memory usage: Strings: 57, 9144 bytes Statements: 23506, 940240 bytes Functions: 1379, 179716 bytes Variables: 108332 bytes Mem used: 2188540 bytes Static data: 408 bytes Allocated: 1176676 bytes Thread size: 7928 bytes collision data: 1373 models 163204 vertices (5100 KB) 273893 edges (12838 KB) 110189 polygons (8170 KB) 15680 brushes (2322 KB) 138243 nodes (6480 KB) 243924 polygon refs (3811 KB) 58507 brush refs (914 KB) 85771 internal edges 9795 sharp edges 0 contained polygons removed 0 polygons merged 39637 KB total memory used 2123 msec to load collision data. map bounds are (22831.0, 23151.4, 9093.0) 79 KB passage memory used to build PVS 52 msec to calculate PVS 252 areas 598 portals 14 areas visible on average 7 KB PVS data [Load AAS] missing maps/hhtlc.aas48 [Load AAS] loading maps/hhtlc.aas96 done. [Load AAS] loading maps/hhtlc.aas32 done. [Load AAS] missing maps/hhtlc.aas100 [Load AAS] loading maps/hhtlc.aas_rat done. [Load AAS] loading maps/hhtlc.aas_elemental done. WARNING:Couldn't load gui: 'guis/map_of.gui' WARNING:idCollisionModelManagerLocal::LoadModel: collision file for 'models/ritual_hammer2.lwo' contains different model WARNING:idCollisionModelManagerLocal::LoadModel: collision file for 'models/ritual_hammer3.lwo' contains different model WARNING:idCollisionModelManagerLocal::LoadModel: collision file for 'models/ritual_hammer4.lwo' contains different model WARNING:Couldn't load sound 'explosion_all_clear.wav' using default [map entity: atdm_trigger_voice_12] [decl: explosion_all_clear in <implicit file>] [sound: explosion_all_clear.wav] No running thread for RestoreScriptObject(), creating new one. -------------------------------------- ----- idRenderModelManagerLocal::EndLevelLoad ----- 0 models purged from previous level, 2786 models kept. --------------------------------------------------- ----- idImageManager::EndLevelLoad ----- WARNING:Couldn't load image: lights/qc_comj [map entity: light_159] [decl: lights/qc_comj in <implicit file>] [image: lights/qc_comj] WARNING:Couldn't load image: guis/assets/game_maps/map_of_icon [map entity: MapMansion1] [decl: atdm:map_of in def/tdm_shopitems.def] [decl: guis/assets/game_maps/map_of_icon in <implicit file>] [image: guis/assets/game_maps/map_of_icon] 0 purged from previous 219 kept from previous 2070 new loaded all images loaded in 41.8 seconds ---------------------------------------- Linking GLSL program cubeMap ... Linking GLSL program bumpyEnvironment ... Linking GLSL program depthAlpha ... Linking GLSL program fog ... Linking GLSL program oldStage ... Linking GLSL program blend ... Linking GLSL program stencilshadow ... Linking GLSL program shadowMapA ... Linking GLSL program ambientInteraction ... Linking GLSL program interactionStencil ... Linking GLSL program interactionShadowMaps ... Linking GLSL program interactionMultiLight ... Linking GLSL program frob ... Linking GLSL program soft_particle ... Linking GLSL program tonemap ... Linking GLSL program gaussian_blur ... Linking GLSL program testImageCube ... Linking GLSL program depth ... Linking GLSL program interaction_ambient ... Linking GLSL program interaction_stencil ... Linking GLSL program interaction_shadowmap ... Linking GLSL program stencil_shadow ... Linking GLSL program shadow_map ... Linking GLSL program frob_silhouette ... Linking GLSL program frob_highlight ... Linking GLSL program frob_extrude ... Linking GLSL program frob_apply ... Linking GLSL program heatHazeWithDepth ... Linking GLSL program HeatHazeWithMaskAndDepth ... Linking GLSL program heatHaze ... Linking GLSL program heatHazeWithMaskAndBlur ... Linking GLSL program fresnel ... Linking GLSL program ambientEnvironment ... Linking GLSL program heatHazeWithMaskAndDepth ... ---------------------------------------- ----- idSoundCache::EndLevelLoad ----- 394497k referenced 125k purged ---------------------------------------- ----------------------------------- 77079 msec to load hhtlc Interaction table generated: size = 0/512 Initial counts: 6903 entities 665 lightDefs 5265 entityDefs ------------- Warnings --------------- during hhtlc... WARNING:Couldn't load gui: 'guis/map_of.gui' WARNING:Couldn't load image: guis/assets/game_maps/map_of_icon WARNING:Couldn't load image: lights/qc_comj WARNING:Couldn't load sound 'explosion_all_clear.wav' using default WARNING:idCollisionModelManagerLocal::LoadModel: collision file for 'models/ritual_hammer2.lwo' contains different model WARNING:idCollisionModelManagerLocal::LoadModel: collision file for 'models/ritual_hammer3.lwo' contains different model WARNING:idCollisionModelManagerLocal::LoadModel: collision file for 'models/ritual_hammer4.lwo' contains different model 7 warnings Interaction table generated: size = 0/512 Initial counts: 6903 entities 665 lightDefs 5265 entityDefs WARNING:Restarted sound to avoid offset overflow: sound/ambient/environmental/water_pool02.ogg WARNING:Restarted sound to avoid offset overflow: sound/ambient/ambience/silence.ogg WARNING:Restarted sound to avoid offset overflow: sound/ambient/ambience/alien05.ogg Linking GLSL program environment ... The ambient volume is now -1.885291 decibels (range: -60..0), i.e., 87.749992% of full volume. Restarting ambient sound snd_ct_babtistery'(derelict03) with volume -1.885291 signal caught: Segmentation fault si_code 128 Trying to exit gracefully.. ----- idRenderModelManagerLocal::EndLevelLoad ----- 0 models purged from previous level, 2786 models kept. --------------------------------------------------- Regenerated world, staticAllocCount = 0. Getting threadname failed, reason: No such file or directory (2) --------- Game Map Shutdown ---------- ModelGenerator memory: 67 LOD entries with 0 users using 1072 bytes. --------- Game Map Shutdown done ----- Shutting down sound hardware idRenderSystem::Shutdown() ...shutting down QGL I18NLocal: Shutdown. ------------ Game Shutdown ----------- ModelGenerator memory: No LOD entries. Shutdown event system -------------------------------------- Sys_Error: ERROR: pthread_join Frontend failed shutdown terminal support About to exit with code 1
-
Hello, everyone! In this multi-part, comprehensive tutorial I will introduce you to a new light type that has been available in The Dark Mod since version 2.06, what it does, why you would want to use it and how to implement it in your Fan Missions. This tutorial is aimed at the intermediate mapper. Explanations of how to use DarkRadiant, write material files, etc. are outside of its scope. I will, however, aim to be thorough and explain the relevant concepts comprehensively. Let us begin by delineating the sections of the tutorial: Part 1 will walk you through four, distinct ways to add ambient light to a scene, the last way using irradiance environment maps (or IEMs). Lighting a scene with an IEM is considered image-based lighting. Explaining this concept is not in the scope of this tutorial; rather, we will compare and contrast our currently available methods with this new one. If you already understand the benefits IBL confers, you may consider this introductory section superfluous. Part 2 will review the current state of cubemap lights in TDM, brief you on capturing an environment cubemap inside TDM and note limitations you may run into. Three cubemap filtering applications will be introduced and reviewed. Part 3 will go into further detail of the types of inputs and outputs required by each program and give a walkthrough of the simplest way to get an irradiance map working in-game. Part 4 will guide you through two additional, different workflows of how to convert your cubemap to an irradiance map and unstitch it back to the six separate image files that the engine needs. Part 5 will conclude the tutorial with some considerations as to the scalability of the methods hitherto explained and will enumerate some good practices in creating IEMs. Typical scenes will be considered. Essential links and resources will be posted here and a succinct list of the steps and tools needed for each workflow will be summarized, for quick reference. Without further ado, let us begin. Part 1 Imagine the scene. You’ve just made a great environment for your map, you’ve got your geometry exactly how you want it… but there’s a problem. Nobody can appreciate your efforts if they can’t see anything! [Fig. 1] This will be the test scene for the rest of our tutorial — I would tell you to “get acquainted with it” but it’s rather hard to, at the moment. The Dark Mod is a game where the interplay between light and shadow is of great importance. Placing lights is designing gameplay. In this example scene, a corridor with two windows, I have decided to place 3 lights for the player to stealth his way around. Two lights from the windows streak down across the floor and a third, placeholder light for a fixture later to be added, is shining behind me, at one end of the corridor. Strictly speaking, this is sufficient for gameplay in my case. It is plainly obvious, however, that the scene looks bad, incomplete. “Gameplay” lights aside, the rest of the environment is pitch black. This is undesirable for two reasons. It looks wrong. In real life, lights bounce off surfaces and diffuse in all directions. This diffused, omni-directional lighting is called ambient lighting and its emitment can be termed irradiance. You may contrast this with directional lighting radiating from a point, which is called point lighting and its emitment — radiance. One can argue that ambient lighting sells the realism of a scene. Be that as it may, suppose we disregard scary, real-life optics and set concerns of “realism” aside… It’s bad gameplay. Being in darkness is a positive for the player avatar, but looking at darkness is a negative for the player, themselves. They need to differentiate obstacles and objects in the environment to move their avatar. Our current light level makes the scene illegible. The eye strain involved in reading the environment in these light conditions may well give your player a headache, figurative and literal, and greatly distract them from enjoying your level. This tutorial assumes you use DarkRadiant or are at least aware of idtech4’s light types. From my earlier explanation, you can see the parallels between the real life point/ambient light dichotomy and the aptly named “point” and “ambient” light types that you can use in the editor. For further review, you can consult our wiki. Seeing as how there is a danger in confusing the terms here, I will hereafter refer to real life ambient light as “irradiant light”, to differentiate it from the TDM ambient lights, which are our engine’s practical implementation of the optical phenomenon. A similar distinction between “radiant light” and point lights will be made for the same reason. Back to our problem. Knowing, now, that most all your scenes should have irradiant light in addition to radiant light, let’s try (and fail, instructionally) to fix up our gloomy corridor. [Fig. 2] The easiest and ugliest solution: ambient lights. Atdm:ambient_world is a game entity that is basically an ambient light with no falloff, modifiable by the location system. One of the first things we all do when starting a new map is putting an ambient_world in it. In the above image, the darkness problem is solved by raising the ambient light level using ambient_world (or via an info_location entity). Practically every Dark Mod mission solves its darkness problem1 like this. Entirely relying on the global ambient light, however, is far from ideal and I argue that it solves neither of our two, aforementioned problems. Ambient_world provides irradiant light and you may further modulate its color and brightness per location. However, said color and brightness are constant across the entire scene. This is neither realistic, nor does it reduce eye strain. It only makes the scene marginally more legible. Let’s abandon this uniform lighting approach and try a different solution that’s more scene-specific. [Fig. 3] Non-uniform, but has unintended consequences. Our global ambient now down to a negligible level, the next logical approach would be hand-placed ambient lights with falloff, like ambient_biground. Two are placed here, supplementing our window point lights. Combining ambient and point lights may not be standard TDM practice, but multiple idtech4 tutorials extol the virtues of this method. I, myself, have used it in King of Diamonds. For instance, in the Parkins residence, the red room with the fireplace has ambient lights coupled to both the electric light and the fire flame. They color the shadows and enrich the scene, and they get toggled alongside their parent (point) lights, whenever they change state (extinguished/relit). This is markedly better than before, but to be honest anything is, and you may notice some unintended side-effects. The AI I’ve placed in the middle of the ambient light’s volume gets omnidirectionally illuminated far more than any of the walls, by virtue of how light projection in the engine works. Moving the ambient lights’ centers closer to the windows would alleviate this, but would introduce another issue — the wall would get lit on the other side as well. Ambient lights don’t cast shadows, meaning they go through walls. You could solve this by creating custom ambient light projection textures, but at this point we are three ad hocs in and this is getting needlessly complicated. I concede that this method has limited use cases but illuminating big spaces that AI can move through, like our corridor, isn’t one of them. Let’s move on. [Fig. 4] More directional, but looks off. I have personally been using this method in my WIP maps a lot. For development (vs. release), I even recommend it. A point light instead of an ambient light is used here. The texture is either “biground1” or “defaultpointlight” (the latter here). The light does not cast shadows, and its light origin is set at one side of the corridor, illuminating it at an angle. This solves the problem of omnidirectional illumination for props or AI in the middle of the light volume, you can now see that the AI is lit from the back rather than from all sides. In addition, the point light provides that which the ambient one cannot, namely specular and normal interaction, two very important features that help our players read the environment better. This is about as good as you can get but there are still some niggling problems. The scene still looks too monochromatic and dark. From experience, I can tell you that this method looks good in certain scenes, but this is clearly not one of them. Sure, we can use two, non-shadowcasting point lights instead of one, aligned to our windows like in the previous example, we can even artfully combine local and global ambient lights to furnish the scene further, but by this point we will have multiple light entities placed, which is unwieldy to work with and possibly detrimental to performance. Another problem is that a point light’s movable light origin helps combat ambient omnidirectionality, but its projection texture still illuminates things the strongest in the middle of its volume. I have made multiple experiments with editing the Z-projection falloff texture of these lights and the results have all left me unsatisfied. It just does not look right. A final, more intellectual criticism against this method is that this does not, in a technical sense, supply irradiant light. Nothing here is diffuse, this is just radiant light pretending the best it can. [Fig. 5] The irradiance map method provides the best looking solution to imbuing your scene with an ambient glow. This is the corridor lit with irradiance map lights, a new lighting method introduced in The Dark Mod 2.06. Note the subtle gradients on the left wall and the bounced, orange light on the right column. Note the agreeable light on the AI. Comparing the previous methods and this, it is plainly obvious that an irradiance environment map looks the most realistic and defines the environment far better than any of the other solutions. Why exactly does this image look better than the others? You can inform yourself on image-based lighting and the nature of diffuse irradiance, but images speak louder than words. As you can see, the fact of the matter is that the effect, subtle as it may be, substantially improves the realism of the scene, at least compared to the methods previously available to us. Procuring irradiance environment maps for use in lighting your level will hereafter be the chief subject of this tutorial. The next part will review environment cubemap capture in TDM, the makeIrradiance keyword and three external applications that you can use to convert a TDM cubemap into an irradiance map. 1 “ Note that the color buffer is cleared to black: Doom3 world is naturally pitch black since there is no "ambient" light: In order to be visible a surface/polygon must interact. with a light. This explains why Doom3 was so dark ! “ [source] Part 2 Cubemaps are not new to The Dark Mod. The skybox materials in some of our prefabs are cubemaps, some glass and polished tile materials use cubemaps to fake reflections for cheap. Cubemap lights, however, are comparatively new. The wiki page linked earlier describes these two, new light types that were added in TDM 2.05. cubicLight is a shadow-casting light with true spherical falloff. An example of such a light can be found in the core files, “lights/cubic/tdm_lampshade_cubic”. ambientCubicLight is the light type we will be focusing on. Prior to TDM 2.06, it acted as a movable, on-demand reflection dispenser, making surfaces in its radius reflect a pre-set cubemap, much like glass. After 2.06, the old behavior was discarded and ambientCubicLight was converted to accept industry standard irradiance environment maps. Irradiance environment maps (IEMs) are what we want to make, so perhaps the first thing to make clear is that they aren’t really “handmade”. An IEM is the output of a filtering process (convolution) which requires an input in the form of a regular environment cubemap. In other words, if we want to make an IEM, we need a regular cubemap, ideally one depicting our environment — in this case, the corridor. I say a snapshot of the environment is ideal for lighting it because this emulates how irradiant light in the real world works. All radiating surfaces are recorded in our cubemap, our ambient optic array as it were, then blurred, or convoluted, to approximate light scatter and diffusion, then the in-game light “shines” this approximation of irradiant light back to the surfaces. There is a bit of a “chicken and the egg” situation here, if your scene is dark to begin with, wouldn’t you just get a dark irradiance map and accomplish nothing? In the captured cubemap faces in Fig. 6, you may notice that the environment looks different than what I’ve shown so far. I used two ambient lights to brighten up the windows for a better final irradiance result. I’ve “primed the pump”, so to speak. You can ignore this conundrum for the moment, ways to set up your scenes for better results, or priming the pump correctly, will be discussed at the end of the tutorial. Capturing the Environment The wiki has a tutorial on capturing cubemaps by angua, but it is woefully out of date. Let me run you through the process for 2.07 really briefly. To start with, I fly to approx. the center of the corridor with noclip. I then type “envshot t 256” in the console. This outputs six .tga images in the <root>/env folder, simply named “t”, sized 256x256 px and constituting the six sides of a cube and depicting the entire environment. This is how they look in the folder: [Fig. 6] The six cube faces in the folder. Of note here is that I do not need to switch to a 640x480 resolution, neither do I need to rename these files, they can already be used in an ambientCubicLight. Setting Up the Lights For brevity’s sake, I’ll skip explaining material definitions, if you’ve ever added a custom texture to your map, you know how to do this. Suffice it to say, it is much the same with custom lights. In your <root>/materials/my_cool_cubemaps.mtr file, you should have something like this: lights/ambientcube/my_test_IEM_light { ambientCubicLight { forceHighQuality //cameraCubeMap makeIrradiance(env/t) cameraCubeMap env/t colored zeroClamp } } We’ll play with the commented out line in just a bit. Firstly, let’s place the actual light in DarkRadiant. It’s as simple as creating a new light or two and setting them up in much the same way you would a regular ambient light. I select the appropriate light texture from the list, “my_test_IEM_light” in the “ambientcube” subfolder and I leave the light colored pure white. [Fig. 7] The corridor in DR, top view, with the ambient cubic lights highlighted. I can place one that fills the volume or two that stagger the effect somewhat. Remember that these lights still have a spherical falloff. Preference and experimentation will prove what looks best to you. Please note that what the material we defined does is load a cubemap while we established that ambientCubicLights only work with irradiance maps. Let’s see if this causes any problems in-game. I save the map and run it in game to see the results. If I already have TDM running, I type “reloadDecls” in the console to reload my material files and “reloadImages” to reload the .tga images in the /env folder. [Fig. 8] Well this looks completely wrong, big surprise. Wouldn’t you know it, putting a cubemap in the place of an irradiance map doesn’t quite work. Everything in the scene, especially the AI, looks to be bathed in slick oil. Even if a material doesn’t have a specular map, it won’t matter, the ambientCubicLight will produce specular reflections like this. Let’s compare how our cubemap .tga files compares with the IEM .tgas we’ll have by the end of the tutorial: [Fig. 9] t_back.tga is the back face of the environment cubemap, tIEM_back.tga is the back face of the irradiance map derived from it. As you can see, the IEM image looks very different. If I were to use “env/tIEM” instead of “env/t” in the material definition above, I would get the proper result, as seen in the last screenshot of part 1. So it is that we need a properly filtered IEM for our lights to work correctly. Speaking of that mtr def though, let’s not invoke an irradiance map we haven’t learned to convert yet. Let’s try an automatic, in-engine way to convert cubemaps to IEMs, namely the makeIrradiance material keyword. makeIrradiance and Its Limitations Let’s uncomment the sixth line in that definition and comment out the seventh. cameraCubeMap makeIrradiance(env/t) //cameraCubeMap env/t Here is a picture of how a cubemap ran through the makeIrradiance keyword looks like: [Fig. 10] Say ‘Hi’ to our friend in the back, the normalmap test cylinder. It’s a custom texture I’ve made to demonstrate cubemap interactions in a clean way. Hey now, this looks pretty nice! The scene is a bit greener than before, but you may even argue it looks more pleasing to the eyes. Unfortunately, the devil is in the details. Let’s compare the makeIrradiance keyword’s output with the custom made irradiance map setup seen at the end of part 1. [Fig. 11, 12] A closer look at the brick texture reveals that the undesired specular highlighting is still present. The normal map test cylinder confirms that the reason for this is the noisy output of the makeIrradiance keyword. The in-engine conversion is algorithmic, more specifically, it doesn't allow us to directly compare .tga files like we did above. Were we able to, however, I'm sure the makeIrradiance IEM would look grainy and rough compared to the smooth gradient of the IEM you’ll have by the end of this tutorial. The makeIrradiance keyword is good for quick testing but it won’t allow you fine control over your irradiance map. If we want the light to look proper, we need a dedicated cubemap filtering software. A Review of Cubemap Filtering Software Here I’ll introduce three programs you can produce an irradiance map with. In the coming parts, I will present you with a guide for working with each one of them. I should also note that installing all of these is trivial, so I’ll skip that instructional step when describing their workflows. I will not relay you any ad copy, as you can already read it on these programs’ websites. I’ll just list the advantages and disadvantages that concern us. Lys https://www.knaldtech.com/lys/ Advantages: Good UI, rich image manipulation options, working radiance/specular map filtering with multiple convolution algorithms. Disadvantages: $50 price tag, limited import/export options, only available on Windows 64-bit systems. cmftStudio https://github.com/dariomanesku/cmftStudio Advantages: Available on Windows, OSX and Linux, free, open source software, command line interface available. Disadvantages: Somewhat confusing UI, limited import options, missing features (radiance/specular map filtering is broken, fullscreen doesn’t work), 32-bit binaries need to be built from source (I will provide a 32-bit Windows executable at the end of the tutorial). Modified CubeMapGen https://seblagarde.wordpress.com/2012/06/10/amd-cubemapgen-for-physically-based-rendering/ Advantages: Free software, quickest to work with (clarified later). Disadvantages: Bad UI, only Windows binaries available, subpar IEM export due to bad image adjustment options. Let’s take a break at this point and come back to these programs in part 3. A lot of caveats need to be expounded on as to which of these three is the “best” software for making an irradiance map for our purposes. Neither of these programs has a discreet workflow; rather, the workflow will include or exclude certain additional programs and steps depending on which app you choose to work with. It will dovetail and be similar in all cases. Part 3 The aim of this tutorial is twofold. First, it aims to provide the most hands-free and time-efficient method of converting an envshot, environment cubemap to an IEM and getting it working in-game. The second is using as few applications as possible and keeping them all free software that is available for download, much like TDM itself. The tutorial was originally going to only cover IEM production through Lys, as that was the app I used to test the whole process with. I soon realized that it would be inconsiderate of me to suggest you buy a fifty dollar product for a single step in a process that adds comparatively little to the value of a FM, if we’re being honest (if you asked me, the community would benefit far more from a level design tutorial than a technical one like this, but hey, maybe later, I’m filling a niche right now that nobody else has filled). This led me to seek out open-source alternatives to Lys, such as Cubemapgen, which I knew of and cmftStudio, which I did not. I will preempt my own explanations and tell you right away that, in my opinion, cmftStudio is the program you should use for IEM creation. This comes with one big caveat, however, which I’m about to get into. Six Faces on a Cross and The Photoshop Problem Let’s review. Taking an envshot in-game gives you six separate images that are game-ready. Meaning, you get six, split cubemap faces as an output, you need six, split irradiance map faces as an input. This is a problem, because neither Lys nor cmftStudio accept a sequence of images as such. They need to be stitched together in a cube cross, a single image of the unwrapped cube, like this: [Fig. 13] From Lys. Our cubemap has been stitched into a cross and the “Debug Cube Map Face Position” option has been checked, showing the orientations of each face. In Lys only panoramas, sphere maps and cube maps can be loaded into the program. The first two do not concern us, the third specifically refers to a single image file. Therefore, to import a TDM envshot into Lys you need to stitch your cubemap into a cross. Furthermore, Lys’ export also outputs a cubemap cross, therefore you also need to unstitch the cubemap into its faces afterwards if you want to use it in TDM. In cmftStudio you can import single map faces! Well… no, you can’t. The readme on GitHub boasts “Input and output types: cubemap, cube cross, latlong, face list, horizontal and vertical strip.” but this is false. The UI will not allow you to select multiple files on import, rendering the “face list” input type impossible.2 Therefore, to import a TDM envshot into cmftStudio you need to stitch your cubemap into a cross. Fortunately, the “face list” export type does work! Therefore, you don’t need to unstitch the cubemap manually, cmftStudio will export individual faces for you. In both of these cases, then, you need a cubemap cross. For this tutorial I will use Adobe Photoshop, a commercial piece of software, to stitch our faces into a cubemap in an automated fashion (using Photoshop’s Actions). This is the big caveat to using cmftStudio, even if you do not want to buy Lys, PS is still a prerequisite for working with both programs. There are, of course, open source alternatives to Photoshop, such as GIMP, but it is specifically Photoshop’s Action functionality that will power these workflows. GIMP has its own Actions in the form of Macros, but they are written with python. GIMP is not a software suite that I use, neither is python a language I am proficient with. Out of deference for those who don’t have, or like working with, Photoshop, I will later go through the steps I take inside the image editor in some detail, in order for the studious reader to reconstruct them, if they so desire, in their image editing software of choice. At any rate, and at the risk of sounding a little presumptuous, I take it that, as creative types, most of you already have Photoshop on your computers. 2 An asterisk regarding the “impossibility” of this. cmftStudio is a GUI for cmft, a command line interface that does the same stuff but inside a command prompt. I need to stress that I am certain multiple faces can be inputted in the command line, but messing with unwieldy prompts or writing batch files is neither time-saving nor user-friendly. This tutorial is aimed at the average mapper, but a coder might find the versatility offered in cmft interesting. The Cubemapgen Workflow You will have noticed that I purposefully omitted Cubemapgen from the previous discussion. This is because working with Cubemapgen, wonderfully, does not need Photoshop to be involved! Cubemapgen both accepts individual cubemap faces as input and exports individual irradiance map faces as output. Why, then, did I even waste your time with all the talk of Lys, cmftStudio and Photoshop? Well, woefully, Cubemapgen’s irradiance maps look poor at worst and inconsistent at best. Comparing IEMs exported from Lys and cmftStudio, you will see that both look practically the same, which is good! An IEM exported from Cubemapgen, by default, is far too desaturated and the confusing UI does not help in bringing it to parity with the other two programs. If you work solely with Cubemapgen, you won’t even know what ‘parity’ is, since you won’t have a standard to compare to. [Fig. 14] A comparison between the same irradiance map face, exported with the different apps at their respective, default settings. Brightened and enlarged for legibility. This may not bother you and I concede that it is a small price to pay for those not interested in working with Photoshop. The Cubemapgen workflow is so easy to describe that I will in fact do just that, now. After I do so, however, I will argue that it flies in the face of one of the aims of this tutorial, namely: efficiency. Step 1: Load the cubemap faces into Cubemapgen. Returning to specifics, you will remember that we have, at the moment, six .tga cubemap faces in a folder that we want to convert to six irradiance map faces. With Cubemapgen open, direct your attention to these buttons: [Fig. 15] You can load a cubemap face by pressing the corresponding button or using the hotkey ‘F’. To ensure the image faces the correct way, you must load it in the corresponding “slot”, from the Select Cubemap Face dropdown menu above, or by pressing the 1-6 number keys on your keyboard. Here is a helpful list: X+ Face <1> corresponds to *_right X- Face <2> corresponds to *_left Y+ Face <3> corresponds to *_up Y- Face <4> corresponds to *_down Z+ Face <5> corresponds to *_forward Z- Face <6> corresponds to *_back ...with the asterisk representing the name of your cubemap. With enough practice, you can get quite proficient in loading cubemap faces using keyboard shortcuts. Note that the ‘Skybox’ option in the blue panel is checked, I recommend you use it. Step 2: Generate the Irradiance Map [Fig. 16] The corridor environment cubemap loaded in and filtered to an irradiance map. The options on the right are my attempt to get the IEM to look right, though they are by no means prescriptive. Generating an IEM with Modified CubeMapGen 1.66 is as easy as checking the ‘Irradiance cubemap’ checkbox and hitting ‘Filter Cubemap’ in the red panel. There are numerous other options there, but most will have no effect with the checkbox on. For more information, consult the Sébastien Lagarde blog post that you got the app from. I leave it to you to experiment with the input and output gamma sliders, you really have no set standard on how your irradiance map is supposed to look, so unfortunately you’ll have to eyeball it and rely on trial and error. Two things are important to note. The ‘Output Cube Size’ box in the red panel is the resolution that you want your IEM to export to. In the yellow panel, make sure you set the output as RGB rather than RGBA! We don’t need alpha channels in our images. Step 3: Export Irradiance Map Faces Back in the green panel, click the ‘Save CubeMap to Images’ button. Save the images as .tga with a descriptive name. [Fig. 17] The exported irradiance map faces in the folder. These files still need to be renamed with appropriate suffixes in order to constitute a readable cubemap for the engine. The nomenclature is the same as the table above: “c00” is the X+ Face, to be renamed “right”, “c01” is the X- Face and so on. Right left, up down, forward and back. That’s the order! This is all there is to this workflow. A “cameraCubeMap env/testshot” in the light material will give us a result that will look, at the very least, better than the inbuilt makeIrradiance material keyword. [Fig. 17] The map ended up being a little bright. Feel free to open Fig. 4 and this in seperate tabs and compare the Lys/cmft export with the cubemapgen one. A Review of the Workflow Time for the promised criticism to this workflow. I already stated my distaste for the lack of a standardised set of filtering values with this method. The lack of any kind of preset system for saving the values you like makes working with Cubemapgen even more slipshod. Additionally, in part 2, I said that Cubemapgen is the fastest to work with, but this needs to be qualified. What we just did was convert one cubemap to an irradiance map, but a typical game level ought to use more than a single IEM. Premeditation and capturing fake, “generic” environment cubemaps (e.g. setting up a “blue light on the right, orange on the left” room or a “bright skylight above, brown floor” room, then capturing them with envshot) might allow for some judicious reuse and keep your distinct IEM light definition count down to single digits, but you can only go so far with that. I am not arguing here for an ambient cubic light in every scene either, certainly only those that you deem need the extra attention, or those for which the regular lighting methods enumerated in Part 1 do not quite work. I do tentatively assume, though, that for an average level you would use between one and two dozen distinct IEMs. Keep in mind that commercial games, with their automated probe systems for capturing environment shots, use many, many more than that. With about 20 cubemaps to be converted and 6 faces each to load into Cubemapgen, you’ll be going through the same motions 120 whole times (saving and renaming not included). If you decide to do this in one sitting (and you should, as Cubemapgen, to reiterate, does not keep settings between sessions), you are in for a very tedious process that, while effective, is not very efficient. The simple fact is that loading six things one by one is just slower than loading a single thing once! The “single thing” I’m referring to is, of course, the single, stitched cubemap cross texture. In the next part, I will go into detail regarding how to make a cubemap cross in Photoshop in preparation for cmftStudio and Lys. It will initially seem a far more time-consuming process to you than the Cubemapgen workflow, but through the magic of automation and the Actions feature, you will be able to accomplish the cubemap stitch process in as little as a drag-and-drop into PS and a single click. The best thing is that after we go through the steps, you won’t have to recreate them yourself, as I will provide you with a custom Actions .atn file and save you the effort. I advise you not to skip the explanations, however. The keen-eyed among you may have noticed that you can also load a cube cross in Cubemapgen. If you want to use both Cubemapgen and Photoshop together to automate your Cubemapgen workflow, be aware that Cubemap gen takes crosses that have a different orientation than the ones Lys and cmftStudio use. My macros (actions) are designed for the latter, so if you want to adjust them for Cubemapgen you would do well to study my steps and modify them appropriately. For the moment, you’ve been given the barebones essentials needed to capture an envshot, convert it to an irradiance map and put it in your level at an appropriate location, all without needing a single piece of proprietary software. You can stop here and start cranking out irradiance maps to your heart’s content, but if you’re in the mood for some more serious automation, consider the next section.
-
I feel I should add - due to my blunder with the volumetric lights shadows I didn't realize I that I was looking at soft shadows for maps instead of stencil when I was comparing them. After some more playing around I definitely see that soft shadows with stencil looks better. So I get what all the fuss is about now.
-
I thought I've read somewhere that if you enable shadow maps, that on some lights, stencil shadows are still forced, for some reason. Correct? I'm not sure if I should vote. This seems more for fm-bakers. Edit: I would go for option 1
-
Not to start a discussion on this but just for correctness, that is not true at all, unless you are using a really low polygon shadow mesh, if you see a pixelated shadow with stencil, then that is a shadow map or a mix of both stencil and shadow maps. Stencil shadows are crisp and well defined, they have no resolution setting or quality setting (besides turning off shadows), because they are literally geometry (triangles) being projected unto surfaces, while shadow maps are pixels (textures) so you can control how sharp they are. TDM has a mix shadow system, where some effects even in stencil shadow mode, will use shadow maps, for example volumetric lights shadows, are shadow maps. Stencil shadows Shadow maps
-
Losing the option for stencil shadows would be extremely sad. TDM has the best stencil shadows implementation I've ever seen, and they look far better than shadow maps. They also perform wonderfully. Stencil shadows not supporting shadows on translucent surfaces is a bummer, but that's a fine tradeoff. Personally, I'd rather not see alpha-tested shadow occluders, because they look awful and are distracting. Shadow maps in general look bad and pixelated -- quite immersion breaking. Another issue with shadow maps is that they substantially increase the usage of the GPU. For those using laptops or integrated GPUs, it could cause performance or heat issues. For those with decent dedicated GPUs, increased wattage (and therefore heat) can and does turn on its GPU fans. The wattage on my AMD RX 6700 XT can become tripled when using shadow maps. That's undesirable. The advice I give players is: There really isn't a "best" shadows implementation these days. Some devs and players prefer one over the other. Regardless of which is chosen, stencil shadows and maps are used where needed. So, I'd try out both and pick the one you prefer. Here's Fen complaining about shadow maps. Complaint #1 (7:28): Complaint #2 (23:46): In his next video (Written in Stone - 4 - Chocolate Coated Brendel Bar), he turned on stencil shadows, and as far as I know, he never complained again. The following area in Written in Stone shows a good example of alpha-tested shadow occluders. Yes, technically the moving leaves cast shadows, but it looks awful in game, in my opinion. I know others like it. The same scene using stencil shadows looks amazing in game. (The screenshots don't do a good job demonstrating how it looks in game.) The current hybrid system is fantastic. It gives people choice. Those who prefer stencil shadows can use them; those who prefer shadow maps can use them. People become attached to the "art" and "style" of a mission, and changing the shadow implementation changes the art and style. If one must be dropped, I'd say shadow maps should be dropped from the menu settings. Use shadow maps for volumetric lights and stencil shadows everywhere else. And, I agree with nbohr1more that defaulting to rules consistent with stencil shadows is a good idea.
(3376.891125_6671.9)edited.thumb.jpg.42be40aa8e92e942cc37d1941eb75715.jpg)
-
"...to a robber whose soul is in his profession, there is a lure about a very old and feeble man who pays for his few necessities with Spanish gold." Good day, TDM community! I'm Ansome, a long-time forums lurker, and I'm here to recruit beta testers for my first FM: "The Terrible Old Man", based on H.P. Lovecraft's short story of the same name. This is a short (30-45 minute), story-driven FM with plenty of readables and a gloomy atmosphere. Do keep in mind that this is a more linear FM than you may be used to as it was deemed necessary for the purposes of the story's pacing. Regardless, the player does still have a degree of freedom in tackling challenges in the latter half of the FM. If this sounds interesting to you, please head over to the beta testing thread I will be posting shortly. Thank you!
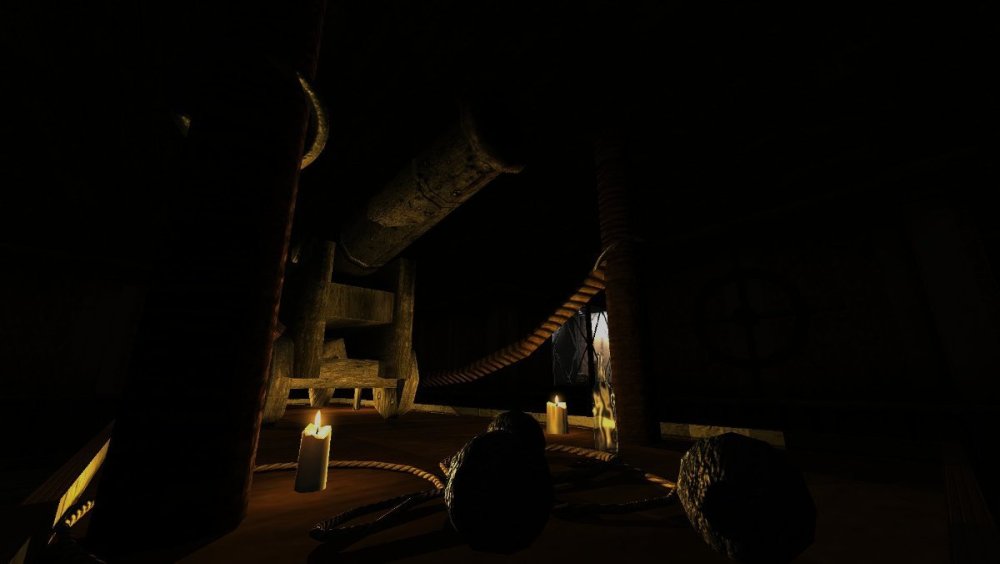
- 6 replies
-
- 10
-
-
fwiw, I tried cloning the material def for lightbiground1 (materials/lights.mtr) and added ai_see 0, but that gives an unknown token error. lights/biground1 { description "Round point light." { forceHighQuality map lights/biground1.tga colored zeroClamp ai_see 0 } }
-
The latest TDM dev version (dev16650-10157) appears to contain broken definitions for ambient cube lights, breaking lighting on any FM that uses them (I have several in progress). I noticed the path got renamed from "ambientcube" to "ambientCube" (c became a capital C). Even if picking the new path however, DarkRadiant shows a "shader not found" error, whereas in-world the light is no longer visible and functional. Can this be fixed for the next dev snapshot please?
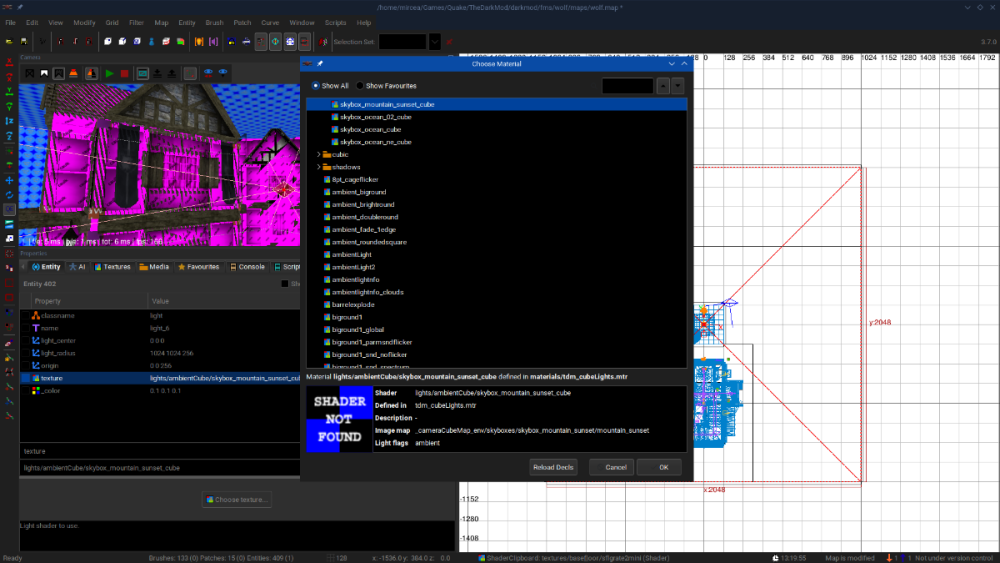
-
Changelog of 2.13 development: dev17035-10724 * Support passing information between game and briefing/debriefing GUI via persistent info. Also changed start map & location selection, added on_mission_complete script callback (6509 thread). * New bumpmapped environment mapping is now default (6354). * New behavior of zero sound spawnarg is not default (6346). * Added sound for "charge post" model (6527). * Major refactoring of cvars system to simplify future changes (5600). Known issues: * Bow does not shoot in some missions: thread dev17026-10712 * Nested subviews (mirrors, remotes, sky, etc.) now work properly (6434). * Added GUI debriefing state on mission success (6509 thread). * Sound argument override with zero now works properly under cvar (6346 thread). * Environment mapping is same on bumpy and non-bumpy surfaces under cvar (6354 thread). * Default console font size reduced to 5, added lower bound depending on resolution. * Added high-quality versions of panel_carved_rectangles (6515). * Added proper normal map for stainglass_saint_03 (6521). * Fixed DestroyDelay warning when closing objectives. * Fixed the only remaining non-threadsafe cvar (5600). * Minor optimization of depth shader. * Added cm_allocator debug cvar (6505). * Fixed r_lockView when compass is enabled. dev17008-10685 * Enabled shadow features specific to maps implementation (poll). * Auto-detect number of parallel threads to use in jobs system (6503). * Improved parallel images loading, parallelized sounds loading, optimized EAS (6503). * Major improvements in mission loading progress bar (6503). * Core missions are now stored uncompressed in assets SVN (6498). * Deleted a lot of old rendering code under useNewRenderPasses + some cleanup (6271). dev16996-10665 * Environment mapping supports texcoord transforms on bumpmap (6500). * Fully disabled shadows on translucent objects (6490). * Fixed dmap making almost axis-aligned visportals buggy (6480). * com_maxFps no longer quantizes by milliseconds on Windows 8+. * Now Uncapped FPS and Vsync are ON by default. * Supported Vsync control on Linux. * Added set of prototype materials (thread). * Fixes to Stone font to remove stray pixels (post). * Loot candlestick no longer toggle the candle when taken. * Optimized volumetric lights and shadows in the new Training Mission (4352). * Fixed frob_light_holder_toggle_light on entities with both skin_lit and skin_unlit. * Now combination lock supports non-door entities by activating them. * Added low-poly version of hedge model (6481). * Added tiling version of distant_cityscape_01 texture (6487). * Added missing editor image for geometric02_red_end_HD (6492). * Added building_facades/city_district decal material. * Fixed rendering with "r_useScissor 0" (6349). * Added r_lockView debug rendering cvar (thread). * Fixed regression in polygon trace model (5887). * Added a set of lampion light entityDefs.
-
We are proud to announce the release of: The Dark Mod 2.12 ! The 2.12 development cycle introduced many large code overhaul projects. Most of these were to lay the groundwork for future fixes and optimizations. The final release is yet another leap in performance over the already impressive 2.10 and 2.11 releases. A full changelog can be viewed here, but some highlights include: The Dark Mod 2.12 is a major step forward for mission designers! The culling system has been extensively overhauled to ensure that your CPU and GPU are not wasting resources rendering unseen geometry, lights, and shadows. Some of our best map optimization experts have achieved similar performance gains to what this new culling system does but it is a rare skill and we have even managed to improve performance on missions that were generally regarded as “well optimized”. Mission authors both new and old can follow standard mapping practices with no need to dive deep into sophisticated optimization techniques even for some pretty challenging scenarios such as wide open areas and long views. Players will immediately notice many missions that have made their system struggle with FPS now may be running much more smoothly! Smoother controls for players! Also during the 2.12 development cycle, work has been done to make controls more seamless and accessible. Frob can now use hold or click actions to use items. Once you get used to the mechanic, it will be hard to go back to using a separate “use key”. Mantling is now smoother, faster, and less prone to cause the player to clip through geometry. Leaning is now more subtle and less prone to cause motion sickness. To reduce the tedium of shuffling knocked out AI around to search for loot, you can now configure TDM to automatically loot any frobbed AI. A special thanks must go out to community member Geep! Over the course of 2.12 development, Geep has created subtitles for nearly all AI barks along with developing testing tools and procedures for this gargantuan task! You can see these changes in action by changing the Subtitles setting to “On” ( rather than “Story” ) on the Audio settings page. Geep also provided substantial feedback for our GUI and subtitle design process and edited font data to improve text quality overall. Datiswous has complimented the massive work by Geep to create AI bark subtitles by creating mission story subtitles for a large number of missions. Thank you! Turrets are now natively supported in The Dark Mod and can be paired with Security Cameras! Finally, the nasty 2.11 bug that caused AI to allow arrows to pass through them at certain angles was fixed by Joebarnin! Your assassin style play-throughs should be far less frustrating. See also, our 2.12 Feature discussions: To UPDATE, simply run the tdm_installer.exe file in your darkmod folder. Note that tdm_update.exe is no longer supported, but you can download the new installer from the Downloads page if you don’t have it yet. Please be aware that old saved games will not be compatible with 2.12, so finish any missions you might be in the middle of first! Also, some missions created prior to 2.12 may need to be updated so they will be playable in 2.12. Use the in-game mission downloader to check for updates.

-
The real St. Alban was a pagan who became a celebrated religious personality, this All Saints Day 2010 The Dark Mod places its own spin on this mythical figure. Screenshots: Intro: "'Business' has been slow lately, even more so after most of my gear got snatched during a Watch raid... I've since been forced to hit the streets and pick pockets for a living. But my luck was about to change, last night I was approached by a red hooded figure with a proposition... As we sat down in a dark corner of a nearby inn, he told to me that the Builders of St. Alban's Cathedral in the Old Quarter had recently unearthed a discovery that might lead to the final resting place of some saint." " But before I do anything, I need to get my tools and stash from the evidence room at the local watch station." "with the hawks, doves will congregate they will drop honey from the cliffs wine will surge over the earth the sheep will wander harmlessly with the wolf then the wicked will rise, but to retribution" - 'scripture of St Alban' There is a new version out now, see the following thread St Albans Cathedral version 1.6 Build Time: about 2-3 months. Thanks:- Huge respect to the Dark Mod team for such a great mod and for all the hard work they put into it and continue to put into it. Special thanks to Fidcal, Serpentine and others for their help on the forums and to Testing:Ugoliant, Baddcog, Grayman, Lost soul, Bjorn and Baal (for doing all the Vp work in the town. Readables: Ungoliant and Mortemdesino for all awesome work on the readables. Resource: Fids, Grayman, Ungoliant - guis, models & images. Misc: Loren Schmidt - the author of the map I based the cathedral on. Info: # Like Thief2, some things are climable, pipes, wall vines etc.. You can also drop some of the keys, some door that are frobbabe mean there is another way inside - explore u taffer! # Due to TDM being a lot more of a resource hog than T2 I have been forced to limit the number of Ai in the mission, but they have better placement than my last mission. # On all difficulty levels the player starts with vertualy no tools/weapons, there are weapons to be found - read, read, read! # For the love of all that is holy, read the briefing otherwise you will problems completing the mission. Known issues:- # This mission will have less than optimal fps at a few points on the map, mid range DX9 card(X1900/GF7800) or higher required. # On low end PCs I recommend, V-sync is off, AA is off, Aniso is 4x or lower and that any and all background apps are closed.
-
A couple more: https://forums.thedarkmod.com/index.php?/topic/21739-resolved-allow-mantling-while-carrying-a-body/ https://forums.thedarkmod.com/index.php?/topic/22211-feature-proposal-new-lean-for-tdm-212/ https://forums.thedarkmod.com/index.php?/topic/22198-feature-proposal-frob-to-use-world-item/ https://forums.thedarkmod.com/index.php?/topic/22249-212-auto-search-bodies/
-
I am considering to replace the fake moon beams in Sir Talbots Collateral with volumetric lights. But I need information on some issues: Do you they work well enough now? Are there issues with stencil shadows? I remember early posts mentioning that. What performance/quality options are there? I use a weak notebook a lot, and want to keep the mission running on it. Can I turn of volumetric rendering without disabling lights? Any other things I need to be aware of?
-
 Author Note: This is a brand new mission and a new entry into the accountant series. There are some different than usual puzzles in this FM, so if you find yourself stuck try to think about your pathway forward in a logical manner. And if you're still having troubles then pop by this thread and ask (preferably with spoiler tags). This FM is brand new and serves as the first installment in The Accountant series, a few years back there was a small prologue style mission released however I felt that it did not represent The Accountant series so I decided to go back to the drawing board and do a whole new mission that's larger, has a better level design and has a story that lines up closer to what I plan to do with the accountant series. The mission is medium sized and you can expect between 30-90 minutes to complete it depending on your playstyle. Beta Testers Captain Cleveland Crowind Kingsal PukeyBee Skacky SquadaFroinx Voice Actors AndrosTheOxen Epifire Goldwell Stevenpfortune Yandros Custom assets Airship Ballet Bentraxx Bob Necro Dragofer DrKubiac Epifire Kingsal MalachiAD Sotha Springheel SquadaFroinx Available via in-game downloader File Size: 233 MB - Updated to v 1.1 (01.06.2018)
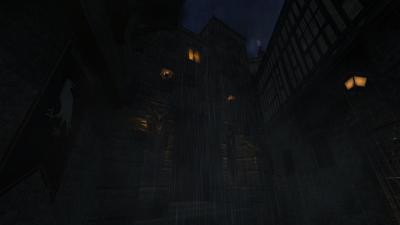
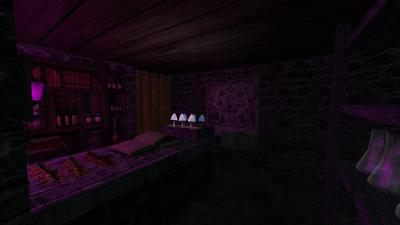
- 115 replies
-
- 20
-
-
When volumetric lights were officially supported, I was blasted away on how good the Screenshots looked. So I tried to implement some in the update of my FM. But actually I always ended up with removing them because it looked rather strange with many small dark dots appearing in the areas of the light or when NPCs walk through them. As I read that many FM authors already implemented them into their missions, I wonder what setup did you use? Which colours and density worked for you? My plan was to use a volumetric light for the fireplaces in this mission. But no matter how ai played around with density and colour, I always endet up having those small black and grey tiny dots around. Also the rest of the room looks out of place if the torches on the wall DON'T use VL but the fireplace does. I can't find another way but to listen to your experience with VL. Thank you!


(3376.891125_6671.9)edited.jpg.d7e2832f69ccc0144210fd9e50b87e6f.jpg)