Search the Community
Searched results for '/tags/forums/prefabs/' or tags 'forums/prefabs/q=/tags/forums/prefabs/&'.
-
Yes, it does. Which makes it interesting that you yourself explicitly said that it's interesting nobody had complained here on the official forums: I did, which is why it stood out to me so much that even though you yourself had personally been involved you would reply claiming nobody had complained here on the official forums. I'm not colorblind at all. Does that make people pointing out that almost no modern games have proper colorblindness support hyperbole? Just because it doesn't affect you, or you choose not to pay attention to the discussion of something, doesn't make it hyperbole. Pick pretty much any modern FPS and you will find plenty of discussion about the near universal disregard for FOV and camera movement as accessibility issues. Denigrating those as hyperbole because you personally don't feel the affects is as bad of a look as demeaning people who bring up the importance of valid allergen warnings like gluten or colorblindness and deafness support.
-
Hey, Every time I've try to use the Full Editor when PM'ing someone, and every single time I get an error. Whoever is in charge of the forum, is it possible that this could be fixed? Thanks Neon
-
Ignoring is somewhat inadequate as you still see other members engaging in a discussion with the problematic user, and as Wellingtoncrab says such discussions displace all other content within that channel. Moderation is also imperfect as being unpleasant to engage with is not in itself banworthy, so there is nothing more to do if such people return to their old behaviour after a moderator had a talk with them, except live with it or move away. I'd be more willing to deal with it if it felt like there were more on-topic discussion, i.e. thoughts about recently played fan missions or mappers showcasing their progress, rather than a stream of consciousness about a meta topic that may or not have to do with TDM. I guess the forums already serve the desired purpose, or they just compartmentalise discussions better.
-
Fleshy beds should now be resolved: http://forums.thedarkmod.com/topic/17587-the-assets-of-aosys/?p=398777
-
Possibility to rescale the hud: http://forums.thedarkmod.com/topic/14394-apples-and-peaches-obsttortes-mapping-and-scripting-thread/?p=398521 Feedback appreciated

-
For the diehards, i created a Ironman mode mod for tdm. http://forums.thedarkmod.com/topic/18518-would-it-be-possible-to-implement-an-ironman-mode-in-darkmod
-
created a ironman-mode for TDM. For more info, see http://forums.thedarkmod.com/topic/18518-would-it-be-possible-to-implement-an-ironman-mode-in-darkmod/
-
Working on a litte expiremental deusexthemed tdm mission http://forums.thedarkmod.com/topic/18512-deus-ex-mod-like-dark-mod-is-to-thief
-

Interesting.
-
-
Dishonoured 2: Tweaks and Fixes guide - http://forums.thedarkmod.com/topic/18494-dishonored-2-tweaks-and-settings/?p=397014
-

Thank you
-
-
National Geographic: Mars - http://forums.thedarkmod.com/topic/18488-this-is-what-i-helped-with-today/
-
The Prefabs section of the Overview is now posted, along with 2 child articles on their import and export. Anyone who has worked with prefabs a lot is encouraged to review these. I have may have "gotten out beyond my skis" in some cases.
-
No. The Aeden's staff optional objective is the hardest of the game. To point out directions here, though, is getting into an area of heavy-duty spoilers ... so I'm constrained in my response just as I was constrained in my responses to the "endless keyhunt" complaints because to show the rather simple direction would be a huge spoiler. So I had to bite my tongue and take it. Aeden's staff is different, though - harder. I've never tried a no-KO ghost playthrough. Because I'm clumsy and have slow reflexes. I think it might be possible to do a stealth no-alerts playthrough. Are you allowed to KO? I think I've gotten the staff a few times in my playthroughs without alerting the builders in that room. The only switchable lights in the FM are table lamps. The cylindrical style wall lamps aren't extinguishable. The other fire and gas wall lamps are extinguished by water. In the Ox all waiters and commoners in the common room and outside are friendlies - except for the waitress in the upper lounge which is filled with enemies. You need water arrows. Moss arrows. Rope arrows. I've never used a gas arrow in a playthrough of the FM but one would make things easier, for sure. I'm going to replay the area and check through the locations that you mentioned - the loop etc. - then if it's OK with you I'll PM you with some info, tho' I'll ask you if you want the info first. So's not to spoil it for others who get that far in the game (few and far between!). I find it almost impossible not to click the "reveal spoiler" tags and read the info ... and, y'know, spoilers do spoil the real deal.
-
Figured out how to crossfade normal maps completing Obsttortes work: http://forums.thedarkmod.com/topic/14394-apples-and-peaches-obsttortes-mapping-and-scripting-thread/page-14?do=findComment&comment=395180
-
PLAYERS * Volumetric lights appeared late before the previous beta, so the quality of volumetrics in 2.10 was rather poor, and the dithering pattern was very annoying to look at. The feature received a lot more development, and now adheres to the standards of modern rendering. The dithering pattern is gone, performance should be much better, and now you won't miss volumetrics even if you prefer to play with stencil shadows all the time! (thread) * Thanks to a certain "AI-heavy" mission, the game code has received major optimizations. It is most noticeable in low performance conditions, when game modelling takes a lot of CPU time. Previously the game could easily descend into the "spiral of death" with FPS falling below 5, now it is way harder due to better scheduling of AI thinking. There is a variety of other game code optimizations which make our lives slightly better. * New version includes several optimizations for shadows, mostly stencil shadows. A long-standing inefficiency of stencil shadows with antialiasing is fixed, new tile-based optimization is added for soft stencil shadows (thread), small lights with large meshes work faster due to BVH efforts (thread). On the side of shadow maps, the rules for distributing the resolution budget are changed: small distant lights no longer steal precious bandwidth for themselves. * There are several improvements on gameplay side as well. The core mechanics of blackjacking enemies has received subtle, yet helpful improvements (thread). Now you can grab many close pieces of loot by holding down the frob button, instead of picking up each item individually. There are several improvements to crouching, making it more responsive (thanks to @Daft Mugi). The in-game downloader now supports "sort by release date" ordering. * There were a ton of small bugfixes for issues like: bow stuck after load, wrong strafe-walk sound, crash when saving shortly after the death of an elemental, melee combat crash, issues with leaning onto doors, missing fracture sounds after loading a save, X-ray glitch in the first frame, toggling solidity/visibility, lightgem on game load, etc. MAPPERS * The engine now supports OBJ model format. This format is much more popular than ASE and LWO. The engine loading code is very lightweight: it will use your model exactly is as, and load it very quickly. The OBJ format is preferred for large meshes due for faster loading times. The only possible downside is somewhat larger download size compared to LWO, although not much and not always (thread). * Renderer should deal with large meshes much faster, thanks to BVH optimizations. Recall that idTech4 was made for very low-poly models. When renderer frontend sees a "surface" in a model, it always treats this surface as an atomic piece, doing all computations for all of its vertices and triangles. This is very good for low-poly models, can heavily drag performance down with large meshes, as several recent missions noticed during beta. The BVH data structure breaks every surface into smaller chunks, allowing renderer to quickly cull away whole chunks. This makes a big difference in case of large meshes (e.g. terrain) lit by many small lights (thread). * You no longer have to write frob-highlight stages in materials, since they are added implicitly. The problem with these stages was that were very easy to forget, which resulted in no highlight on frobable items. Also it increased cognitive load and scared mappers away. While writing frobstages is no longer necessary, the old stages work just fine. So mappers can still customize frob-highlighting if they really want to (thread). * It is now legal to override a single decl of core game in your mission. Recall that "decl" means a material, a skin, an entityDef, a particle, etc. Note that overriding a whole file from core game always worked as expected, but overriding a single decl from a file did not work reliably before (despite the common belief that it should). * The major cleaning of shaders resulted in some changes in lighting model. The aim was to make TDM lighting closer to the standard Phong model, and make it more logical in general. The changes should rarely make a big difference, aside from probably stronger specular (thread). * Added error-reporting to the GUI scripting engine. Implementing GUI scripts is very hard, error-prone, and confusing. Aside from surprising differences in Doom 3 GUI behavior compared to e.g. Javascript in DOM, a lot of confusion was caused by total lack of any error handling whatsoever! In the new version, all possible errors should result in easy-to-understand console warnings, so writing correct GUI is much easier. Also, we fixed a few features, and added a few new ones to the GUI engine (thread). * dmap command received minor improvements. Yet another big rewrite happened for T-junctions fixing code, since it took tremendous amount of time on one mission. Also a few precision improvements were made. * Other small fixes and additions: added script functions getAnimRate / setAnimRate for tweaking animations added script function setObjectiveNotification for silent objective change added script function getCurInvItemCount for interaction with inventory added script variable "AI_ENEMY_TACTILE" to the base AI scriptobject, which is true whenever the AI is in tactile range of an enemy added spawnarg absence_alert_increase for loot items as a proper substitute for absence_alert, giving control over how much an AI gets alerted if that piece goes missing added spawnargs allow_idle_anims / allow_random_headturning for customization during a running mission, useful i.e. for cutscenes AIs notice broken fracture entities trigger_multiple now works on stationary AIs almost doubled tracemodel limits, raising the restrictive limits for making collision meshes for moveable items door movers can now call "used_action_script" whenever something like a key, lockpick or other item is used on them, if they have the spawnarg "call_used_action_script" "1". ASSETS * Many new assets from capable creators in our community have been incorporated into the core assets. These include: Loot assets: Detailed coins and ingots with accompanying lore. Link Ancient loot items suitable for museums, collectors and ancient sites, first seen in the Volta series. A tiling treasure hoard texture for those with unimagineable wealth. 6 detailed book skins including 3 that are lootable, a first for TDM. Link Security assets Highly detailed standing and wall safes - with or without an accompanying combination lock. Link The combination "safe lock" is now part of core assets and can be operated by either scrolling or frobbing. Mappers no longer need to track down this asset and include it with their FM files as a custom asset. Wall-mounted locks in the style of those commonly found in the original Thief games. Camgoyle sentry, a magical stone guardian based on the security camera shooting magical projectiles at the player, first seen in Written in Stone. The prefab also includes a power source pedestal. Link Fully useable audiograph for playing recorded sounds, first seen in the Accountant and Shadow of Northdale missions. A new full-featured scriptobject makes them easy to implement and control via spawnargs. Wiki Furniture assets Posh upholstered armchairs and sofas for the wealthiest nobles. Link A new high-detail grandfather clock with a working scriptobject and a mantle clock. Link A gothic-style cabinet. Link Office assets Including bundled stacks of paper, blueprints, a letter, crumpled paper, waste bins, an end table and an ornate table. Nautical assets Full-scale modular ship prefabs with interiors, allowing anyone to assemble a ship for a nautical mission in a matter of seconds. 1 merchant galleon and 2 smaller sailing ships are available. Link Link Link A large galleon ship wreck in 2 pieces for those sailors who have met an unfortunate end. Decorative assets An impressive multi-tiered wall fountain, first seen in the mansion in Noble Affairs. A new pair of marble lion statues. Link A standing stone menir with carved symbols on it, ideal for pagan missions. Link Stone pedestal with purple cloth for presenting valuable items. Textures High-resolution cobblestone textures for detailing the streets of TDM. Link Starry wallpaper. Lamps A set of 6 bronze vintage lamps has been added for particulary posh establishments. Link Thief-style charge post streetlamp. A new open-top carriage, the barouche. Link Miscellaneous other models, including: wall planter, 7 small "foliage" herbs, 2 mine carts, 6 shop signs, equippable feather duster and 5 decor plates * We fixed all loading warnings on all existing assets. This became possible after creating an automatic map generator which forces the engine to load all assets from every group. All the references to missing files are fixed too, which means a variety of assets have become available: Old noblewoman skin, plain mage robes skin, moor helmet, electrical arcs, stone window decals (5178), yellow banner skin (5563), wine barrel (Link), grass particles (5689), lampion lights and more graffiti decals. PROGRAMMING Under the hood, we updated third-party libraries, and moved to Visual Studio 2022. The "Debug With Inlines" configuration was split into "Debug Editable" (with hot-reload support) and "Debug Fast" (fastest debuggable). Marking the final step in transition to tdm_installer, the old tdm_update program is finally removed, with TDM packaging code extracted to standalone program.
- 263 replies
-
- 14
-

-
I don't recall a system for noise masking. It sounds like it'd be a good idea, but when you get into the details you realize it'd be complicated to implement. It's not only noise that that goes into it, I think. E.g., a high register can cut through even a loud but low register rumble. And it's not like the .wav file even has data on the register of what it's playing. So either you have to add meta-data (which is insane), or you have to have a system to literally check pitch on the .wav data and paramaterize it in time to know when it's going to cut through what other parameters from other sounds. For that matter, it doesn't even have the data on the loudness either, so you'd have to get that off the file too and time the peaks with the "simultaneous" moment at arbitrary places in every other sound file correctly. And then position is going to matter independently for each AI. So it's not like you can have one computation that works the same for all AI. You'd have to compute the masking level for each one, and then you get into the expense you're mentioning. I know there was a long discussion about it in the internal forums, and probably on the public subforums too, but it's been so long ago now I can't even remember the gist of them. Anyway the main issue is I don't know if you'll find a champion that wants to work on it. But if you're really curious to see how it might work, you could always try your hand at coding & implementing it. Nothing beats a good demo to test an idea in action. And there's no better way to learn how to code than a little project like that. I always encourage people to try to implement an idea they have, whether or not it may be a good idea, just because it shows the power of an open source game. We fans can try anything we want and see if it works!
-
Hello, everyone! In this multi-part, comprehensive tutorial I will introduce you to a new light type that has been available in The Dark Mod since version 2.06, what it does, why you would want to use it and how to implement it in your Fan Missions. This tutorial is aimed at the intermediate mapper. Explanations of how to use DarkRadiant, write material files, etc. are outside of its scope. I will, however, aim to be thorough and explain the relevant concepts comprehensively. Let us begin by delineating the sections of the tutorial: Part 1 will walk you through four, distinct ways to add ambient light to a scene, the last way using irradiance environment maps (or IEMs). Lighting a scene with an IEM is considered image-based lighting. Explaining this concept is not in the scope of this tutorial; rather, we will compare and contrast our currently available methods with this new one. If you already understand the benefits IBL confers, you may consider this introductory section superfluous. Part 2 will review the current state of cubemap lights in TDM, brief you on capturing an environment cubemap inside TDM and note limitations you may run into. Three cubemap filtering applications will be introduced and reviewed. Part 3 will go into further detail of the types of inputs and outputs required by each program and give a walkthrough of the simplest way to get an irradiance map working in-game. Part 4 will guide you through two additional, different workflows of how to convert your cubemap to an irradiance map and unstitch it back to the six separate image files that the engine needs. Part 5 will conclude the tutorial with some considerations as to the scalability of the methods hitherto explained and will enumerate some good practices in creating IEMs. Typical scenes will be considered. Essential links and resources will be posted here and a succinct list of the steps and tools needed for each workflow will be summarized, for quick reference. Without further ado, let us begin. Part 1 Imagine the scene. You’ve just made a great environment for your map, you’ve got your geometry exactly how you want it… but there’s a problem. Nobody can appreciate your efforts if they can’t see anything! [Fig. 1] This will be the test scene for the rest of our tutorial — I would tell you to “get acquainted with it” but it’s rather hard to, at the moment. The Dark Mod is a game where the interplay between light and shadow is of great importance. Placing lights is designing gameplay. In this example scene, a corridor with two windows, I have decided to place 3 lights for the player to stealth his way around. Two lights from the windows streak down across the floor and a third, placeholder light for a fixture later to be added, is shining behind me, at one end of the corridor. Strictly speaking, this is sufficient for gameplay in my case. It is plainly obvious, however, that the scene looks bad, incomplete. “Gameplay” lights aside, the rest of the environment is pitch black. This is undesirable for two reasons. It looks wrong. In real life, lights bounce off surfaces and diffuse in all directions. This diffused, omni-directional lighting is called ambient lighting and its emitment can be termed irradiance. You may contrast this with directional lighting radiating from a point, which is called point lighting and its emitment — radiance. One can argue that ambient lighting sells the realism of a scene. Be that as it may, suppose we disregard scary, real-life optics and set concerns of “realism” aside… It’s bad gameplay. Being in darkness is a positive for the player avatar, but looking at darkness is a negative for the player, themselves. They need to differentiate obstacles and objects in the environment to move their avatar. Our current light level makes the scene illegible. The eye strain involved in reading the environment in these light conditions may well give your player a headache, figurative and literal, and greatly distract them from enjoying your level. This tutorial assumes you use DarkRadiant or are at least aware of idtech4’s light types. From my earlier explanation, you can see the parallels between the real life point/ambient light dichotomy and the aptly named “point” and “ambient” light types that you can use in the editor. For further review, you can consult our wiki. Seeing as how there is a danger in confusing the terms here, I will hereafter refer to real life ambient light as “irradiant light”, to differentiate it from the TDM ambient lights, which are our engine’s practical implementation of the optical phenomenon. A similar distinction between “radiant light” and point lights will be made for the same reason. Back to our problem. Knowing, now, that most all your scenes should have irradiant light in addition to radiant light, let’s try (and fail, instructionally) to fix up our gloomy corridor. [Fig. 2] The easiest and ugliest solution: ambient lights. Atdm:ambient_world is a game entity that is basically an ambient light with no falloff, modifiable by the location system. One of the first things we all do when starting a new map is putting an ambient_world in it. In the above image, the darkness problem is solved by raising the ambient light level using ambient_world (or via an info_location entity). Practically every Dark Mod mission solves its darkness problem1 like this. Entirely relying on the global ambient light, however, is far from ideal and I argue that it solves neither of our two, aforementioned problems. Ambient_world provides irradiant light and you may further modulate its color and brightness per location. However, said color and brightness are constant across the entire scene. This is neither realistic, nor does it reduce eye strain. It only makes the scene marginally more legible. Let’s abandon this uniform lighting approach and try a different solution that’s more scene-specific. [Fig. 3] Non-uniform, but has unintended consequences. Our global ambient now down to a negligible level, the next logical approach would be hand-placed ambient lights with falloff, like ambient_biground. Two are placed here, supplementing our window point lights. Combining ambient and point lights may not be standard TDM practice, but multiple idtech4 tutorials extol the virtues of this method. I, myself, have used it in King of Diamonds. For instance, in the Parkins residence, the red room with the fireplace has ambient lights coupled to both the electric light and the fire flame. They color the shadows and enrich the scene, and they get toggled alongside their parent (point) lights, whenever they change state (extinguished/relit). This is markedly better than before, but to be honest anything is, and you may notice some unintended side-effects. The AI I’ve placed in the middle of the ambient light’s volume gets omnidirectionally illuminated far more than any of the walls, by virtue of how light projection in the engine works. Moving the ambient lights’ centers closer to the windows would alleviate this, but would introduce another issue — the wall would get lit on the other side as well. Ambient lights don’t cast shadows, meaning they go through walls. You could solve this by creating custom ambient light projection textures, but at this point we are three ad hocs in and this is getting needlessly complicated. I concede that this method has limited use cases but illuminating big spaces that AI can move through, like our corridor, isn’t one of them. Let’s move on. [Fig. 4] More directional, but looks off. I have personally been using this method in my WIP maps a lot. For development (vs. release), I even recommend it. A point light instead of an ambient light is used here. The texture is either “biground1” or “defaultpointlight” (the latter here). The light does not cast shadows, and its light origin is set at one side of the corridor, illuminating it at an angle. This solves the problem of omnidirectional illumination for props or AI in the middle of the light volume, you can now see that the AI is lit from the back rather than from all sides. In addition, the point light provides that which the ambient one cannot, namely specular and normal interaction, two very important features that help our players read the environment better. This is about as good as you can get but there are still some niggling problems. The scene still looks too monochromatic and dark. From experience, I can tell you that this method looks good in certain scenes, but this is clearly not one of them. Sure, we can use two, non-shadowcasting point lights instead of one, aligned to our windows like in the previous example, we can even artfully combine local and global ambient lights to furnish the scene further, but by this point we will have multiple light entities placed, which is unwieldy to work with and possibly detrimental to performance. Another problem is that a point light’s movable light origin helps combat ambient omnidirectionality, but its projection texture still illuminates things the strongest in the middle of its volume. I have made multiple experiments with editing the Z-projection falloff texture of these lights and the results have all left me unsatisfied. It just does not look right. A final, more intellectual criticism against this method is that this does not, in a technical sense, supply irradiant light. Nothing here is diffuse, this is just radiant light pretending the best it can. [Fig. 5] The irradiance map method provides the best looking solution to imbuing your scene with an ambient glow. This is the corridor lit with irradiance map lights, a new lighting method introduced in The Dark Mod 2.06. Note the subtle gradients on the left wall and the bounced, orange light on the right column. Note the agreeable light on the AI. Comparing the previous methods and this, it is plainly obvious that an irradiance environment map looks the most realistic and defines the environment far better than any of the other solutions. Why exactly does this image look better than the others? You can inform yourself on image-based lighting and the nature of diffuse irradiance, but images speak louder than words. As you can see, the fact of the matter is that the effect, subtle as it may be, substantially improves the realism of the scene, at least compared to the methods previously available to us. Procuring irradiance environment maps for use in lighting your level will hereafter be the chief subject of this tutorial. The next part will review environment cubemap capture in TDM, the makeIrradiance keyword and three external applications that you can use to convert a TDM cubemap into an irradiance map. 1 “ Note that the color buffer is cleared to black: Doom3 world is naturally pitch black since there is no "ambient" light: In order to be visible a surface/polygon must interact. with a light. This explains why Doom3 was so dark ! “ [source] Part 2 Cubemaps are not new to The Dark Mod. The skybox materials in some of our prefabs are cubemaps, some glass and polished tile materials use cubemaps to fake reflections for cheap. Cubemap lights, however, are comparatively new. The wiki page linked earlier describes these two, new light types that were added in TDM 2.05. cubicLight is a shadow-casting light with true spherical falloff. An example of such a light can be found in the core files, “lights/cubic/tdm_lampshade_cubic”. ambientCubicLight is the light type we will be focusing on. Prior to TDM 2.06, it acted as a movable, on-demand reflection dispenser, making surfaces in its radius reflect a pre-set cubemap, much like glass. After 2.06, the old behavior was discarded and ambientCubicLight was converted to accept industry standard irradiance environment maps. Irradiance environment maps (IEMs) are what we want to make, so perhaps the first thing to make clear is that they aren’t really “handmade”. An IEM is the output of a filtering process (convolution) which requires an input in the form of a regular environment cubemap. In other words, if we want to make an IEM, we need a regular cubemap, ideally one depicting our environment — in this case, the corridor. I say a snapshot of the environment is ideal for lighting it because this emulates how irradiant light in the real world works. All radiating surfaces are recorded in our cubemap, our ambient optic array as it were, then blurred, or convoluted, to approximate light scatter and diffusion, then the in-game light “shines” this approximation of irradiant light back to the surfaces. There is a bit of a “chicken and the egg” situation here, if your scene is dark to begin with, wouldn’t you just get a dark irradiance map and accomplish nothing? In the captured cubemap faces in Fig. 6, you may notice that the environment looks different than what I’ve shown so far. I used two ambient lights to brighten up the windows for a better final irradiance result. I’ve “primed the pump”, so to speak. You can ignore this conundrum for the moment, ways to set up your scenes for better results, or priming the pump correctly, will be discussed at the end of the tutorial. Capturing the Environment The wiki has a tutorial on capturing cubemaps by angua, but it is woefully out of date. Let me run you through the process for 2.07 really briefly. To start with, I fly to approx. the center of the corridor with noclip. I then type “envshot t 256” in the console. This outputs six .tga images in the <root>/env folder, simply named “t”, sized 256x256 px and constituting the six sides of a cube and depicting the entire environment. This is how they look in the folder: [Fig. 6] The six cube faces in the folder. Of note here is that I do not need to switch to a 640x480 resolution, neither do I need to rename these files, they can already be used in an ambientCubicLight. Setting Up the Lights For brevity’s sake, I’ll skip explaining material definitions, if you’ve ever added a custom texture to your map, you know how to do this. Suffice it to say, it is much the same with custom lights. In your <root>/materials/my_cool_cubemaps.mtr file, you should have something like this: lights/ambientcube/my_test_IEM_light { ambientCubicLight { forceHighQuality //cameraCubeMap makeIrradiance(env/t) cameraCubeMap env/t colored zeroClamp } } We’ll play with the commented out line in just a bit. Firstly, let’s place the actual light in DarkRadiant. It’s as simple as creating a new light or two and setting them up in much the same way you would a regular ambient light. I select the appropriate light texture from the list, “my_test_IEM_light” in the “ambientcube” subfolder and I leave the light colored pure white. [Fig. 7] The corridor in DR, top view, with the ambient cubic lights highlighted. I can place one that fills the volume or two that stagger the effect somewhat. Remember that these lights still have a spherical falloff. Preference and experimentation will prove what looks best to you. Please note that what the material we defined does is load a cubemap while we established that ambientCubicLights only work with irradiance maps. Let’s see if this causes any problems in-game. I save the map and run it in game to see the results. If I already have TDM running, I type “reloadDecls” in the console to reload my material files and “reloadImages” to reload the .tga images in the /env folder. [Fig. 8] Well this looks completely wrong, big surprise. Wouldn’t you know it, putting a cubemap in the place of an irradiance map doesn’t quite work. Everything in the scene, especially the AI, looks to be bathed in slick oil. Even if a material doesn’t have a specular map, it won’t matter, the ambientCubicLight will produce specular reflections like this. Let’s compare how our cubemap .tga files compares with the IEM .tgas we’ll have by the end of the tutorial: [Fig. 9] t_back.tga is the back face of the environment cubemap, tIEM_back.tga is the back face of the irradiance map derived from it. As you can see, the IEM image looks very different. If I were to use “env/tIEM” instead of “env/t” in the material definition above, I would get the proper result, as seen in the last screenshot of part 1. So it is that we need a properly filtered IEM for our lights to work correctly. Speaking of that mtr def though, let’s not invoke an irradiance map we haven’t learned to convert yet. Let’s try an automatic, in-engine way to convert cubemaps to IEMs, namely the makeIrradiance material keyword. makeIrradiance and Its Limitations Let’s uncomment the sixth line in that definition and comment out the seventh. cameraCubeMap makeIrradiance(env/t) //cameraCubeMap env/t Here is a picture of how a cubemap ran through the makeIrradiance keyword looks like: [Fig. 10] Say ‘Hi’ to our friend in the back, the normalmap test cylinder. It’s a custom texture I’ve made to demonstrate cubemap interactions in a clean way. Hey now, this looks pretty nice! The scene is a bit greener than before, but you may even argue it looks more pleasing to the eyes. Unfortunately, the devil is in the details. Let’s compare the makeIrradiance keyword’s output with the custom made irradiance map setup seen at the end of part 1. [Fig. 11, 12] A closer look at the brick texture reveals that the undesired specular highlighting is still present. The normal map test cylinder confirms that the reason for this is the noisy output of the makeIrradiance keyword. The in-engine conversion is algorithmic, more specifically, it doesn't allow us to directly compare .tga files like we did above. Were we able to, however, I'm sure the makeIrradiance IEM would look grainy and rough compared to the smooth gradient of the IEM you’ll have by the end of this tutorial. The makeIrradiance keyword is good for quick testing but it won’t allow you fine control over your irradiance map. If we want the light to look proper, we need a dedicated cubemap filtering software. A Review of Cubemap Filtering Software Here I’ll introduce three programs you can produce an irradiance map with. In the coming parts, I will present you with a guide for working with each one of them. I should also note that installing all of these is trivial, so I’ll skip that instructional step when describing their workflows. I will not relay you any ad copy, as you can already read it on these programs’ websites. I’ll just list the advantages and disadvantages that concern us. Lys https://www.knaldtech.com/lys/ Advantages: Good UI, rich image manipulation options, working radiance/specular map filtering with multiple convolution algorithms. Disadvantages: $50 price tag, limited import/export options, only available on Windows 64-bit systems. cmftStudio https://github.com/dariomanesku/cmftStudio Advantages: Available on Windows, OSX and Linux, free, open source software, command line interface available. Disadvantages: Somewhat confusing UI, limited import options, missing features (radiance/specular map filtering is broken, fullscreen doesn’t work), 32-bit binaries need to be built from source (I will provide a 32-bit Windows executable at the end of the tutorial). Modified CubeMapGen https://seblagarde.wordpress.com/2012/06/10/amd-cubemapgen-for-physically-based-rendering/ Advantages: Free software, quickest to work with (clarified later). Disadvantages: Bad UI, only Windows binaries available, subpar IEM export due to bad image adjustment options. Let’s take a break at this point and come back to these programs in part 3. A lot of caveats need to be expounded on as to which of these three is the “best” software for making an irradiance map for our purposes. Neither of these programs has a discreet workflow; rather, the workflow will include or exclude certain additional programs and steps depending on which app you choose to work with. It will dovetail and be similar in all cases. Part 3 The aim of this tutorial is twofold. First, it aims to provide the most hands-free and time-efficient method of converting an envshot, environment cubemap to an IEM and getting it working in-game. The second is using as few applications as possible and keeping them all free software that is available for download, much like TDM itself. The tutorial was originally going to only cover IEM production through Lys, as that was the app I used to test the whole process with. I soon realized that it would be inconsiderate of me to suggest you buy a fifty dollar product for a single step in a process that adds comparatively little to the value of a FM, if we’re being honest (if you asked me, the community would benefit far more from a level design tutorial than a technical one like this, but hey, maybe later, I’m filling a niche right now that nobody else has filled). This led me to seek out open-source alternatives to Lys, such as Cubemapgen, which I knew of and cmftStudio, which I did not. I will preempt my own explanations and tell you right away that, in my opinion, cmftStudio is the program you should use for IEM creation. This comes with one big caveat, however, which I’m about to get into. Six Faces on a Cross and The Photoshop Problem Let’s review. Taking an envshot in-game gives you six separate images that are game-ready. Meaning, you get six, split cubemap faces as an output, you need six, split irradiance map faces as an input. This is a problem, because neither Lys nor cmftStudio accept a sequence of images as such. They need to be stitched together in a cube cross, a single image of the unwrapped cube, like this: [Fig. 13] From Lys. Our cubemap has been stitched into a cross and the “Debug Cube Map Face Position” option has been checked, showing the orientations of each face. In Lys only panoramas, sphere maps and cube maps can be loaded into the program. The first two do not concern us, the third specifically refers to a single image file. Therefore, to import a TDM envshot into Lys you need to stitch your cubemap into a cross. Furthermore, Lys’ export also outputs a cubemap cross, therefore you also need to unstitch the cubemap into its faces afterwards if you want to use it in TDM. In cmftStudio you can import single map faces! Well… no, you can’t. The readme on GitHub boasts “Input and output types: cubemap, cube cross, latlong, face list, horizontal and vertical strip.” but this is false. The UI will not allow you to select multiple files on import, rendering the “face list” input type impossible.2 Therefore, to import a TDM envshot into cmftStudio you need to stitch your cubemap into a cross. Fortunately, the “face list” export type does work! Therefore, you don’t need to unstitch the cubemap manually, cmftStudio will export individual faces for you. In both of these cases, then, you need a cubemap cross. For this tutorial I will use Adobe Photoshop, a commercial piece of software, to stitch our faces into a cubemap in an automated fashion (using Photoshop’s Actions). This is the big caveat to using cmftStudio, even if you do not want to buy Lys, PS is still a prerequisite for working with both programs. There are, of course, open source alternatives to Photoshop, such as GIMP, but it is specifically Photoshop’s Action functionality that will power these workflows. GIMP has its own Actions in the form of Macros, but they are written with python. GIMP is not a software suite that I use, neither is python a language I am proficient with. Out of deference for those who don’t have, or like working with, Photoshop, I will later go through the steps I take inside the image editor in some detail, in order for the studious reader to reconstruct them, if they so desire, in their image editing software of choice. At any rate, and at the risk of sounding a little presumptuous, I take it that, as creative types, most of you already have Photoshop on your computers. 2 An asterisk regarding the “impossibility” of this. cmftStudio is a GUI for cmft, a command line interface that does the same stuff but inside a command prompt. I need to stress that I am certain multiple faces can be inputted in the command line, but messing with unwieldy prompts or writing batch files is neither time-saving nor user-friendly. This tutorial is aimed at the average mapper, but a coder might find the versatility offered in cmft interesting. The Cubemapgen Workflow You will have noticed that I purposefully omitted Cubemapgen from the previous discussion. This is because working with Cubemapgen, wonderfully, does not need Photoshop to be involved! Cubemapgen both accepts individual cubemap faces as input and exports individual irradiance map faces as output. Why, then, did I even waste your time with all the talk of Lys, cmftStudio and Photoshop? Well, woefully, Cubemapgen’s irradiance maps look poor at worst and inconsistent at best. Comparing IEMs exported from Lys and cmftStudio, you will see that both look practically the same, which is good! An IEM exported from Cubemapgen, by default, is far too desaturated and the confusing UI does not help in bringing it to parity with the other two programs. If you work solely with Cubemapgen, you won’t even know what ‘parity’ is, since you won’t have a standard to compare to. [Fig. 14] A comparison between the same irradiance map face, exported with the different apps at their respective, default settings. Brightened and enlarged for legibility. This may not bother you and I concede that it is a small price to pay for those not interested in working with Photoshop. The Cubemapgen workflow is so easy to describe that I will in fact do just that, now. After I do so, however, I will argue that it flies in the face of one of the aims of this tutorial, namely: efficiency. Step 1: Load the cubemap faces into Cubemapgen. Returning to specifics, you will remember that we have, at the moment, six .tga cubemap faces in a folder that we want to convert to six irradiance map faces. With Cubemapgen open, direct your attention to these buttons: [Fig. 15] You can load a cubemap face by pressing the corresponding button or using the hotkey ‘F’. To ensure the image faces the correct way, you must load it in the corresponding “slot”, from the Select Cubemap Face dropdown menu above, or by pressing the 1-6 number keys on your keyboard. Here is a helpful list: X+ Face <1> corresponds to *_right X- Face <2> corresponds to *_left Y+ Face <3> corresponds to *_up Y- Face <4> corresponds to *_down Z+ Face <5> corresponds to *_forward Z- Face <6> corresponds to *_back ...with the asterisk representing the name of your cubemap. With enough practice, you can get quite proficient in loading cubemap faces using keyboard shortcuts. Note that the ‘Skybox’ option in the blue panel is checked, I recommend you use it. Step 2: Generate the Irradiance Map [Fig. 16] The corridor environment cubemap loaded in and filtered to an irradiance map. The options on the right are my attempt to get the IEM to look right, though they are by no means prescriptive. Generating an IEM with Modified CubeMapGen 1.66 is as easy as checking the ‘Irradiance cubemap’ checkbox and hitting ‘Filter Cubemap’ in the red panel. There are numerous other options there, but most will have no effect with the checkbox on. For more information, consult the Sébastien Lagarde blog post that you got the app from. I leave it to you to experiment with the input and output gamma sliders, you really have no set standard on how your irradiance map is supposed to look, so unfortunately you’ll have to eyeball it and rely on trial and error. Two things are important to note. The ‘Output Cube Size’ box in the red panel is the resolution that you want your IEM to export to. In the yellow panel, make sure you set the output as RGB rather than RGBA! We don’t need alpha channels in our images. Step 3: Export Irradiance Map Faces Back in the green panel, click the ‘Save CubeMap to Images’ button. Save the images as .tga with a descriptive name. [Fig. 17] The exported irradiance map faces in the folder. These files still need to be renamed with appropriate suffixes in order to constitute a readable cubemap for the engine. The nomenclature is the same as the table above: “c00” is the X+ Face, to be renamed “right”, “c01” is the X- Face and so on. Right left, up down, forward and back. That’s the order! This is all there is to this workflow. A “cameraCubeMap env/testshot” in the light material will give us a result that will look, at the very least, better than the inbuilt makeIrradiance material keyword. [Fig. 17] The map ended up being a little bright. Feel free to open Fig. 4 and this in seperate tabs and compare the Lys/cmft export with the cubemapgen one. A Review of the Workflow Time for the promised criticism to this workflow. I already stated my distaste for the lack of a standardised set of filtering values with this method. The lack of any kind of preset system for saving the values you like makes working with Cubemapgen even more slipshod. Additionally, in part 2, I said that Cubemapgen is the fastest to work with, but this needs to be qualified. What we just did was convert one cubemap to an irradiance map, but a typical game level ought to use more than a single IEM. Premeditation and capturing fake, “generic” environment cubemaps (e.g. setting up a “blue light on the right, orange on the left” room or a “bright skylight above, brown floor” room, then capturing them with envshot) might allow for some judicious reuse and keep your distinct IEM light definition count down to single digits, but you can only go so far with that. I am not arguing here for an ambient cubic light in every scene either, certainly only those that you deem need the extra attention, or those for which the regular lighting methods enumerated in Part 1 do not quite work. I do tentatively assume, though, that for an average level you would use between one and two dozen distinct IEMs. Keep in mind that commercial games, with their automated probe systems for capturing environment shots, use many, many more than that. With about 20 cubemaps to be converted and 6 faces each to load into Cubemapgen, you’ll be going through the same motions 120 whole times (saving and renaming not included). If you decide to do this in one sitting (and you should, as Cubemapgen, to reiterate, does not keep settings between sessions), you are in for a very tedious process that, while effective, is not very efficient. The simple fact is that loading six things one by one is just slower than loading a single thing once! The “single thing” I’m referring to is, of course, the single, stitched cubemap cross texture. In the next part, I will go into detail regarding how to make a cubemap cross in Photoshop in preparation for cmftStudio and Lys. It will initially seem a far more time-consuming process to you than the Cubemapgen workflow, but through the magic of automation and the Actions feature, you will be able to accomplish the cubemap stitch process in as little as a drag-and-drop into PS and a single click. The best thing is that after we go through the steps, you won’t have to recreate them yourself, as I will provide you with a custom Actions .atn file and save you the effort. I advise you not to skip the explanations, however. The keen-eyed among you may have noticed that you can also load a cube cross in Cubemapgen. If you want to use both Cubemapgen and Photoshop together to automate your Cubemapgen workflow, be aware that Cubemap gen takes crosses that have a different orientation than the ones Lys and cmftStudio use. My macros (actions) are designed for the latter, so if you want to adjust them for Cubemapgen you would do well to study my steps and modify them appropriately. For the moment, you’ve been given the barebones essentials needed to capture an envshot, convert it to an irradiance map and put it in your level at an appropriate location, all without needing a single piece of proprietary software. You can stop here and start cranking out irradiance maps to your heart’s content, but if you’re in the mood for some more serious automation, consider the next section.
-
Sign out of TDM forums, close browser, re-open later, "Huh...I'm still signed in?"
- Show previous comments 1 more
-
Its a cookie thats keeping you logged in.
-

Another visitor! Stay a while; stay forever!
-

We´re like a Shalebridge Cradle: what comes in must never leave
-
I am wondering if it's possible to make a plugin using Python for DarkRadiant, that will load prefabs based on a set of rules and align them accordingly ? Thanks.
-
I relied on prefabs a LOT while building A Reputation to Uphold, and I think we should give them a bit more love and attention as mapping tools. Really good prefabs have huge potential to speed up the building process. I plan on adding a bunch of new prefabs, and improving some of the ones that are already there, starting with buildings. I have a question though. If I'm going to update an existing building prefab (adding more details, correcting texture mistakes, adding dirt decals, etc), would you prefer that I save the result as a new prefab, or overwrite the one that's already there? Neither option affects existing maps, it just affects how many entries are in the list and the overall quality of what's available.
-
working on a new project: tdmlauncher. for more info http://forums.thedarkmod.com/topic/18310-the-dark-mod-launcher/
-

Feedback wanted on Selection Focus
MirceaKitsune replied to greebo's topic in DarkRadiant Feedback and Development
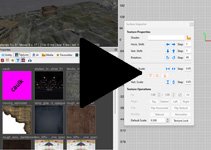
Thank you for this beautiful and much needed change! One of the biggest limitations in DR was that you couldn't edit items in a group without first ungrouping everything, and since you want things like prefabs to stay grouped having to group it all back after making changes was the other part of the pain. Now we finally no longer need to ungroup / change / regroup and the feature also allows preventing changes to other areas you aren't working on Gave it a quick test in latest Git and it seems to be working great. Only thing I'd change is adding a toolbar icon for this: I'll likely be using the Control + F shortcut exclusively but that's good to have in case we ever forget it. -
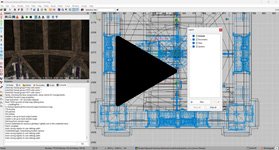
DarkRadiant 3.6.0 is ready for download. What's new: Feature: Selection Focus (Ctrl-F) Feature: Add Radiant.findEntityByName script method Feature: Media Browser shows a thumbnail preview when selecting folders Feature: Map is remembering layer visibilities between loads Fixed: ModelDefs are shown in T-pose Fixed: Patch vertices are the wrong colour Fixed: Shader Clipboard source gets cleared on 'copy shader' operation Fixed: Nodes of hidden layers are still visible after loading the map Fixed: Can't close properties window Fixed: Merge Action rendering is broken Fixed: After using ToggleMainControl_Camera, the center panel is grey after restart Fixed: When using ToggleMainControl_Camera, arrow keys cannot be used to move the viewer Fixed: Property Panel not remembering undocked/closed tabs Fixed: Texture Tool not updating during manipulation Fixed: Orthoview ignores filters for surfaces in models Fixed: Blue dot when selecting one face removed Tweak: Conversation Editor: double-click opens selected conversation Tweak: Preference option to disable drag select in camera view Tweak: ESC key should clear the resource tree view filter text Tweak: New layers function: tooltip popup getting in the way Feature: Selection Focus (see video) Windows and Mac Downloads are available on Github: https://github.com/codereader/DarkRadiant/releases/tag/3.6.0 and of course linked from the website https://www.darkradiant.net Thanks to all the awesome people who keep using DarkRadiant to create Fan Missions - they are the main reason for me to keep going. Please report any bugs or feature requests here in these forums, following these guidelines: Bugs (including steps for reproduction) can go directly on the tracker. When unsure about a bug/issue, feel free to ask. If you run into a crash, please record a crashdump: Crashdump Instructions Feature requests should be suggested (and possibly discussed) here in these forums before they may be added to the tracker. The list of changes can be found on the our bugtracker changelog. Have fun mapping!
- 12 replies
-
- 14
-
-

-
HI guys. Is it just me, or does the prefab viewer crash DR for everyone? I can view roughly half the prefabs in the viewer. Those that I can view, I can import into maps. But the rest of the prefabs in darkmod/tdm_prefabs01/prefabs crash DR when I click on them. And at least one top-level folder crashes DR when I click on it (/lights). Have I set up something wrong, or is this a known problem with some prefabs that simply hasn't made it to the top of the fix list yet? Thanks, Steve
-
I'm using the version from kcghost. I just tested and I can't see any difference inside the inventory. On the stats itself it doesn't show the different loot types (still seen in the inventory), but instead gives more info on stealth score. Edit: I see Dragofer made an updated version of his script. I have to check that out. Edit2: That version works: https://forums.thedarkmod.com/applications/core/interface/file/attachment.php?id=21272&key=02755164a3bed10498683771fe9a0453
-
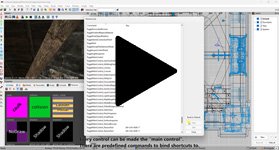
DarkRadiant 3.5.0 is ready for download. What's new: Feature: More customisable layout, all windows and panes can be dragged and arranged Layouts like Embedded, Regular and Splitpane are superseded and have been removed Tweak: The LayerControlPanel's tooltip popup is now less annoying Tweak: Clarify distinction between Shadow render mode and other render modes Fixed: Show/hide Light Volumes for combined entities inconsistent Fixed: Currently applied particleDef not selected in Particle Selector Fixed: Layer visibility checkbox not reacting to double-clicks Fixed: Cannot toggle visibility of layers in Linux Fixed: Drag-and-dropping layers is not working in Linux Feature: Customisable Layout (click to see the videos) Windows and Mac Downloads are available on Github: https://github.com/codereader/DarkRadiant/releases/tag/3.5.0 and of course linked from the website https://www.darkradiant.net Thanks to all the awesome people who keep using DarkRadiant to create Fan Missions - they are the main reason for me to keep going. Please report any bugs or feature requests here in these forums, following these guidelines: Bugs (including steps for reproduction) can go directly on the tracker. When unsure about a bug/issue, feel free to ask. If you run into a crash, please record a crashdump: Crashdump Instructions Feature requests should be suggested (and possibly discussed) here in these forums before they may be added to the tracker. The list of changes can be found on the our bugtracker changelog. Have fun mapping!
- 85 replies
-
- 16
-
-