Search the Community
Searched results for '/tags/forums/map/' or tags 'forums/map/q=/tags/forums/map/&'.
-
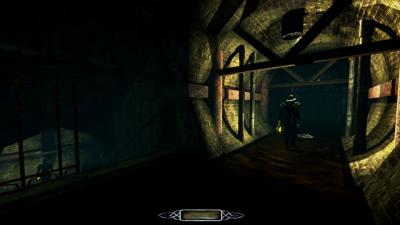
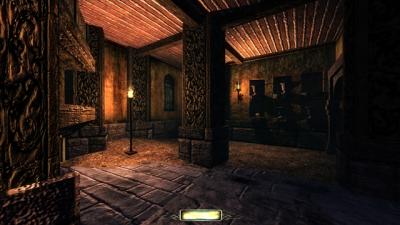
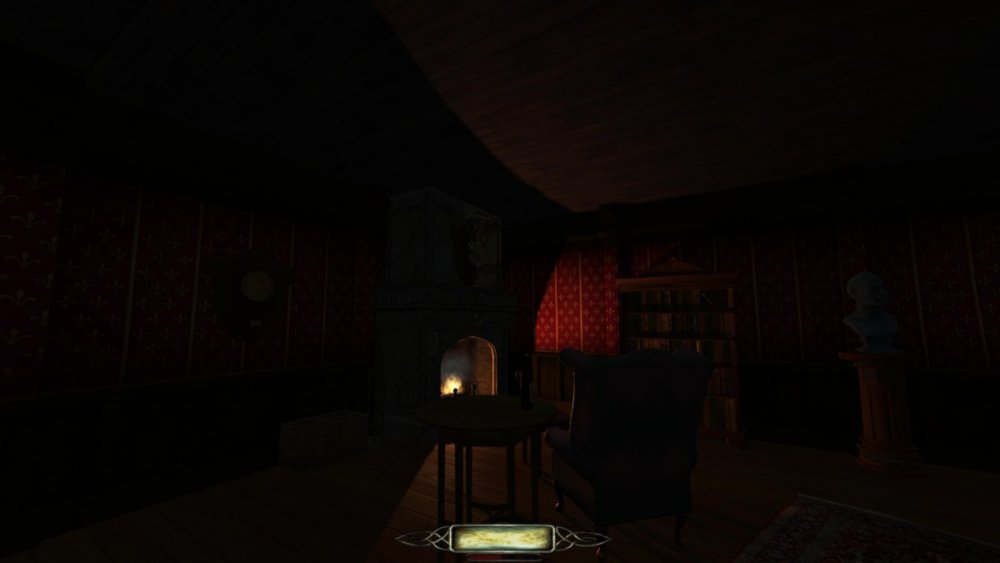
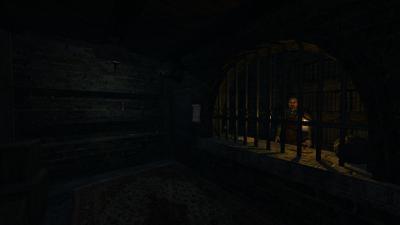
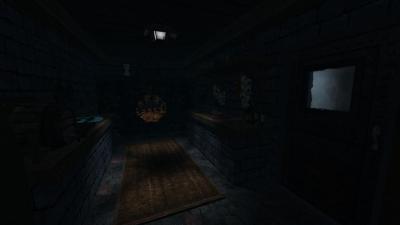
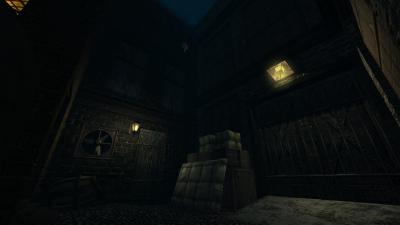
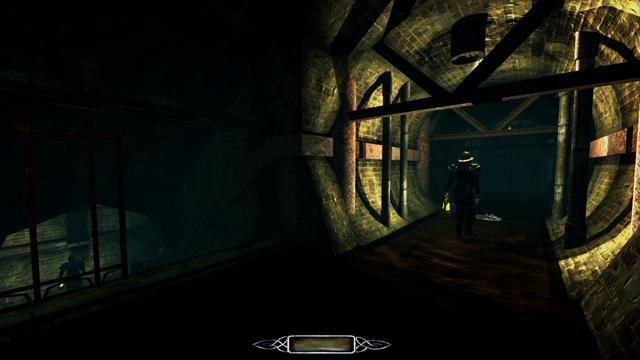
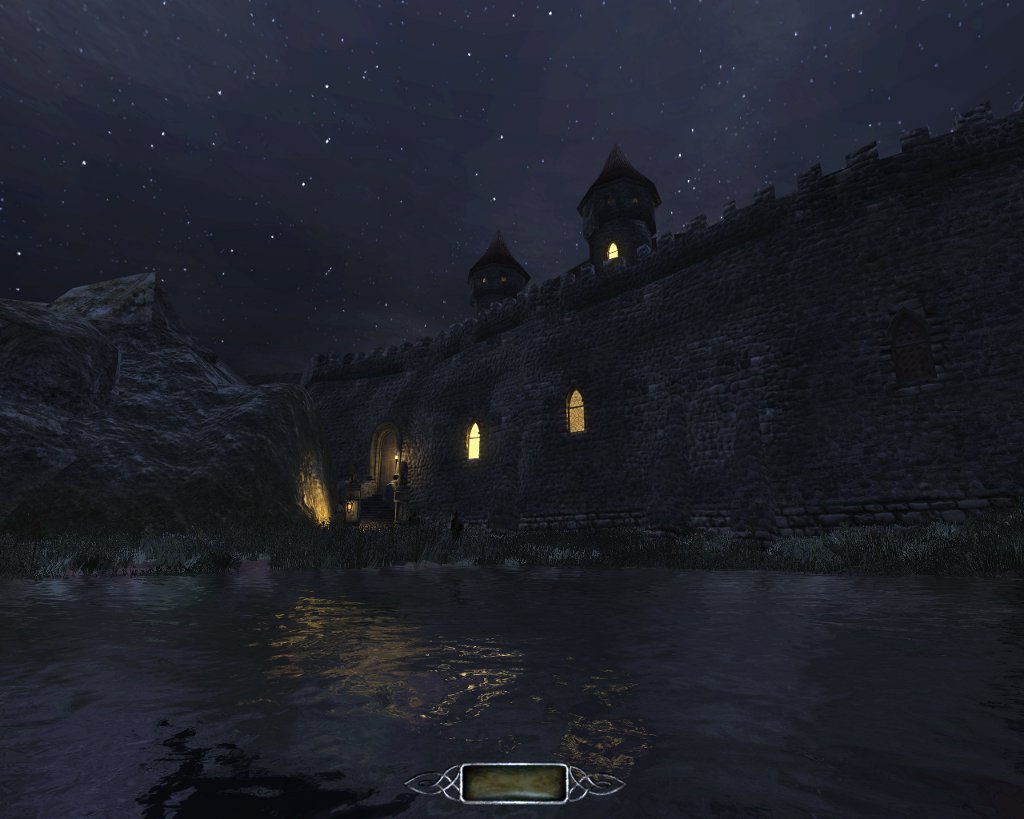
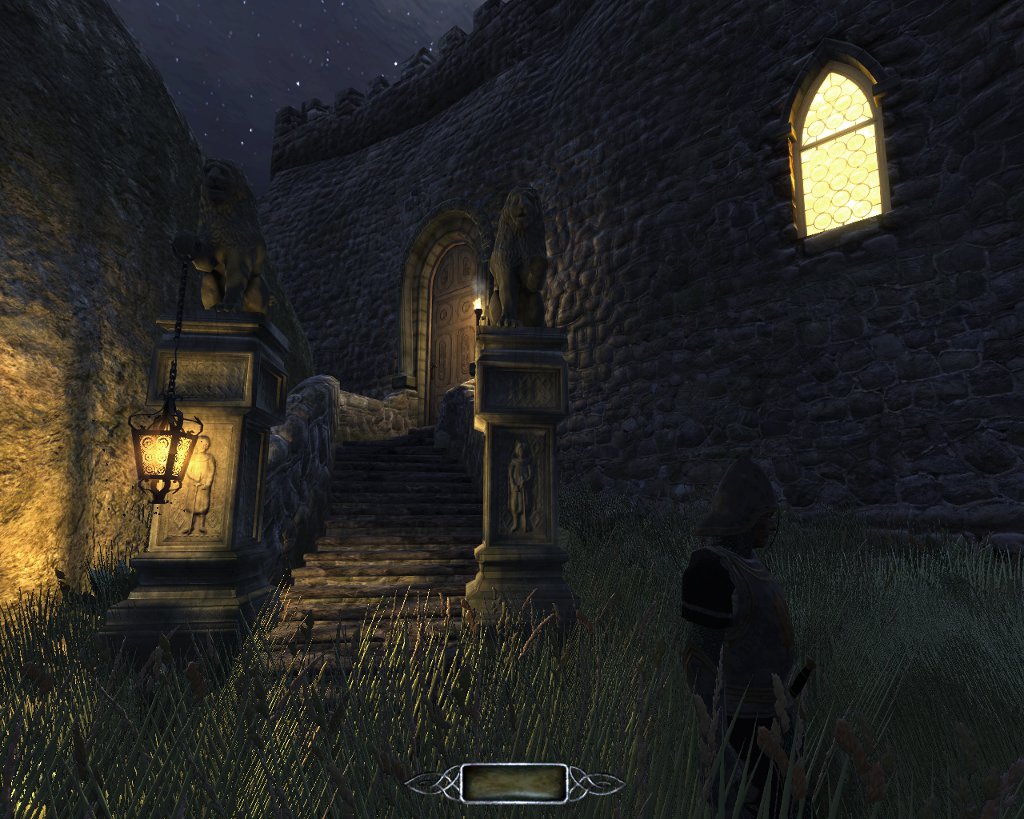
Announcing the release of the third William Steele mission! Summary Cleighmoor takes Steele inside Cleighmoor Gaol, where Warden Fielder likes nothing better than a glass of wine and some cheese, while watching a miscreant hang from his gallows. Steele is tracking down the evidence of his parents’ murder. The mission starts in the sewers, and progresses to Cleighmoor’s compound. The William Steele Missions Cleighmoor is the third of several Steele missions. Altogether they'll tell a story of corruption, greed, and revenge. At some point, I'll start packaging them as a campaign, in addition to the single missions. If you haven’t played WS1: In the North, or WS2: Home Again, I suggest you complete those before playing WS3: Cleighmoor. Download Cleighmoor is available in the in-game downloader. Problem with Suicidal AI Occasionally, someone reports that a distant AI commits suicide. Since one of the mission objectives is to kill only in self-defense, this fails the mission when it occurs. To avoid that, I've created a replacement *.map file that you can obtain here. After you've downloaded and installed the mission, create a new folder named "maps" so that you have: darkmod/fms/ws3_cleighmoor/maps/ Unzip the replacement *.map file and place the new *.map file into the maps folder. So now you have: darkmod/fms/ws3_cleighmoor/maps/ws3_cleighmoor.map This should solve the suicide problem. A new version of the mission will be released after TDM 2.05. Build Time Nearly 4 years. (This was my first attempt at a mission, and it sat on the back burners until being folded into Steele’s story.) I18n Cleighmoor is ready for translation. Thanks Thanks to the TDM team for creating a terrific platform for storytelling and stealth gaming. Thanks to my beta testers: AluminumHaste, Bikerdude, Goldwell, Xarg, Lux, Moonbo, Deadlove, and plotzzz. Thanks to Goldwell for his voice work on the conversations. And thanks to YOU, for playing! Known Issues This is a large mission. To ease the burden on older systems, consider shutting doors behind you as you go. If you experience low frame rates, please consult the Performance Tweaks page on the Wiki. Performance Tweaks For very low end PCs I recommend the following settings: V-sync is off AA is off Aniso is 4x or lower Advanced settings are simple/default Post processing is disabled Anyone having performance issues with TDM missions can put the following cvars into their Darkmod.cfg file. This will improve the framerate and stutter/chop when in-game, but may increase loading times a little. image_usePrecompressedTextures "1" image_useNormalCompression "2" image_useAllFormats "1" image_useCompression "1" image_preload "1" Important This mission requires TDM 2.01 or later. The William Steele story is heavy with readables. Please try to read every readable you find. Most importantly, Enjoy! Screenshots WS4: The Warrens Steele ventures into The Warrens, a dangerous area near Bridgeport's docks. You can find it here.
- 162 replies
-
- 15
-

-
No dice with the debug cvar, unfortunately. s_overrideParmsMode 2 didn't give me any console logs, and 0 didn't cause the sound to play. I also tried to set s_volume to -1 in the speaker, just to ensure that it had a non-zero/non-default value, and it already has a s_mindistance and s_maxdistance that look reasonable based on the editor's circles. It sure seems like it ought to be in the neighborhood of the issue you posted, though - I imagine I was leaning on some unseen defaults that were silently working here since I'm quite new to DarkRadiant. Anything else I can try/should look at? Would posting my .map file, or trying to make a minimal .map (since mine is more than the 500kb forum limit) to reproduce this be helpful?
-
 I have recently installed Dhewm3 (with the Doom 3 demo) and DarkRadiant. I know my way around GTK Radiant and Preditor, so I assumed DarkRadiant would be a walk in the park. However, I'm getting these two problems I never got with the other editors. 1) I have installed DarkRadiant from the package darkradiant-3.7.0-x64.portable.7z. I launched it, configured it to use the Doom 3 demo (Game Type: Doom 3 Demo), selected the folder where the Dhewm3.exe file is located, but it cannot find any textures. 2) If I try to make a test map (a square room with no textures, a player start) and save it, I get an error message that says: "Failed to locate map format module". Subsequently, nothing gets saved. I have pasted the DarkRadiant log at https://pastebin.com/YAGv2u5h . You can see a screenshot showing the problems (error, no textures) at https://imgur.com/a/qVhx4dv. How do I solve these problems?
 -
Since Aluminum directed me here ( https://forums.thedarkmod.com/index.php?/topic/9082-newbie-darkradiant-questions/page/437/#comment-475263 ) can we have unlimited renderer effects? Well, maybe not unlimited, by maybe 3-5? Thanks.
- Show previous comments 1 more
-

Since I wasn't the one mainly asking, I'll just cite you in the original thread instead.
-

There already is a kind of sorting, sort nearest, sort decal, sort <n>. For things like windows and such, sort nearest should probably have the desirable affect, though looking through multiple translucent shaders might kill performance.
-
Is having multiple render effects really killing performance that badly? I don't understand. You're saying that if I have two transparent objects side-by-side, then they'll just count as two render effects, but when combined, they somehow become something much more difficult to render?
Never-the-less, unless we're talking some kind of infinite portal problem, why not let the mapper choose how much he wants to kill performance? Just warn him against putting too many effects close together.
-
This is a bug I run into often. When reading a book with multiple pages, sometimes the pages become blank, and the book cannot be closed anymore. It looks like this: https://imgur.com/a/kAahZZe.
-

AI and elevators are driving me crazy
grodenglaive replied to grodenglaive's topic in TDM Editors Guild
Despite getting it somewhat working in the test map, that didn't translate to my fm. The AI still refused to get on or even press the call button. I had given up and removed their paths involving the elevator. Recently, the AI have started using the elevator on their own! During mission testing yesterday, I had caused a ruckus on the first floor and was surprised when an AI rode up from basement to join the fight. I wonder if the 2.13 update has fixed something? -
 Figured I'd ask about this here before posting on the bug tracker, there might be a reason why it hasn't been done yet. Let me explain my reasoning first: When creators are working on multiple FM's at once, each one will obviously be located in its own directory. Most FM's contain custom assets and definitions, when working with maps in DarkRadiant you need to select their data folder for additional defs. This is done by going to File - Game / Project Setup - Mission and selecting it there. The issue: Let's say you want to take a break from one FM and work on another. Each time you load a map from a different FM, you also need to go to that menu and select it from there, otherwise custom assets won't be detected and appear as missing in DR. This is quite a bit of an annoyance. Suggestion: Is it not possible to detect and automatically select the active mission from the path the map is located in? We know every map should be located in "darkmod/fms/name/maps", so why not automatically extract the maps directory and set that to "darkmod/fms/name"? If there's an issue with getting such detection right, we can at worst simply store this information in the map.darkradiant file, so even if the player needs to first select it manually the choice is remembered per map and automatically reverted when you load it. We could technically do this with the other settings in that menu, such as Game Type and Darkmod Path. Not sure how much we need it for those unless someone is working with multiple installs and wants the convenience. Sounds good if doable but the important one is the mission directory as that must always be changed with the map you're editing.
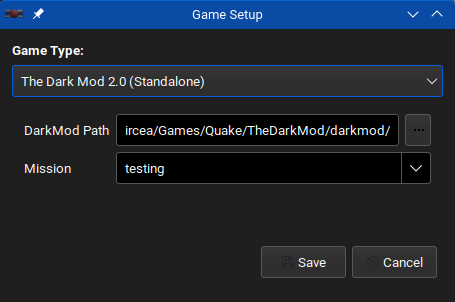
-
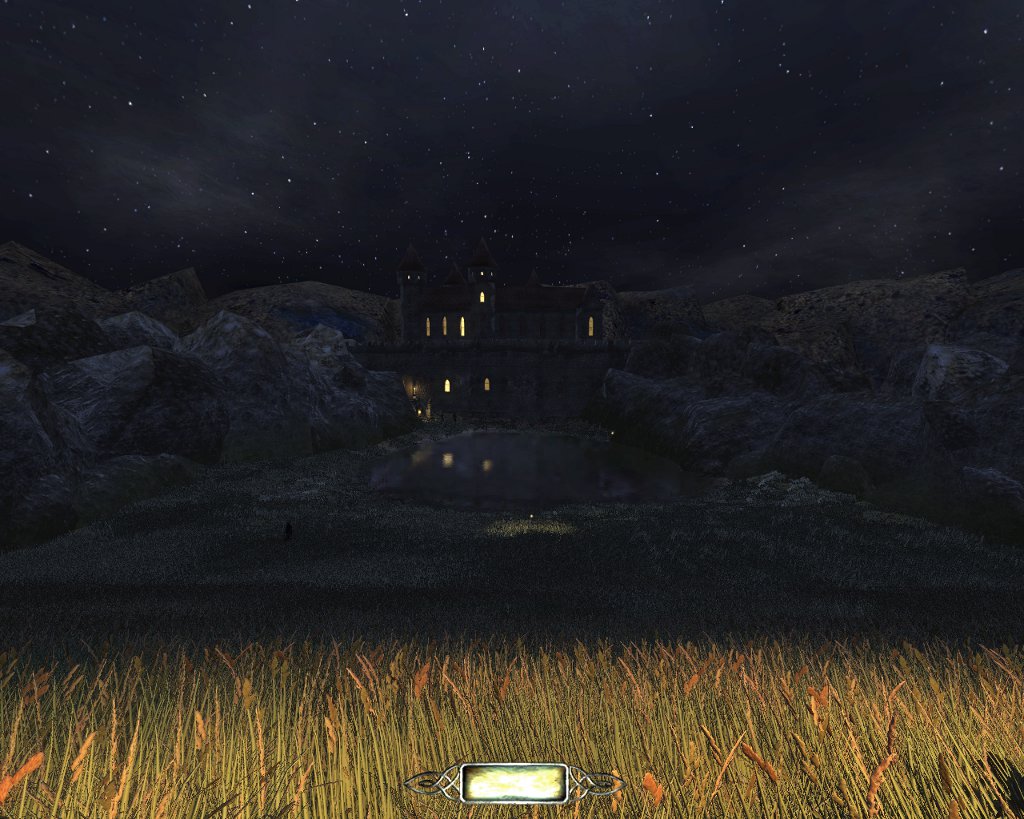
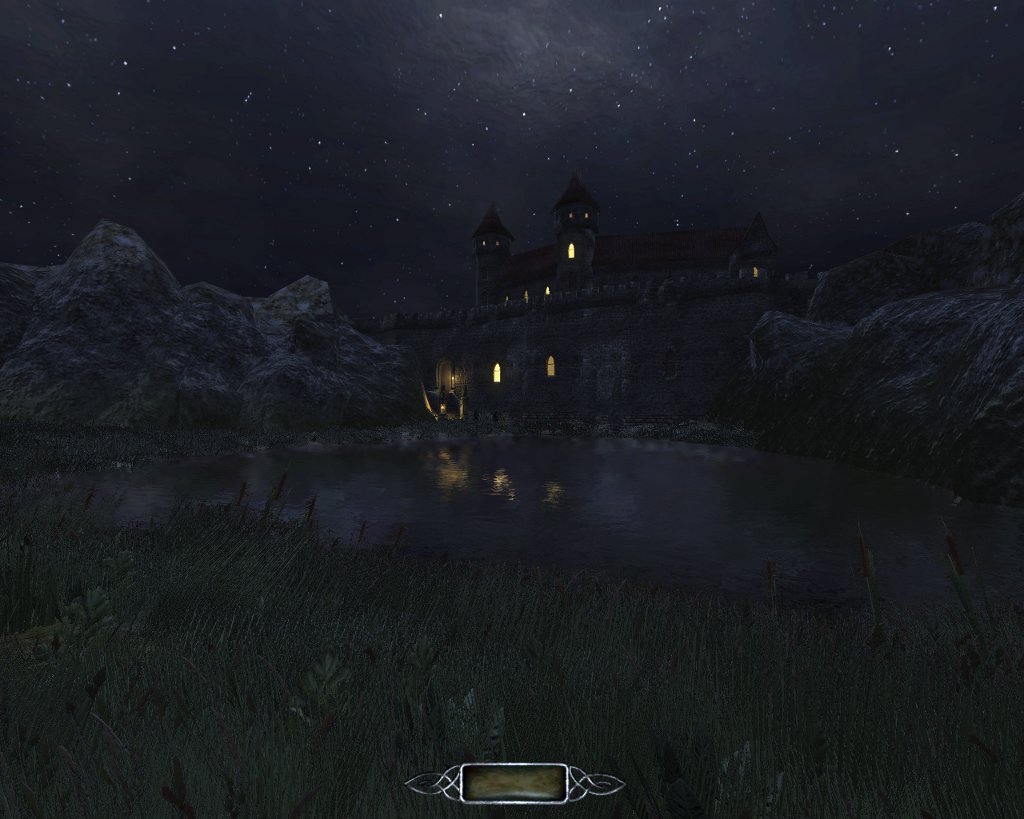
It's a small map for testing purposes. I've been working on it for the last 3 months. It's only one large "room" so there's not much gameplay but I hope you'll enjoy it anyway. You can download the demo here: http://www.moddb.com...ated-grass-demo The file is rather large because there is a lot of custom material: models, particles etc. NPCs are set to neutral. There are fish in the pool but they are easy to overlook. If you use godmode and swim a bit longer you should spot them. I created the map with LOD set to 'very high'. By default it's set to 'normal' so you should set 'Object detail (LOD)' in Video -> Advanced to 'Very high'. Otherwise models will disappear too soon. Some more screenshots:


-
Something wrong with the hosts? See following topic for the investigation. https://forums.thedarkmod.com/index.php?/topic/22663-cannot-download-dark-mod/
-
Maybe something is wrong on the hosts on that time? Others cant download it as well. https://forums.thedarkmod.com/index.php?/topic/22662-error-missing-end-chunk-0-193/
-
@BoilerDunce startmap.txt should contain only the name of the map, without directory prefix or extension. So if your map file is called /darkmod/fms/bdtaff/maps/bdtaff.map then startmap.txt should contain only "bdtaff" As for your readable error, this usually occurs when the readable you're trying to open refers to an xdata that doesn't exist. Check the document carefully in the readable editor, and then check the xdata file in your fm's xdata directory. There'll be a bug in there somewhere.
-
I seem to have royally messed up. For one, my readables aren't readable and can't be dropped. Also can't interact with anything while holding them, so it softlocks me. I get a green glow but nothing is read. The other thing... I try to launch my mission without console and I only get "couldn't load map/maps" No mention of the map file already there. It said something about making a startmap.txt, which I did, but I couldn't find anything saying on what to put in a startmap.txt, so I just put then name of the map and it didn't do anything to help. Thanks to anyone who can help.
-
TDM Packer 2 - another tool for managing and packing missions
Skaruts replied to Skaruts's topic in TDM Editors Guild
@datiswous by the way, is the executable icon a little cardboard box? (And showing everywhere, window, filesystem, taskbar, etc?) Just wanted to be sure I set the icon properly. Yes, you need to edit by hand, for now (and save). I may do something with the trees at some point, but that will probably be a rabbit-hole of its own. There are no handy UI buttons for now either. As far the text editors go, you still have all the hotkeys you might expect: ctrl-s, ctrl-z, ctrl-shift-z, etc. Including multi-cursors, if I didn't forget to turn them on. Yes, you have to save the .pkignore in order for it to rebuild the trees. Damn... that's a bummer. I don't know what to do about it, as I'm just using Godot's api to execute a process. Have you tried running the console version of TDM Packer? I don't know if it will show any useful information. I didn't export with debug, so probably not. Yes. If you have more than one map in the map sequence it will create a tdm_mapsequence.txt, instead of a startingmap.txt. This is something I still have to look deeper into, though. I've never made any campaigns, so this feature is probably not reliable as is, and I'm not even sure I'm on the right track. I only looked into the files of NHAT. Just to clarify it, I made it this way because I tend to have lots of small test maps and even some local backups, or different versions of the main map. Excluding them all by hand in the .pkignore would be quite tedious. Since I couldn't think of a reason why one might want to include unused maps in the pack, I just went with the assumption that there probably isn't one. -
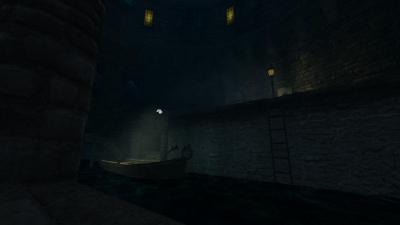
The nights are getting colder and you need to pay your rent on time before you get tossed out into the winter air. Luckily, your neighbor told you about a mysterious merchant from faraway shores who has come to the small hamlet of Wilford's Hollow, and he's staying at the inn next door. What's more, he's brought something with him... Gameplay Notes: 1) This is a fairly small map, but I did intend for this map to be a bit harder than normal Dark Mod missions, even on the lowest difficulty setting. But there will certainly be plenty of rewards for the careful thief... 2) This map implements the func_peek mechanic by allowing players to peek through any door that has a keyhole by leaning forward. PLEASE NOTE: This function has been known to cause crashes for players using the 32-bit version of the Dark Mod 2.07 (should be fine for those running the 64-bit version). While this function has worked painlessly for some, please be aware that crashing may occur. At no point in this mission is it required to use the func_peek mechanic, it is purely optional, so feel free to not use it. Download: This FM is available via the in-game downloader FM: https://drive.google.com/file/d/1eGMhIkoMFqlkk_ehN430cP63RQr5quEh/view?usp=sharing Promotional Screenshots: https://drive.google.com/drive/folders/1bwuy0QPhaGpV32CgEdXhBIA5KgvcRueN?usp=sharing Credits: A HUGE thanks goes out to JackFarmer, Dragofer, and Bikerdude for scripting, EFX, custom ambient tracks, assets, answering a billion of my questions and doing so, so, so much more to make this mission something special. Thank you! Another GIANT thank you to my beta testers: Jedi_Wannabe, Bienie, Filizitas, joebarnin, bikerdude, Cambridge Spy, STRUNK, Lonewanderer, Rezar. Thank you all very much for your wonderful work and eye for detail! And another thank you goes out to Goldwell, Kingsal, and Grayman for scripting help and patient guidance. Assets are from: Springheel's Superb Modules Refl3ks' Rad Artwork Kingsal's Killer Assets Dragofer's Delightful Assets Epifire's Expert Models dmw's Dazzling Textures Spooks' Spectacular Painting for the Loading Screen R Soul's Fantabulous Assets JackFarmer's Miraculous Machines and Sounds Bikerdude's Bountiful Assets Hugo Lobo's Luxurious Textures ***PLAYER BEWARE*** SPOILERS lie in the depths below. I strongly suggest playing it first so you don't spoil the fun for yourself *** Version 2 Changelog: - Fixed several broken visportals - Fixed reflections in flooded basement, improved performance - New particles, models, and textures - Fixed broken AI pathing - Fixed fireplace glitch in the Inn - Fixed several texture issues - Added new secret objective - Lighting and fog changes - Implemented fade lights - Implemented Kingsal's inventory icons - Replaced slow match with flint - Increased bow draw speed using modified settings from Kingsal
- 136 replies
-
- 12
-
-

-
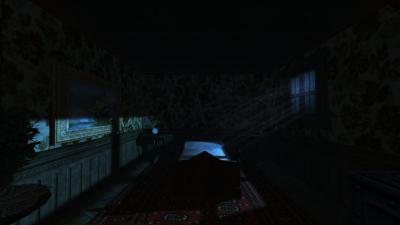
 Author Note: Shadows of Northdale is a new campaign that takes place in a city called Northdale that is situated up in the mountains of the western empire. Across the campaign the player will traverse through the varying districts of the city with each mission featuring it's own unique location as well as different locations in the city hub to access. ACT I is the first mission which is designed to introduce the player to the city hub area and the new mechanics available to them. During the first night in the city hub section there are a couple of places to explore however this will expand and open up further as you progress through the campaign's missions. This mission features some aspects which are different to the usual dark mod FM experience which are: - Food is an item that is picked up and stored in your inventory, pressing the use key with the food item highlighted will cause the player to eat it and gain 5hp - There is an ingame fence where you can purchase gear using any loot you may have found during the mission, you can visit him as many times as you wish but do be mindful of your loot goals - Also inside the fence's shop are contracts, these are readables which detail tasks that a client wishes you to complete for an agreed sum of gold. Upon completing them you will be rewarded with the designated sum immediately - Because you are not a wanted criminal (yet) the citywatch will only attack you if they catch you breaking the law or find you near the scene of a crime - Candles are pinchable in this mission, frobbing them causes Corbin to pinch them to put them out rather than pick them up The mission was designed and tested on 2.05, if you are playing on any other version there may be bugs present. If you enjoyed the mission please feel free to leave a review, I enjoy reading them and it gives me inspiration for my next projects. Tell me what you felt worked and what you felt could be improved for next time. Have fun taffers! - Goldwell. 2.06 UPDATE INFO: If you are experiencing any path finding issues (AI walking around in circles or getting stuck) on 2.06 then please enter the following console command to resolve these issues cm_backFaceCull 0. Thanks goes to Nbohr1more for solving that! Testers Crowind Epifire Kingsal Random_Taffer Skacky SquadaFroinx Voice Actors AndrosTheOxen Goldwell SlyFoxx Custom assets Andreas Rocha Bentraxx Bob Necro Dragofer Epifire Freesound Kingsal MalachiAD Tannar And a very special thank you to the following people without whom the mission would not exist: Epifire for creating some amazing detailed custom models that help bring a unique layer that wouldn't be possible without it. Seriously go check out his modeling page! Dude is very talented https://sketchfab.com/Epifire Grayman for helping to debug a lot of critical bugs in the mission, without him there wouldnt be a mission Kingsal and Skacky for helping out with excellent tips on level design, flow and lighting Moonbo for lending his writing talents to help optimize the briefing video script Obsttorte for making the majority of the scripts featured in this mission, and for dealing with my constant nagging about issues and bugs, you are awesome! SlyFoxx for lending his vocal talents and making the fence character come to life and sound great SquadaFroinx for providing thorough beta reports (that are equally hilarious as they are useful) And finally a huge thank you to Tannar for drawing the fantastic looking ingame map Available via in-game downloader MIRROR File Size: 295 mb
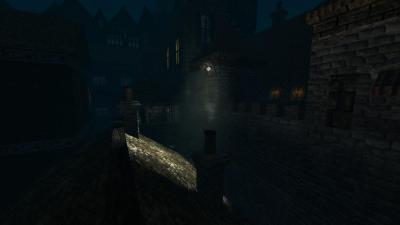
-
r_bloom_weight is set to "0.7" both in my 2.12 installation and in main repository. I never touched those values which means the default must be 0.7. Troy Sobotka is the original creator of AgX. He was active on Blender forums where he had long philosophical arguments about color with people. Also on Blender developer forums. I don't know if there's much more beyond those and his github page: https://github.com/sobotka Edit @stgatilov AgX however is a direct continuation of Sobotka's earlier 'Filmic', so there may be more about that: https://github.com/sobotka/filmic-blender https://blender.stackexchange.com/questions/164991/are-the-technical-details-of-filmic-available
-
Good idea. Why didn't I think of that? (To quote Hitchhikers Guide to the Galaxy, "I think my mind must be too highly trained" :) I did figure out a workaround. I took the decal texture file (.dds) and did an Color>Invert command in GIMP, so now it looks like this: With that file, I can play with the rendered color using a material definition like this: textures/darkmod/decals/dirt/dripping_grunge01_color { DECAL_MACRO noimpact { blend gl_zero,gl_one_minus_src_color map textures/darkmod/decals/dirt/dripping_grunge01_my red .8 green 0 blue .8 //colored } } That allows me to adjust the color via the material definition. How this works, has something to do with the options to the blend command - I still need to figure that out.
-
Experimental support of parallax mapping in 2.13
Wellingtoncrab replied to lowenz's topic in The Dark Mod
These days a height map is relatively straightforward to derive from a normal map using pretty much any node based material software (there is usually a dedicated node for this). Provided the result is even physically correct, in my limited experience this will not necessarily be suitable to use as a displacement map in the game right away. There will be a lot of high frequency detail which give a noisy result (this kind of detail in a texture remains better handled by the normal map) and the black/white values will need to be adjusted to get both a good displacement effect in the game AND retain any practical versatility in the texture itself (for all the reasons I outlined above). The greater a proportion of the displacement map you get to approaching a value of 1 (white) while still keep the effect you want the better result you will get when you try to go and use the texture in a map. This is obviously very early, and I am just a amateur so consider this advice as opposed to firm guidance. If I am dealing with an existing heightmap I will usually: Level adjust to remove detail and bring the values closer to 1 Apply blur and reduce resolution to further remove detail Prep a corner wrapped material test and begin to adjust the min/max values in the material def and/or steps 1 & 2 in until you get *acceptable* tiling across the transition - this will *not* be perfect - you just want to minimize and to minimize distortion or being able to see *past* the edge via the parallax. This looks like a pretty great example of what you want in a displacement map in terms of the frequency of detail! -
Fan Mission: Footloose Museum Theft (V.2)
MirceaKitsune replied to Goblin of Akenash's topic in Fan Missions
I decided to share my in-depth thoughts on this. On one side I don't want to be discouraging or throw lessons like I know better... on the other side I want to encourage other creators to make awesome content. I think you have the basics in order, but would advice practicing more for the next FM. I'll address everything of importance that I noticed... some of these are important for creating a working FM, others are based on my experience and how I do things. Visual: Most areas appear pretty simple and rough, the rooms look too much like cubes textured with flat materials that lack detail. While not everything needs to look AAA all the time, I'd encourage adding more detail to the world and using fitting textures with more complexity where appropriate. I'd also check out the building modules. Skybox: A big problem is you can see and touch the skybox. Being able to see the world edge and walk into an invisible wall isn't recommended. You usually want some kind of wall or structure between the player and any portal_sky surface. Portals: You aren't using visportals. This is a small mission with few entities so performance happens to be good, but every FM requires portals. You add them by filling spaces in and between walls with a brush that has a nodraw texture on all sides and a visportal texture on one face, every interactive door and window should have one, the brush must perfectly fit in those spaces without leaving gaps or you'll get a dmap error. You can press N in-game to see them, I'd use that to look at how other missions portal their maps. Just think of them as virtual windows that only show entities and other portals that can be seen through them, your goal is to design the architecture in such a way that they cover each other as much as possible from any position and angle. Clips: Since you likely haven't used those either, clip brushes are another aspect worth mentioning. Apart from the standard clip texture that used to keep the player from reaching certain areas, encase all large static models (eg: furniture) in a brush textured with monsterclip or AI won't detect collisions and attempt to walk into them. Lighting: Light placement was okay. I'd be careful about putting too many candles next to each other, lights are performance intensive so you want to have as few as possible covering an area. Only issue was ambient light which is too strong, both visually and in making the player visible, I suspect I alerted everyone because it's so bright I scared the whole map when jumping through the window. When the player is crouched without moving in a completely dark area, the light gem should be at its minimum value, adjust ambient light based on that. Ambiance: The map has no music, this isn't a big deal but for a good FM you'll need to learn about locations and using the location_info / location_separator entities to separate portal rooms and give each one an unique song and ambient color. Objectives: Having just two objectives is fine for a tiny FM, usually you'll also want a loot objective based on difficulty level. Only issue with the main objective was that it's difficult to grab the leg; It's lit by a lamp that can't be turned off, lots of AI walking around at once so it's also hard to catch a break when no one is looking... always be on the lookout for those things and what options the player is given. The final objective telling the player to leave once all is ready should use a location check rather than interacting with an item. Tools: The FM doesn't provide any of the starting items that are normally available... blackjack and sword, lockpicks, spyglass, lantern, compass. This isn't always a bad thing, in mine I like having the player pick them up from the world, but generally you'll want them to be available. Navigation: The layout was good and navigates well. There was only a problem at the end, where the map requires you to take a fall that deals damage; If this is intended I don't think it's a problem, there's one FM I played recently that requires you to take some damage as you proceed, but most aim to let the player have a no-damage run without having to confront any AI if you can help it (excluding knockout or assassination objectives). I hope this helped, let me know if I can help with more info. Here's a screenshot of the world edge I was referring to, you can also tell the excess ambient brightness which is reflected in the lightgem.(-19.712875_2197.94).thumb.jpg.959f2f99081c1ef1545fa0fc00c3d94b.jpg)
-
I want to modify a decal to display as a different color. Example, dripping_grunge01 I'd like to clone the material definition and modify it so that the grunge is greenish. Here's the definition: textures/darkmod/decals/dirt/dripping_grunge01 { DECAL_MACRO noimpact { blend filter map textures/darkmod/decals/dirt/dripping_grunge01 } } I tried to figure the various options to the "blend" command, but my poor brain isn't capable. Using the color commands affects the transparent parts as well, which is not what I want. Is there a tutorial or some examples I can take a look at?
-
It might be best to simply encourage them to come to the forums
-
There's a person messaging the Dark Mod twitter account, saying they can do a Catalan translation of the game. I pointed them in the direction of the Wiki and the forums, but they're saying they want to email someone about it. I'm not really involved in the translation side of things, so I don't have any useful input here. Any ideas?
-
Mission Administration Terms of Service
demagogue replied to nbohr1more's topic in TDM Editors Guild
Yeah the reason you'd mention no illegal or infringing material is for us to be able to say we're acting in good faith, if somebody finds their IP in an FM, they can't or it's not as straightforward to want to sue us for it. In practice I think it's more of a formality. As for FMs that don't finish or have buggy elements, there are demo-like or novelty FMs that might have both of those. Somebody mentioned the Tutorial itself. I wouldn't want to discourage somebody being creative, and I'd probably word it differently. Something like FMs should be "complete" before being submitted, but leaving it technically open what "complete" means. I guess it might give some examples "... including but not necessarily in special cases ..." that it starts and ends, is not egregiously buggy, does not consistently crash, etc. But I think even here it should be an encouragement instead of a hard rule, like we encourage mappers to get their FMs beta-tested, confirm that it starts and finishes, doesn't consistently crash, before submitting, and we may ask that you work on an FM more before uploading it if it is manifestly broken "without justification" (to leave open the possibility of "broken" FMs with a justification, like a novelty FM). Some of you might remember that TTLG ran a "buggy FM" contest once where broken FMs was actually the theme, and it was an amazing contest. Some of those FMs were broken in very creating, fun, and interesting ways, and it might be good to have FMs like that sometimes. The intentionality part was important though; you could have something broken if that's part of the artistic intention, so language that could leave something like that open may be good, or again encouraging people to always betatest and avoid unintentional crashing or broken FMs, etc. Because of past experience, we might also have language to give expectations regarding possible changes after they submit. Like an alert that while we make every effort to make sure future changes to the game are backwards compatible, it's possible a change breaks an FM. Also other people may want to take assets or things from the FM for their own FM, so we should say that technically, when you submit, you agree to the license we have for our assets (I forget exactly, CC-nc something something). So under that license people can use those assets. If you don't want that, you might make a personal appeal in the readme... The other worry is when people just take big chunks of the map itself, or make their own levels in the same maps... I wonder if we could have people make explicit what they consent to having done to their maps post release, if they allow the translation file, other people to use their map work, etc. But make it clear that the map is under the CC license, which allows people to use anything from it, and they can make a personal appeal that isn't binding, but people may be moved by it. And then we might have our own internal standards what seems egregious enough not to allow, like if someone completely takes another person's map and basically tries to recycle it under their own name, or when it's a team made map and the team disagrees what happens to it. Anyway, whatever we think, it's good to have language about it here to help manage expectations about what might happen, so it's good to think about what we should say to minimize conflict later on. -
Woo!! 2.10 Beta "Release Candidate" ( 210-07 ) is out:
https://forums.thedarkmod.com/index.php?/topic/21198-beta-testing-210/
It wont be long now
") ...
...
-
-
2
-
1
-
- Report
-
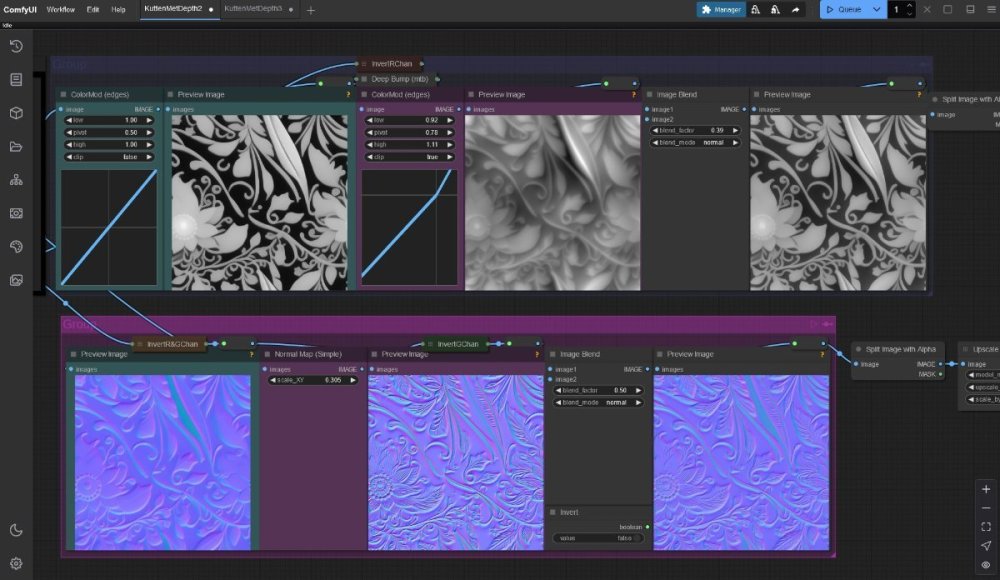
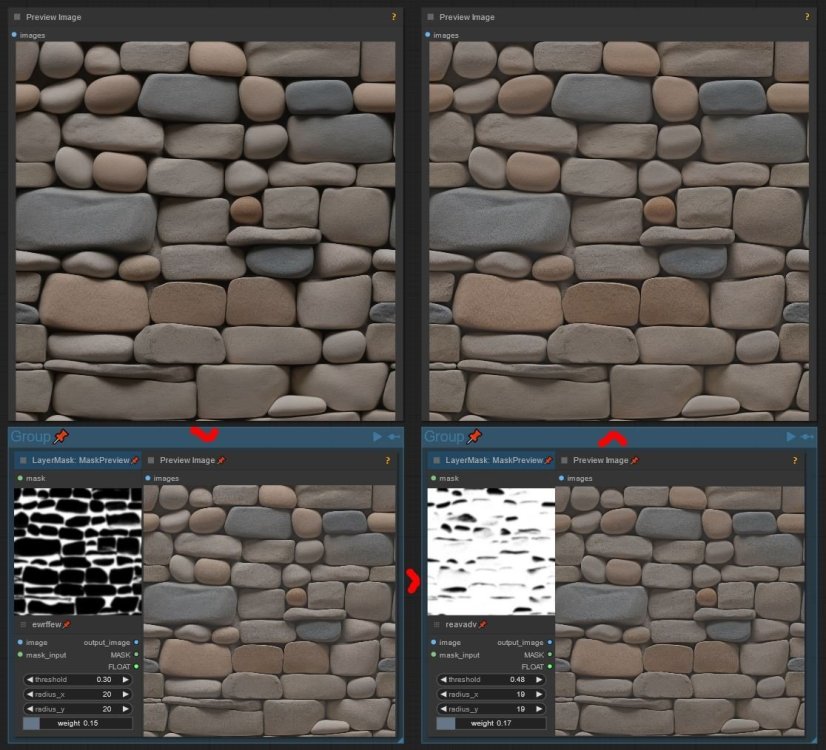
Still working on the comfyUI "workflow". As all was looking very good at first glance, there were some things that didn't work as they should; mainly producing decent seamless tiling height (depth) maps. But I got that figuered out with a trick: Make a 3x3 grid with the diffuse (color) map (scaled to 512 so the combined image is 1536) > make a heightmap of that and crop to the center, so the output is 512 again. And it works (using geowizard nodes that produce a height and normalmap). Added bonus: The seamless tiling normalmap from geowizerd can be converted to a height map with deepbump, that produces seamless heightmaps also, but in a very different way: they can be blended together to get a very decent result. Added bonus 2: The normal map created from the diffuse map with deepbump was already quite good, but now there is the normalmap created by geowizard also, both tiling seamless: They can be blended together (to have more or less detail). Also I added a way to reduce the highlights and shadows from generated images a bit; that is still a problem with generating textures with AI. Prompting: "A floor that looks like a stone wall" works a bit but doesn't work with a door somehow. AI models are trained on images with light coming from above. Althought there are (re)lighting options, they are trained on humans and objects, not on walls and doors and stuff ... so that is still a limitation. Maybe I should train a lora on perpendicular lighted vs top lighted surfaces ... : )


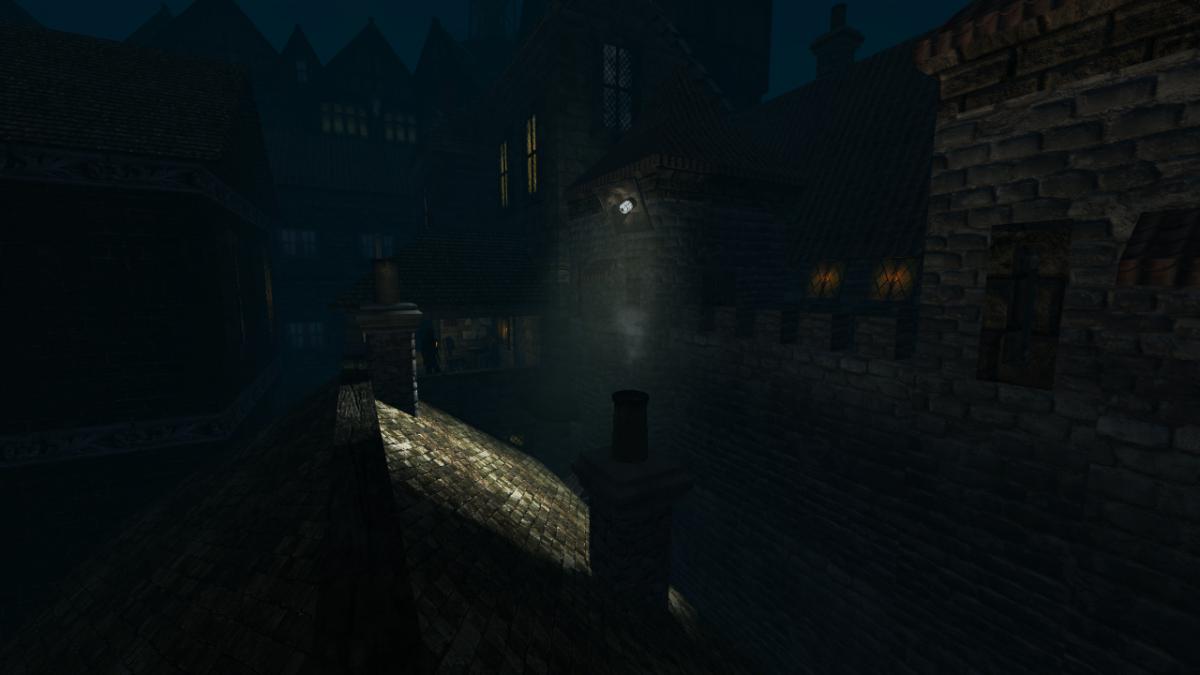


(-19.712875_2197.94).jpg.e289e085aaddcdb2d403147f743df53b.jpg)