Search the Community
Showing results for '/tags/forums/input/'.
-
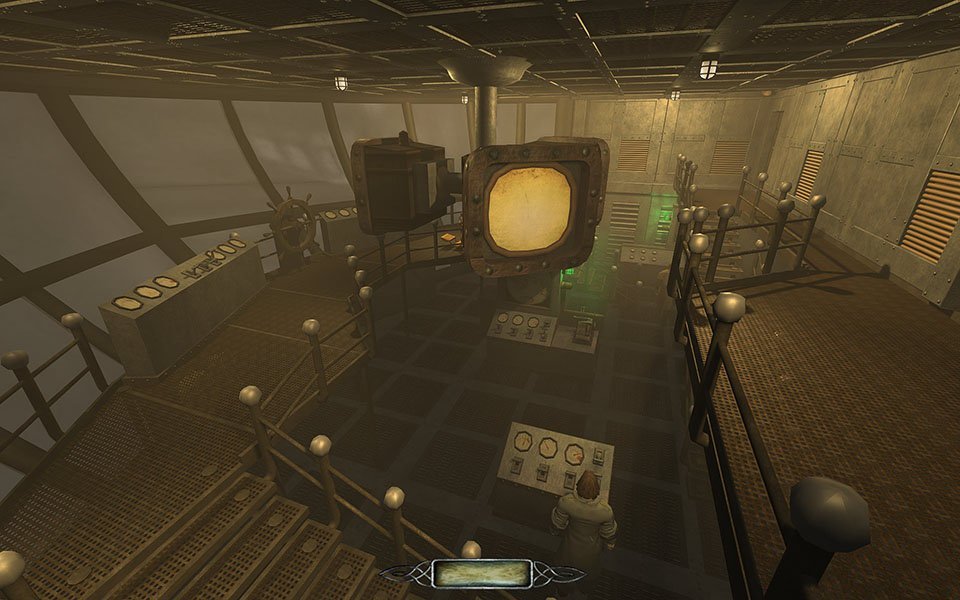
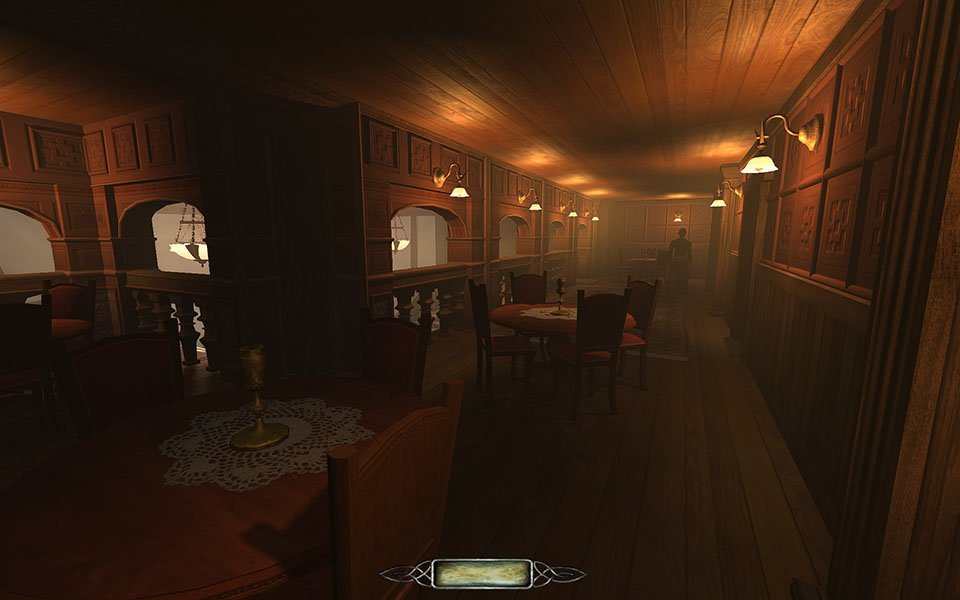
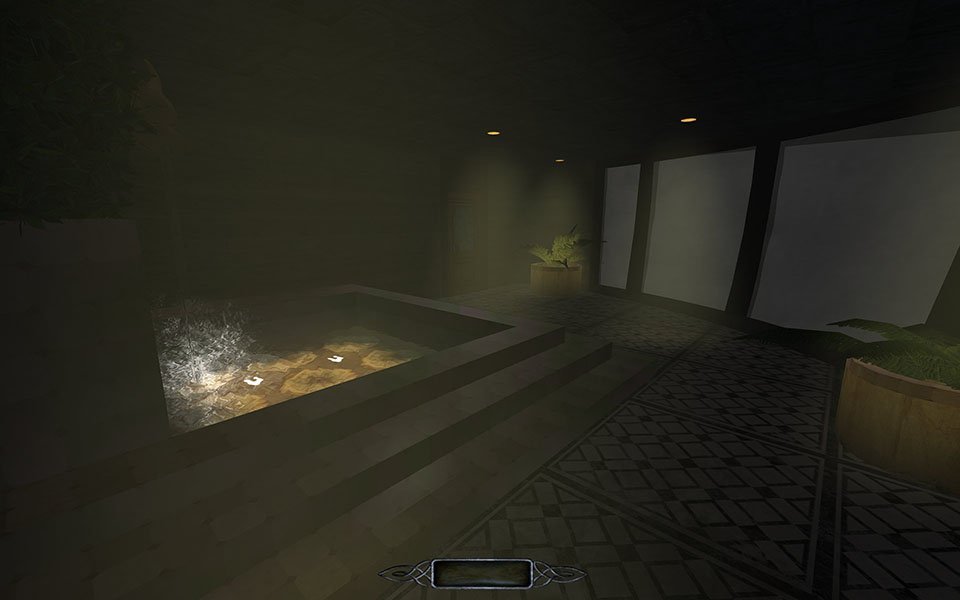
 Oohhhh, the day has come! This old lurker releases another creation of his deranged mind...! What has he in store? Does it involve sunlight and pollen and hayfever? Will it involve strange towers and priests with bad breath? Naah, just some mediocre airship type of mission, aimed at the Anniversary mapping contest! I have a lengthy/humourly rant/lore for some of the building process for anyone interrested, in spoiler tags. According to DarkRadiant I have worked 570 hours on this, and that doesn't take into account all hours of coding and scripting. This feels like an insanely huge amount of mapping time for this small mission but I try not to judge myself. DarkRadiant says 570 so...I say thanks to all calm hours at the night shift at work where I could sit and script and write readables. And I also humbly bow myself to the scripting genuses that are on the forums. A special thanks to my girlfriend who (almost) always lets me talk about my projects. She has also written some of the readables and voiced some recordings in the mission. Thanks to Dragofer, Mirceakitsune and Melchior for much needed scripting help. Thanks to YouTube channels BGM President and Sound Effects where I've borrowed some music and sound effects. Thanks to my betatesters; nbohr1more, Bergante, datiswous, Wesp5, nightmare, Jaxa and Cambridge Spy. And a big thank you to the mod in general for still being alive and supportive! ########################################## MISSION RELATED STUFF ########################################## On an airship, heading for Flowerdale a lot of strange things can happen. As some people guzzle down liquor in the bar, some others skulk around in the shadows. Certain people cannot be trusted and there are even those that kill for a living. Somebody may or may not work for foreign powers. But everyone yearns for those shiny pennies. There are some strange things in the cargo, huge coffers that can hold bodies, alive and dead. This story may unfold in several different ways; Three characters can be chosen; Zacharias the thief, Oliver Mortimer, the assassin or Rupert Peabody, youngling of the Wizlas woodfolk. DOWNLOAD LINK https://drive.google.com/file/d/10w_SJSBAxxVFYTwPjJhIo48fEzvuTo1M/view?usp=sharing
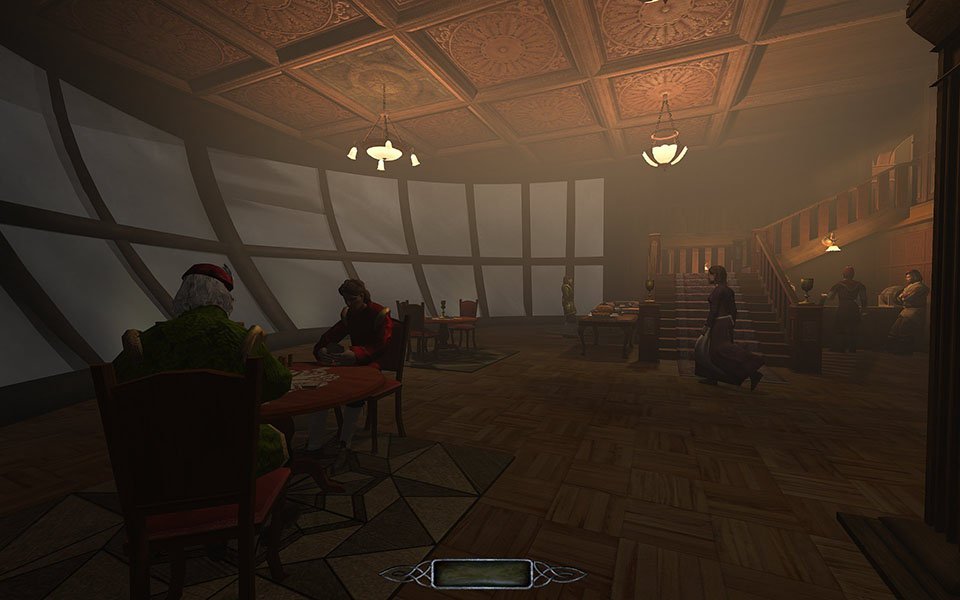

- 80 replies
-
- 17
-

-

-
Hello taffers, the people over at TTLG forums have started a speedbuild game jam. 1st Thief Speedbuild Jam It's not a contest, and you have a tentative submission date of Dec 1, to get a mission built for T1-3 or TDM. Looks fun, and I'm going to participate too.
-
Inn Business It's business, at an inn, over three nights. Development screenshots: Download: https://drive.google...dit?usp=sharing Update 1.48 uploaded March 8th, 2014, one change: patches key rarely not being frobable in one of its possible spots Big thanks to my beta testers: Airship Ballet, Kyyrma and AluminumHaste! Development supporters of note: Sotha, Springheel and Obsttorte. Also thanks Sotha, for urinating in my mission. ;-) And thanks Kyyrma for the title screen! My appreciation to all forum/wiki contributors, without whom, this wouldn't exist. Thanks to positive commenters on my previous mission too, extra motivation helps! :-) Note this uses campaign features, what you use the first night, impacts subsequent nights. And to quote a tester, "...the level is maybe best experienced in more than one sitting". If you do pause between nights, please be sure to save, you can't begin partway through effectively. (If you accidentally start a night you already completed, just fail the kill objective to switch to another night.) If your frame rates are too low facing the cemetery, please reduce your "Object Details LOD" setting. It was designed with "AI Vision" set to "Forgiving", to be able to sneak through with minimal reactions, if you want more/less, adjust your settings accordingly. There are several random, conditional aspects, and ways of going about things, so others might have slightly different experiences. Post here if you discover hidden objectives for extra points! My condolences to loot completionists, I made a bit on the third night hard, you've got your challenge cut out for you! Speaking of which, there's a TDM bug that mission complete totals too high, here are the real amounts per night: 2026/970/202. Oh, there is something that in the U.S. would be rated PG, in case you play with kids in earshot. I hope you enjoy playing it, feel free to let me know you did, and I'm glad to respond to inquiries (like how stuff was done, nothing was scripted). (Note which night you are referring to if it's something specific.) (Please remember spoiler tags to not expose things meant to be discovered by playing.) Like so: [spoiler]secrets[/spoiler] Developed for TDM 2.01. PS: Thiefette, good news, no spiders! Springheel, if you find an optional objective you can skip...you might find it immersion breaking. Others, no undead! There are a couple other interactive critters though. :-) Edit note: Some posts below were from users of an unreleased version of TDM 2.02 which broke several things, they do not reflect regular game-play.
-
BC4 is single channel. It would require another branch in the normal shaders and would probably look awful because the Y slope would need to be reconstructed from the x slope data. Might be useful for grayscale heightmap input data though ( both for POM and Doom 3 formats ). @OrbWeaver @stgatilov ?
-
Complaint From Players The player must pick up candles before extinguishing them, and then the player must remember to drop the candle. The player must drag a body before shouldering it (picking it up), and the player must remember to frob again to stop dragging the body. The player finds this annoying or easy to make mistakes. For players who ghost, some of them have the goal of returning objects back to their original positions. With the current "pick up, use item, and drop" system, the item might not return easily or at all to its original position. For example, a candlestick might bounce off its holder. (See player quotes at the bottom.) Bug Tracker https://bugs.thedarkmod.com/view.php?id=6316 Problems to Solve How can the "pick up" step be eliminated so that the player can directly use or interact with the item where it is in the game world? How can so much key pressing and mouse clicking be eliminated when the player wants to directly use an item? How can candles be extinguished and lanterns toggled off/on without first picking them up? How can bodies be shouldered without first dragging them? Solution Design Goals Make TDM easier for new players while also improving it for longtime players. Reduce tedious steps for common frob interactions. Make it intuitive so that menu settings are unnecessary. Do not introduce bugs or break the game. Terms frob -- the frob button action happens instantly. hold frob -- the frob button is held for 200ms before the action happens. (This can be changed via cvar: 200ms by default.) Proposed Solution Note: Some issues have been struckthrough to show changes since the patch has been updated. Change how frobbing works for bodies, candles, and lanterns. For bodies: Frob to shoulder (pick up) a body. Second frob to drop shouldered body, while allowing frob on doors, switches, etc. Hold frob (key down) to start drag, continue to hold frob (key down) to drag body, and then release frob (key up) to stop dragging body. Also, a body can be dragged immediately by holding frob and moving the mouse. For candles/lanterns: Frob to extinguish candles and toggle off/on lanterns. Hold frob to pick it up, and then frob again to drop. Frob to pick it up, and then frob again to drop. Hold frob to extinguish candles and toggle off/on lanterns. For food: Frob to pick it up, and then frob again to drop. Hold frob to eat food. For other items: No change. New cvar "tdm_frobhold_delay", default:"200" The frob hold delay (in ms) before drag or extinguish. Set to 0 for TDM v2.11 (and prior) behavior. Solution Benefits Bodies: New players will have less to learn to get started moving knocked out guards. With TDM v2.11 and earlier, some players have played several missions before realizing that they could shoulder a body instead of dragging it long distances. Frob to shoulder body matches Thief, so longtime Thief players will find it familiar. Second frob drops a shouldered body. Players still have the ability to both shoulder and drag bodies. Compatible with the new auto-search bodies feature. Dragging feels more natural -- just grab, hold, and drop with a single button press. There is no longer the need to press the button twice. Also, it's no longer possible to walk away from a body while unintentionally dragging it. Set "tdm_frobhold_delay" cvar to delay of 0 to restore TDM v2.11 (and prior) behavior. Candles: New players will have less to learn to get started extinguishing candles. With TDM v2.11 and earlier, some players didn't know they could extinguish candles by picking them up and using them. Instead, they resorted to throwing them to extinguish them or hiding them. Hold frob to extinguish a candle feels like "pinching" it out. Once a candle is picked up, players still have the ability to manipulate and use them the same way they are used to in TDM v2.11 and earlier. For players who ghost and have the goal of putting objects back to their original positions, they'll have an easier time and not have to deal with candles popping off their holders when trying to place them back carefully. Set "tdm_frobhold_delay" cvar to delay of 0 to restore TDM v2.11 (and prior) behavior. Solution Issues Bodies: Frob does not drop a shouldered body, so that might be unexpected for new players. This is also different than Thief where a second frob will drop a body. "Use Inv. Item" or "Drop Inv. Item" drops the body. This is the same as TDM v2.11 and earlier. This is the price to pay for being able to frob (open/close) doors while shouldering a body. Patch was updated to drop body on second frob, while allowing frob on doors, switches, etc. Candles: Picking up a candle or lantern requires a slight delay, because the player must hold the frob button. The player might unintentionally extinguish a candle while moving it if they hold down frob. The player will need to learn that holding frob will extinguish the candle. The player can change the delay period via the "tdm_frobhold_delay" cvar. Also, when the cvar is set to a delay of 0, the behavior matches TDM v2.11 and earlier, meaning the player would have to first "Frob/Interact" to pick up the candle and then press "Use Inv. Item" to extinguish it. Some players might unintentionally extinguish a candle when they are trying to move it or pick it up. They need to make sure to hold frob to initiate moving the candle. When a candle is unlit, it will highlight but do nothing on frob. That might confuse players. However, the player will likely learn after extinguishing several candles that an unlit candle still highlights. It makes sense that an already-extinguished candle cannot be extinguished on frob. The official "Training Mission" might need to have its instructions updated to correctly guide the player through candle manipulation training. Updating the training mission to include the hold frob to extinguish would probably be helpful. Similar Solutions In Fallout 4, frob uses an item and long-press frob picks it up. Goldwell's mission, "Accountant 2: New In Town", has candles that extinguish on frob without the need of picking them up first. Snatcher's TDM Modpack includes a "Blow / Ignite" item that allows the player to blow out candles Wesp5's Unofficial Patch provides a way to directly extinguish movable candles by frobbing. Demonstration Videos Note: The last two videos don't quite demonstrate the latest patch anymore. But the gist is the same. This feature proposal is best experienced in game, but some demonstration videos are better than nothing. The following videos show either a clear improvement or that the player is not slowed down with the change in controls. For example, "long-press" sounds long, but it really isn't. Video: Body Shouldering and Dragging The purpose of this video is to show that frob to shoulder a body is fast and long-press frob to drag a body is fast enough and accurate. Video: Long-Press Frob to Pick Up Candle The purpose of this video is to show how the long-press frob to pick up a candle isn't really much slower than regular frob. Video: Frob to Extinguish The purpose of this video -- if a bit contrived -- is to show the efficiency and precision of this proposed feature. The task in the video was for the player to as quickly and accurately as possible extinguish candles and put them back in their original positions. On the left, TDM v2.11 is shown. The player has to highlight each candle, press "Frob/Interact" to pick up, press "Use Inv. Item" to extinguish, make sure the candle is back in place, and finally press "Frob/Interact" to drop the candle. The result shows mistakes and candles getting misplaced. On the right, the proposed feature is shown. The player frobs to extinguish the candles. The result shows no mistakes and candles are kept in their original positions. Special Thanks @Wellingtoncrab was instrumental in improving this feature during its early stages. We had many discussions covering varying scenarios, pros, and cons, and how it would affect the gameplay and player experience. Originally, I had a completely different solution that added a special "use modifier" keybinding. He suggested the frob to use and long-press frob to pick up mechanics. I coded it up, gave it a try, and found it to be too good. Without his feedback and patience, this feature wouldn't be as good as it is. Thank you, @Wellingtoncrab! And, of note, @Wellingtoncrab hasn't been able to try it in game yet, because I'm using Linux and can't compile a Windows build for him. So, if this feature isn't good, that's my fault. Code Patch I'll post the code patch in another post below this one so that folks who compile TDM themselves can give this proposal a try in game. And, if you do, I look forward to your feedback! Player Complaints TTLG (2023-01-10) Player 1: TDM Forums (2021-03-13) Player 2: Player 3: TDM Forums (2023-06-17) Player 4: TDM Discord (2021-05-18) Player 5: TDM Discord (2023-02-14) Player 6: Player 7: Player 8:
- 336 replies
-
- 12
-
-
-
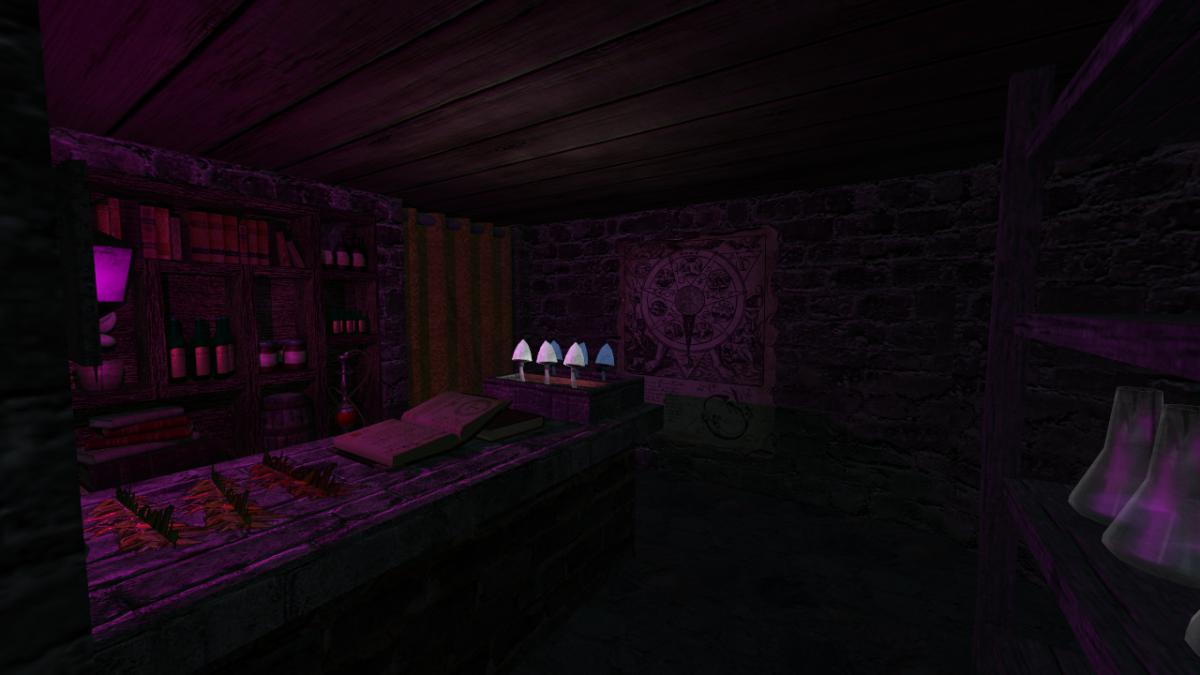
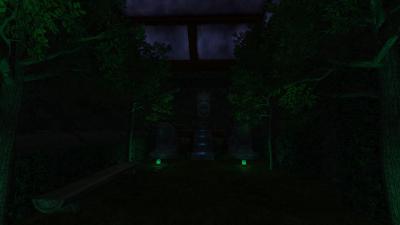
 Author Note: This is a brand new mission and a new entry into the accountant series. There are some different than usual puzzles in this FM, so if you find yourself stuck try to think about your pathway forward in a logical manner. And if you're still having troubles then pop by this thread and ask (preferably with spoiler tags). This FM is brand new and serves as the first installment in The Accountant series, a few years back there was a small prologue style mission released however I felt that it did not represent The Accountant series so I decided to go back to the drawing board and do a whole new mission that's larger, has a better level design and has a story that lines up closer to what I plan to do with the accountant series. The mission is medium sized and you can expect between 30-90 minutes to complete it depending on your playstyle. Beta Testers Captain Cleveland Crowind Kingsal PukeyBee Skacky SquadaFroinx Voice Actors AndrosTheOxen Epifire Goldwell Stevenpfortune Yandros Custom assets Airship Ballet Bentraxx Bob Necro Dragofer DrKubiac Epifire Kingsal MalachiAD Sotha Springheel SquadaFroinx Available via in-game downloader File Size: 233 MB - Updated to v 1.1 (01.06.2018)
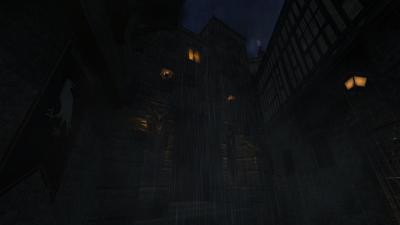
- 116 replies
-
- 21
-
-
@nbohr1more, I just recently noticed that back in Oct you reported in https://www.ttlg.com/forums/showthread.php?t=152771 I didn't see anything about this in the current "What's New in 2.13". Will this new functionality actually happen for 2.13, and if so what FMs can now be re-downloaded to get the enhanced translation packs? Particularly "early TDM missions [that] also have German, Italian, French, etc translations". Pointer to any new bugtracker/forum/wiki info about this appreciated.
-
I think it's good to make sure it's only happening in 2.13 and not also in 2.12. If it also happens in 2.12 it's probably just an (lod related) mission bug that the missionmaker (bikerdude) has to fix. I already send your post info to him (he's not on the forums)
-
All is working and has a basic directory and save system, with automatic scaling to the recommended dimenstions (upper left) and can be used just to make the maps for input images (to the right from the directory and name, the red lines indicate how the reference image stays as it is), or have the inputted image as a reference for the AI to work from. I tried to make it as simple as possible where things can be bypassed (like maps and saves) and a lot of nodes are hidden under other nodes, and nodes are pinned so you can't drag them around without unpinning them. Next step: getting it all ready and packed for download and install so ppl can use it .. and some sort of manual I guess : P @nbohr1more I see the texture guidlines were updated! But now I wonder about the recommended dimension or the heightmap?
-
How about AI voice generation using the already existing voices?
STRUNK replied to STRUNK's topic in TDM Editors Guild
I have installed F5-TTS with pinokio: https://pinokio.computer/ It's remarkable how fast this model is and how easy to use. Just find some longer voice clip and use it as reference audio. Under Multi-Speech you can upload more voice clips and give them tags/Speech Type Names, of use this for different voices alltogether, then simply start the scentence with {your tag}. {your tag2} etc. I took 4 clips from the moor tagging them soft, normal, angry and shout, then making them say the same line: YourCamel.mp3 It works very fast and the quality is very much the same as I got out of tortoise-TTS, but seems not as good in keeping the character of the voice. -
Happy 15th Anniversary to The Dark Mod! As of October 17th. 2024, 15 years have passed since the TDM 1.0 release! In that time, we evolved to most or all of the features that players were asking for since the concept of TDM was first mooted in the TTLG forums in late 2004. Campaign Support, Soft Shadows, EFX Reverb, Multi-Core Rendering, Uncapped FPS, Ambient Occlusion, Subtitles, are among the roster of perennial requested things that have been brought to life by the development team in addition to the core Thief 1 \ 2 game-play items like the Lightgem, Rope Arrows, Swim-able water, lock-picking and ( of course ) advanced AI enemies. To commemorate this occasion, please join us in celebrating the Release of 5 missions for our 15th Anniversary Contest! . The Imperial Sword Bikerdude was encouraged to reclaim an abandoned version of his older mission and rework it into a new one. Now the formerly lost work is a glorious new experience with scripted dialog, special events, and a decayed imperial cityscape! . The Wizard’s Treasure Thebigh has made yet another bite-sized mission with a focus on quality game-play and challenge. The mission is extra impressive for the scope and visuals achieved since his decision to join the contest was fairly late compared to other entrants. . You Only Fly Thrice DeTeEff has continued his progression of high quality and complex releases. Another relative late comer to the contest, this mission is a tour-de-force of excellent game-play ideas and is quite handsome with excellent volumetric lighting and modular asset usage. . Volta 3: Gemcutter Kingsal has decided to release his long awaited Volta Series sequel to be included in the contest. DO NOT MISS THIS MISSION! . Pinnacle: A Test of Talents UncertainTitle and TwilitWitch decided to risk their first mission release to be included in the contest roster. The use of both modular assets and many custom models give this mission a familiar yet refreshing visual appeal. . Please join the celebration and vote in the forum threads for each respective mission based on their contest criteria ( Game-play, Story, Visuals ). . . The Dark Mod 2.13 “Developer Build” The Dark Mod 2.13 is still a few months away from release but we wanted to highlight the fact that a few more of the long requested changes have been added in the upcoming release! . Parallax Occlusion Mapping! In the above video, you can see a that TDM has finally incorporated the long requested effect. This wont be applied to all textures since there may be some problems with visual anomalies and performance but we are already preparing for a future where lots of textures use this new and more three dimensional surface effect. Better AI sight! While the AI have always been good at seeing the player due to the lightgem ( sometimes “too good” so we had to nerf their sight ), AI have had various challenges seeing things like bodies, missing objects, opened doors, weapons, blood, etc. This is because it is not practical to give all entities \ objects their own lightgem. Instead we have used very simple math to represent lights which don’t match shadow and light textures. In 2.13 a new sampling approach aims to improve this so that AI can better see ( or not see ) items and bodies in a way that better matches the actual lighting in the mission. Mission Search! There is now a search window where you can specify the mission author or title to help you find your preferred mission rather than scrolling through over 170 missions. You can also change how mission titles are rendered with either the original title or the title with prefix words like “A, The” moved to the end. Improved Training Mission! The Training Mission has been upgraded to include a Vine Arrow tutorial, a Slow Match tutorial, EFX Reverb, Volumetric Lights, and some performance optimizations! Translation Packs! Between TDM 1.06 and 2.0 Tels and the translating community started translating many missions but these translations required that the original mission be altered in a way that made it harder for the mission authors to revise. The meant that translation packs were in limbo being hosted by 3rd party sites \ forums along with their orphaned old missions. The translators over at the Darkfate forums came up with an solution by including not only the translation strings in the translation pack but also the altered map files, GUI defs, etc that had translation work done to them. This would leave the original mission untouched but allow translation packs to override some parts. We have gone through the old archive of these translations and have reworked them to work with the latest version of TDM (and the associated missions). Most of the translations are Russian ( due to the continued work of the Darkfate people ) but many of the early TDM missions also have German, Italian, French, etc translations too. Subtitles! Datiswous has been creating story subtitles for many of the existing missions in the TDM mission database. Most authors have incorporated these into their official releases, otherwise players can still add them to the FM folder. . Hidden Hands: Blood and Metal Campaign Just before the 15th anniversary entries were starting to arrive, JackFarmer released an enormous 5 mission campaign that continues his well regarded “Hidden Hands” series!
-
- 25
-
-
@Epifire@nbohr1more@datiswous Thanx guys. I have been experimenting with nodes for comfyUI that generate normalmaps. Metric3D normalmap and DSINE Normal Map (more detail) do quite a good job. The only thing is that the normalmaps for TDM are different then what these nodes put out. I tried rotating the generated image 180 degrees, then have the normalmap generated and then rotating that again 180 degrees. Metric3D produces the right normalmap with that method, it seems, but DSINE doesn't. Then I tried all sorts of things with splitting the generated normalmap in RGB colors, inverting the green channel and then blending/mixing the RGB chanels back to one image, but with no success. The color/invert function in blender works different then anything I could do with the nodes I tried. Is there an other name for what blender calls invert, or an other method that might be accomplished using nodes? Ultimately I would like to make a workflow for comfyUI that produces all needed maps at once, for generated- and input images, in a way that it doesn't need editing in other software anymore ... if possible. Exept maybe from converting the files to .dds at the end.
-
Since Aluminum directed me here ( https://forums.thedarkmod.com/index.php?/topic/9082-newbie-darkradiant-questions/page/437/#comment-475263 ) can we have unlimited renderer effects? Well, maybe not unlimited, by maybe 3-5? Thanks.
- Show previous comments 1 more
-

Since I wasn't the one mainly asking, I'll just cite you in the original thread instead.
-
There already is a kind of sorting, sort nearest, sort decal, sort <n>. For things like windows and such, sort nearest should probably have the desirable affect, though looking through multiple translucent shaders might kill performance.
-
Is having multiple render effects really killing performance that badly? I don't understand. You're saying that if I have two transparent objects side-by-side, then they'll just count as two render effects, but when combined, they somehow become something much more difficult to render?
Never-the-less, unless we're talking some kind of infinite portal problem, why not let the mapper choose how much he wants to kill performance? Just warn him against putting too many effects close together.
-
I would like the development team to consider applying the GPL3 licence to the following Text file which was created by @Tels, @Greebo and @Dragofer. tdm_internal_engine.mtr (darkmod>materials) The reason for this request is that it is a critical core file and without it the engine (when built from source) cannot launch at all. I would also like to query whether the following script files created by @Obsttorte and @Dragofer: tdm_audiograph.script tdm_camgoyle.script tdm_grandfather_clock.script tdm_safe_lock.script tdm_safe.script tdm_turret.script were intentionally released under the CC-BY_NC_SA_3 licence or if this was an oversight? I ask since all other .script files included with TDM (and which are all called by the engine source) all contain GPL3 headers while these files have no licence information at all so naturally fall under the CC-BY_NC_SA_3 licence. Additionally in investigating which text files are required by the engine depending on scenario (and while I understand that the number of developers who are no longer on the development team may affect how many of these files can be licenced) I wondered if these too may be open for consideration as to their licence? tdm_base.def tdm_soundprop.def cursor.gui mainmenu_background_custom.gui mainmenu_background.gui mainmenu_briefing_video.gui mainmenu_briefing.gui mainmenu_credits_background.gui mainmenu_credits.gui mainmenu_custom_defaults.gui mainmenu_custom_defs.gui mainmenu_debriefing_video.gui mainmenu_defs.gui mainmenu_download.gui mainmenu_failure.gui mainmenu_loadsave.gui mainmenu_main_ingame.gui mainmenu_main.gui mainmenu_message.gui mainmenu_music.gui mainmenu_newgame.gui mainmenu_objectives.gui mainmenu_quit.gui mainmenu_settings_audio.gui mainmenu_settings_controls.gui mainmenu_settings_gameplay.gui mainmenu_settings_gamma.gui mainmenu_settings_guisize.gui mainmenu_settings_language.gui mainmenu_settings_video.gui mainmenu_settings.gui mainmenu_shop.gui mainmenu_success.gui mainmenu_utils.gui mainmenu.gui msg.gui tdm_objectives_core.gui tdm_subtitles_common.gui tdm_subtitles_message.gui tdm_gui.mtr tdm_tables.mtr tdm_guis.sndshd all.lang english.lang These provide the foundation of a working base main menu. TDM's main menu also includes several undocumented commands (that neither show in listcmds nor listcvars) which are useful to know for anyone wishing to use the base source code. I have listed the .lang files solely because of the #StringNum associations, I appreciate that they are not truly required for the above to be a foundation. While looking into how far I could break TDM in removal of files, I came across this thread by @Fiver suggesting a Libre version of TDM: https://forums.thedarkmod.com/index.php?/topic/22346-libre-version-of-tdm/ I believe that in that instance all text based files would need to be GPL3 licenced, leaving only videos, sounds, textures, models and the like as still being under the CC_BY_NC_SA_3 licence since remaking the files would likely result in most cases with near-identical looking files to the original. Thankyou for your consideration.
-
The rendering color buffer is already expanded. It is our monitors which only have 8-bit output precision normally. Unless you have some HDR monitor, which can display more with proper program support. In the reality I think there are several approaches for tonemapping: Based on modelling something Just arbitrary math or 0-1 monotonous curves which look good to you AgX belongs to p.1, it expects proper physical quantities as input in order to work properly. TDM does not belong to the world of p.1 / PBR, so we can just as well tweak some curves without any regard for physics.
- 79 replies
-
- 1
-
-
- color management
- tonemapping
- (and 4 more)
-
Ah, in that case i wrongly assumed linear space as the input. I updated the tonemap.frag.glsl accordingly, now it converts srgb space to linear before applying AgX and i fixed the gamma conversion afterwards. It's probably not ideal going from srgb space to linear, but it seems to work well with 64bit enabled. 32bit though shows a significant loss in detail. Yeah, looks more correct that way. Not as dull and the menu doesn't appear overly soft anymore. Screenshots: tonemap.frag.glsl
- 79 replies
-
- 1
-
-
- color management
- tonemapping
- (and 4 more)
-
I'm good at causing uncommon errors. I found this thread about it (there was nothing in the wikki): and this in the idtech4 modwikki: Error: i >= MAX_REACH_PER_AREA Severe : An error issued by the AAS compiler. An Area that has been created has more than 256 adjoining Areas . You should simplify the map’s brush geometry (which the aas compiler uses as input) using monster clip to block off areas that the AI won’t/shouldn’t go. This error may also be caused by surrounding the map with a large caulk hull with leaks between the map and hull.
-
[Feature Proposal] Frob to Use World Item
Wellingtoncrab replied to Daft Mugi's topic in The Dark Mod
Impossible to miss. Read their feedback. Anyone playing the game knows to interact with things that are highlighted and that the primary way to interact with things is to frob them. What they don't know is there is an entirely different control layer in the game which provides different interactions: "use item to shoulder" being the example we are discussing. Long press is still a complex input in this regard and it is not the proposed solution to the added complexity in the game, it is a proposed way to manage that complexity from a single input. It is the tying of the familiar input (frobbing) to the familiar result (interacting with a body to shoulder it), and then tying the unfamiliar "new" input (long frob/double click/use item/etc) to the unfamiliar "new" result (using a interaction modifier to do fine grain manipulation of the body) that is a potential solution to this. That is not to claim it is perfect. Shouldering/dropping bodies is an essential player action. There are missions, such as volta 2, where shouldering a body is essential to complete the mission. There is no example I am aware of where fine manipulation of a body is ever essential - it is a nice additional layer of control. So why is fine control of bodies the first thing many players will learn? Maybe because the mod launched without shouldering or something? (I played it when it came out and am not sure if this was the case or like these new players I just didn't know it was possible, but I used to just drag bodies everywhere) Maybe it was to show off some of the physics interactions that were new to the mod vs thief? I am not sure. I am sure it is not working for some players. It did not work for me. When I came back to try the mod in 2019 it took many missions for me to stumble upon this input combination (I remember it quite clearly - it happened on accident while I was playing my now favorite mission “Perilous Refuge”). And yes I had played the training mission - multiple times. -
Something wrong with the hosts? See following topic for the investigation. https://forums.thedarkmod.com/index.php?/topic/22663-cannot-download-dark-mod/
-
Maybe something is wrong on the hosts on that time? Others cant download it as well. https://forums.thedarkmod.com/index.php?/topic/22662-error-missing-end-chunk-0-193/
-
r_bloom_weight is set to "0.7" both in my 2.12 installation and in main repository. I never touched those values which means the default must be 0.7. Troy Sobotka is the original creator of AgX. He was active on Blender forums where he had long philosophical arguments about color with people. Also on Blender developer forums. I don't know if there's much more beyond those and his github page: https://github.com/sobotka Edit @stgatilov AgX however is a direct continuation of Sobotka's earlier 'Filmic', so there may be more about that: https://github.com/sobotka/filmic-blender https://blender.stackexchange.com/questions/164991/are-the-technical-details-of-filmic-available
-
Woo!! 2.10 Beta "Release Candidate" ( 210-07 ) is out:
https://forums.thedarkmod.com/index.php?/topic/21198-beta-testing-210/
It wont be long now
") ...
...
-
-
2
-
1
-
- Report
-
From BSP To ESP – How S3ctor Abused Quake Editors to Redefine the Morrowind Modding Experience https://openmw.org/2024/from-bsp-to-esp-how-s3ctor-abused-quake-editors-to-redefine-the-morrowind-modding-experience/ https://github.com/cdb-boop/Space-Quest-V-Voice-Acting-Mod another informative article https://danluu.com/input-lag/
-
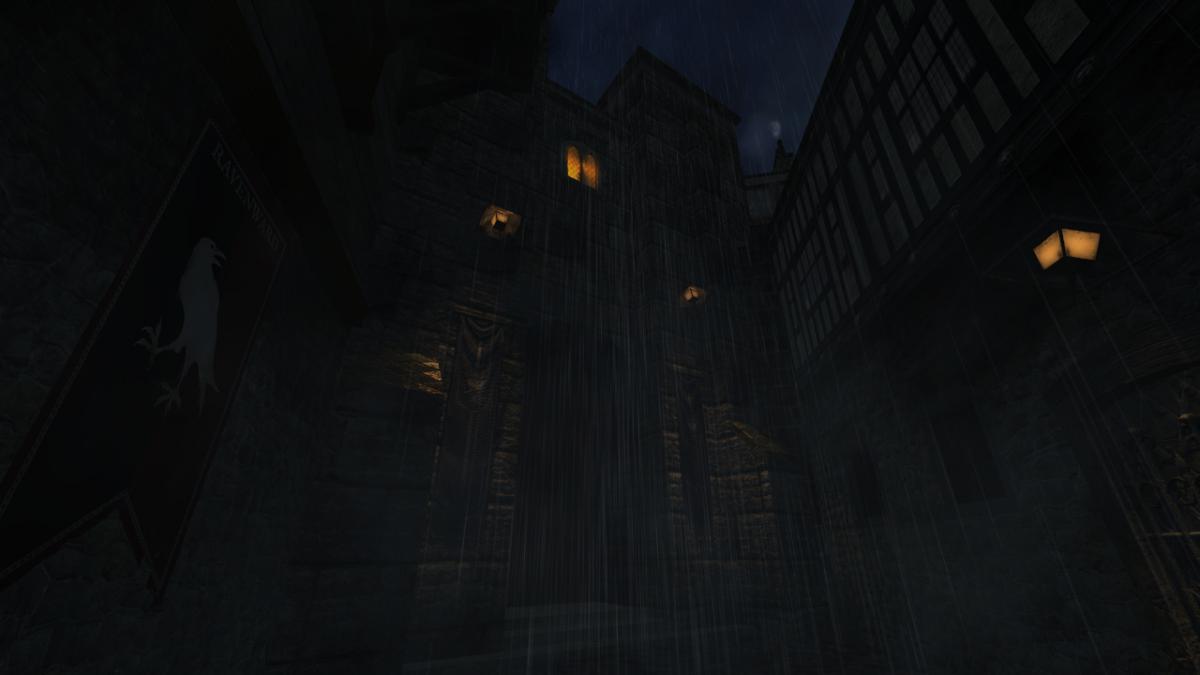
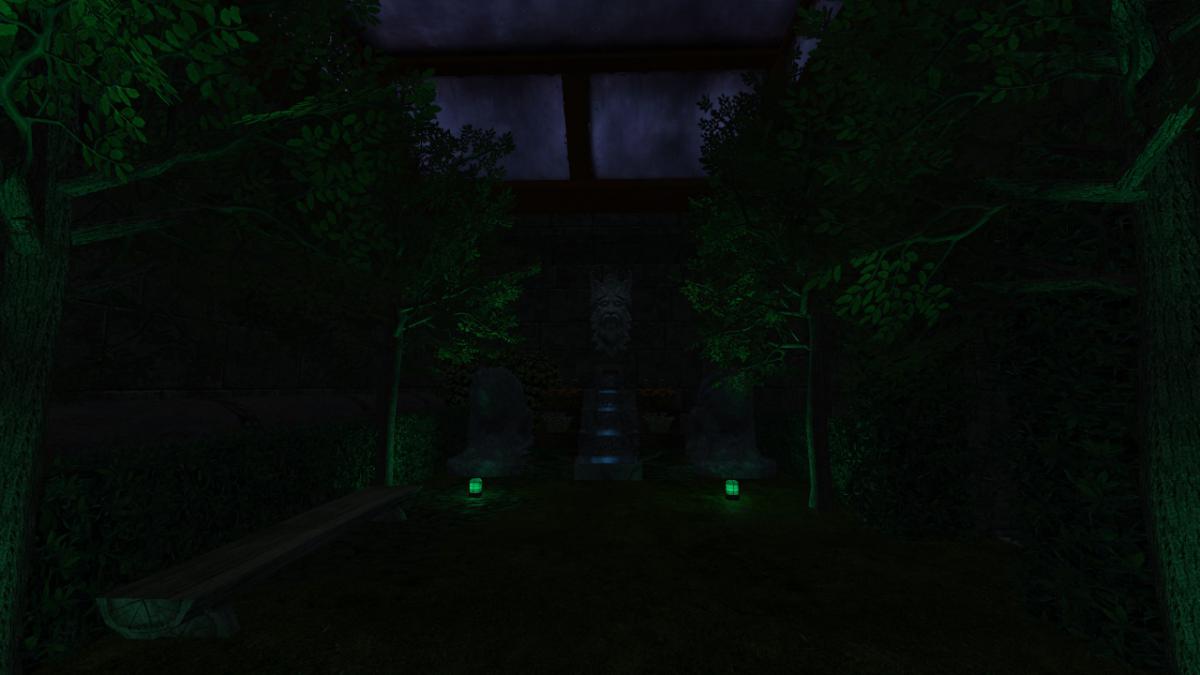
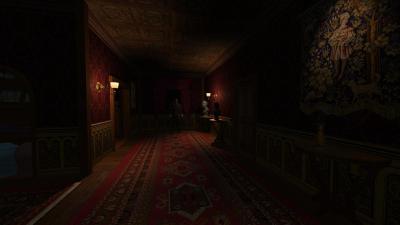
A virulent and deadly illness afflicts the children of Bridgeport. One brilliant but greedy physician can treat the disease, for an extortionate fee. Burgle his house for the cure your daughter needs. Hello sneaksies! I'm happy to announce my new mission. A sequel to my first map, The Factory Heist, this is a smallish mansion heist that's turned out to be somewhat tricky, and I hope you enjoy uncovering the house's hidden secret! Promotional pictures here. Big thanks to my beta testers: datiswous, madtaffer, acolytesix, and wellingtoncrab. Without their input the level would be an unbalanced mess. V1.01 available in the mission downloader.
- 62 replies
-
- 12
-
-
I don't think there's a link to thedarkmod.com on forums.thedarkmod.com ...
-
Yeah and the wiki and moddb. It should have those links in the footer I think. Probably easy to add by an admin.
Edit: And a link to the bugtracker. I'm always searching for a post in the forum that links to that because I can't remember the url.
-
I drew attention to this several times in the last few years. No one payed it any attention, so I just gave up.
-
-
1
-
- Report
-
Reluctance to improve the forums is matched by reluctance to allow more people to work on it. Talk about trust and power.
-
-
1
-
- Report
-