Search the Community
Searched results for '/tags/forums/keyboard' or tags 'forums/keyboardq=/tags/forums/keyboard&'.
-
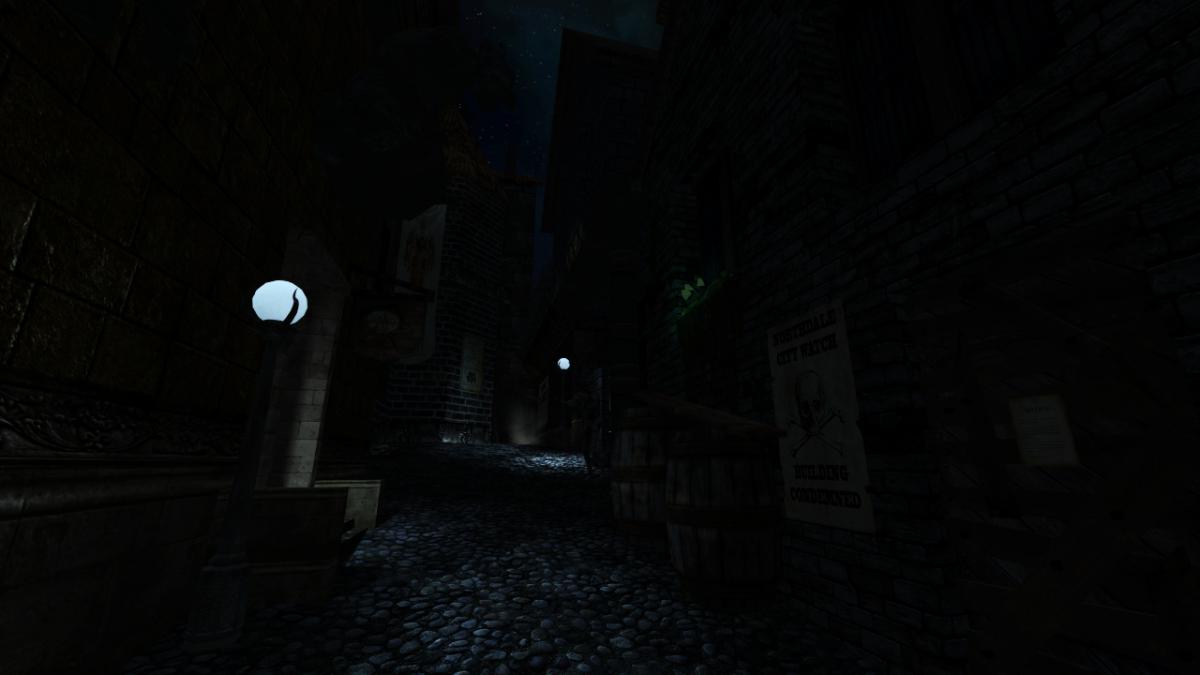
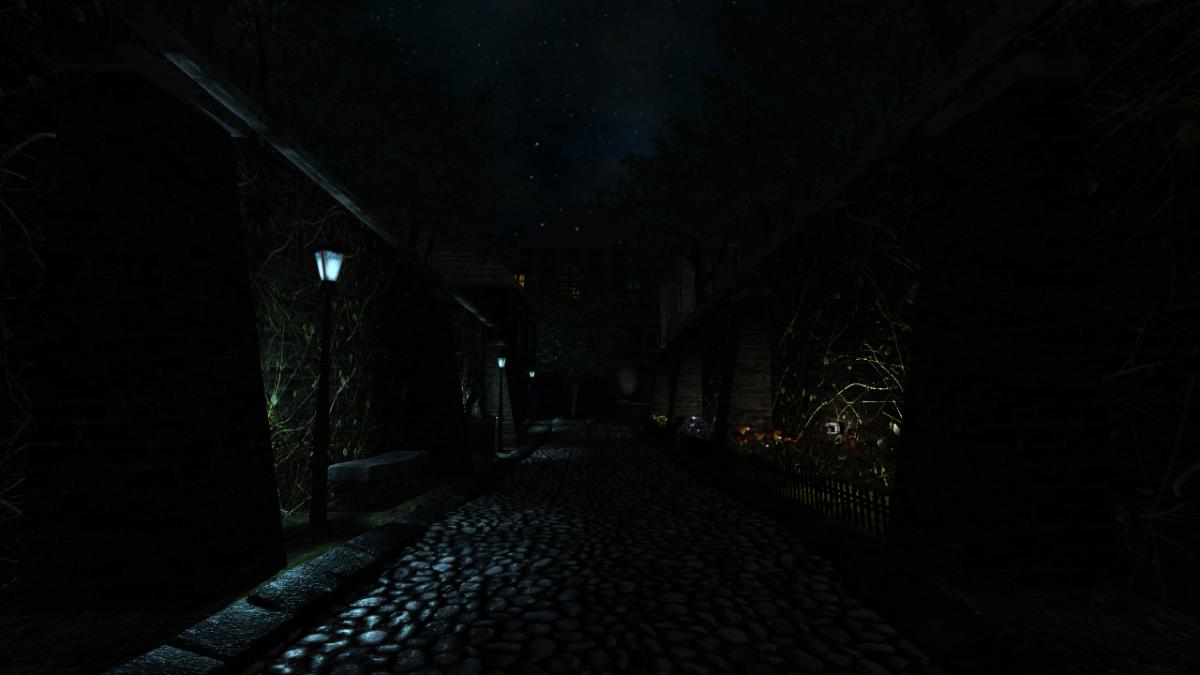
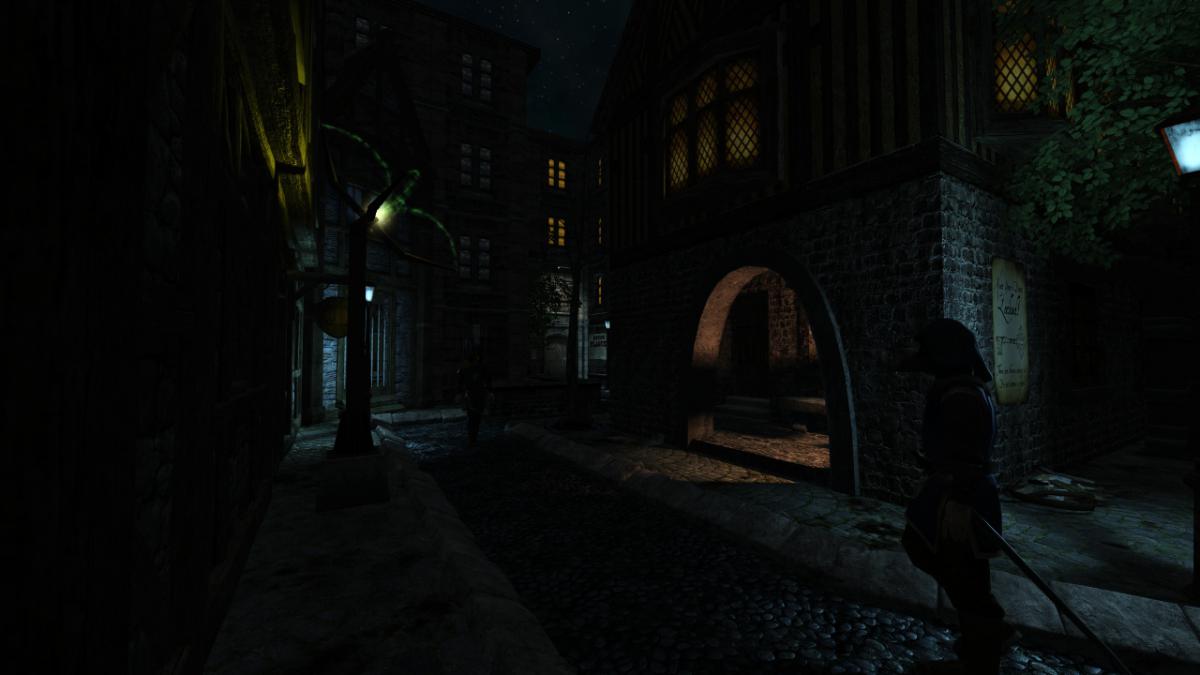
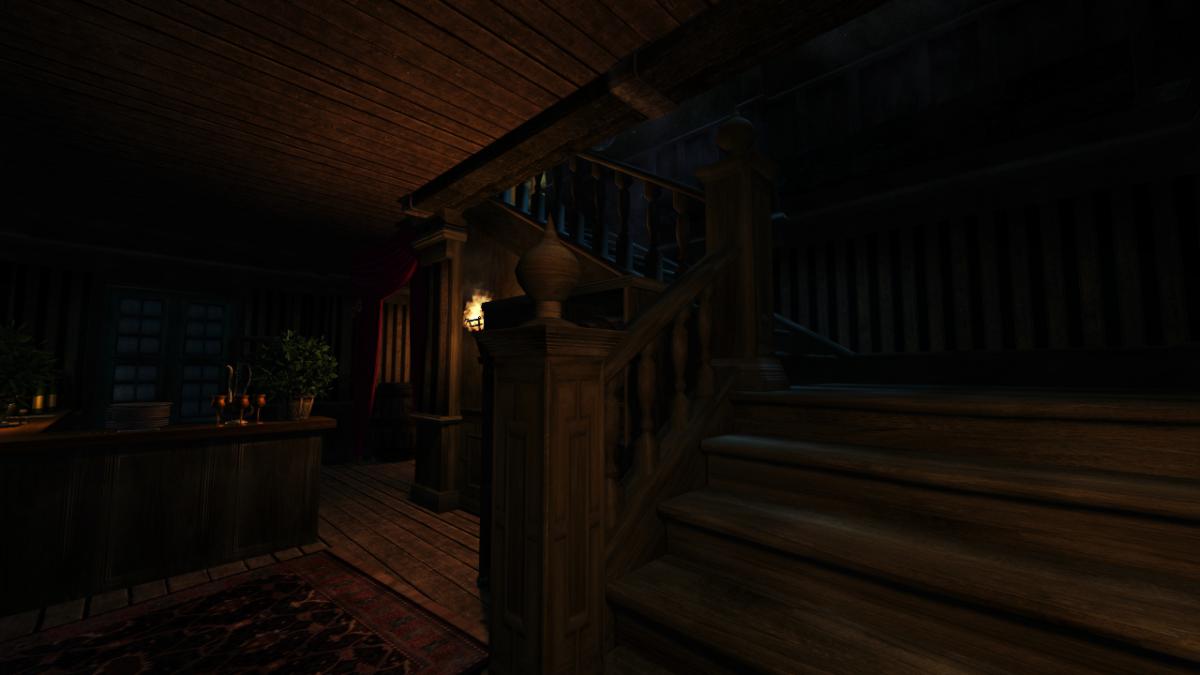
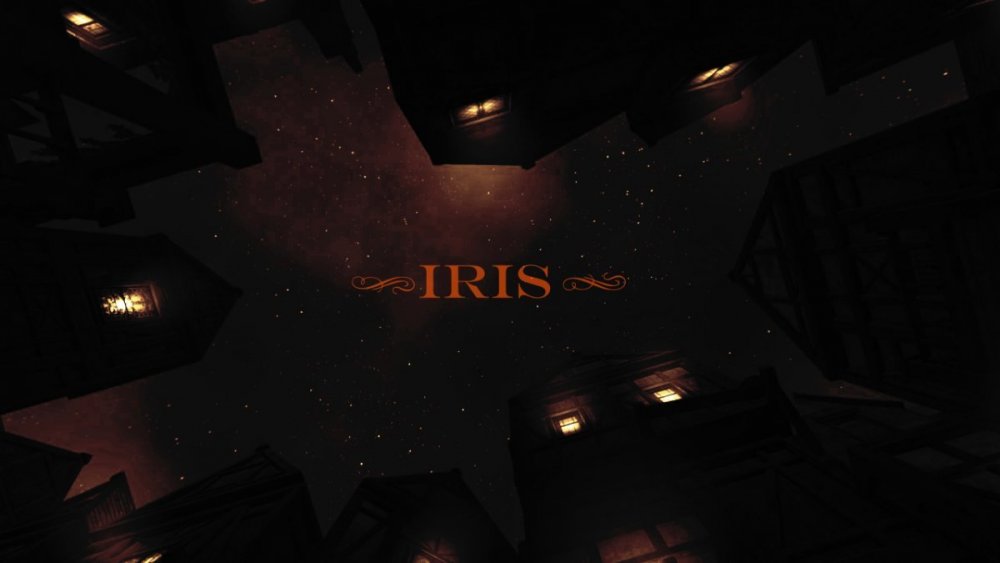
 ============== -= IRIS =- ============== WELLINGTONCRAB TDM v 2.11 REQ Ver. 1.3 *For Maureen* -=- "Carry the light of the Builder, Brother. Unto its end." -Valediction of the Devoted "What year is this? Am I dreaming?" -Plea of the Thief Dear Iris, I am old and broken. When we were young it felt like the words came easily. Now I find the ink has long dried on the pen and I'm as wanting for words as coin in my purse. I can tell we are nearing the end of the tale; time enough for one more job before the curtain call... ============== -Installation- Requires minimum version of TDM 2.13 -Iris does not support mods or the Unofficial Patch- Download and place the following .pk4 into you FMs directory: Iris Download ============== Russian Language Translations by @kalinovka Mirror #1: yandex.ru Mirror #2: Google Drive ============== *Thank you for playing. Iris is a large mission which can either take as quickly or as long as you are compelled to play. I hope someone out there enjoys it and this initial release is not completely busted - I tried the best I could!* *Iris both is and isn't what it seems. If commenting please use spoiler tags where appropriate. If you are not certain if it would be appropriate a good assumption would be to use a spoiler tag* *Support TDM by rating missions on Thief Guild: https://www.thiefguild.com/* ============== WITH LASTING GRATITUDE: OBSTORTTE - Whose gameplay scripts from his thread laid the foundation which made the mission seem like something I could even pull off at all. Also fantastic tutorial videos! DRAGOFER - Who built upon that foundation and made it shine even brighter! And whom also provided immeasurable quantities of help and encouragement the past couple years on the TDM discord. ORBWEAVER & GIGAGOOGA - For generously offering their ambient music up for use. EPIFIRE - Who lent me his fine trash and trash receptacle models. AMADEUS - Who was the first person who wasn't me to play the damn thing and provided his excellent editorial services to improving the readers experience playing TESTERS AND TROUBLESHOOTERS: AMADEUS * DATISWOUS * SPOOKS * ALUMINUMHASTE * JAXA * JACKFARMER * WESP5 * ATE0ATE * MADTAFFER * STGATILOV * DRAGOFER * KINGSAL * KLATREMUS - What can I possibly say? Playing this thing over and over again could not have been easy. Deepest thanks and all apologies. -=THANKS TO ALL ON THE TDM DISCORD AND FORUM=- ==SEE README.TXT FOR ADDITIONAL ATTRIBUTIONS & INFORMATION== HONORABLE MENTION: GOLDWELL - If I hadn't by chance stumbled into Northdale back in 2018/2019 I would probably still be trying to get this thing to work in TDS, which means it probably would not exist - though more details on that in readme. ============== Boring Technical Information: *Iris is a performance intensive mission and I recommend a GTX 1060 or equivalent. I find the performance similar to other demanding TDM missions on my machine, but mileage may vary and my apologies if this prevents anyone from enjoying the mission.* *Iris heavily modifies the behavior of AI in the game, how they relate/respond to each other and the player. So they may act even stranger than they do typically in TDM. Feedback on this is useful - as it can potentially be improved and expanded upon in future patches.* -=- This is my first release and it has been a long time coming! If I forgot anything please let me know! God Speed. 2.10 Features Used:
- 451 replies
-
- 25
-

-

-
Hello, everyone! In this multi-part, comprehensive tutorial I will introduce you to a new light type that has been available in The Dark Mod since version 2.06, what it does, why you would want to use it and how to implement it in your Fan Missions. This tutorial is aimed at the intermediate mapper. Explanations of how to use DarkRadiant, write material files, etc. are outside of its scope. I will, however, aim to be thorough and explain the relevant concepts comprehensively. Let us begin by delineating the sections of the tutorial: Part 1 will walk you through four, distinct ways to add ambient light to a scene, the last way using irradiance environment maps (or IEMs). Lighting a scene with an IEM is considered image-based lighting. Explaining this concept is not in the scope of this tutorial; rather, we will compare and contrast our currently available methods with this new one. If you already understand the benefits IBL confers, you may consider this introductory section superfluous. Part 2 will review the current state of cubemap lights in TDM, brief you on capturing an environment cubemap inside TDM and note limitations you may run into. Three cubemap filtering applications will be introduced and reviewed. Part 3 will go into further detail of the types of inputs and outputs required by each program and give a walkthrough of the simplest way to get an irradiance map working in-game. Part 4 will guide you through two additional, different workflows of how to convert your cubemap to an irradiance map and unstitch it back to the six separate image files that the engine needs. Part 5 will conclude the tutorial with some considerations as to the scalability of the methods hitherto explained and will enumerate some good practices in creating IEMs. Typical scenes will be considered. Essential links and resources will be posted here and a succinct list of the steps and tools needed for each workflow will be summarized, for quick reference. Without further ado, let us begin. Part 1 Imagine the scene. You’ve just made a great environment for your map, you’ve got your geometry exactly how you want it… but there’s a problem. Nobody can appreciate your efforts if they can’t see anything! [Fig. 1] This will be the test scene for the rest of our tutorial — I would tell you to “get acquainted with it” but it’s rather hard to, at the moment. The Dark Mod is a game where the interplay between light and shadow is of great importance. Placing lights is designing gameplay. In this example scene, a corridor with two windows, I have decided to place 3 lights for the player to stealth his way around. Two lights from the windows streak down across the floor and a third, placeholder light for a fixture later to be added, is shining behind me, at one end of the corridor. Strictly speaking, this is sufficient for gameplay in my case. It is plainly obvious, however, that the scene looks bad, incomplete. “Gameplay” lights aside, the rest of the environment is pitch black. This is undesirable for two reasons. It looks wrong. In real life, lights bounce off surfaces and diffuse in all directions. This diffused, omni-directional lighting is called ambient lighting and its emitment can be termed irradiance. You may contrast this with directional lighting radiating from a point, which is called point lighting and its emitment — radiance. One can argue that ambient lighting sells the realism of a scene. Be that as it may, suppose we disregard scary, real-life optics and set concerns of “realism” aside… It’s bad gameplay. Being in darkness is a positive for the player avatar, but looking at darkness is a negative for the player, themselves. They need to differentiate obstacles and objects in the environment to move their avatar. Our current light level makes the scene illegible. The eye strain involved in reading the environment in these light conditions may well give your player a headache, figurative and literal, and greatly distract them from enjoying your level. This tutorial assumes you use DarkRadiant or are at least aware of idtech4’s light types. From my earlier explanation, you can see the parallels between the real life point/ambient light dichotomy and the aptly named “point” and “ambient” light types that you can use in the editor. For further review, you can consult our wiki. Seeing as how there is a danger in confusing the terms here, I will hereafter refer to real life ambient light as “irradiant light”, to differentiate it from the TDM ambient lights, which are our engine’s practical implementation of the optical phenomenon. A similar distinction between “radiant light” and point lights will be made for the same reason. Back to our problem. Knowing, now, that most all your scenes should have irradiant light in addition to radiant light, let’s try (and fail, instructionally) to fix up our gloomy corridor. [Fig. 2] The easiest and ugliest solution: ambient lights. Atdm:ambient_world is a game entity that is basically an ambient light with no falloff, modifiable by the location system. One of the first things we all do when starting a new map is putting an ambient_world in it. In the above image, the darkness problem is solved by raising the ambient light level using ambient_world (or via an info_location entity). Practically every Dark Mod mission solves its darkness problem1 like this. Entirely relying on the global ambient light, however, is far from ideal and I argue that it solves neither of our two, aforementioned problems. Ambient_world provides irradiant light and you may further modulate its color and brightness per location. However, said color and brightness are constant across the entire scene. This is neither realistic, nor does it reduce eye strain. It only makes the scene marginally more legible. Let’s abandon this uniform lighting approach and try a different solution that’s more scene-specific. [Fig. 3] Non-uniform, but has unintended consequences. Our global ambient now down to a negligible level, the next logical approach would be hand-placed ambient lights with falloff, like ambient_biground. Two are placed here, supplementing our window point lights. Combining ambient and point lights may not be standard TDM practice, but multiple idtech4 tutorials extol the virtues of this method. I, myself, have used it in King of Diamonds. For instance, in the Parkins residence, the red room with the fireplace has ambient lights coupled to both the electric light and the fire flame. They color the shadows and enrich the scene, and they get toggled alongside their parent (point) lights, whenever they change state (extinguished/relit). This is markedly better than before, but to be honest anything is, and you may notice some unintended side-effects. The AI I’ve placed in the middle of the ambient light’s volume gets omnidirectionally illuminated far more than any of the walls, by virtue of how light projection in the engine works. Moving the ambient lights’ centers closer to the windows would alleviate this, but would introduce another issue — the wall would get lit on the other side as well. Ambient lights don’t cast shadows, meaning they go through walls. You could solve this by creating custom ambient light projection textures, but at this point we are three ad hocs in and this is getting needlessly complicated. I concede that this method has limited use cases but illuminating big spaces that AI can move through, like our corridor, isn’t one of them. Let’s move on. [Fig. 4] More directional, but looks off. I have personally been using this method in my WIP maps a lot. For development (vs. release), I even recommend it. A point light instead of an ambient light is used here. The texture is either “biground1” or “defaultpointlight” (the latter here). The light does not cast shadows, and its light origin is set at one side of the corridor, illuminating it at an angle. This solves the problem of omnidirectional illumination for props or AI in the middle of the light volume, you can now see that the AI is lit from the back rather than from all sides. In addition, the point light provides that which the ambient one cannot, namely specular and normal interaction, two very important features that help our players read the environment better. This is about as good as you can get but there are still some niggling problems. The scene still looks too monochromatic and dark. From experience, I can tell you that this method looks good in certain scenes, but this is clearly not one of them. Sure, we can use two, non-shadowcasting point lights instead of one, aligned to our windows like in the previous example, we can even artfully combine local and global ambient lights to furnish the scene further, but by this point we will have multiple light entities placed, which is unwieldy to work with and possibly detrimental to performance. Another problem is that a point light’s movable light origin helps combat ambient omnidirectionality, but its projection texture still illuminates things the strongest in the middle of its volume. I have made multiple experiments with editing the Z-projection falloff texture of these lights and the results have all left me unsatisfied. It just does not look right. A final, more intellectual criticism against this method is that this does not, in a technical sense, supply irradiant light. Nothing here is diffuse, this is just radiant light pretending the best it can. [Fig. 5] The irradiance map method provides the best looking solution to imbuing your scene with an ambient glow. This is the corridor lit with irradiance map lights, a new lighting method introduced in The Dark Mod 2.06. Note the subtle gradients on the left wall and the bounced, orange light on the right column. Note the agreeable light on the AI. Comparing the previous methods and this, it is plainly obvious that an irradiance environment map looks the most realistic and defines the environment far better than any of the other solutions. Why exactly does this image look better than the others? You can inform yourself on image-based lighting and the nature of diffuse irradiance, but images speak louder than words. As you can see, the fact of the matter is that the effect, subtle as it may be, substantially improves the realism of the scene, at least compared to the methods previously available to us. Procuring irradiance environment maps for use in lighting your level will hereafter be the chief subject of this tutorial. The next part will review environment cubemap capture in TDM, the makeIrradiance keyword and three external applications that you can use to convert a TDM cubemap into an irradiance map. 1 “ Note that the color buffer is cleared to black: Doom3 world is naturally pitch black since there is no "ambient" light: In order to be visible a surface/polygon must interact. with a light. This explains why Doom3 was so dark ! “ [source] Part 2 Cubemaps are not new to The Dark Mod. The skybox materials in some of our prefabs are cubemaps, some glass and polished tile materials use cubemaps to fake reflections for cheap. Cubemap lights, however, are comparatively new. The wiki page linked earlier describes these two, new light types that were added in TDM 2.05. cubicLight is a shadow-casting light with true spherical falloff. An example of such a light can be found in the core files, “lights/cubic/tdm_lampshade_cubic”. ambientCubicLight is the light type we will be focusing on. Prior to TDM 2.06, it acted as a movable, on-demand reflection dispenser, making surfaces in its radius reflect a pre-set cubemap, much like glass. After 2.06, the old behavior was discarded and ambientCubicLight was converted to accept industry standard irradiance environment maps. Irradiance environment maps (IEMs) are what we want to make, so perhaps the first thing to make clear is that they aren’t really “handmade”. An IEM is the output of a filtering process (convolution) which requires an input in the form of a regular environment cubemap. In other words, if we want to make an IEM, we need a regular cubemap, ideally one depicting our environment — in this case, the corridor. I say a snapshot of the environment is ideal for lighting it because this emulates how irradiant light in the real world works. All radiating surfaces are recorded in our cubemap, our ambient optic array as it were, then blurred, or convoluted, to approximate light scatter and diffusion, then the in-game light “shines” this approximation of irradiant light back to the surfaces. There is a bit of a “chicken and the egg” situation here, if your scene is dark to begin with, wouldn’t you just get a dark irradiance map and accomplish nothing? In the captured cubemap faces in Fig. 6, you may notice that the environment looks different than what I’ve shown so far. I used two ambient lights to brighten up the windows for a better final irradiance result. I’ve “primed the pump”, so to speak. You can ignore this conundrum for the moment, ways to set up your scenes for better results, or priming the pump correctly, will be discussed at the end of the tutorial. Capturing the Environment The wiki has a tutorial on capturing cubemaps by angua, but it is woefully out of date. Let me run you through the process for 2.07 really briefly. To start with, I fly to approx. the center of the corridor with noclip. I then type “envshot t 256” in the console. This outputs six .tga images in the <root>/env folder, simply named “t”, sized 256x256 px and constituting the six sides of a cube and depicting the entire environment. This is how they look in the folder: [Fig. 6] The six cube faces in the folder. Of note here is that I do not need to switch to a 640x480 resolution, neither do I need to rename these files, they can already be used in an ambientCubicLight. Setting Up the Lights For brevity’s sake, I’ll skip explaining material definitions, if you’ve ever added a custom texture to your map, you know how to do this. Suffice it to say, it is much the same with custom lights. In your <root>/materials/my_cool_cubemaps.mtr file, you should have something like this: lights/ambientcube/my_test_IEM_light { ambientCubicLight { forceHighQuality //cameraCubeMap makeIrradiance(env/t) cameraCubeMap env/t colored zeroClamp } } We’ll play with the commented out line in just a bit. Firstly, let’s place the actual light in DarkRadiant. It’s as simple as creating a new light or two and setting them up in much the same way you would a regular ambient light. I select the appropriate light texture from the list, “my_test_IEM_light” in the “ambientcube” subfolder and I leave the light colored pure white. [Fig. 7] The corridor in DR, top view, with the ambient cubic lights highlighted. I can place one that fills the volume or two that stagger the effect somewhat. Remember that these lights still have a spherical falloff. Preference and experimentation will prove what looks best to you. Please note that what the material we defined does is load a cubemap while we established that ambientCubicLights only work with irradiance maps. Let’s see if this causes any problems in-game. I save the map and run it in game to see the results. If I already have TDM running, I type “reloadDecls” in the console to reload my material files and “reloadImages” to reload the .tga images in the /env folder. [Fig. 8] Well this looks completely wrong, big surprise. Wouldn’t you know it, putting a cubemap in the place of an irradiance map doesn’t quite work. Everything in the scene, especially the AI, looks to be bathed in slick oil. Even if a material doesn’t have a specular map, it won’t matter, the ambientCubicLight will produce specular reflections like this. Let’s compare how our cubemap .tga files compares with the IEM .tgas we’ll have by the end of the tutorial: [Fig. 9] t_back.tga is the back face of the environment cubemap, tIEM_back.tga is the back face of the irradiance map derived from it. As you can see, the IEM image looks very different. If I were to use “env/tIEM” instead of “env/t” in the material definition above, I would get the proper result, as seen in the last screenshot of part 1. So it is that we need a properly filtered IEM for our lights to work correctly. Speaking of that mtr def though, let’s not invoke an irradiance map we haven’t learned to convert yet. Let’s try an automatic, in-engine way to convert cubemaps to IEMs, namely the makeIrradiance material keyword. makeIrradiance and Its Limitations Let’s uncomment the sixth line in that definition and comment out the seventh. cameraCubeMap makeIrradiance(env/t) //cameraCubeMap env/t Here is a picture of how a cubemap ran through the makeIrradiance keyword looks like: [Fig. 10] Say ‘Hi’ to our friend in the back, the normalmap test cylinder. It’s a custom texture I’ve made to demonstrate cubemap interactions in a clean way. Hey now, this looks pretty nice! The scene is a bit greener than before, but you may even argue it looks more pleasing to the eyes. Unfortunately, the devil is in the details. Let’s compare the makeIrradiance keyword’s output with the custom made irradiance map setup seen at the end of part 1. [Fig. 11, 12] A closer look at the brick texture reveals that the undesired specular highlighting is still present. The normal map test cylinder confirms that the reason for this is the noisy output of the makeIrradiance keyword. The in-engine conversion is algorithmic, more specifically, it doesn't allow us to directly compare .tga files like we did above. Were we able to, however, I'm sure the makeIrradiance IEM would look grainy and rough compared to the smooth gradient of the IEM you’ll have by the end of this tutorial. The makeIrradiance keyword is good for quick testing but it won’t allow you fine control over your irradiance map. If we want the light to look proper, we need a dedicated cubemap filtering software. A Review of Cubemap Filtering Software Here I’ll introduce three programs you can produce an irradiance map with. In the coming parts, I will present you with a guide for working with each one of them. I should also note that installing all of these is trivial, so I’ll skip that instructional step when describing their workflows. I will not relay you any ad copy, as you can already read it on these programs’ websites. I’ll just list the advantages and disadvantages that concern us. Lys https://www.knaldtech.com/lys/ Advantages: Good UI, rich image manipulation options, working radiance/specular map filtering with multiple convolution algorithms. Disadvantages: $50 price tag, limited import/export options, only available on Windows 64-bit systems. cmftStudio https://github.com/dariomanesku/cmftStudio Advantages: Available on Windows, OSX and Linux, free, open source software, command line interface available. Disadvantages: Somewhat confusing UI, limited import options, missing features (radiance/specular map filtering is broken, fullscreen doesn’t work), 32-bit binaries need to be built from source (I will provide a 32-bit Windows executable at the end of the tutorial). Modified CubeMapGen https://seblagarde.wordpress.com/2012/06/10/amd-cubemapgen-for-physically-based-rendering/ Advantages: Free software, quickest to work with (clarified later). Disadvantages: Bad UI, only Windows binaries available, subpar IEM export due to bad image adjustment options. Let’s take a break at this point and come back to these programs in part 3. A lot of caveats need to be expounded on as to which of these three is the “best” software for making an irradiance map for our purposes. Neither of these programs has a discreet workflow; rather, the workflow will include or exclude certain additional programs and steps depending on which app you choose to work with. It will dovetail and be similar in all cases. Part 3 The aim of this tutorial is twofold. First, it aims to provide the most hands-free and time-efficient method of converting an envshot, environment cubemap to an IEM and getting it working in-game. The second is using as few applications as possible and keeping them all free software that is available for download, much like TDM itself. The tutorial was originally going to only cover IEM production through Lys, as that was the app I used to test the whole process with. I soon realized that it would be inconsiderate of me to suggest you buy a fifty dollar product for a single step in a process that adds comparatively little to the value of a FM, if we’re being honest (if you asked me, the community would benefit far more from a level design tutorial than a technical one like this, but hey, maybe later, I’m filling a niche right now that nobody else has filled). This led me to seek out open-source alternatives to Lys, such as Cubemapgen, which I knew of and cmftStudio, which I did not. I will preempt my own explanations and tell you right away that, in my opinion, cmftStudio is the program you should use for IEM creation. This comes with one big caveat, however, which I’m about to get into. Six Faces on a Cross and The Photoshop Problem Let’s review. Taking an envshot in-game gives you six separate images that are game-ready. Meaning, you get six, split cubemap faces as an output, you need six, split irradiance map faces as an input. This is a problem, because neither Lys nor cmftStudio accept a sequence of images as such. They need to be stitched together in a cube cross, a single image of the unwrapped cube, like this: [Fig. 13] From Lys. Our cubemap has been stitched into a cross and the “Debug Cube Map Face Position” option has been checked, showing the orientations of each face. In Lys only panoramas, sphere maps and cube maps can be loaded into the program. The first two do not concern us, the third specifically refers to a single image file. Therefore, to import a TDM envshot into Lys you need to stitch your cubemap into a cross. Furthermore, Lys’ export also outputs a cubemap cross, therefore you also need to unstitch the cubemap into its faces afterwards if you want to use it in TDM. In cmftStudio you can import single map faces! Well… no, you can’t. The readme on GitHub boasts “Input and output types: cubemap, cube cross, latlong, face list, horizontal and vertical strip.” but this is false. The UI will not allow you to select multiple files on import, rendering the “face list” input type impossible.2 Therefore, to import a TDM envshot into cmftStudio you need to stitch your cubemap into a cross. Fortunately, the “face list” export type does work! Therefore, you don’t need to unstitch the cubemap manually, cmftStudio will export individual faces for you. In both of these cases, then, you need a cubemap cross. For this tutorial I will use Adobe Photoshop, a commercial piece of software, to stitch our faces into a cubemap in an automated fashion (using Photoshop’s Actions). This is the big caveat to using cmftStudio, even if you do not want to buy Lys, PS is still a prerequisite for working with both programs. There are, of course, open source alternatives to Photoshop, such as GIMP, but it is specifically Photoshop’s Action functionality that will power these workflows. GIMP has its own Actions in the form of Macros, but they are written with python. GIMP is not a software suite that I use, neither is python a language I am proficient with. Out of deference for those who don’t have, or like working with, Photoshop, I will later go through the steps I take inside the image editor in some detail, in order for the studious reader to reconstruct them, if they so desire, in their image editing software of choice. At any rate, and at the risk of sounding a little presumptuous, I take it that, as creative types, most of you already have Photoshop on your computers. 2 An asterisk regarding the “impossibility” of this. cmftStudio is a GUI for cmft, a command line interface that does the same stuff but inside a command prompt. I need to stress that I am certain multiple faces can be inputted in the command line, but messing with unwieldy prompts or writing batch files is neither time-saving nor user-friendly. This tutorial is aimed at the average mapper, but a coder might find the versatility offered in cmft interesting. The Cubemapgen Workflow You will have noticed that I purposefully omitted Cubemapgen from the previous discussion. This is because working with Cubemapgen, wonderfully, does not need Photoshop to be involved! Cubemapgen both accepts individual cubemap faces as input and exports individual irradiance map faces as output. Why, then, did I even waste your time with all the talk of Lys, cmftStudio and Photoshop? Well, woefully, Cubemapgen’s irradiance maps look poor at worst and inconsistent at best. Comparing IEMs exported from Lys and cmftStudio, you will see that both look practically the same, which is good! An IEM exported from Cubemapgen, by default, is far too desaturated and the confusing UI does not help in bringing it to parity with the other two programs. If you work solely with Cubemapgen, you won’t even know what ‘parity’ is, since you won’t have a standard to compare to. [Fig. 14] A comparison between the same irradiance map face, exported with the different apps at their respective, default settings. Brightened and enlarged for legibility. This may not bother you and I concede that it is a small price to pay for those not interested in working with Photoshop. The Cubemapgen workflow is so easy to describe that I will in fact do just that, now. After I do so, however, I will argue that it flies in the face of one of the aims of this tutorial, namely: efficiency. Step 1: Load the cubemap faces into Cubemapgen. Returning to specifics, you will remember that we have, at the moment, six .tga cubemap faces in a folder that we want to convert to six irradiance map faces. With Cubemapgen open, direct your attention to these buttons: [Fig. 15] You can load a cubemap face by pressing the corresponding button or using the hotkey ‘F’. To ensure the image faces the correct way, you must load it in the corresponding “slot”, from the Select Cubemap Face dropdown menu above, or by pressing the 1-6 number keys on your keyboard. Here is a helpful list: X+ Face <1> corresponds to *_right X- Face <2> corresponds to *_left Y+ Face <3> corresponds to *_up Y- Face <4> corresponds to *_down Z+ Face <5> corresponds to *_forward Z- Face <6> corresponds to *_back ...with the asterisk representing the name of your cubemap. With enough practice, you can get quite proficient in loading cubemap faces using keyboard shortcuts. Note that the ‘Skybox’ option in the blue panel is checked, I recommend you use it. Step 2: Generate the Irradiance Map [Fig. 16] The corridor environment cubemap loaded in and filtered to an irradiance map. The options on the right are my attempt to get the IEM to look right, though they are by no means prescriptive. Generating an IEM with Modified CubeMapGen 1.66 is as easy as checking the ‘Irradiance cubemap’ checkbox and hitting ‘Filter Cubemap’ in the red panel. There are numerous other options there, but most will have no effect with the checkbox on. For more information, consult the Sébastien Lagarde blog post that you got the app from. I leave it to you to experiment with the input and output gamma sliders, you really have no set standard on how your irradiance map is supposed to look, so unfortunately you’ll have to eyeball it and rely on trial and error. Two things are important to note. The ‘Output Cube Size’ box in the red panel is the resolution that you want your IEM to export to. In the yellow panel, make sure you set the output as RGB rather than RGBA! We don’t need alpha channels in our images. Step 3: Export Irradiance Map Faces Back in the green panel, click the ‘Save CubeMap to Images’ button. Save the images as .tga with a descriptive name. [Fig. 17] The exported irradiance map faces in the folder. These files still need to be renamed with appropriate suffixes in order to constitute a readable cubemap for the engine. The nomenclature is the same as the table above: “c00” is the X+ Face, to be renamed “right”, “c01” is the X- Face and so on. Right left, up down, forward and back. That’s the order! This is all there is to this workflow. A “cameraCubeMap env/testshot” in the light material will give us a result that will look, at the very least, better than the inbuilt makeIrradiance material keyword. [Fig. 17] The map ended up being a little bright. Feel free to open Fig. 4 and this in seperate tabs and compare the Lys/cmft export with the cubemapgen one. A Review of the Workflow Time for the promised criticism to this workflow. I already stated my distaste for the lack of a standardised set of filtering values with this method. The lack of any kind of preset system for saving the values you like makes working with Cubemapgen even more slipshod. Additionally, in part 2, I said that Cubemapgen is the fastest to work with, but this needs to be qualified. What we just did was convert one cubemap to an irradiance map, but a typical game level ought to use more than a single IEM. Premeditation and capturing fake, “generic” environment cubemaps (e.g. setting up a “blue light on the right, orange on the left” room or a “bright skylight above, brown floor” room, then capturing them with envshot) might allow for some judicious reuse and keep your distinct IEM light definition count down to single digits, but you can only go so far with that. I am not arguing here for an ambient cubic light in every scene either, certainly only those that you deem need the extra attention, or those for which the regular lighting methods enumerated in Part 1 do not quite work. I do tentatively assume, though, that for an average level you would use between one and two dozen distinct IEMs. Keep in mind that commercial games, with their automated probe systems for capturing environment shots, use many, many more than that. With about 20 cubemaps to be converted and 6 faces each to load into Cubemapgen, you’ll be going through the same motions 120 whole times (saving and renaming not included). If you decide to do this in one sitting (and you should, as Cubemapgen, to reiterate, does not keep settings between sessions), you are in for a very tedious process that, while effective, is not very efficient. The simple fact is that loading six things one by one is just slower than loading a single thing once! The “single thing” I’m referring to is, of course, the single, stitched cubemap cross texture. In the next part, I will go into detail regarding how to make a cubemap cross in Photoshop in preparation for cmftStudio and Lys. It will initially seem a far more time-consuming process to you than the Cubemapgen workflow, but through the magic of automation and the Actions feature, you will be able to accomplish the cubemap stitch process in as little as a drag-and-drop into PS and a single click. The best thing is that after we go through the steps, you won’t have to recreate them yourself, as I will provide you with a custom Actions .atn file and save you the effort. I advise you not to skip the explanations, however. The keen-eyed among you may have noticed that you can also load a cube cross in Cubemapgen. If you want to use both Cubemapgen and Photoshop together to automate your Cubemapgen workflow, be aware that Cubemap gen takes crosses that have a different orientation than the ones Lys and cmftStudio use. My macros (actions) are designed for the latter, so if you want to adjust them for Cubemapgen you would do well to study my steps and modify them appropriately. For the moment, you’ve been given the barebones essentials needed to capture an envshot, convert it to an irradiance map and put it in your level at an appropriate location, all without needing a single piece of proprietary software. You can stop here and start cranking out irradiance maps to your heart’s content, but if you’re in the mood for some more serious automation, consider the next section.
-
I think that a forum is always better for communication and interaction in is random access structure, not possible this way in social networks wit sequencial structure, where it is easy to loose the theme and you have to scroll up kms to find it. Yes, its mainly for socializing. Forums are dying, despite it is way better and feature rich than a chat, but it was killed by smartphones. In a smartphone the handling of a forum is a toothache, there a chat or social network is easier and more direct. But for an tech support, there exist nthing better than a forum. Respect Markdown, which I like a lot, would be nice to have instead of the BBcode. But here is needed to maintan the automatic insetion of YT videos, because In Markdown it don't exist like in the BBcode.
-
How you can help depends a lot on what skills you have. I can Record Video Recording "Let's Play" videos or simple walkthroughs of existing missions and posting them to Youtube is great exposure for the mod (see example .) Be sure to let us know so we can link to them. If you have some editing ability, Video tutorials, where you explain how the mod works, or how to use specific tools, would also be great. Video trailers, showcasing interesting places and features, are also great for publicity. An example is . I can Write Writing reviews for missions are always nice, especially if they include good screenshots. Not only does it give us something to post on other forums, but it makes mappers feel good when their mission gets attention (especially if it's positive). We have a collective thread to post reviews in: http://forums.thedar...s-walkthroughs/ Writing reviews of the mod as a whole, targetted an an audience that doesn't know much about TDM, is also very useful. You could also try offering your services to mappers to create interesting readables, or to proofread for their mission. I can Act and Record Audio We are always on the lookout for good quality audio recordings for vocal sets. If interested, you can pick a few different lines from this script: http://wiki.thedarkm...t:_Average_Jack and send the recordings to Springheel, who then writes a script based on the type of voice you have. I can Translate We could always use translations of our menu/hud into more languages. Also, only a few FMs are aavailable in more than one language, so there is a lot of work there, see the I18N Translator's Guide in the Wiki. I can Model Great! Take a look at the model request thread:http://forums.thedar...-requests-here/ and pick something that interests you. Or just post a, "Hey, anybody want a model?" thread in this forum and I'm sure mappers will get back to you. I can Animate Fantastic. We can always use more good animations. Our current character rigs use a Maya skeleton. PM Springheel for more info. I know C++ Have a look at our coding section in the wiki, pick an issue or feature from the bugtracker of the mod or the leveleditor, download the recent sourcecode release (or better ask for an SVN checkout) and get cracking. Make sure nobody is already working on that specific issue and feel free to ask questions. I can Edit Images We can always use completely new textures and/or improved versions of older textures. How to get started and how to import them into the mod. I can Take Photos Good quality photos of useful textures (medieval-ish building facades, dirt, rocks, wood, etc) are always welcome. The fewer directional shadows and higher resolution, the better. I don't have any skills Even if you can't do any of the above, you can still help out. Talk about TDM in other forums; share your (preferably positive) experiences with other gamers you know. Last, but not least, compliment people when you like their work. Saying "thanks", to a developer or, "I really enjoyed your mission" to a mapper will make their day. -------------------- I'll update this further as more things occur to me.
-
Fan Mission: Scroll of Remembrance, by MirceaKitsune (03/11/2020)
chakkman replied to MirceaKitsune's topic in Fan Missions
ThiefGuild has some tags: https://www.thiefguild.com/fanmissions/?advanced_search=&series=&collection=&table=&page=&works=&work_lists=&sort_by=newest&search=&games=5&released_from=all&released_to=all&genre=all&original_games=fms Not sure how complete or accurate those are, after all either the author or users add the tags to the missions. -
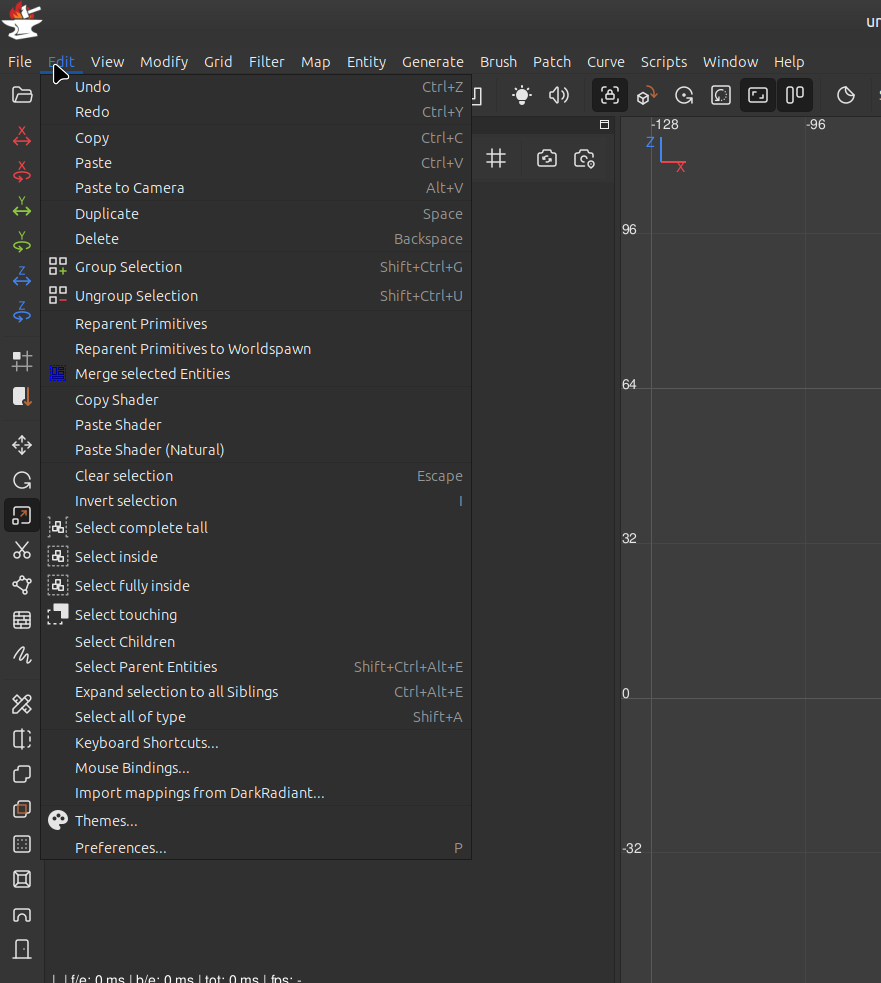
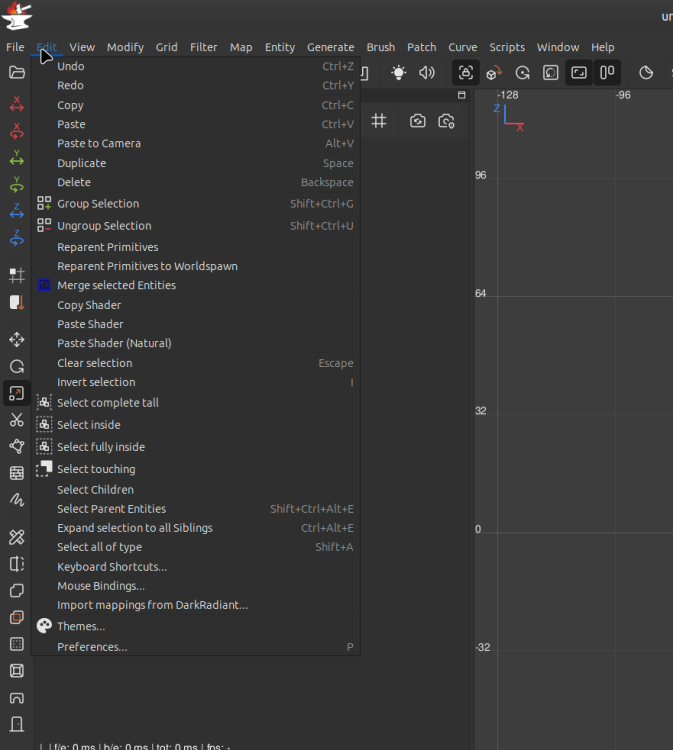
 What is also nice is that the Linux version of Hellforge has the keyboard shortcuts listed in the menu. On the Linux version of DR, this is not the case, which is for me a bit of a dealbreaker in itself:
-
For the people eager to play with the latest state of development, two things are provided: regular dev builds source code SVN repository Development builds are created once per a few weeks from the current trunk. They can be obtained via tdm_installer. Just run the installer, check "Get Custom Version" on the first page, then select proper version in "dev" folder on the second page. Name of any dev version looks like devXXXXX-YYYY, where XXXXX and YYYY are SVN revision numbers from which the build was created. The topmost version in the list is usually the most recent one. Note: unless otherwise specified, savegames are incompatible between any two versions of TDM! Programmers can obtain source code from SVN repository. Trunk can be checked out from here: https://svn.thedarkmod.com/publicsvn/darkmod_src/trunk/ SVN root is: https://svn.thedarkmod.com/publicsvn/darkmod_src Build instructions are provided inside repository. Note that while you can build executable from the SVN repository, TDM installation of compatible version is required to run it. Official TDM releases are compatible with source code archives provided on the website, and also with corresponding release tags in SVN. A dev build is compatible with SVN trunk of revision YYYY, where YYYY is the second number in its version (as described above). If you only want to experiment with the latest trunk, using the latest dev build gives you the maximum chance of success. P.S. Needless to say, all of this comes with no support. Although we would be glad if you catch and report bugs before the next beta phase starts
- 35 replies
-
- 15
-
-
-
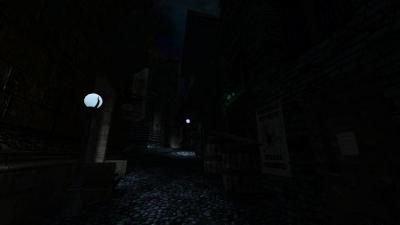
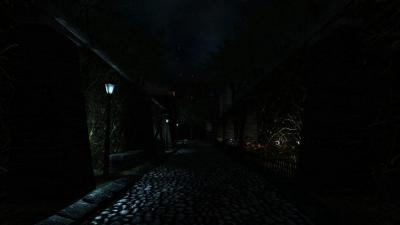
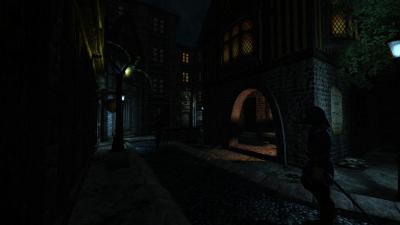
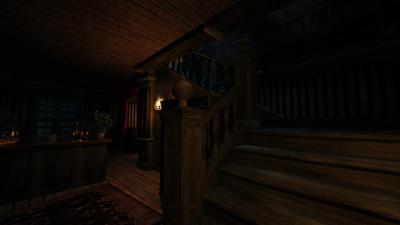
 Author note: It's hard to believe it's already been a year since Act 1 came out! Well during this mission the player will be following Corbin into the Grimwood district to followup on a lead from last night (Act 1) .. the mysterious tablet! This mission is my first time including full EFX support as well as a HD briefing video file, additionally a new script has been added crafted by the talented Obsttorte which has loot flying towards the player when you pick it up. On a level design front I have tried to change things up a bit by really catering towards a number of play styles, this mission can be completely ghosted or you can use the tools at your disposal to wreak havoc on the citizens of Northdale. For the first time I have tried to create more sandbox environments which don't offer clear answers handed directly to you, so if you're having trouble figuring something out try a different method. This mission takes between 1 - 2 hours to finish depending on the difficulty you play on and how thoroughly you explore. I hope you enjoy your night in Northdale! - Goldwell Voice actors Fen Phoenix Goldwell Random_taffer Yandros Beta testers Amadeus Boiler's Hiss Cambridge Spy Chakkman Crowind Epifire Kingsal SquadaFroinx Custom Assets Andreas Rocha DrK Epifire Grayman Kingsal MalachiAD Obsttorte Sotha Springheel SquadaFroinx Purgator With special thanks to Epifire for creating a large collection of custom models, Grayman for helping out with coding, Kingsal for drawing the ingame map and Moonbo for his script revision on the briefing video. Available via in-game downloader MIRROR File Size: 417 mb EDIT: If you are having performance issues please consult this post by Nbohr1more which may address your issue http://forums.thedarkmod.com/topic/19936-fan-mission-shadows-of-northdale-act-ii-by-goldwell-20190320/page-2?do=findComment&comment=436271
-
-

Besides the red light, I hope they add features like the YLOD on the PS3 or the BLOD on the PS4
Hopefully it"ll never say, “I’m sorry, Dave, I’m afraid I can’t do that,” when the red light comes on
-
HL3 when
-

World War 3 when
-
-
Agree with this sentiment 100 percent. Just come ask for help on these forums before asking chatgpt there are tons of knowledgeable folks here, especially those who know how materials work
-
I don't know who has what skillset, as I am still pretty green on the forums. However, I do know that shader development does require some voodoo black magic! I understand the fundamentals of shaders, but understanding the basic how and why is very, very different from creating them.
-

Full VR support for The Dark Mod, new bow, climbing mechanics and more!
freyk replied to JAKE's topic in The Dark Mod
Nice work! Is there a build/code that other users can download and try? Please merge back the code with TDM VR, see topic: https://forums.thedarkmod.com/index.php?/topic/20468-the-dark-mod-vr-210-alpha-is-now-available/ === Reddit topic: link Video of JAKE's work: -
For more info, read this topic: https://forums.thedarkmod.com/index.php?/topic/23261-i-made-full-vr-support-for-the-dark-mod-new-bow-climbing-mechanics-and-more/ He based his code of TDM VR, so I referred him to this topic.
-
Well... if I remember correctly, Ctrl+Ins and Shift+Ins were present in DOS, while Ctrl + C and Ctrl + V became widespread in Windows. Somewhat similar to Ctrl + Shift versus Alt + Shift for changing keyboard language. Also, Ctrl+C and Ctrl+V often mean something in Linux terminals, some kind of escape characters, I don't know myself. The point is: they don't work as I expect often. For instance, it did not work for me in pure terminal until I had set it as hotkey in the settings. And even now, some embedded terminals (e.g. in Kate) still don't work as expected. In general, I have a feeling that the only reason some Linux versions support Ctrl+C and Ctrl+V out of the box is to make us poor Windows users feel at home, and not as some traditional option.
-
I started using Unexpected Keyboard for Android phone.
It's pretty cool, because it has an actual Ctrl key, which you can use to do cut, copy and paste actions via x, c and v. pretty handy in the forums, to move quoted text around for example.
-
I have committed my changes to SVN, now SVN works on the UTF-8 system. It reads all language strings from all.utf8lang file, and only reads old-style {language}.lang files for missions if the equivalent new-style files are not available. The core .lang / .map files are present yet, but will hopefully be deleted. In the end, I had to manually add some characters to utf8map to suppress warnings. They were not handled by the old engine: I simply remapped them all to the question mark. It seems that the majority of them come from language names, and I don't care if they look broken or have question marks. I have already stated my position about language names. At the current moment, .utf8lang uses the same format as .lang, but this is temporary. As I said before, this must be changed in order to not lock us into compatibility trap. The format should be a sequence of "commands", each command starting with a keyword saying which command it is. And global state should be kept to minimum (e.g. current language seems acceptable). In addition to the current "#str_{name}" placeholders, I'd like to add two more types of replacements for missions. 1) Plain-text replacements, i.e. replace "Not enough drive space to save the game." with "Não há espaço para salvar o jogo.", as I suggested before. This approach provides zero inconvenience for the mapper, but it rather unreliable. It becomes especially bad for short strings. This kind of replacements is not cheap to perform, but I think I know how to do it efficiently. The first version will do it with bruteforce algorithm, we don't have any plain-text replacements yet anyway. 2) Full-text + ID replacements, i.e. replace "Not enough drive space to save the game.#id_nospacesave#" with "Não há espaço para salvar o jogo.#id_nospacesave#". The #id_...# placeholders are stripped from the text by the engine even if translation does not exist. If translation exists, then the engine verifies the context around the placeholder and does not apply it in case of mismatch. This approach gives mild inconvenience to the mapper, since he can clearly see the original text but has to tolerance this annoying tag at the end. The mapper can even edit the text without touching the placeholder: the obsolete translations will stop working automatically. I have a feeling that plain-text replacements won't be enough for the missions, and hope that such extra "tags" can be used here and there to make it more reliable.
-
 Hello and thanks for checking out this post. I'm delighted to announce that version 1.1 of my fan mission "Cole Hurst 1: Eaton" is now available to download and play. This post is spoiler free, so please don't avoid digging into the details below if you are interested. I'm just using the spoiler tags to organize this post a bit. Let me start by saying "thank you" to anyone who has either previously played - or is considering playing this mission. It really means a lot to me. I have been away for a while, but following a round of beta testing that took place some time last year, I've only just recently managed to finish this update. I'm slightly embarrassed by how long it has taken me to complete, but I wanted to make sure that the valuable feedback I received was all properly addressed. Mission description "Tonight, Eaton's wealthiest citizens will gather at Lord Mayor Zelmer's estate to celebrate the city's founding. Nobles, dignitaries, a famed musician, and even the Queen will pass through its gates. While the guests celebrate Eaton's future, Cole Hurst is looking for a way out." For those new to and/or curious about this mission: I guess I would describe it as a traditional heist-style mission - although with a couple of major plot twist along the way. It's a very large map and I think it should take most players at least a few hours to complete. Screenshots Changes in version 1.1 Countless additions and a large amount of smaller tweaks and changes have all made it into this release. I may have already forgot a few things, but here are what I consider to be the main highlights: * New secrets & optional side quests * Story tweaks and reworked readables * Subtitles * Difficulty tweaks and related changes * Stability fixes * Various cosmetic changes * Audio tweaks * TDM version 2.13 now required Contributions and acknowledgments A special thanks to all of those listed below. I'm sincerely grateful for all your contributions! Mission testers and technical support @nbohr1more, @stgatilov, @duzenko, @Acolytesix, @Dragofer, @JackFarmer, @Shadow, @Cambridge Spy, @wesp5, @madtaffer, @prjames, @suzy8track, @datiswous, @boissiere and @Bergante Story Kelly Hrupa Voice actors twhalen2600 (AKA @Benny_the_guard) and Kelly Hrupa
- 15 replies
-
- 14
-
-
-
https://www.ttlg.com/forums/showthread.php?t=153454&p=2543356&viewfull=1#post2543356 Great reaction from heywood.
-
by the great cthulhu christians have invaded the blood of the dawnwalker forums moaning about them being put in a bad light by a game... looking back chritianity was one of the most bloody in human history and they bitch about the game allowing for people to fight back i mean wtf... yes lets have the dark ages back as if we truely need more to bog us down. i think its time we neutered they're access to the internet .
-
Hi team, I've come back to the FreeBSD native port that I was working on and have some patches that I would like to upstream. What is the best way to submit patches for consideration? Is there a public tracker/email list, or is it best to post patches somewhere here on the forums? Thanks!
-
Regrettably, required by the current TDM implementation, and so when someone names a "save", it will understand their keyboard correctly, likewise key bindings. In theory, it would be good to go over to UTF8 internally for all TDM strings & key handling, but that's a big project that would need a hero. As for testing my proposed fixes... It would be easy for you to test those changes in your ut8.lang build right now. I'm only downloading dev builds, so I don't think I can directly change all.lang & get it to run (due to the manifest). As for Portuguese, well, I just discovered it assigned #str_02469 to Netherlands instead of Catalan, so links are messed up.
-
okay 1 testbed is done , time to post to ttlg , here is the link : https://www.ttlg.com/forums/showthread.php?t=153456&page=2&p=2542791&viewfull=1#post2542791 originally windows 7 isnt recommended but i decided to go down the path i have no dx9 gpu left ( and the hwtl document itself doesnt recommend dx9 era gpu) The remaining test results from other PCs and laptops will follow
-
seems there is a new version of newdark out https://www.ttlg.com/forums/showthread.php?t=153456 version 1.29 the hwtl version supports shadowmaps postprocessing effects (bloom etc) and other nifty stuff. this one done by le corbeau himself. the hwtl version gets rather spooky with dynamic shadowmaps on . EDIT: ah just noticed it was posted earlier lol.
-
Looks like at least some other Frenchies have access to it: https://www.ttlg.com/forums/showthread.php?t=152974
-
Dear TDM folk, If anyone would like a break from the lovely summer weather, I'm offering you a couple of hours sitting at your keyboard in a dimly-lit room. Thank you if you can spare some time. Cheers, Groden